Tableau User Connector Setup Guide
This guide provides step-by-step instructions for creating and configuring a Tableau user connector with Abacus.AI's ChatLLM platform. Once set up, your chatbots and agents can read Tableau Cloud content — workbooks, views, published data sources, and projects — and query view data on demand.
Prerequisites
Before starting, ensure you have:
- Access to the Abacus.AI platform.
- A Tableau Cloud site, with each end user provisioned as a Tableau user (matching their Abacus.AI account email).
- Tableau site administrator access to create a Connected App (Direct Trust).
- Administrative access in Abacus.AI to create a config connector, projects, and deployments.
Config Connector Setup (Required)
A config connector is required for the Tableau user connector to work. The org-level Tableau connector is config only — it stores the Tableau Connected App (Direct Trust) credentials that every user-level connection uses to mint its Direct Trust JWT. Without it, users cannot connect.
Step A: Create a Tableau Connected App (Direct Trust)
In Tableau Cloud (as a site admin):
- Go to Settings → Connected Apps.
- Click New Connected App → Direct Trust.
- Give the app a name and select the access level / project scope you want to expose.
- Set the app's status to Enabled.
- Under the app, click Generate New Secret. Note down:
- The Client ID (the Connected App ID),
- The Secret ID,
- The Secret Value.
Keep these values handy — you will paste them into the Abacus.AI config connector in the next step.
Step B: Create the config connector in Abacus.AI
-
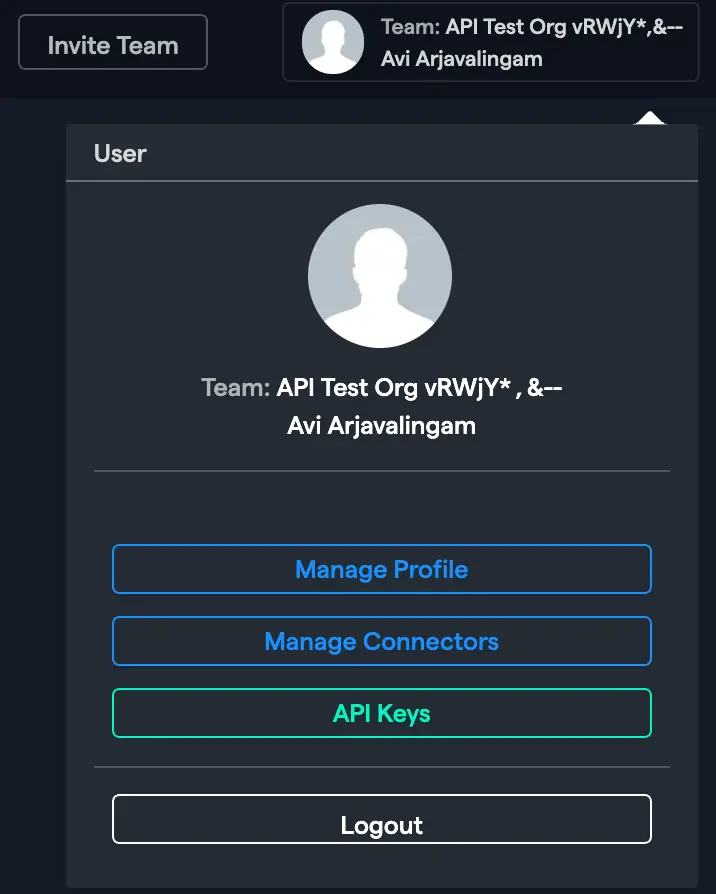
Navigate to the Abacus.AI Connected Services Dashboard. You can also click your profile picture in the top right corner and select "Manage Connectors".

-
Click "Add New Connector" and choose "Tableau" from the "Select a Service" popup.
-
Toggle Config Only to "Yes".
-
Fill in the Tableau Connected App fields:
Field Required Description Tableau Server URL Yes Your Tableau Cloud URL, e.g. https://10ax.online.tableau.com.Site Content URL No The site's content URL (the value after /site/in the Tableau URL). Leave blank to use the Tableau Cloud default site.Connected App Client ID Yes The Connected App (Direct Trust) Client ID from Step A. Connected App Secret ID Yes The Connected App Secret ID from Step A. Connected App Secret Value Yes The Connected App Secret Value from Step A. -
Click "Create" to save the config connector.
Why is a config connector required? The config connector stores the org-level Tableau Connected App (Direct Trust) credentials. Each end-user connection inherits these values to mint its own short-lived Direct Trust JWT and exchange it for a Tableau REST session. Without the config connector, user connectors have no credentials to authenticate with Tableau.
Step-by-Step Instructions
1. Navigate to Projects Page
Navigate to the projects page by clicking on the ABACUS.AI logo.
2. Create New Project
Click on "Create a new project" to begin setting up your ChatLLM project.
3. Select Project Type
Choose GenAI → Custom Chatbot option from the available project types.
4. Configure Project Name
Enter a descriptive name for your project that reflects its purpose.
5. Skip to Dashboard
Select "Skip to project dashboard" to proceed directly to the project configuration.
6. Access Model Training
- Click on the Model option in the left toolbar.
- Select "Train Model" in the top right corner of the page.
7. Configure Advanced Options
Navigate through the following menu structure:
- Select Advanced Option
- Choose Tool Use
- Select Tableau_Tool
- Navigate to Config Connectors and pick the Tableau config connector you created in the Config Connector Setup step.
Make sure to select the config connector. Without it, end users will not be able to connect to Tableau when they use the chatbot.
8. Initiate Model Training
Click on "Train Model" to begin the training process.
9. Access Trained Model
Once training is complete:
- Click on Models in the navigation.
- Select your newly trained model.
10. Create Deployment
Click on "Create a new deployment" to make your model available for use.
11. Configure Deployment Type
- Select "Offline Batch + Realtime" deployment option.
- Click "Next" to proceed.
12. Name Your Deployment
Enter a user-friendly name that your end users will see, then click "Deploy".
13. Monitor Deployment Status
- Return to your model by clicking Models → [Your Model Name].
- Wait for the deployment status to show as "Active".
- Click on the deployment name once active.
14. Access Prediction Dashboard
Click on the "Prediction Dash" option under the Deployment section.
15. Test Your Bot
Click on "Go to Abacus.AI Chat" to access the testing interface.
16. Start Using the Chatbot
- Enter your questions or prompts in the chat interface.
- Note: Each user is prompted to Connect to Tableau once. Because Tableau is a zero-interaction connector, clicking Connect activates the connection immediately — there is no Tableau login pop-up. The user's Abacus.AI account email is used to identify them on the Tableau site.
Supported Tableau Tool Actions
The Tableau user connector provides a thin REST wrapper that lets the AI agent call the Tableau Cloud REST API. The tool automatically resolves the Tableau server URL and site ID from the connector, attaches the session token, and refreshes it when it expires. You only provide the path after /api/3.21/sites/{site_id}/.
Common Operations
| Operation | Endpoint | Description |
|---|---|---|
| List Workbooks | workbooks | List all workbooks on the site |
| Get Workbook | workbooks/{workbook_id} | Get details for a single workbook |
| List Views | views | List all views on the site |
| Get View Data | views/{view_id}/data | Query / download the data for a view (returned as CSV under result.raw) |
| List Data Sources | datasources | List published data sources |
| List Projects | projects | List projects on the site |
Important Notes
- Config Connector Required: The org-level Tableau Connected App config connector must be set up before any user can connect. See Config Connector Setup.
- Zero-interaction connect: There is no Tableau OAuth/login pop-up for end users; clicking Connect activates the connection using the platform session email.
- Matching Tableau user required: A Tableau user with the same email as the Abacus.AI account must exist on the Tableau site, otherwise Tableau rejects the Direct Trust JWT.
- Read-only: The connector is provisioned with the
tableau:content:readscope and is intended for read-only metadata and data retrieval. - Automatic token refresh: Tableau REST session tokens (default 240 minutes of inactivity on Tableau Cloud) and Direct Trust JWTs are minted and refreshed automatically.
Troubleshooting
If you encounter issues:
- Cannot connect / connection fails immediately: Confirm the org-level Tableau config connector exists and that its Connected App Client ID, Secret ID, and Secret Value are correct and the Connected App is Enabled in Tableau.
- "User not found" or sign-in rejected: Ensure a Tableau user with the same email as your Abacus.AI account exists on the configured Tableau site.
- Wrong site / empty results: Verify the Site Content URL on the config connector. Leave it blank only if you intend to use the Tableau Cloud default site.
- Users cannot connect from the chatbot: Verify the Tableau config connector is selected under the model's Tool Use → Config Connectors configuration.
- Server URL errors: Use the full Tableau Cloud URL including the scheme (e.g.
https://10ax.online.tableau.com) and without a trailing path.