June 2026 Platform Update
New Models
A number of new models have been made available in the platform over the last month:
- Anthropic's Sonnet 5
- OpenAI's GPT5.6 (Sol, Luna, Terra)
- Grok 4.5
Livebench
We have launched a new version of our LiveBench site for LLM assessment. Here are the main updates:
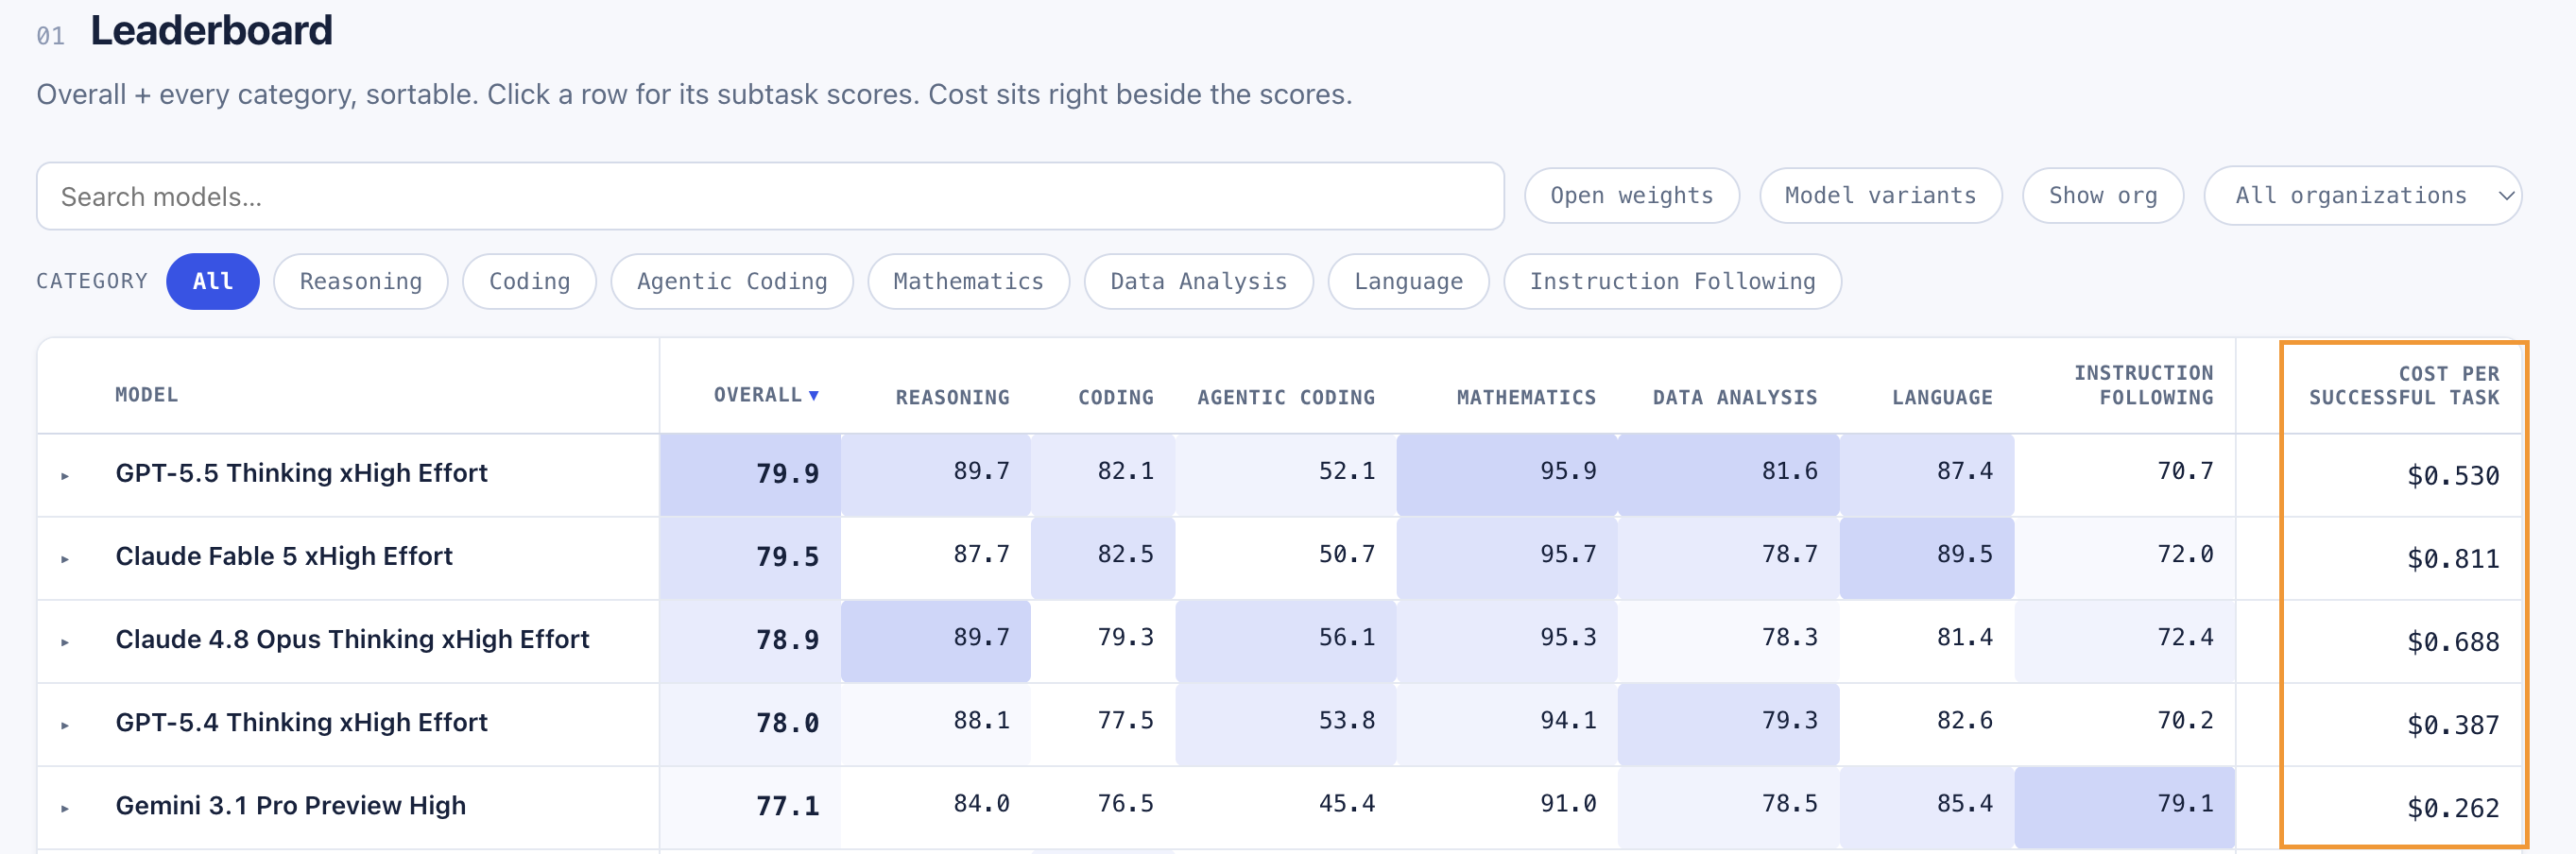
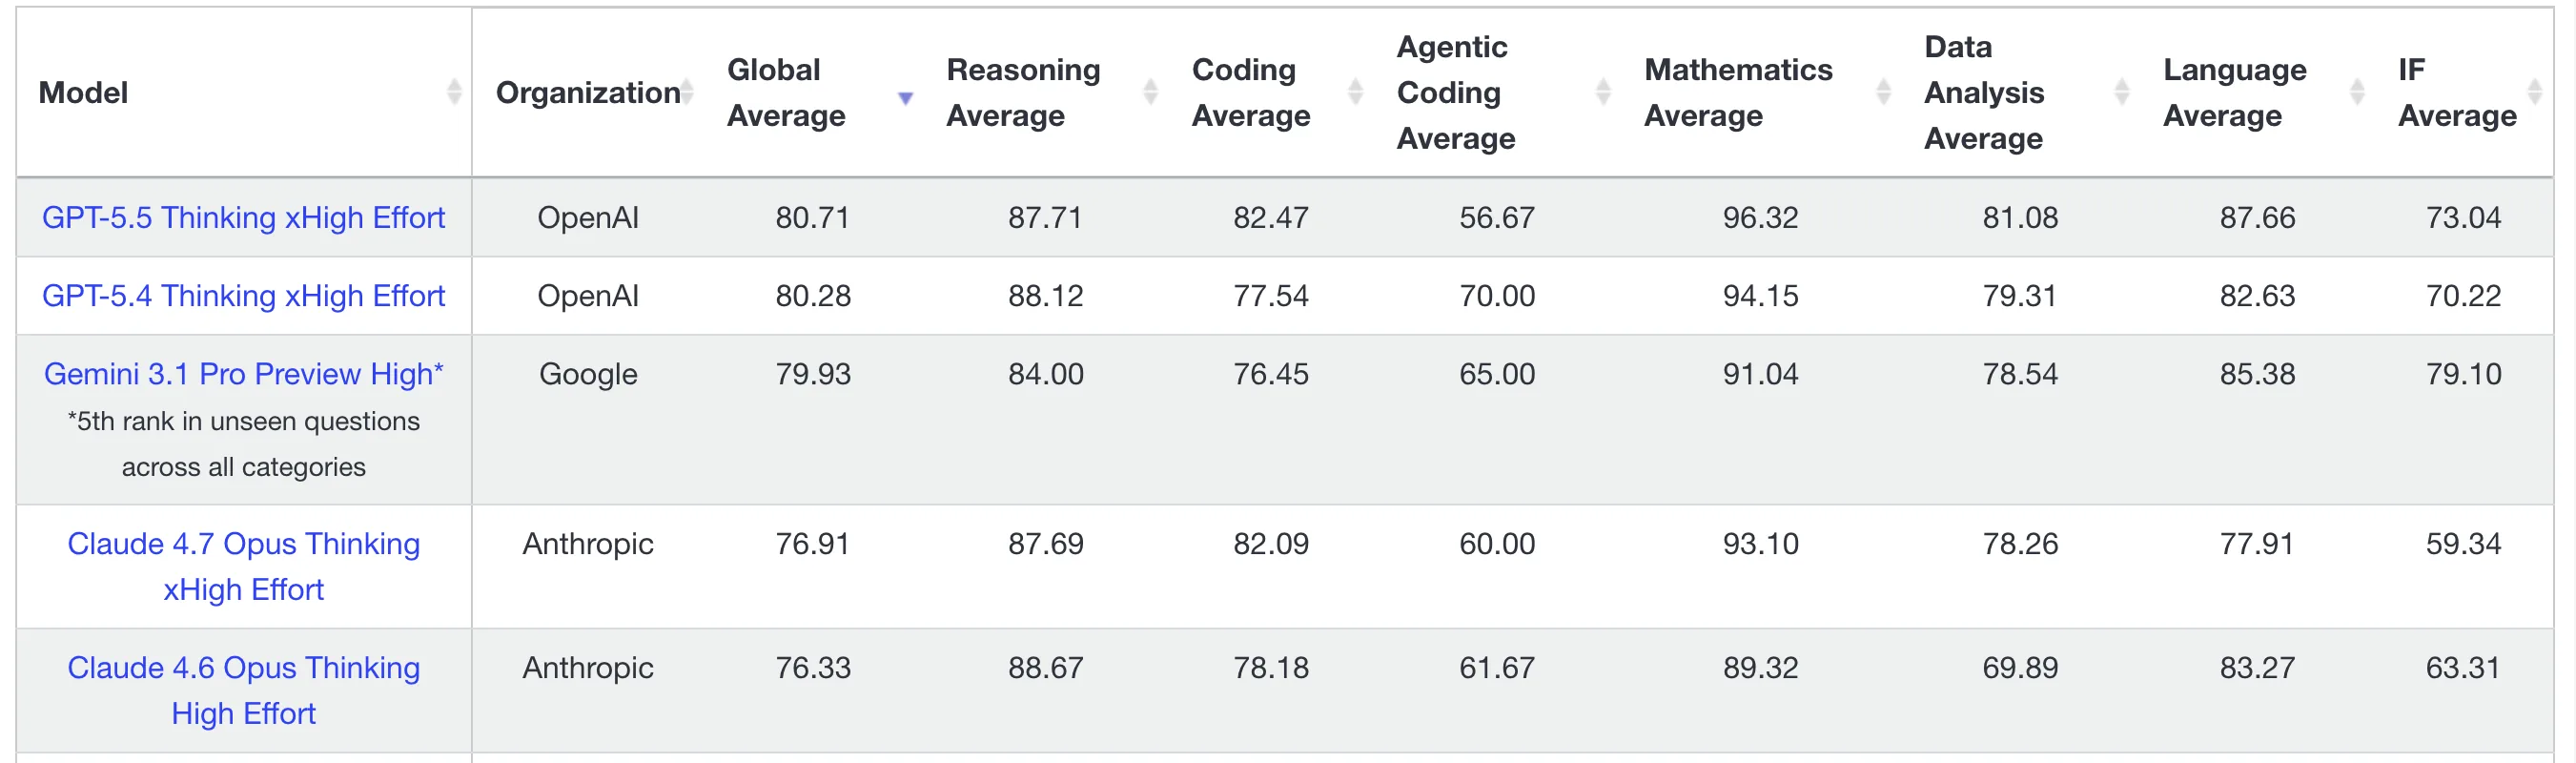
Price per task A new column in the leaderboard tracks the overall cost per task for each model, providing you with much clear information for cost optimization when selecting an LLM.
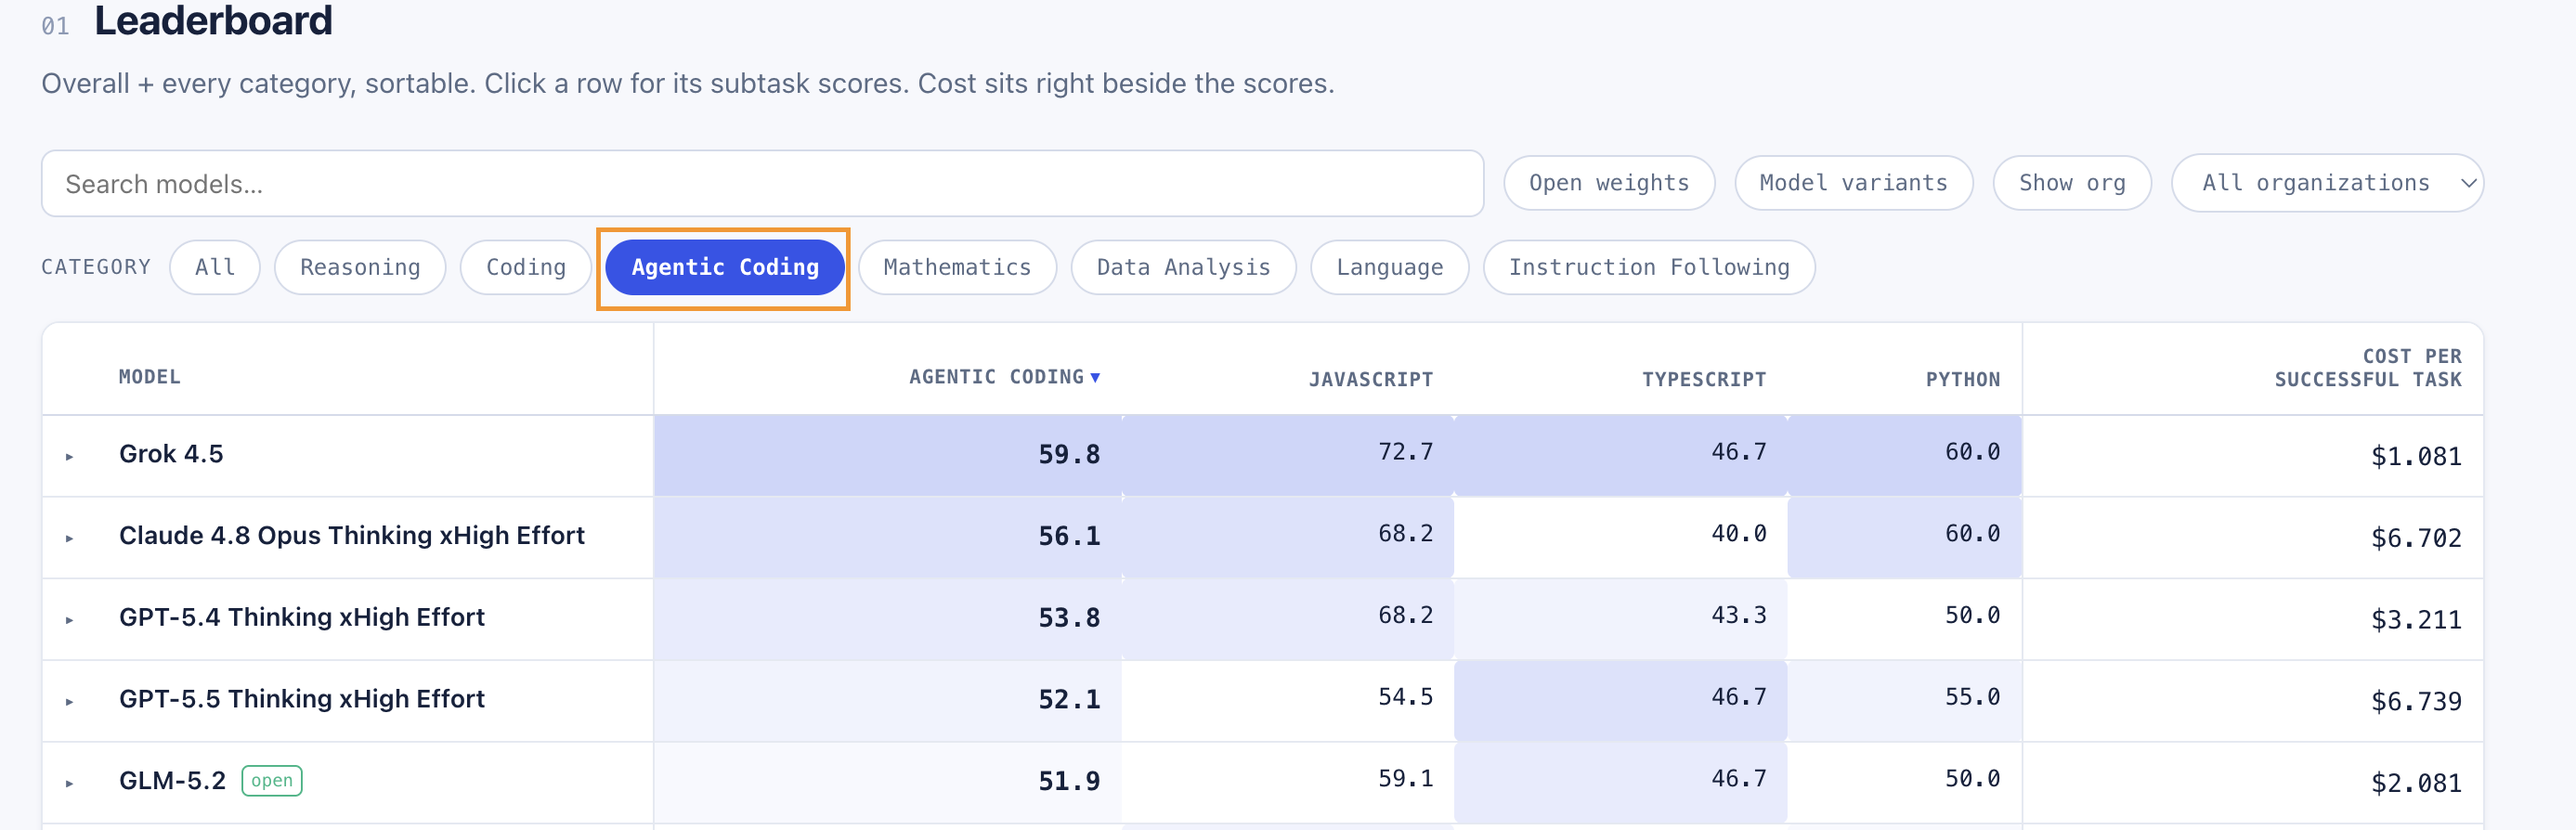
The costs get filtered for the specific categories you are looking at. So looking at Agentic Coding allows me to sort models based on each subcategory, but also see the costs of these models on this category of tasks:
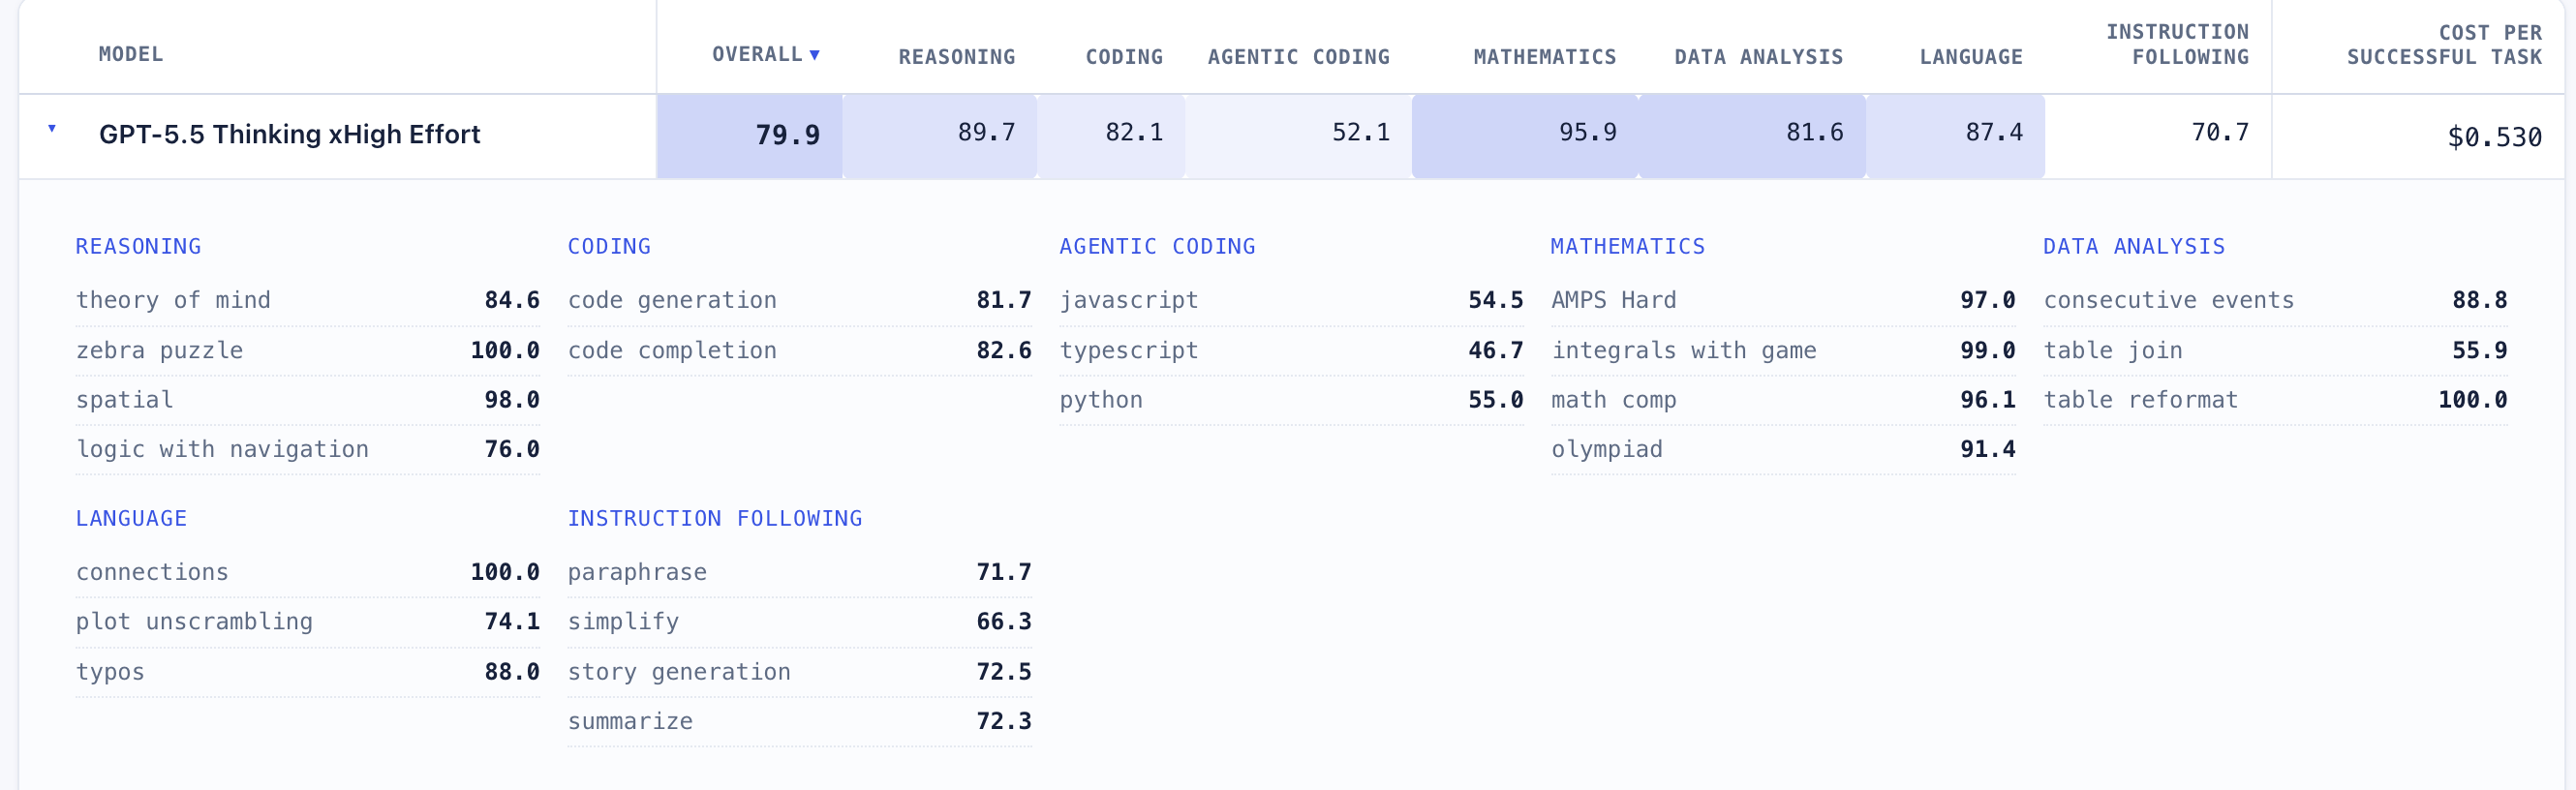
Category details It is now much easier to view how each model performs on the category sub-tasks by simply clicking on the model to view this information:
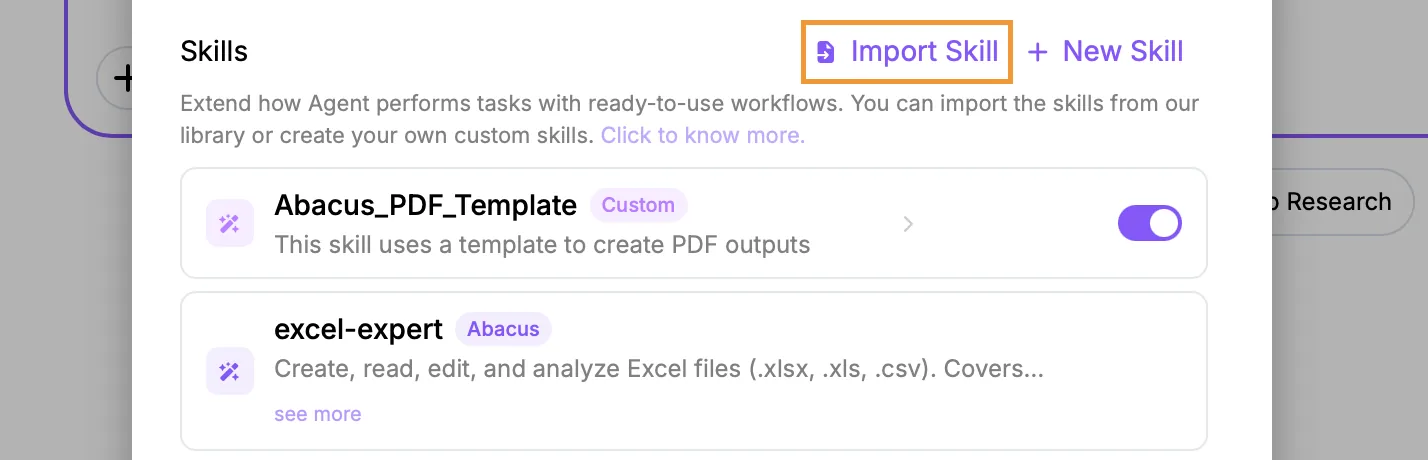
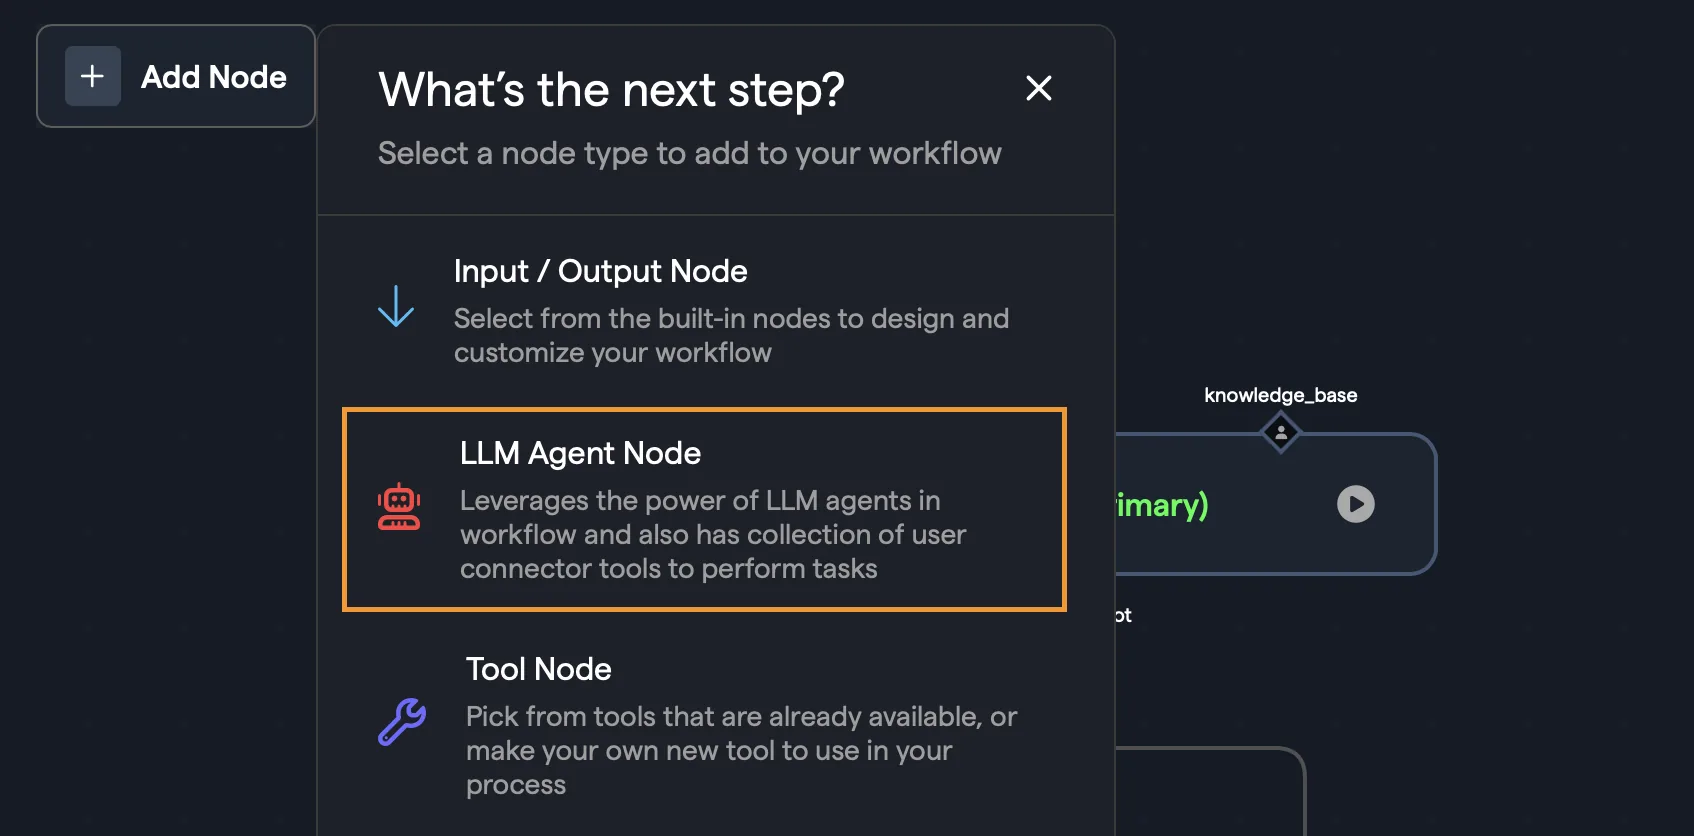
Build Your Own Router
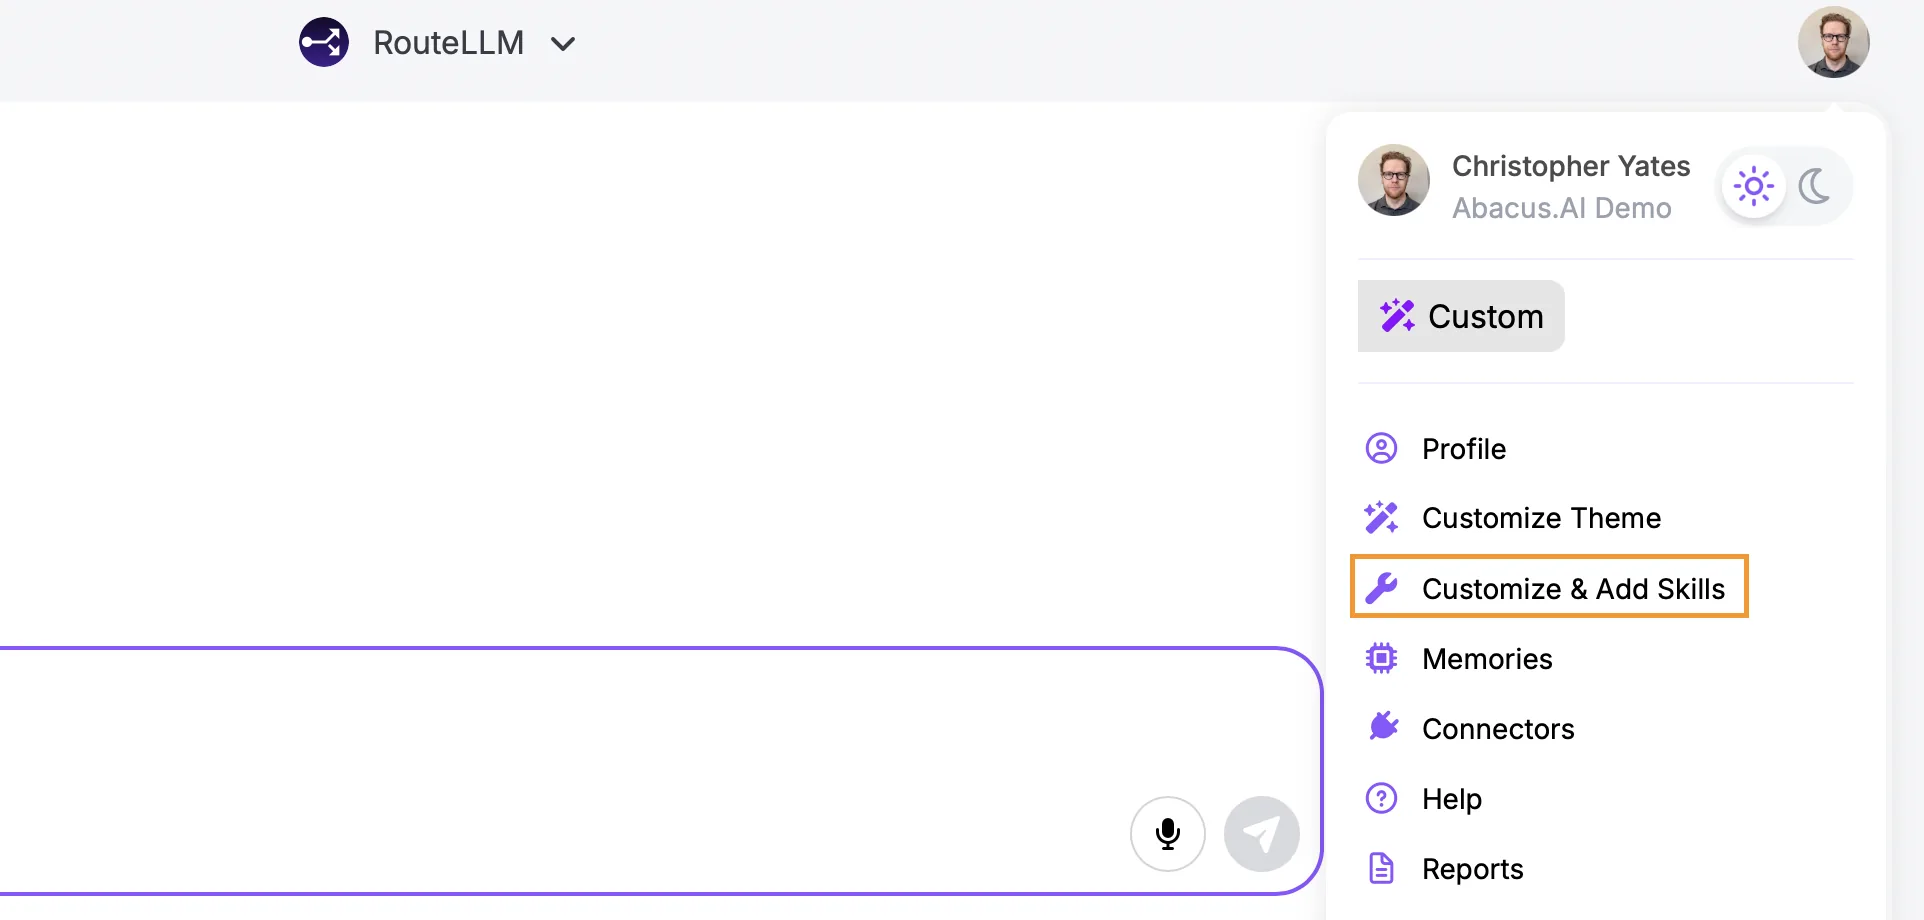
An exciting new feature in the platform is the ability to create your own custom routers. Access to this feature is found under Profile >> Custom Routers and APIs menu:
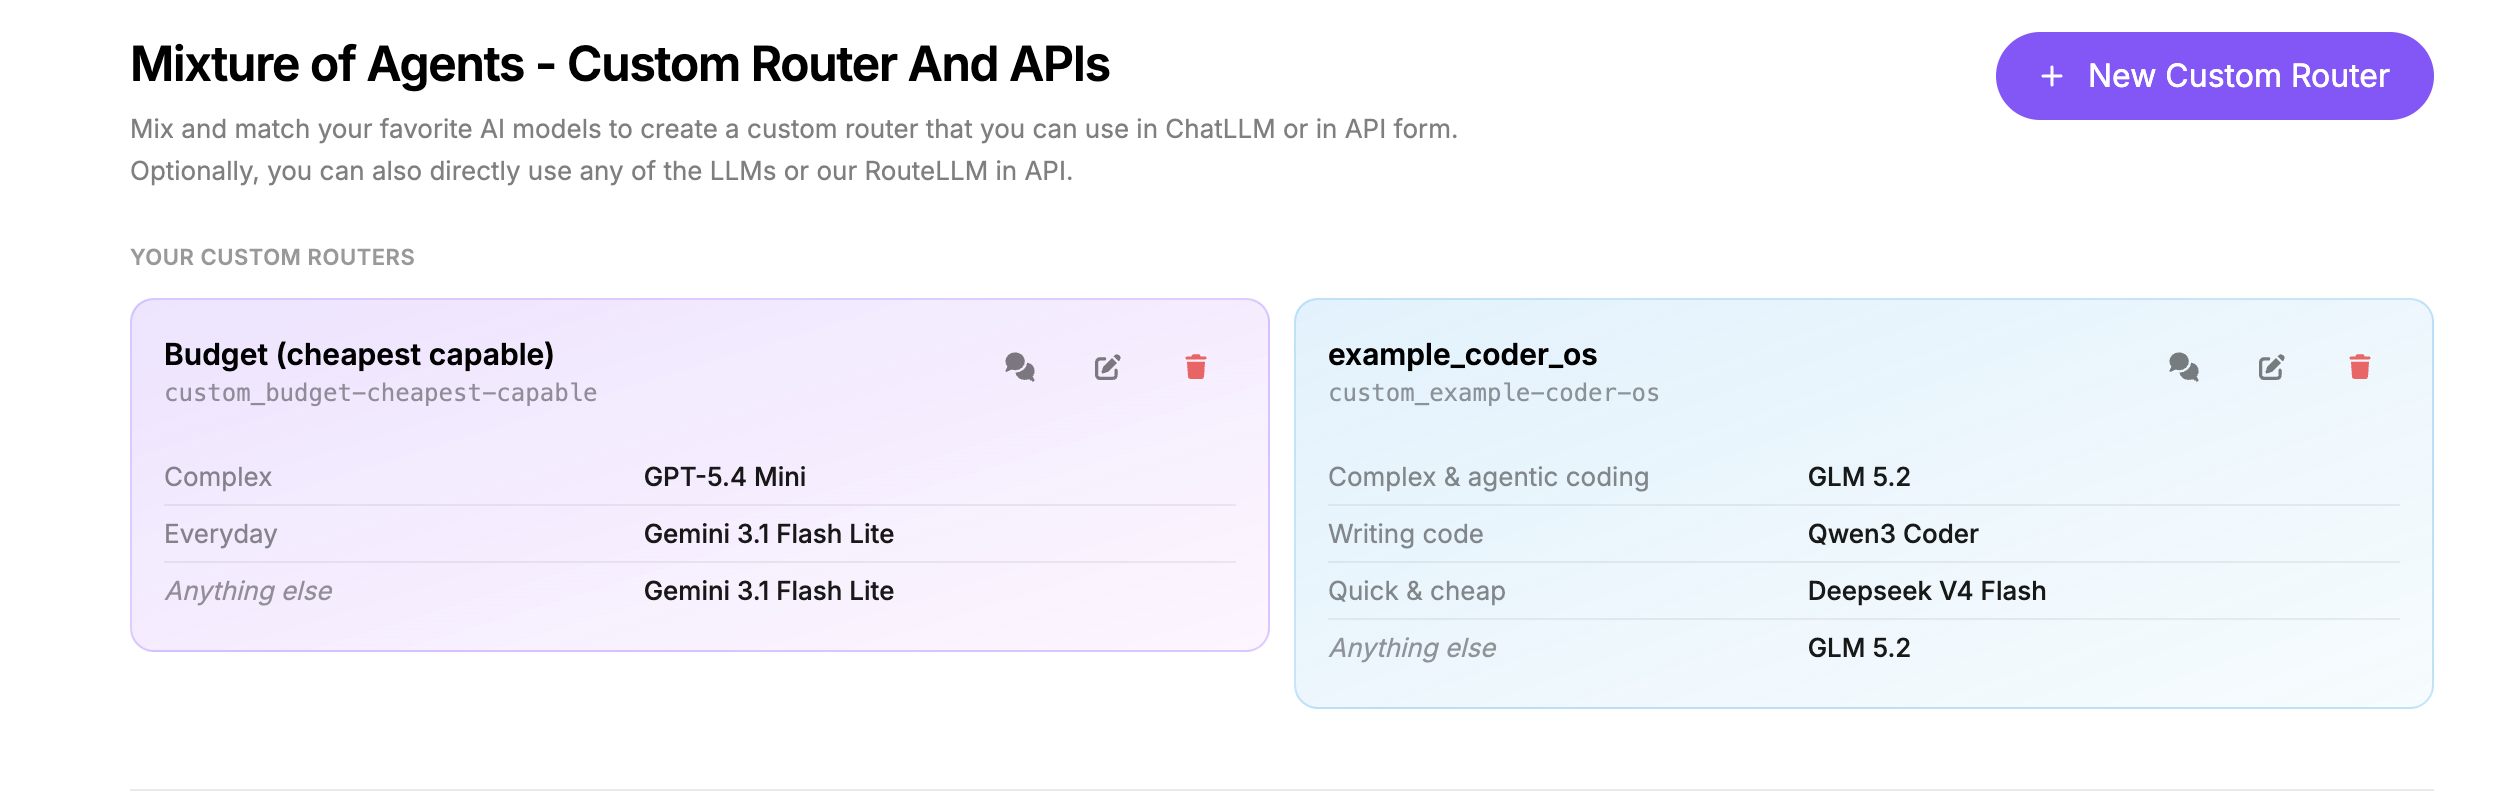
To create your own custom router click on the New Custom Router button. This will give you three main options:
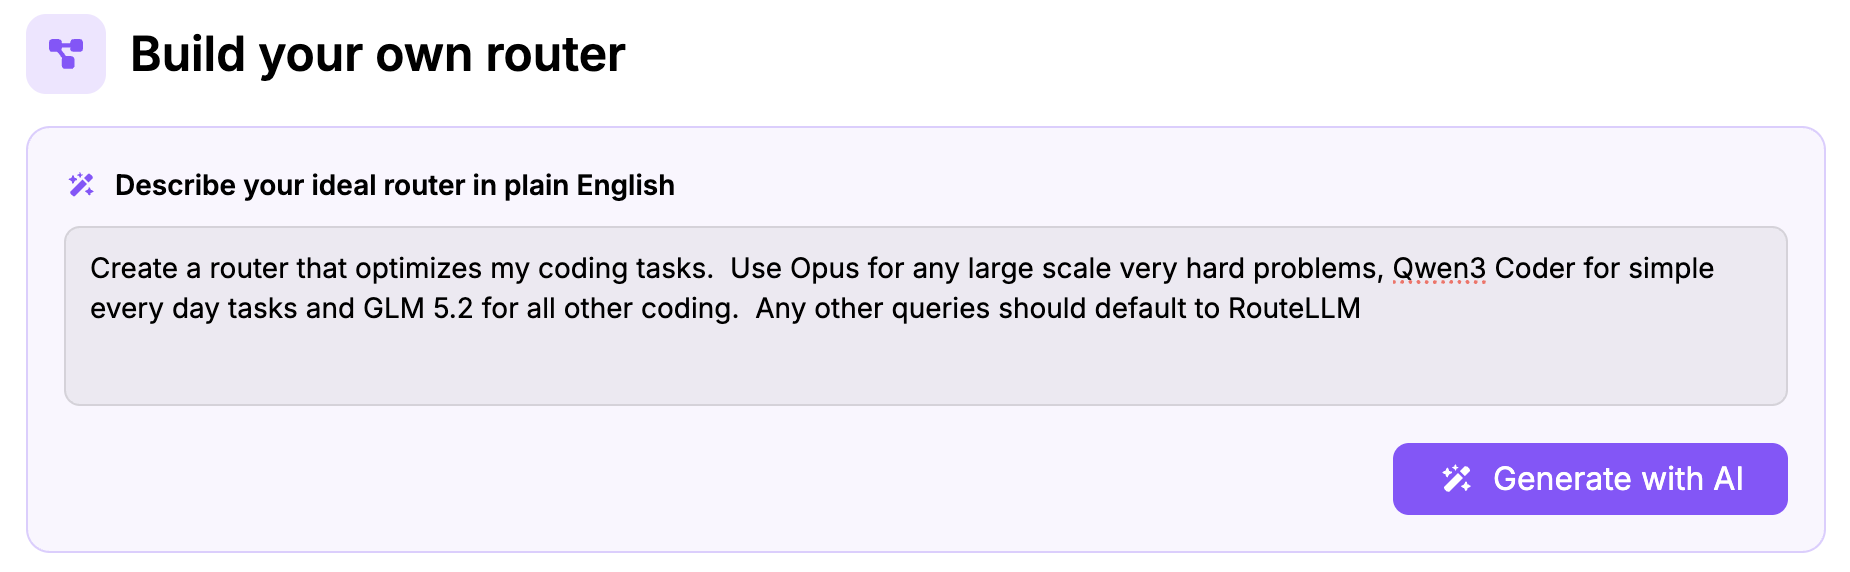
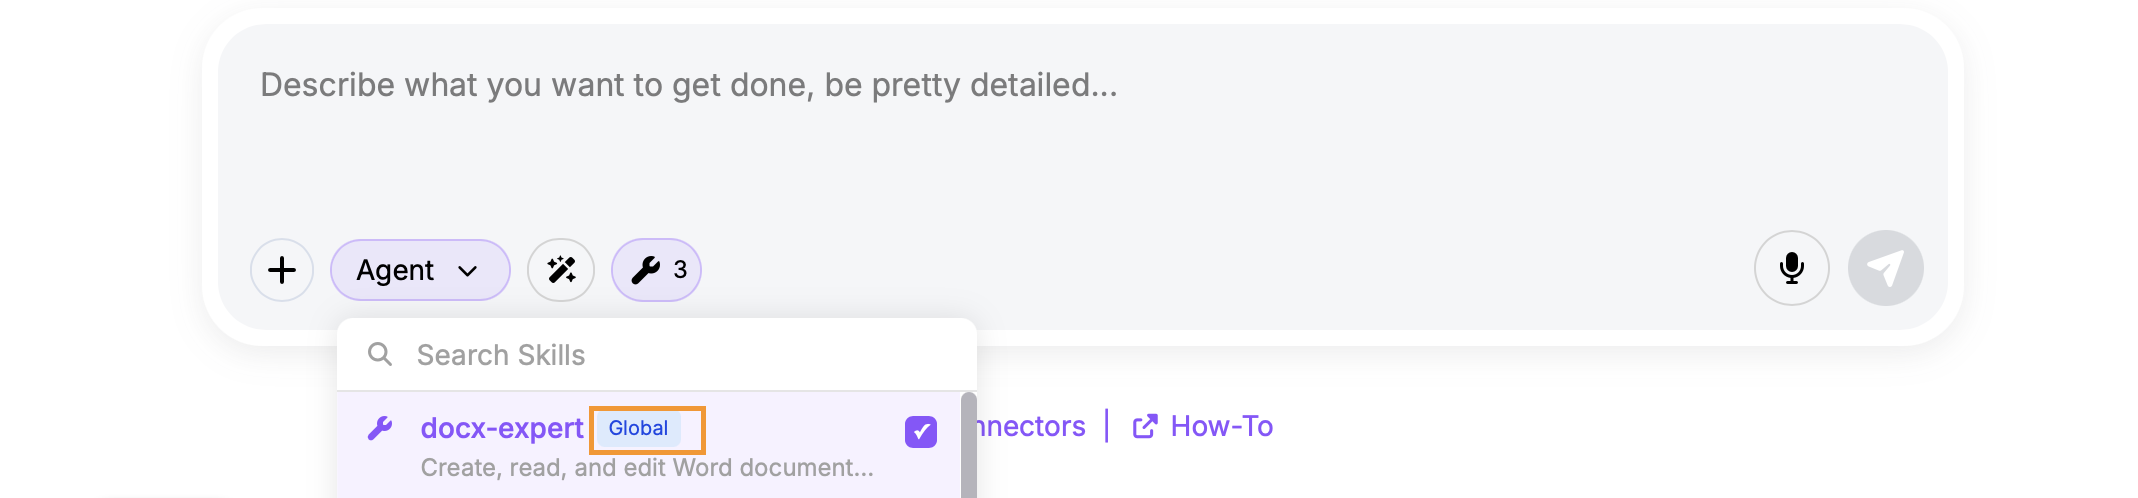
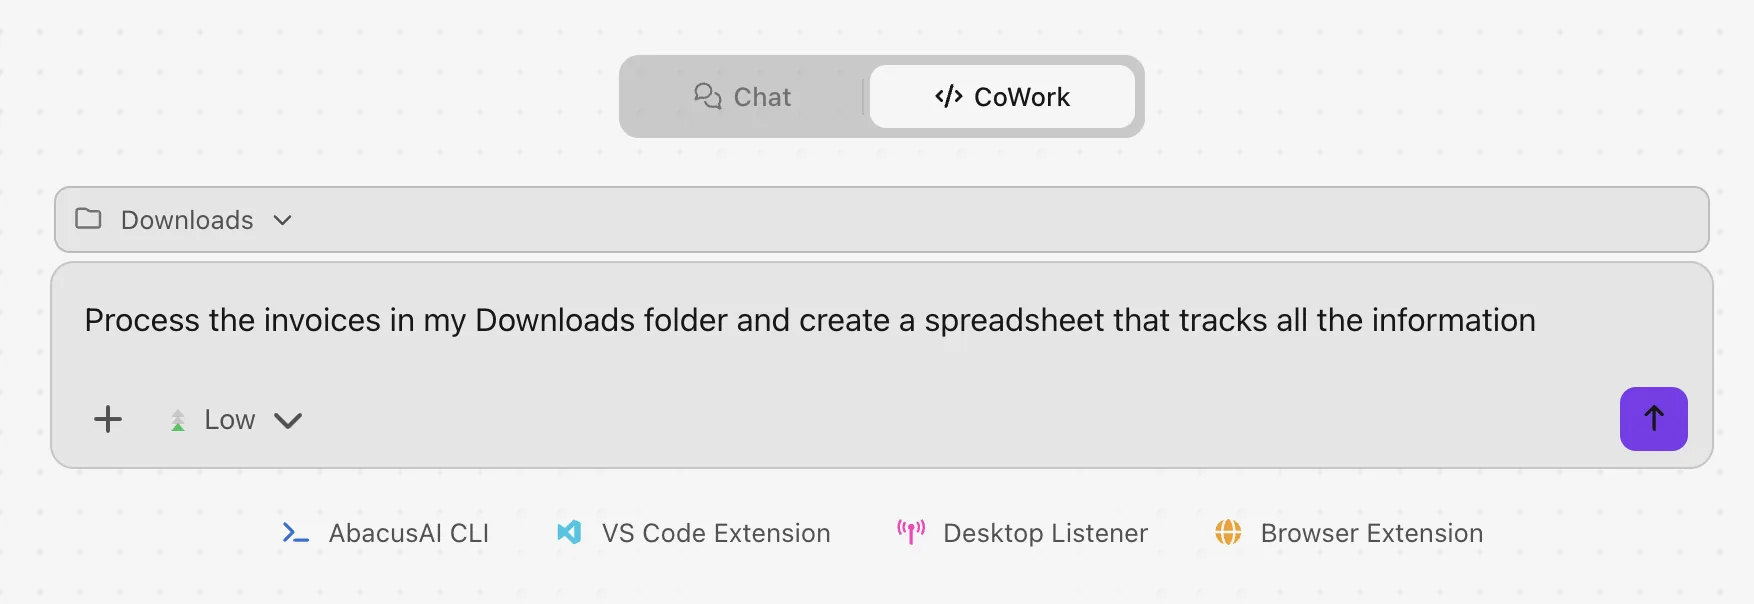
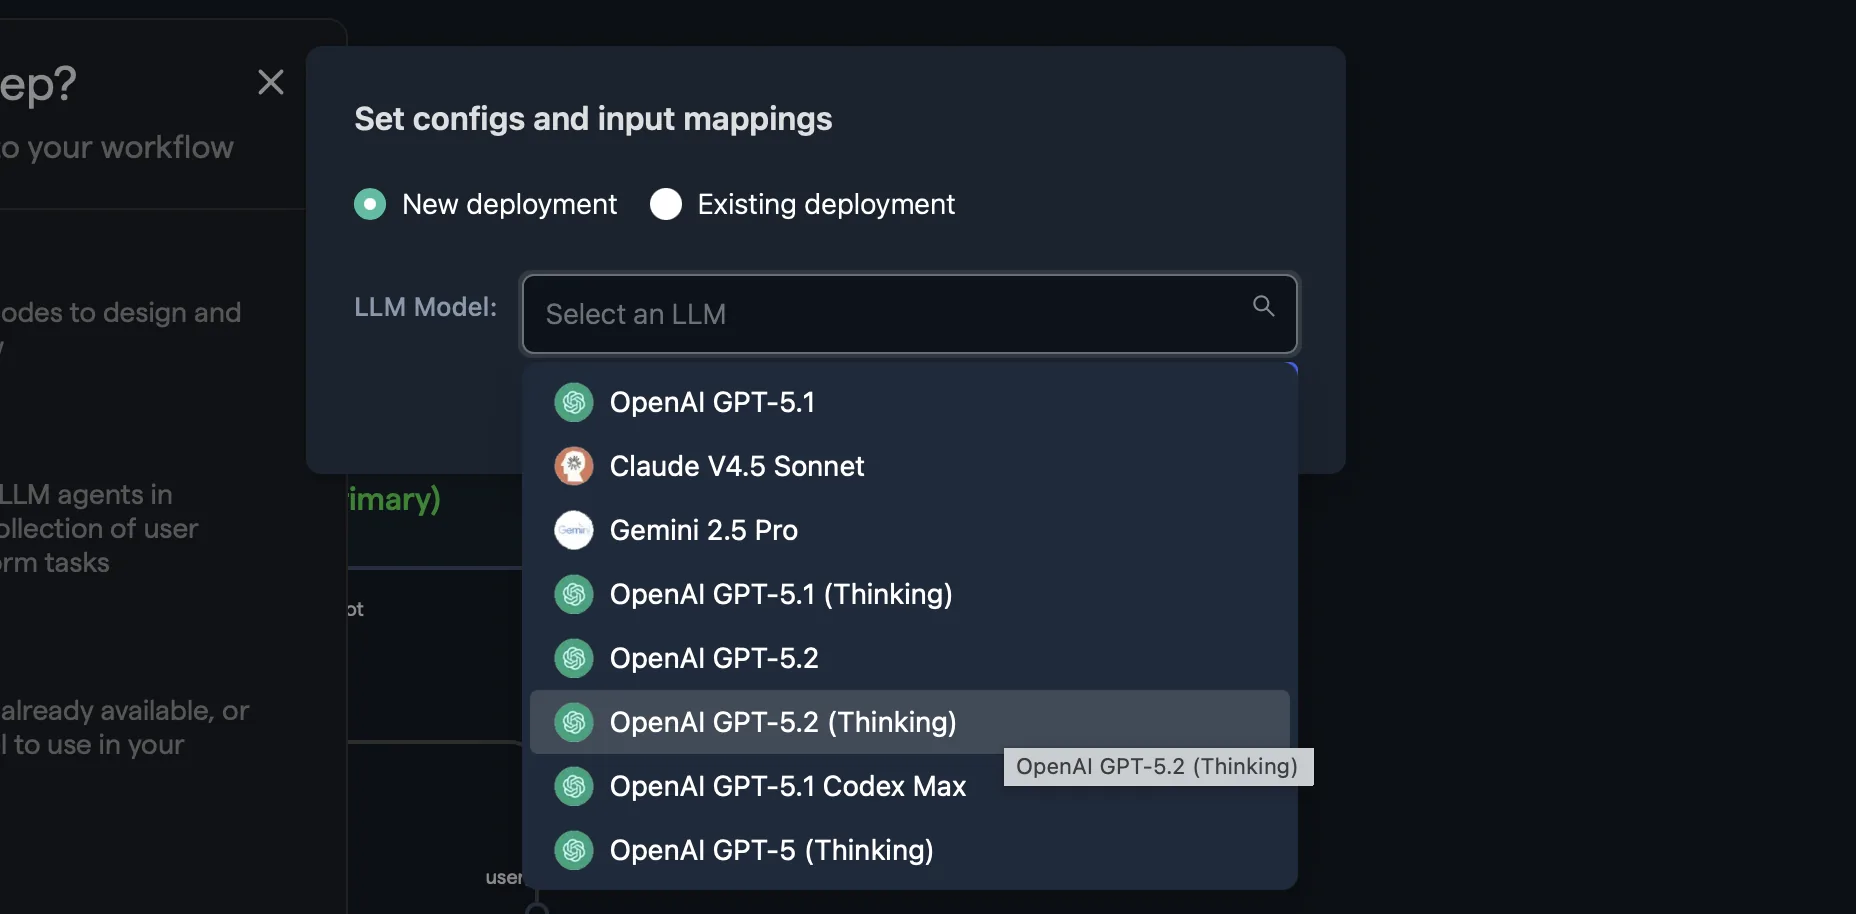
1. Describe with AI Use the Abacus Agent to build your routing mechanism through natural language. For example take this prompt:
The Agent digests this prompt and creates the following configuration for the router, defining the categories and creating category descriptions that are provided as classification prompts:
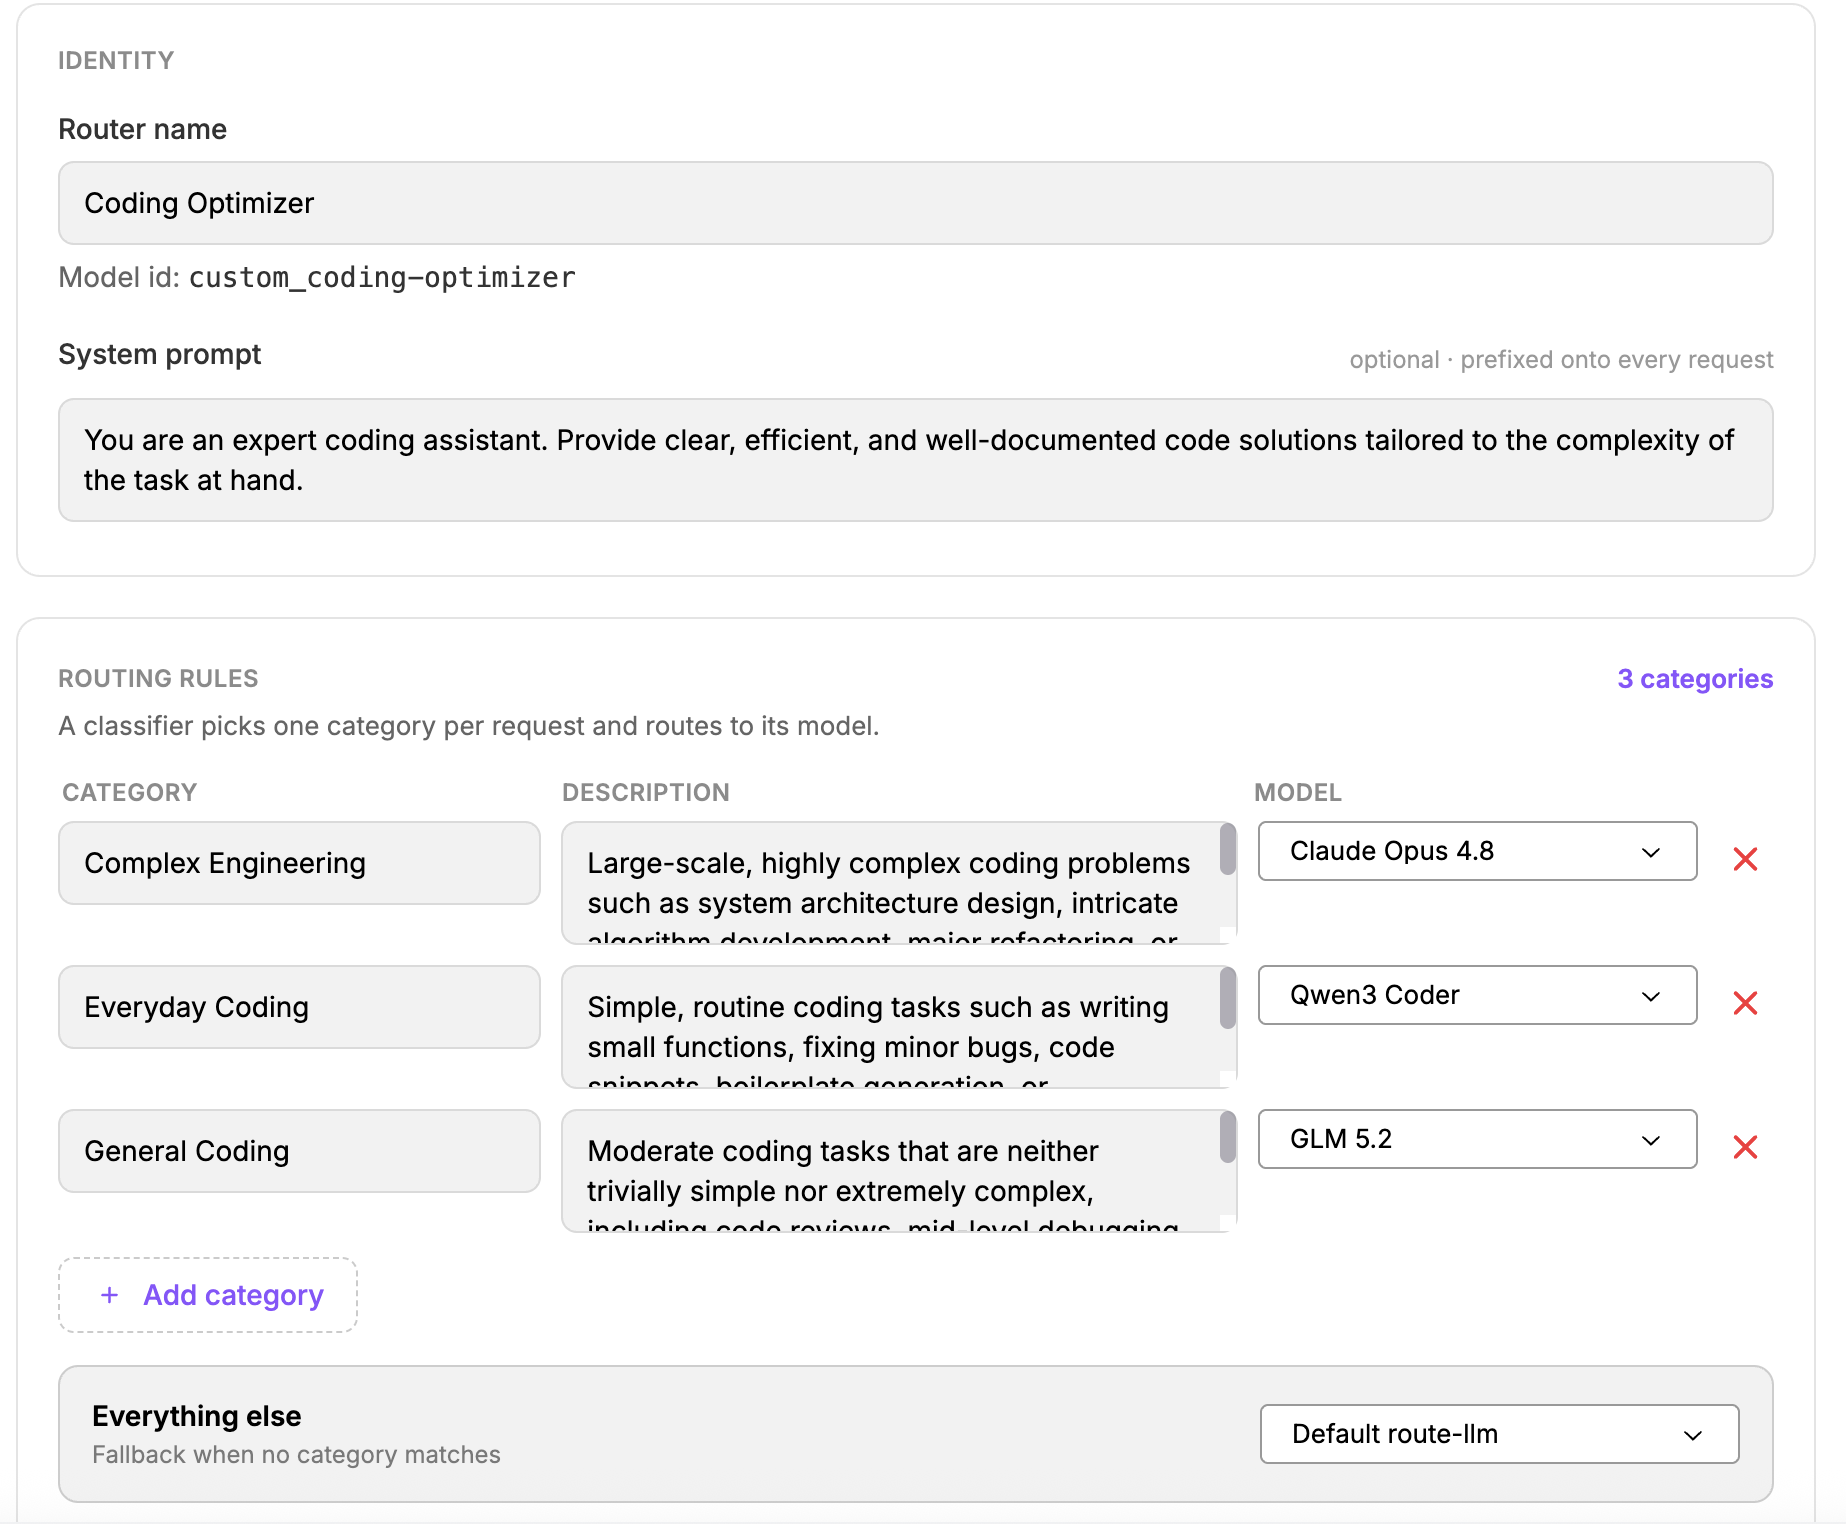
Notice that categories can be further refined, deleted or new ones added by the user.
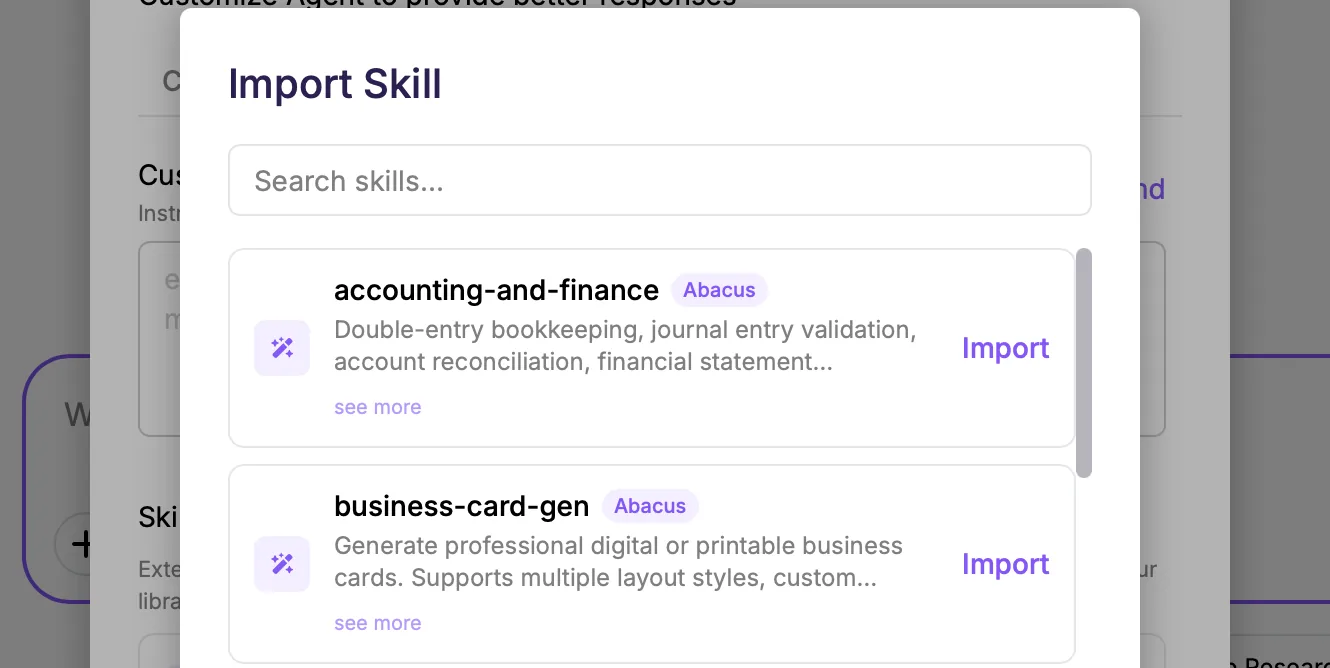
2. Use a template For this option Abacus provides a number of templates for users to get started with pre-defined categories, descriptions and models:

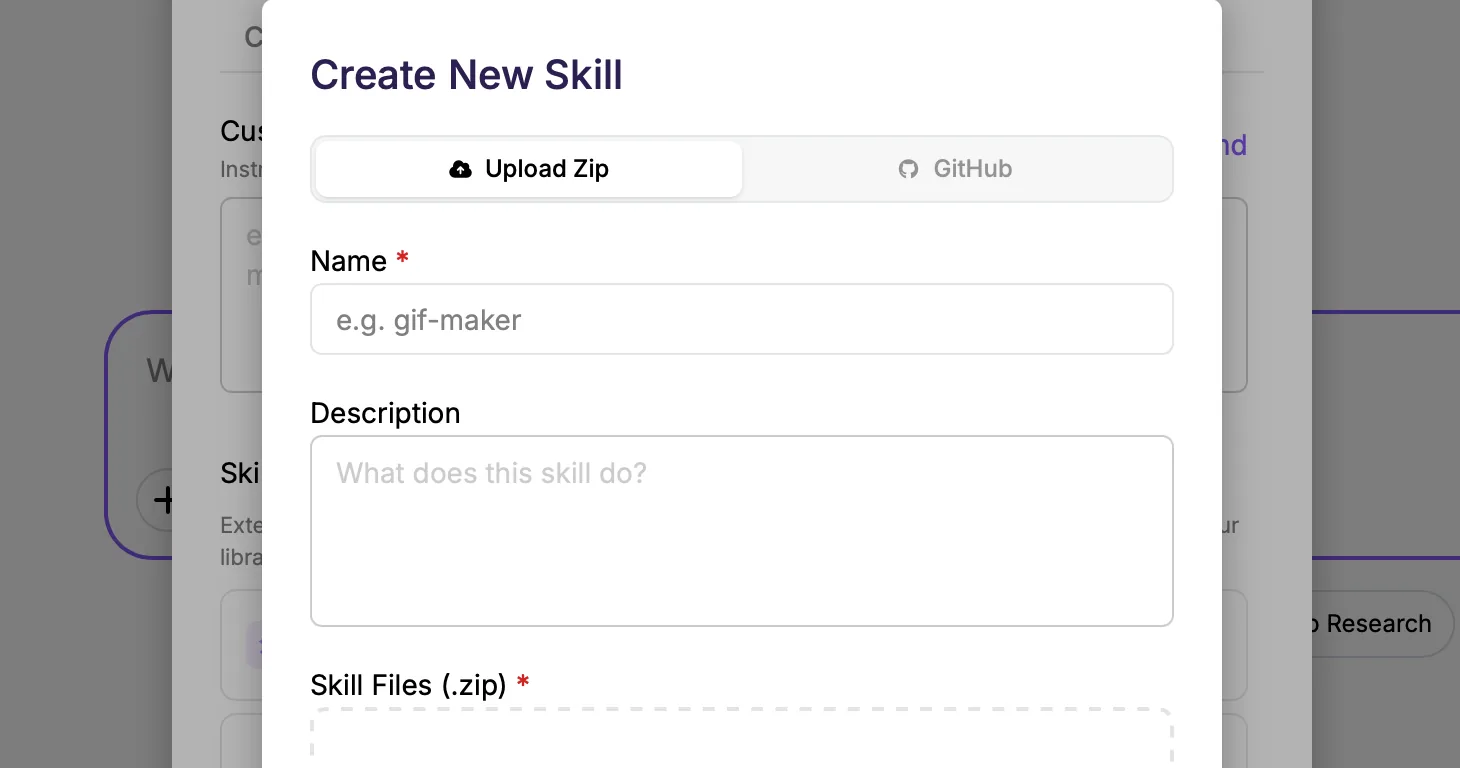
3. Start from scratch This option gives users a totally blank slate to fully design their own router from scratch.
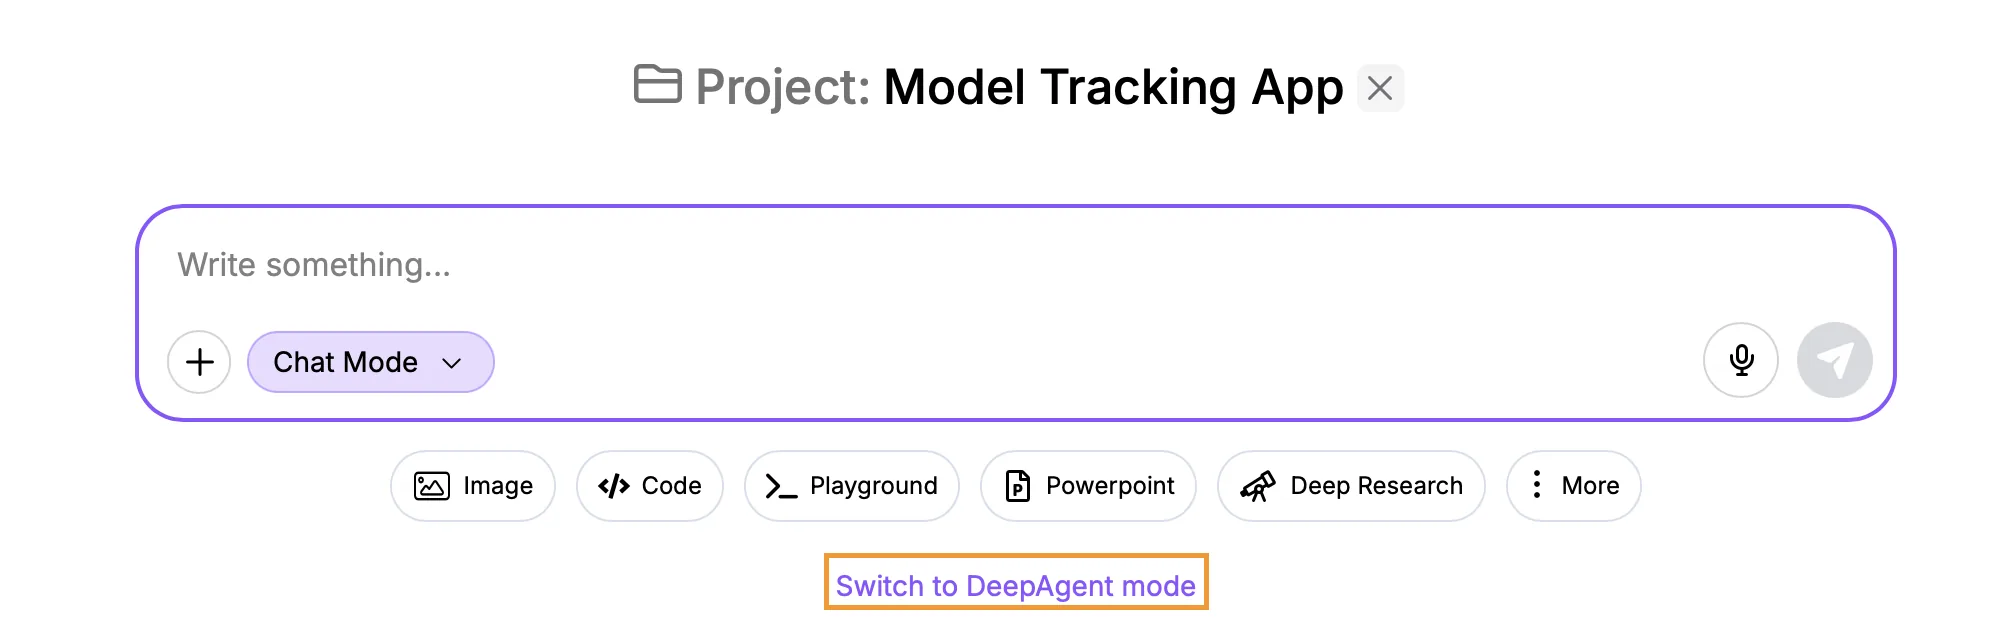
Once your custom router is built it will be available in two places: via the routellm api and as part of the Super Assistant chat mode.
Via the RouteLLM API When the router is created it is given an api tag:
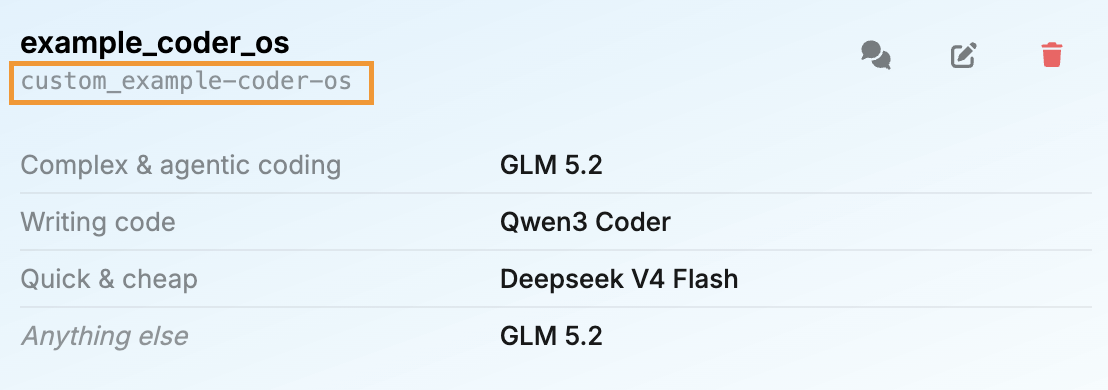
This tag can be plugged into the routeLLM api to identify the model that is being used in the api request.
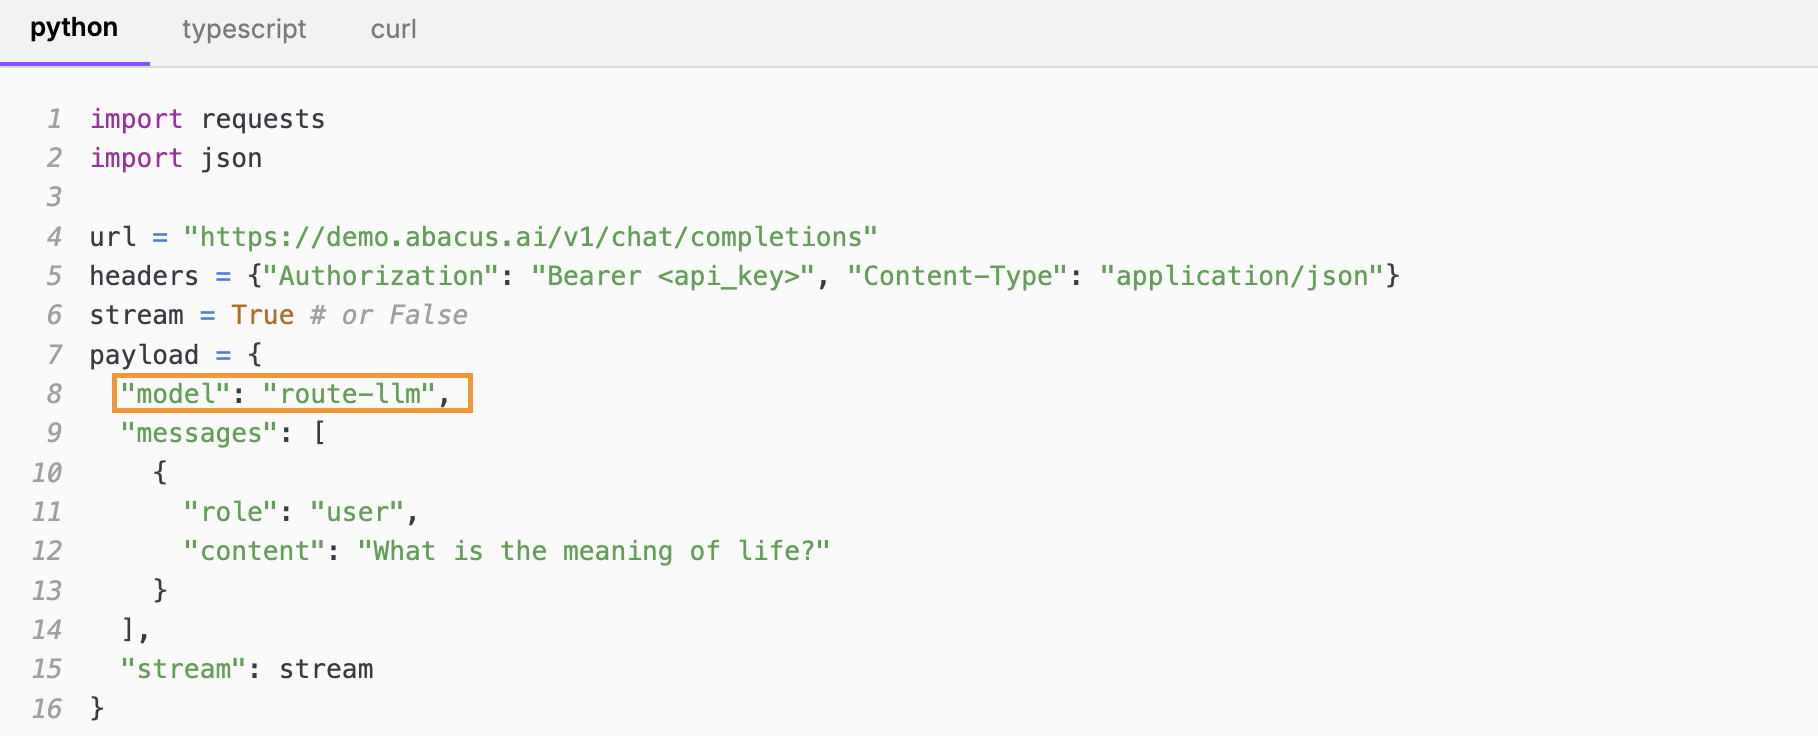
Details about how to use the routeLLM api can be found either on the Custom Routers and API page or in our documentation
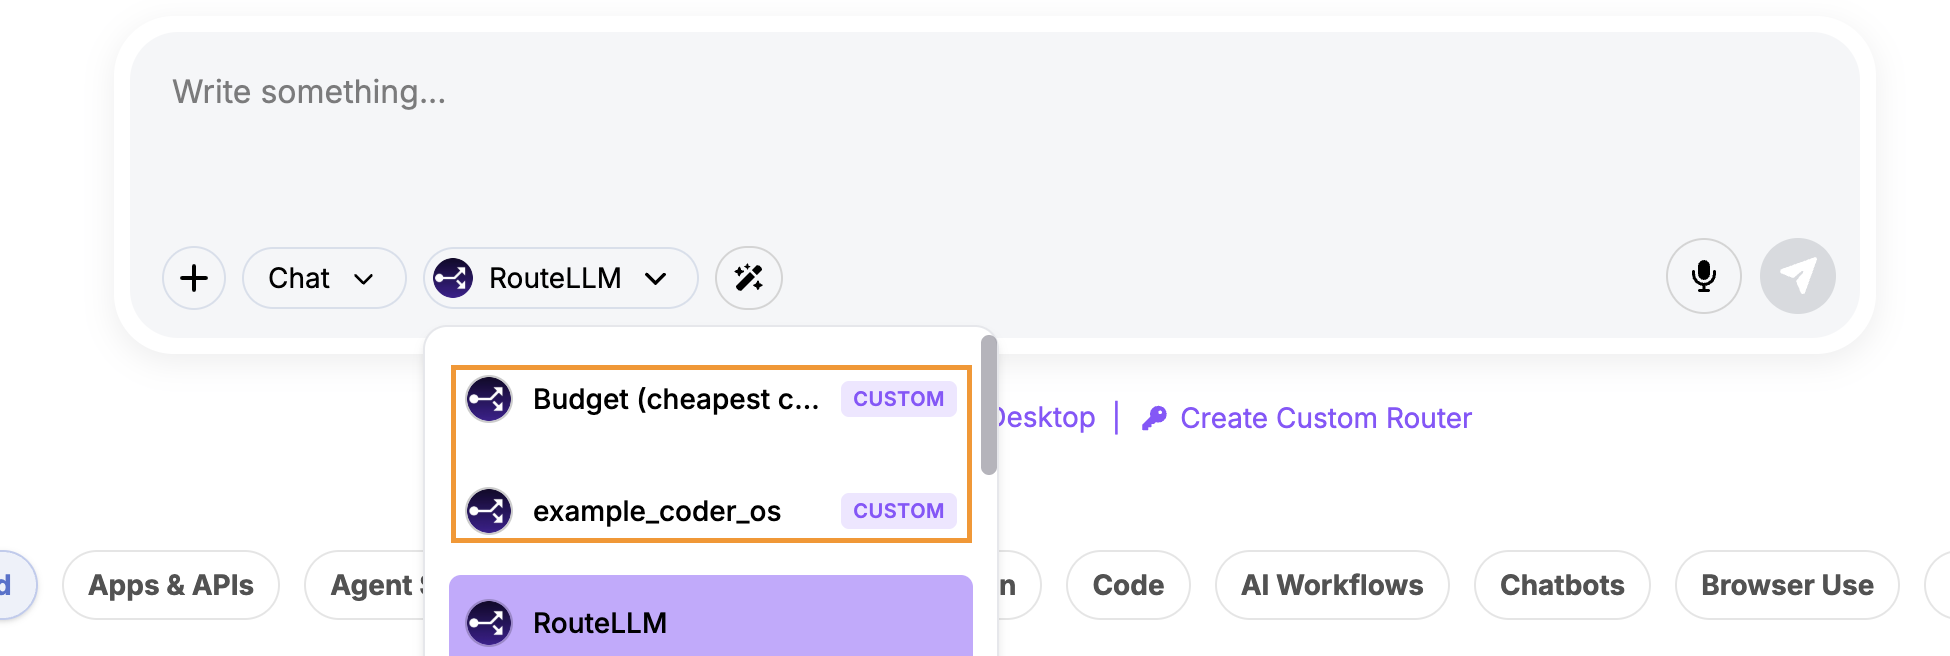
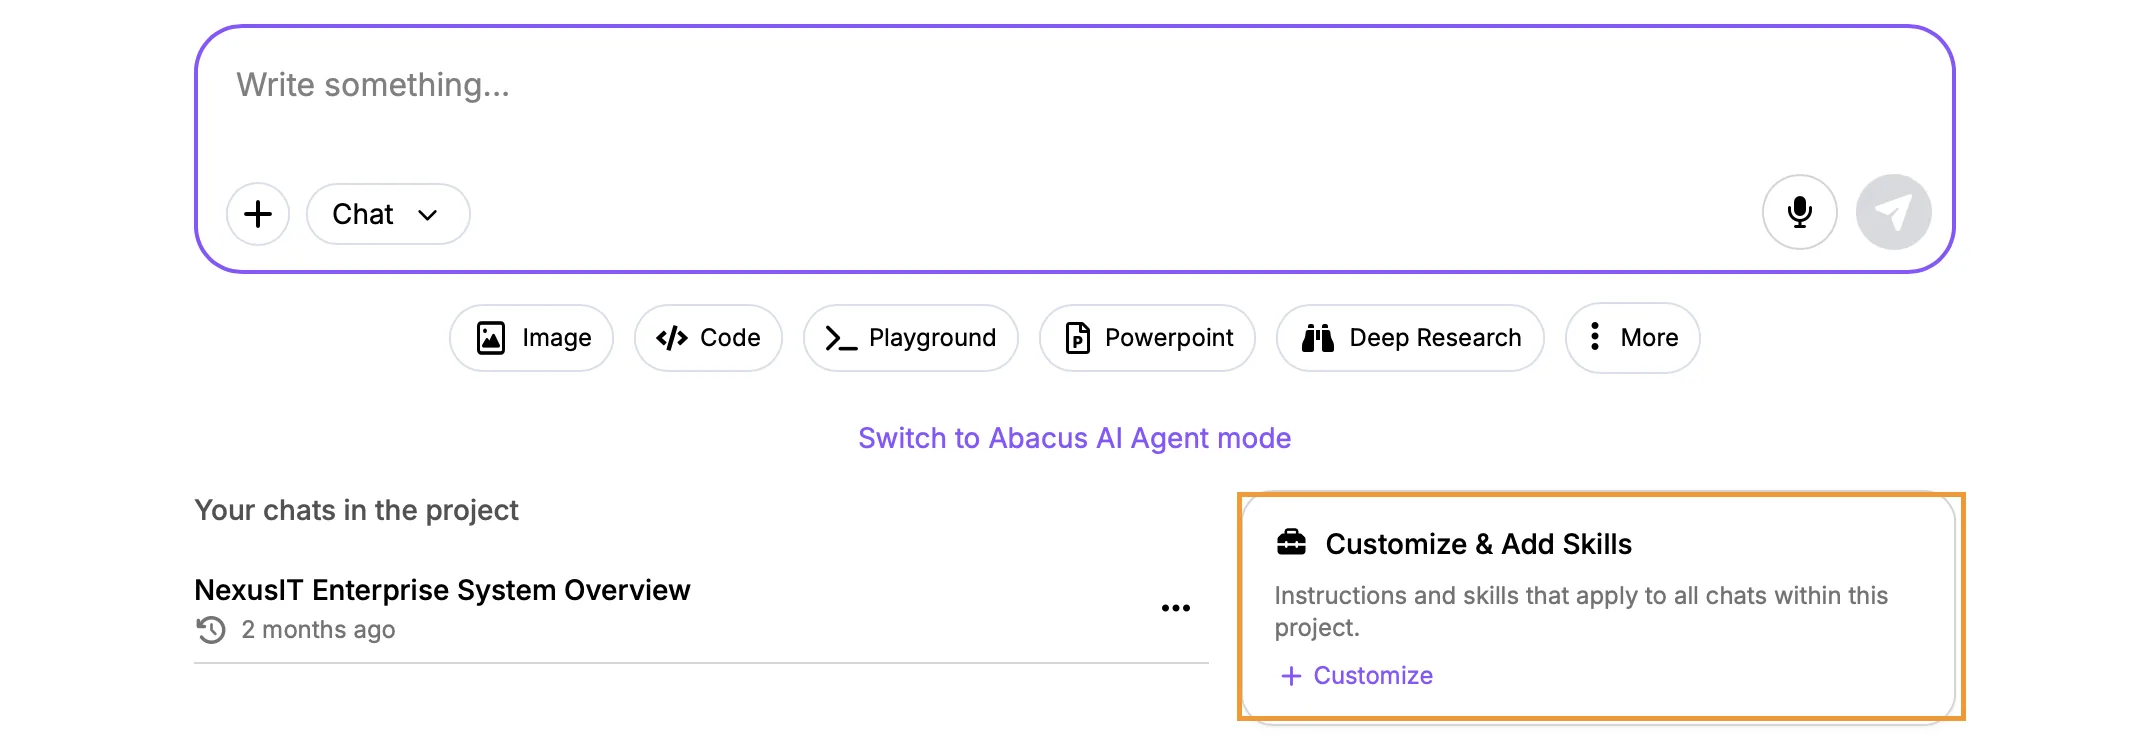
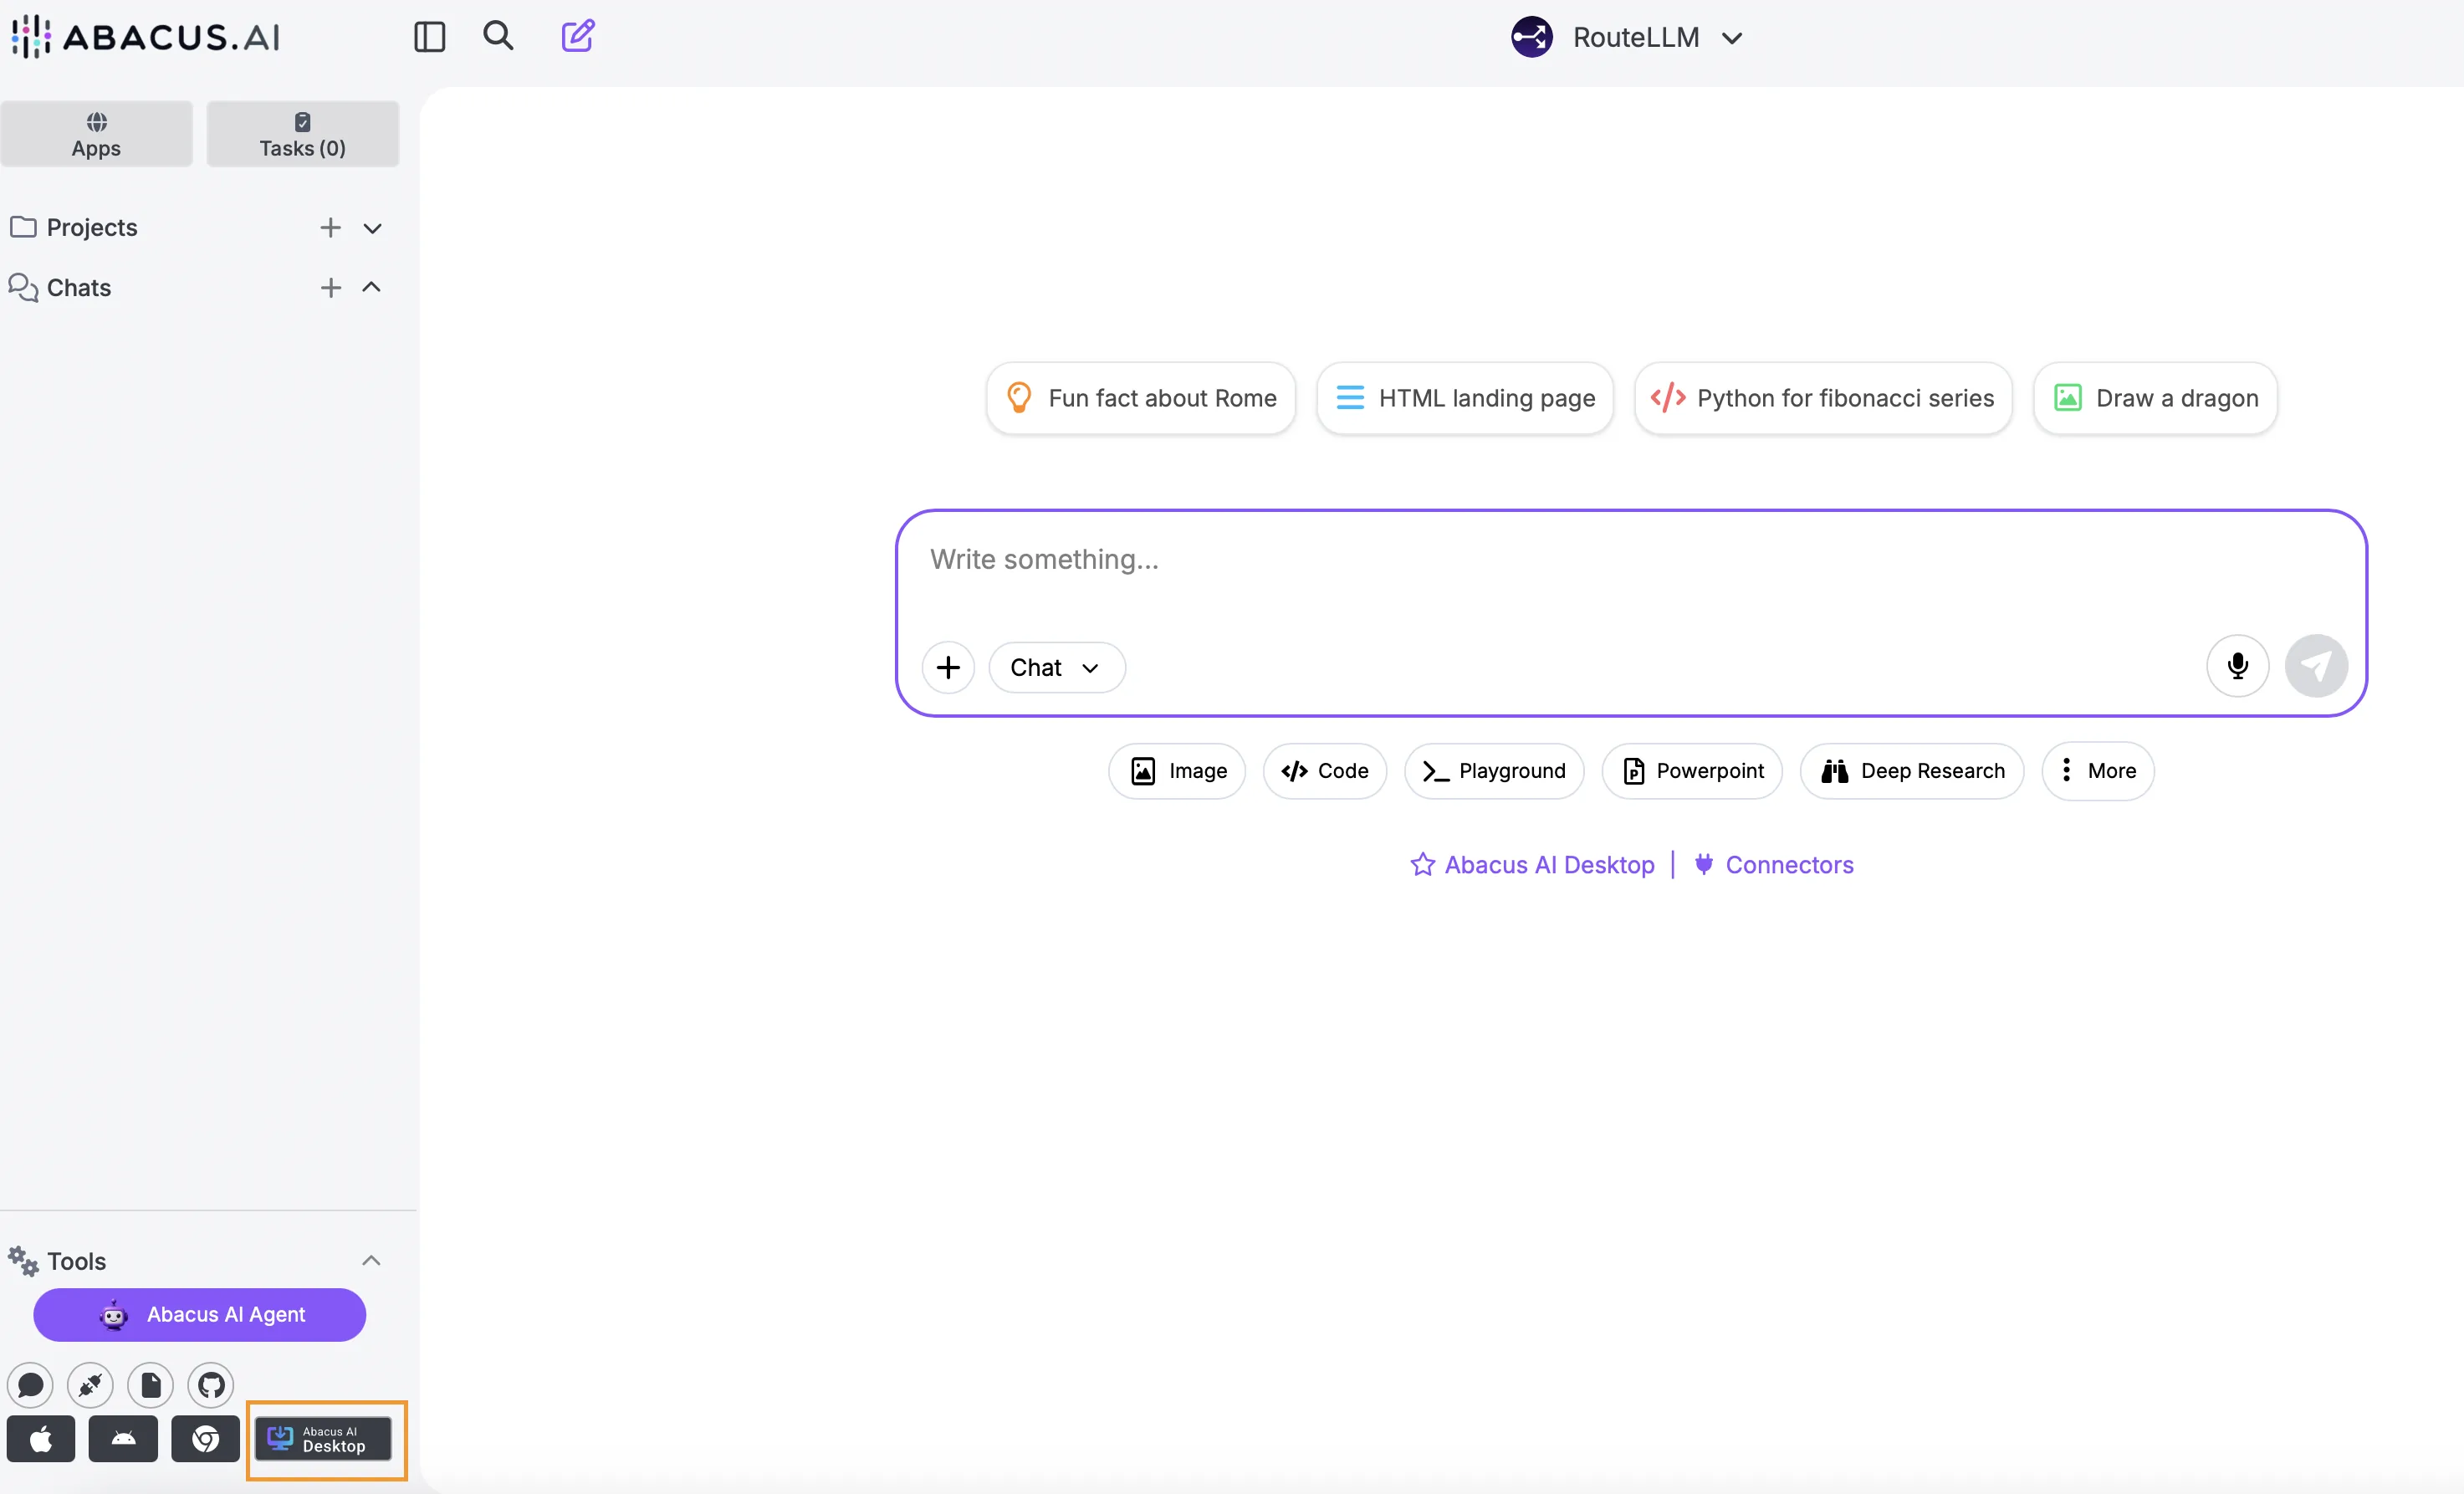
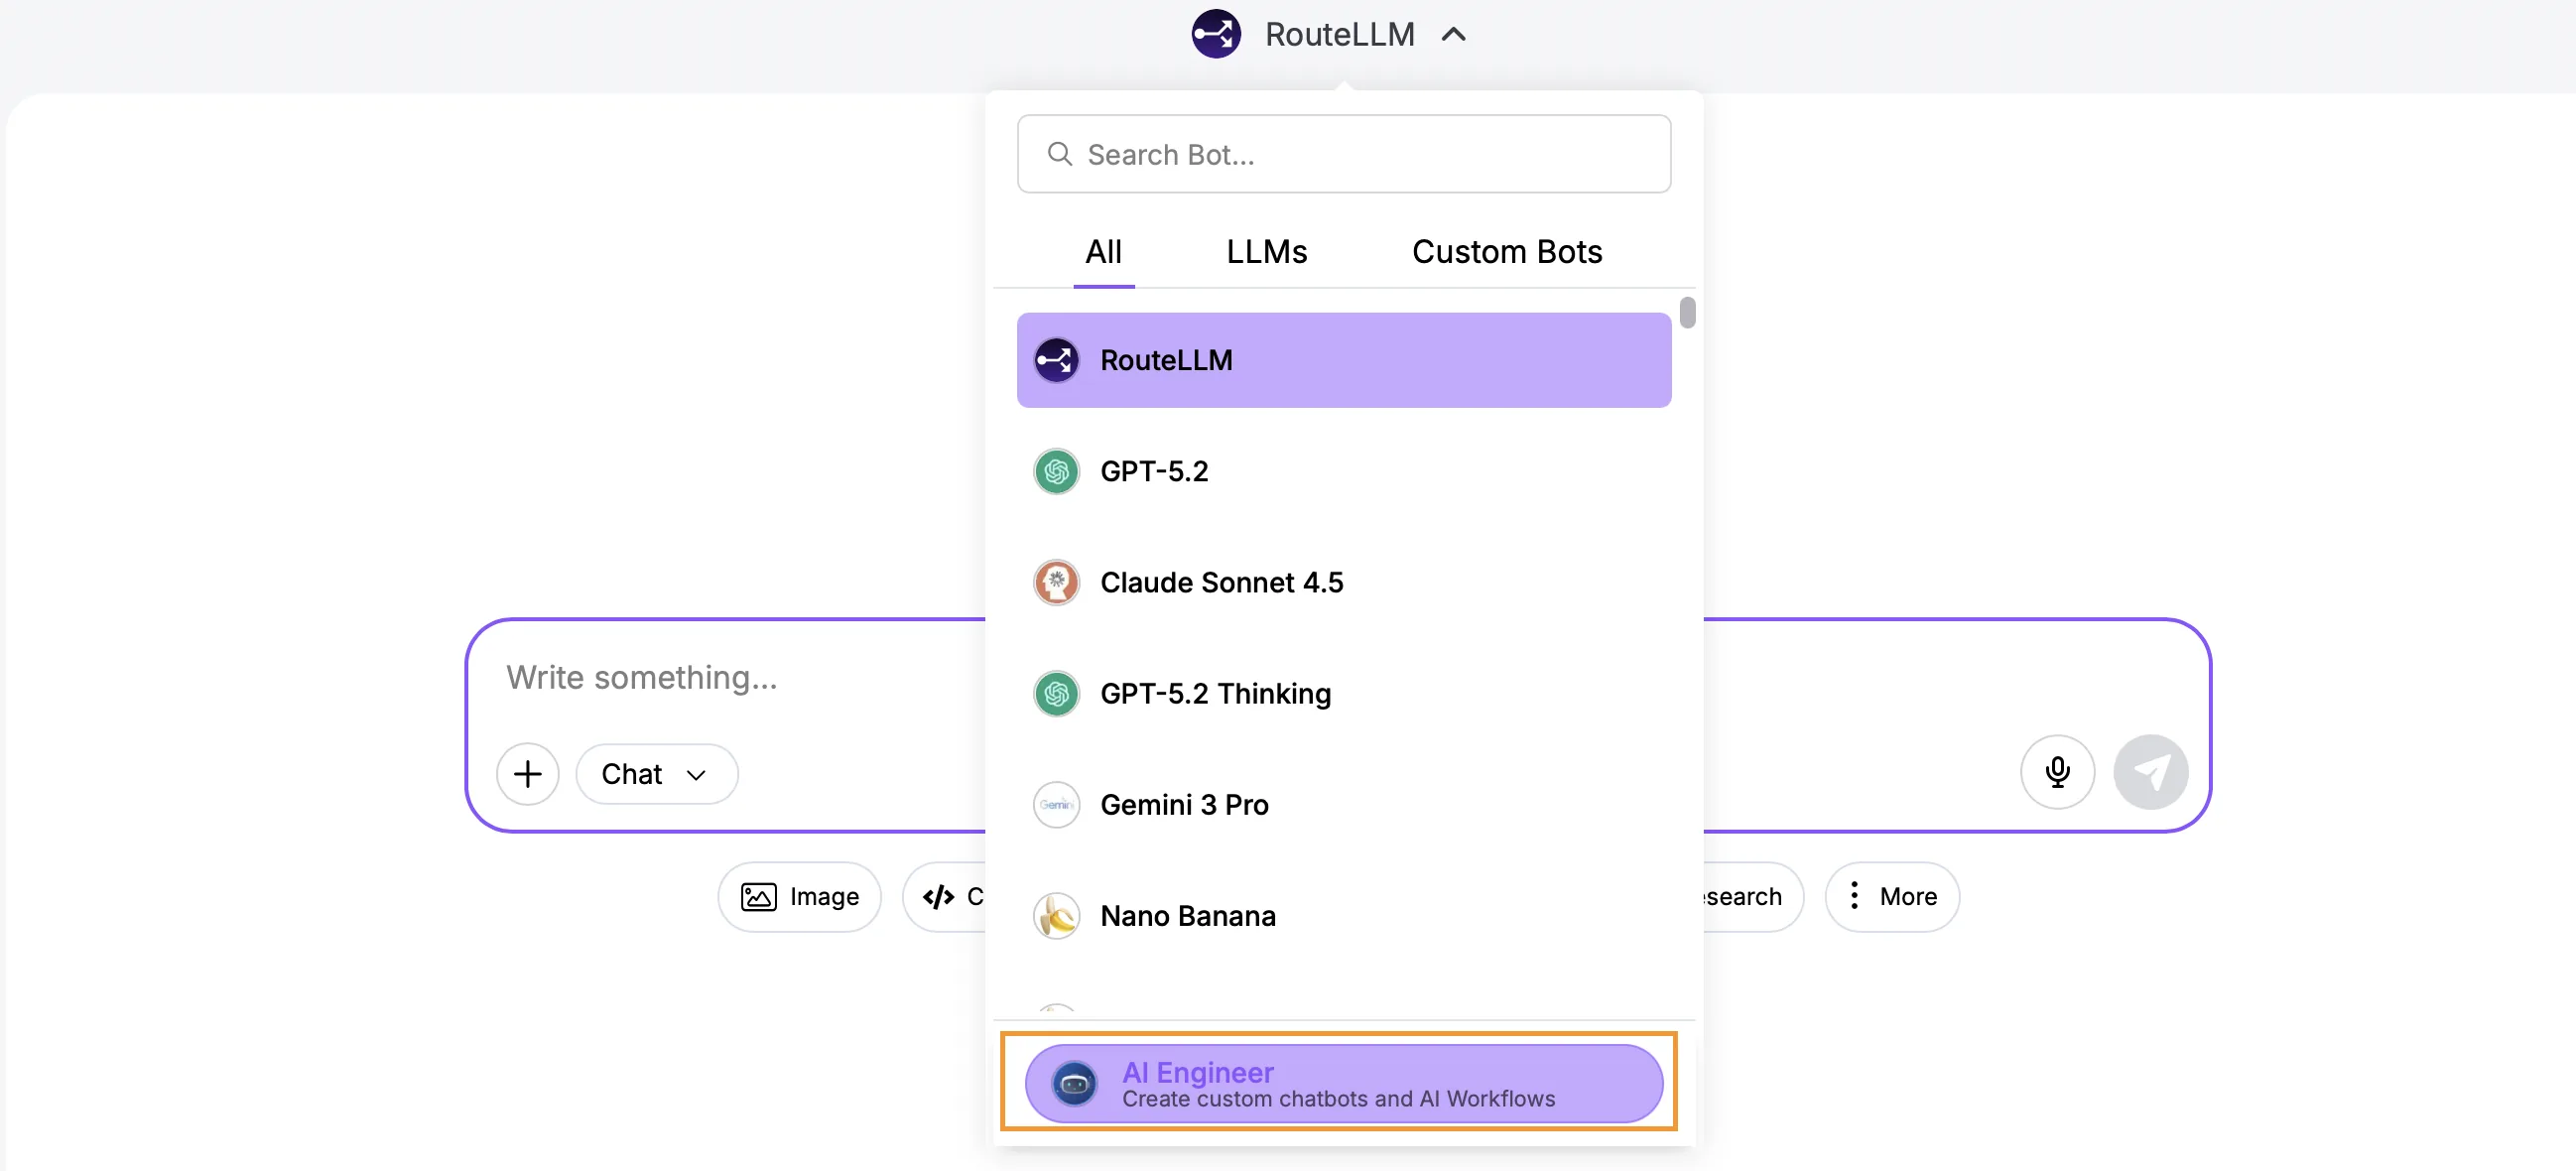
In the Super Assistant UI The custom router will be available as one of the models available in chat mode:
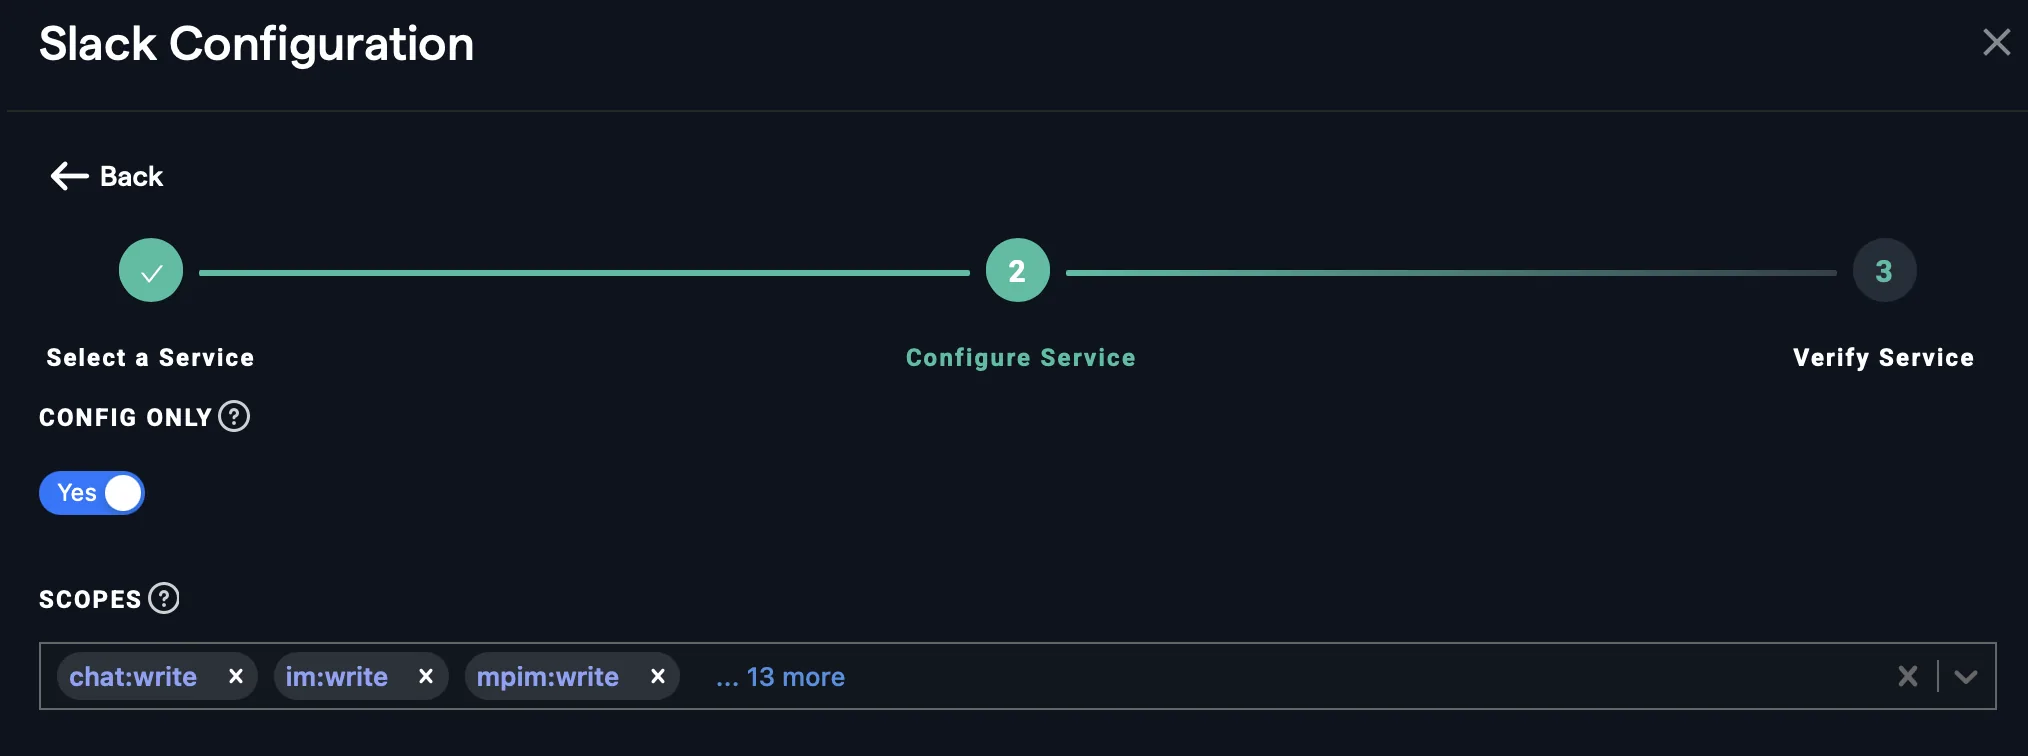
Organizational MCP Servers
A key addition to our MCP server options is the ability to now make them organization wide. Platform administrators have the option when configuring a connection to an MCP server to make it available to all users in the organization.
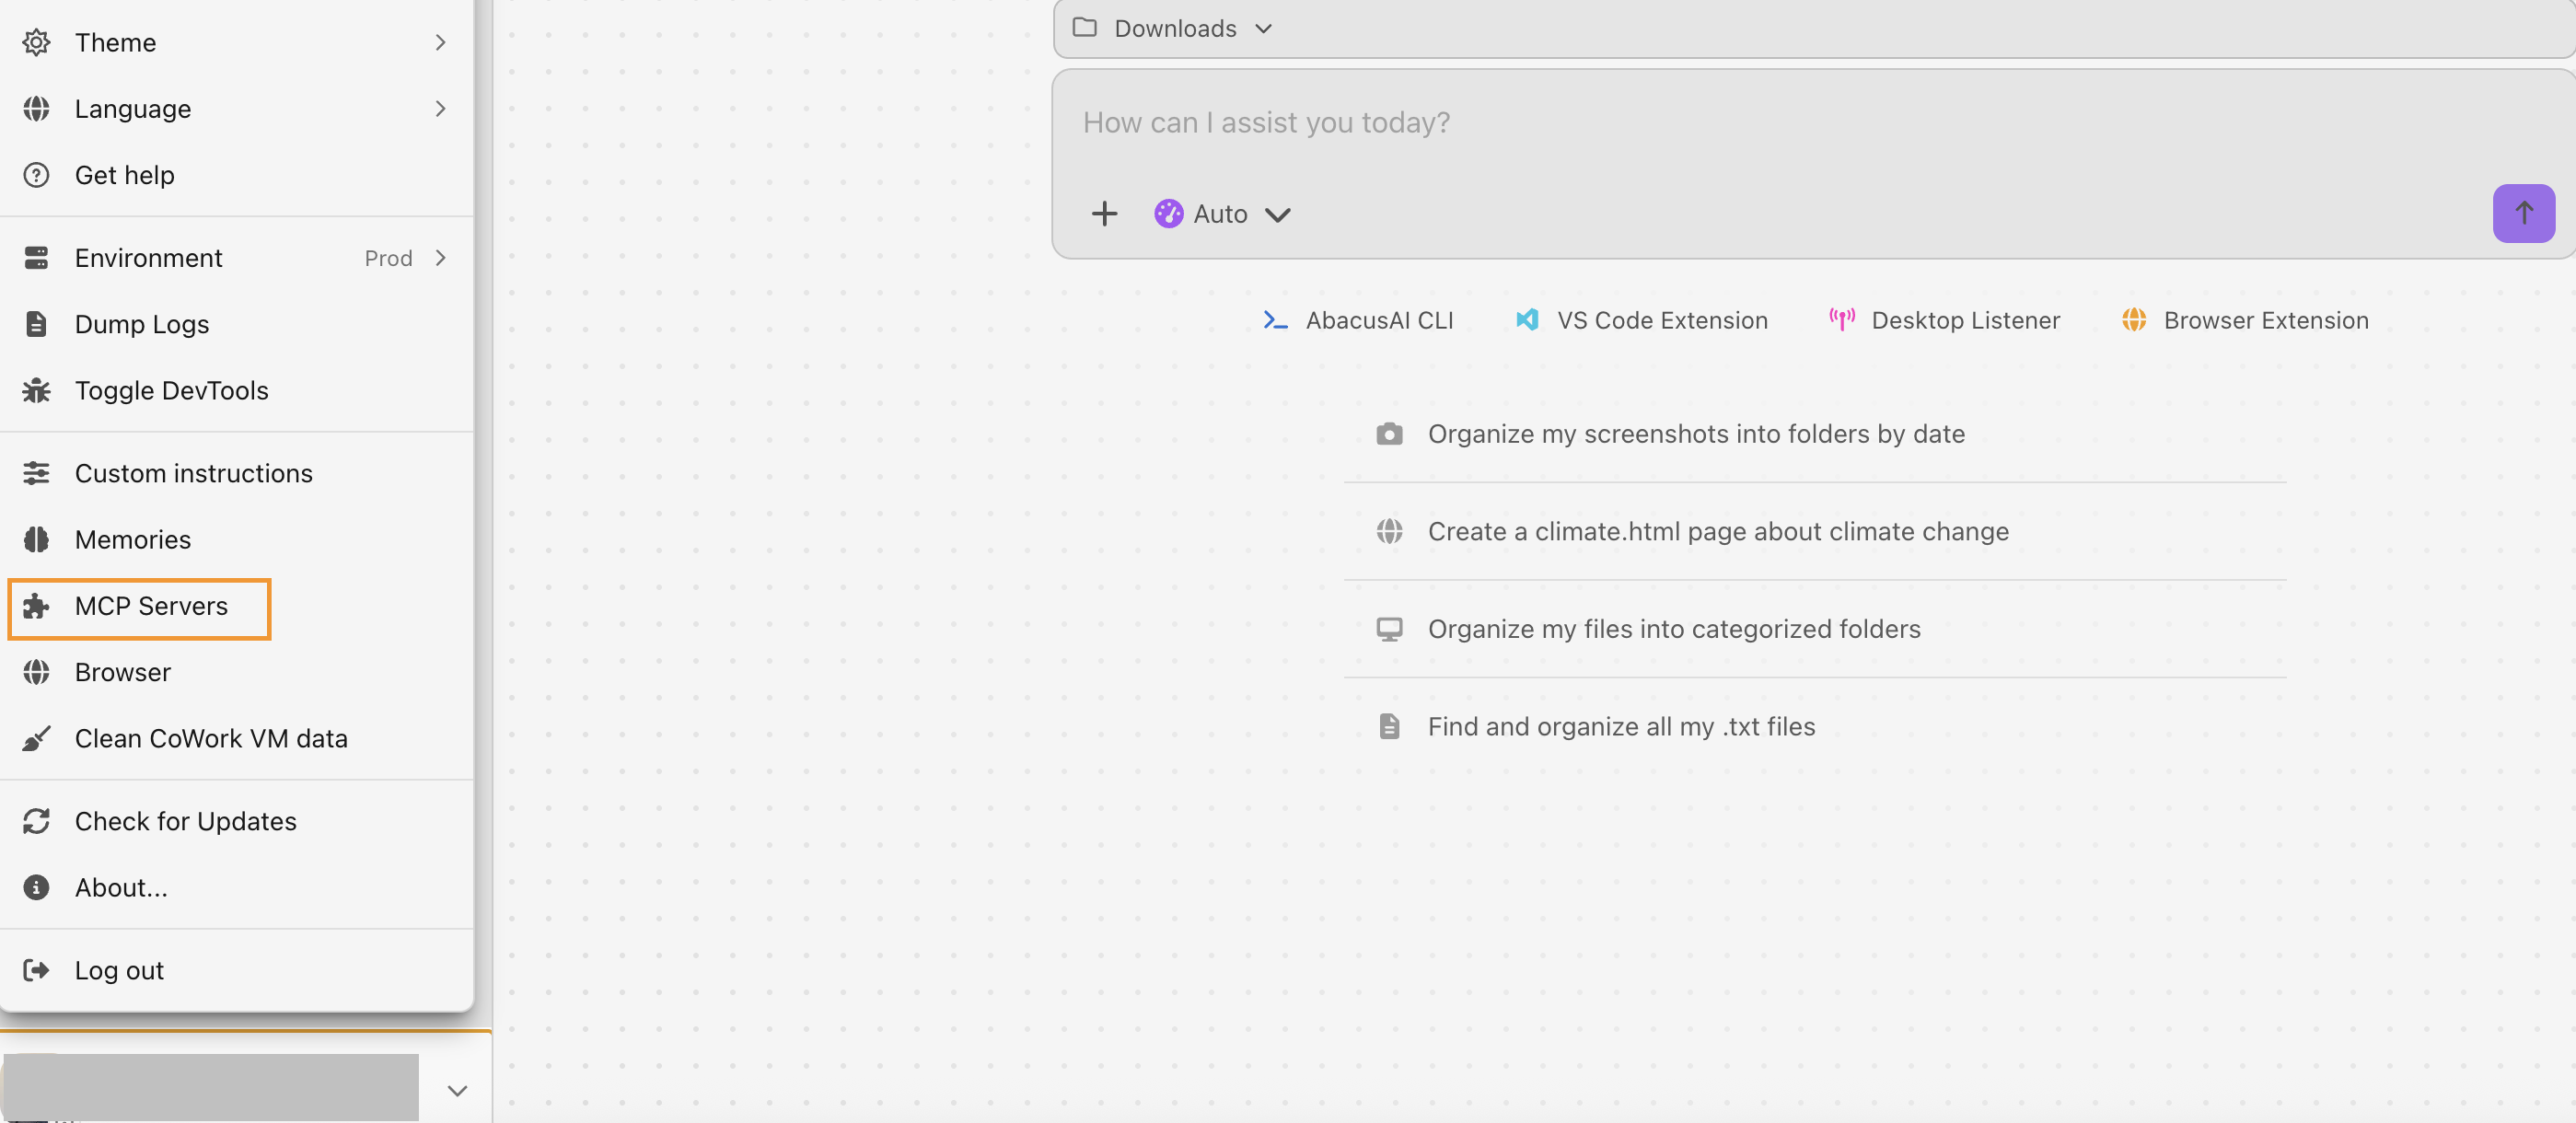
Viewing Organizational MCP Servers First navigate to the MCP Server Configuration tab, found under Profile >> Connectors. On this page you will be able to see MCP servers that you have personally configured, plus a list of organization MCP configurations:
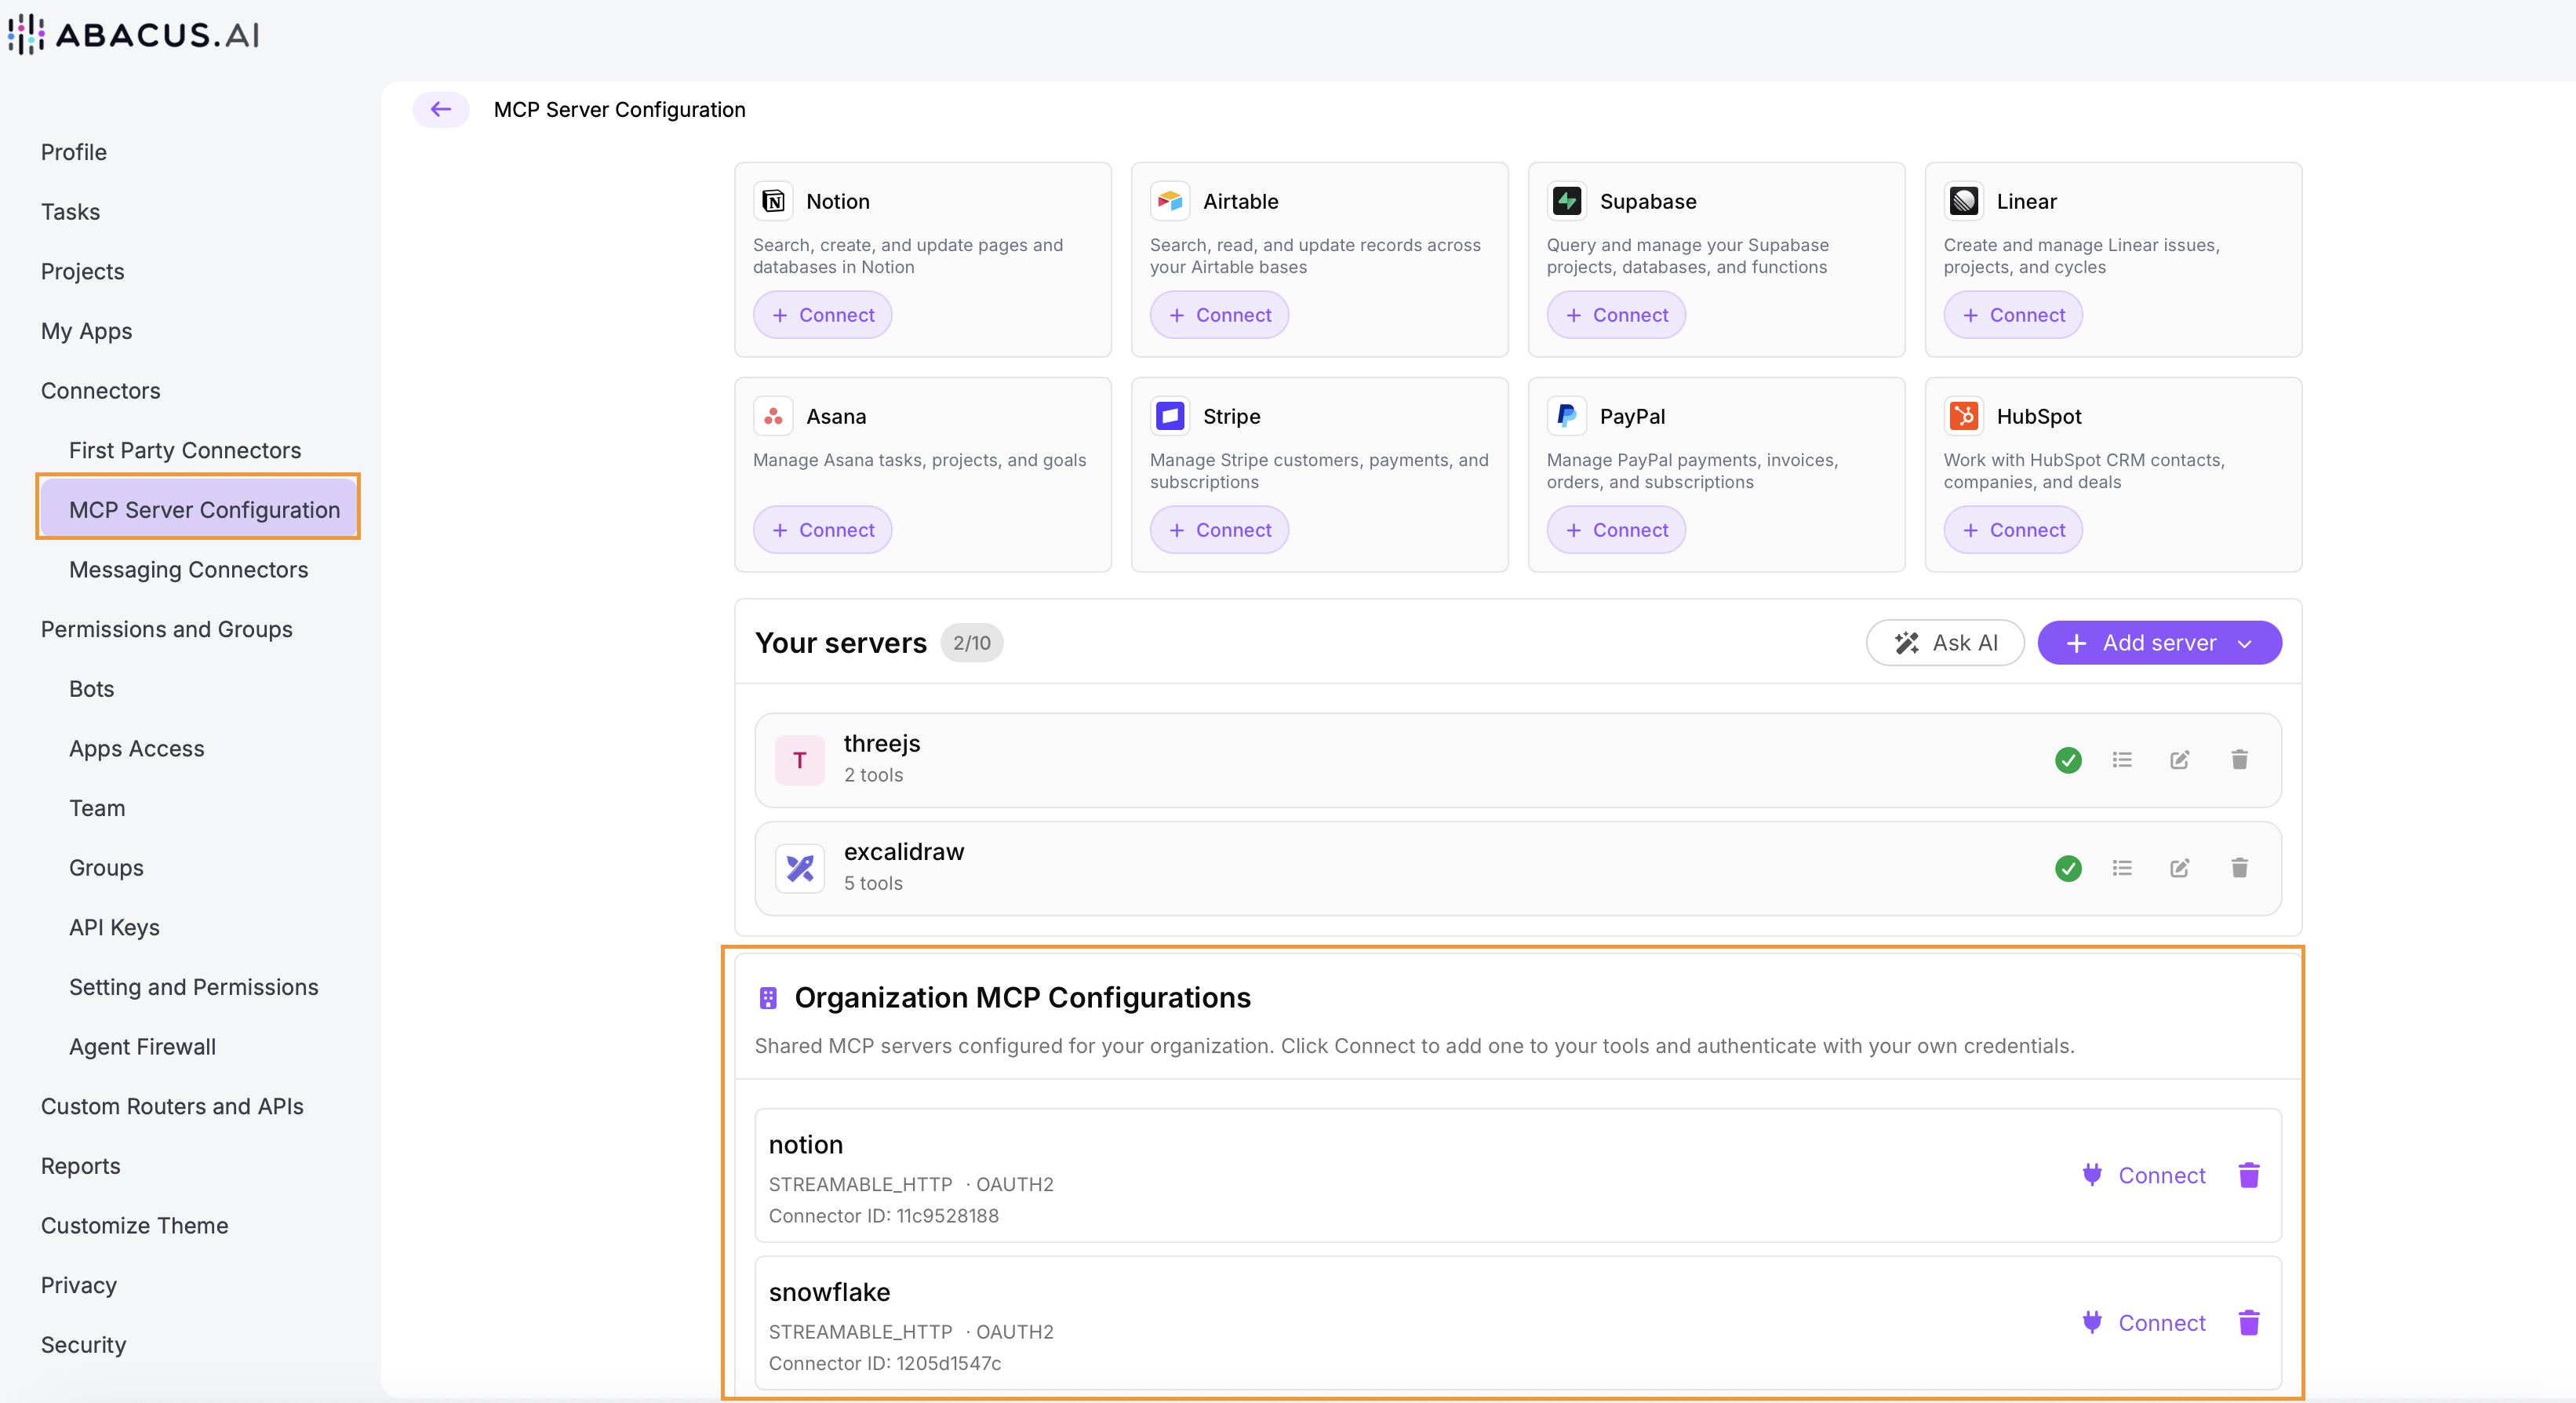
An important point to note is that these organizational MCP servers still require individual users to Connect to the server and provide authentication if necessary.

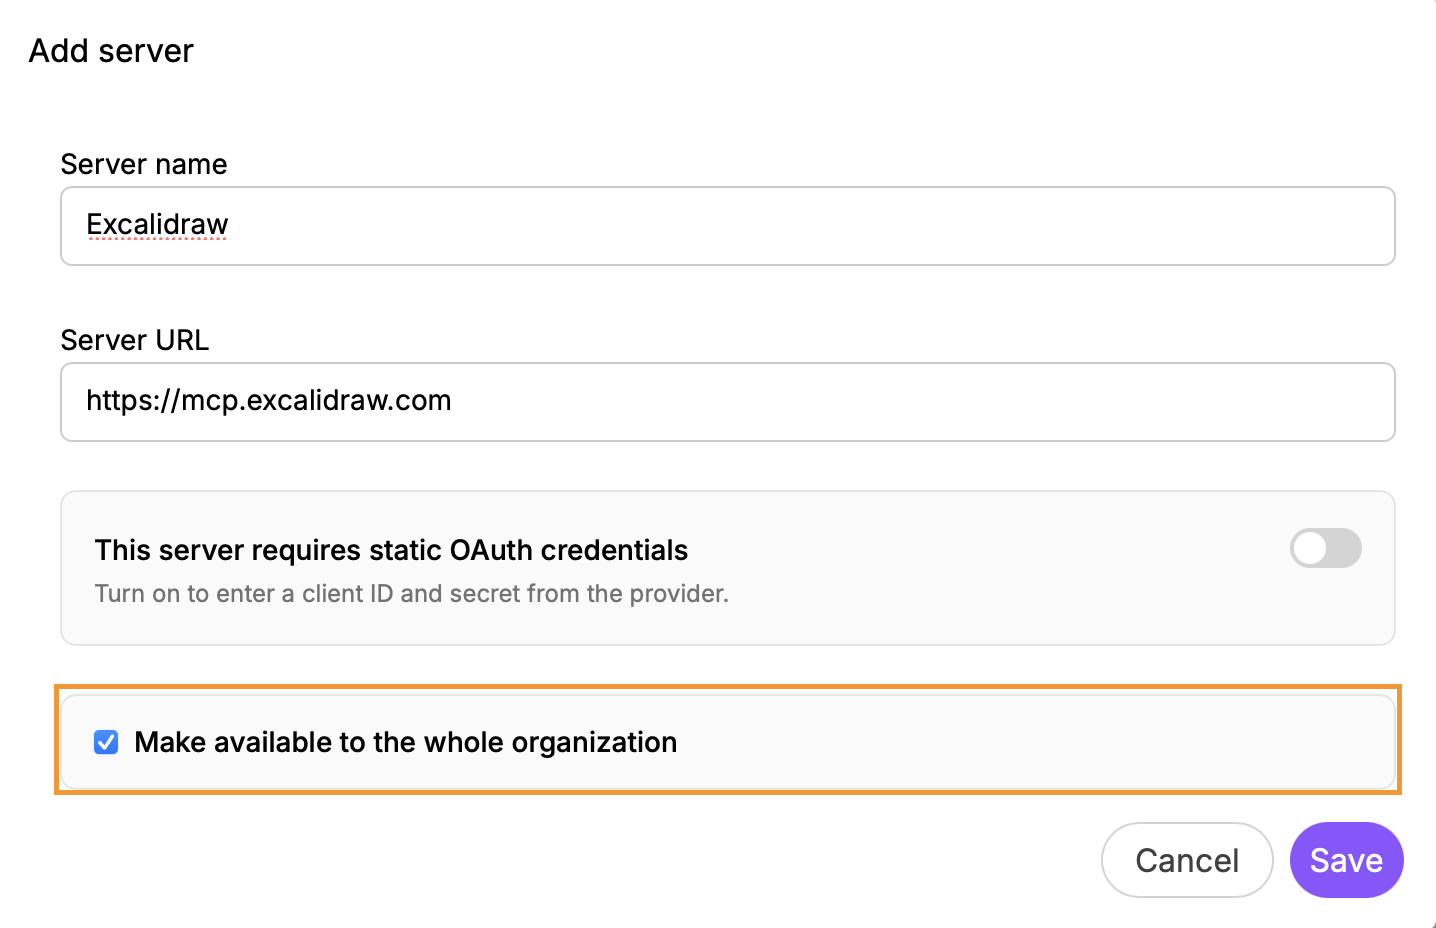
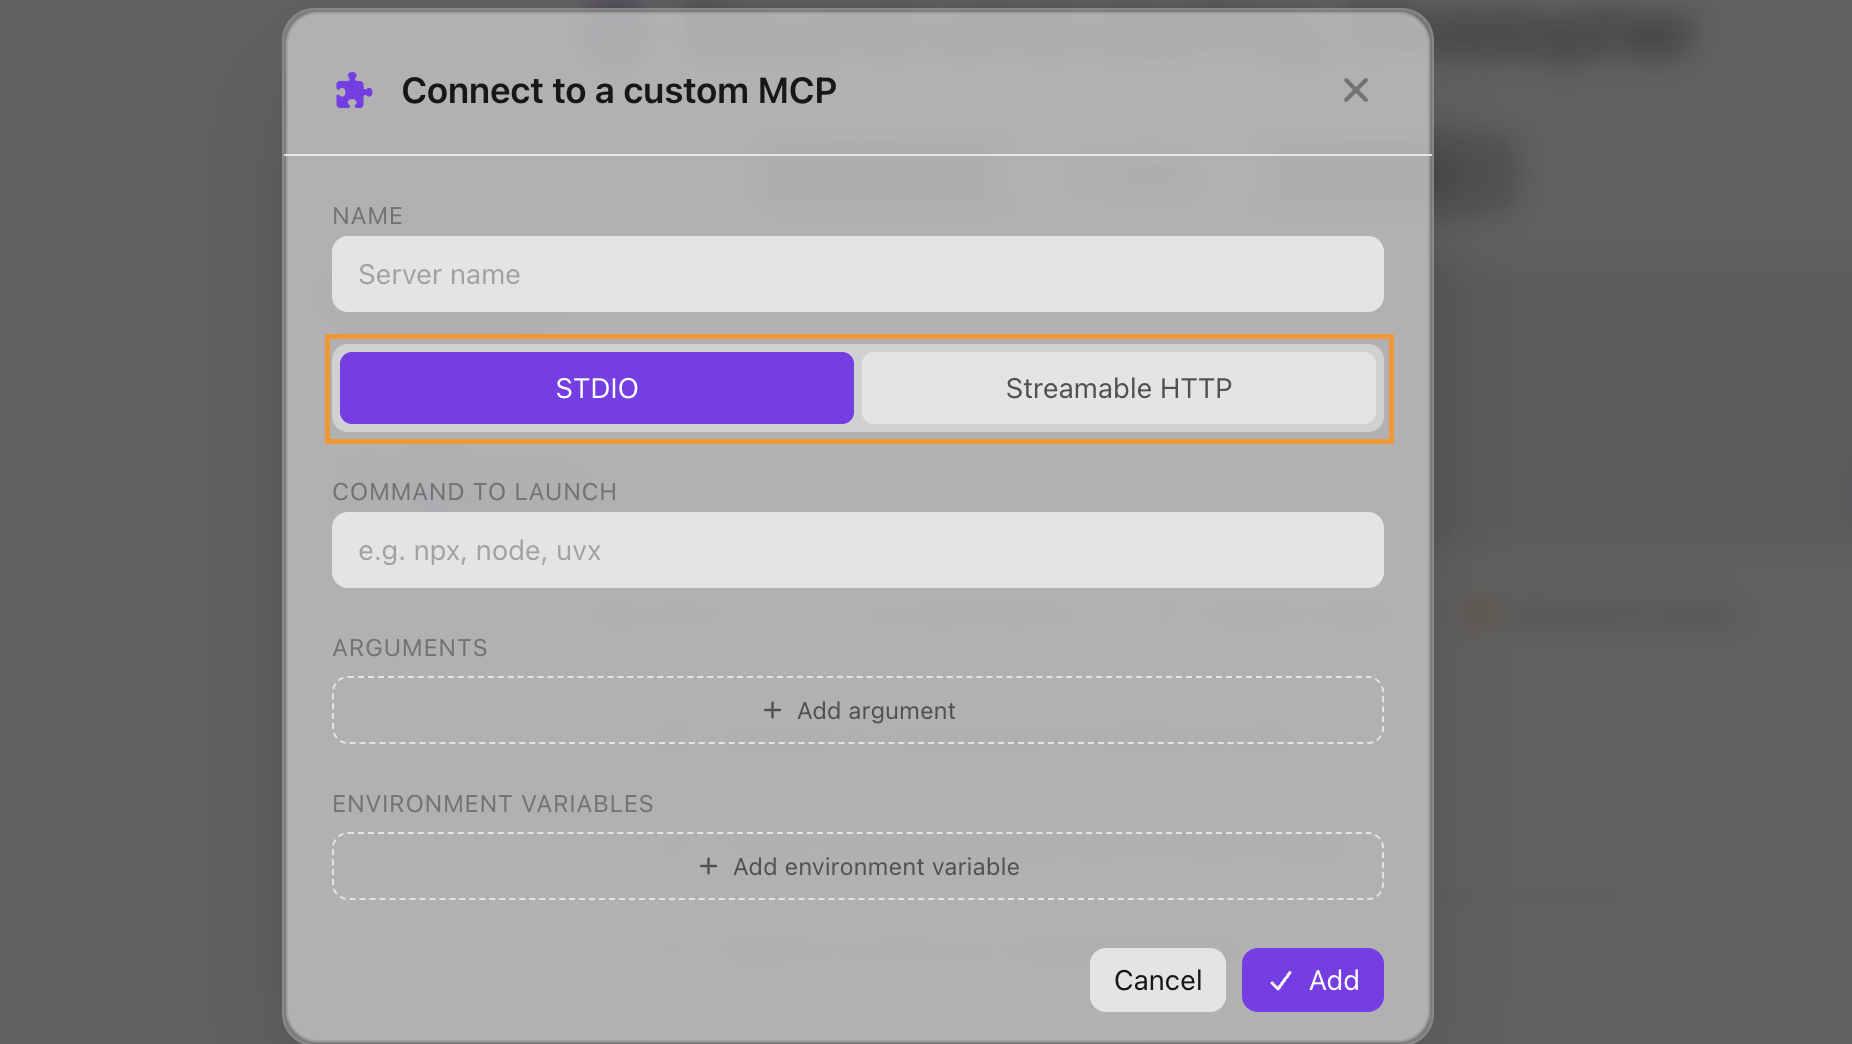
Creating an Organizational MCP Configuration Platform admins can create these servers using the Add Server button on the MCP Server Configuration page.

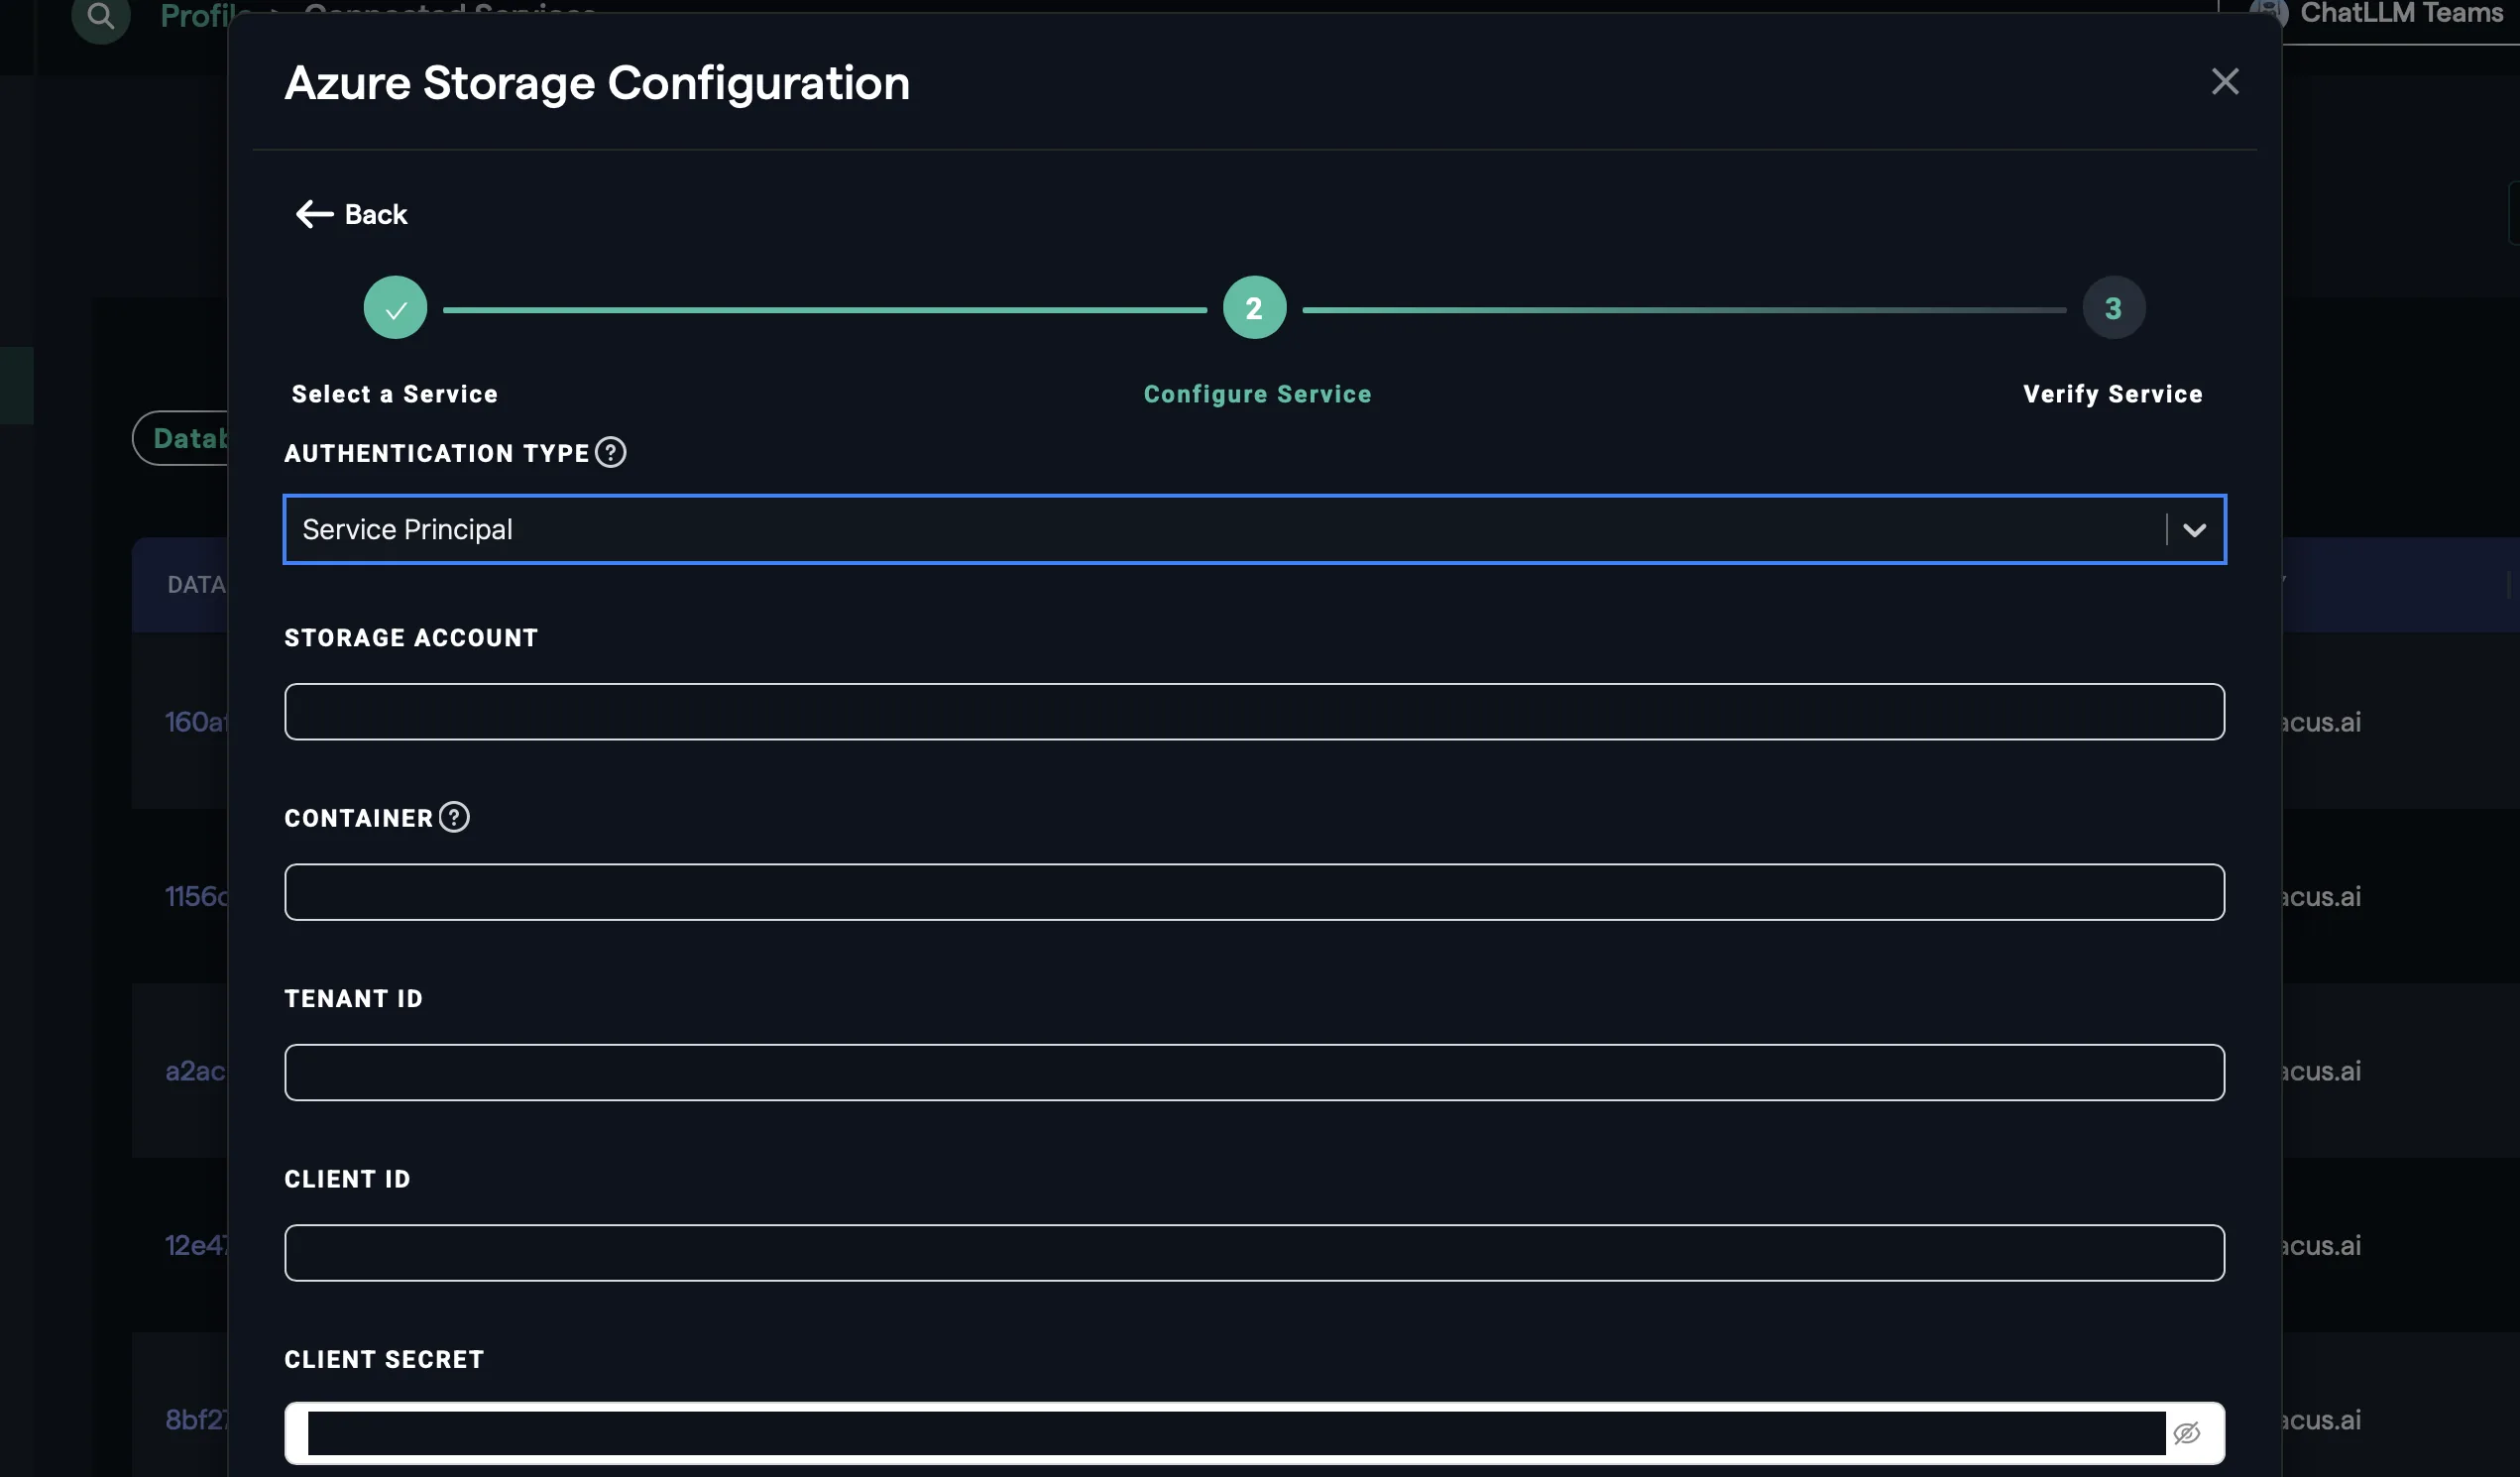
Select either the Add via URL or Add via JSON option. Complete the details based on the option and select the Make available to the whole organization option at the bottom of the configuration box:
For more detailed information on this feature please refer to our documentation
App Ownership Transfer
A new App Ownership Transfer feature makes it easier to manage applications as teams grow and responsibilities change. App owners can now transfer ownership of both deployed and hosted apps to another user within the same organization, without affecting the app's deployment or permissions. This helps organizations maintain continuity when team members change roles, leave the organization or hand over responsibility for an application.
When a transfer is completed:
- The selected user becomes the new owner of the application
- The ownership change is reflected throughout the platform wherever the app owner is displayed
- Existing app permissions remain unchanged
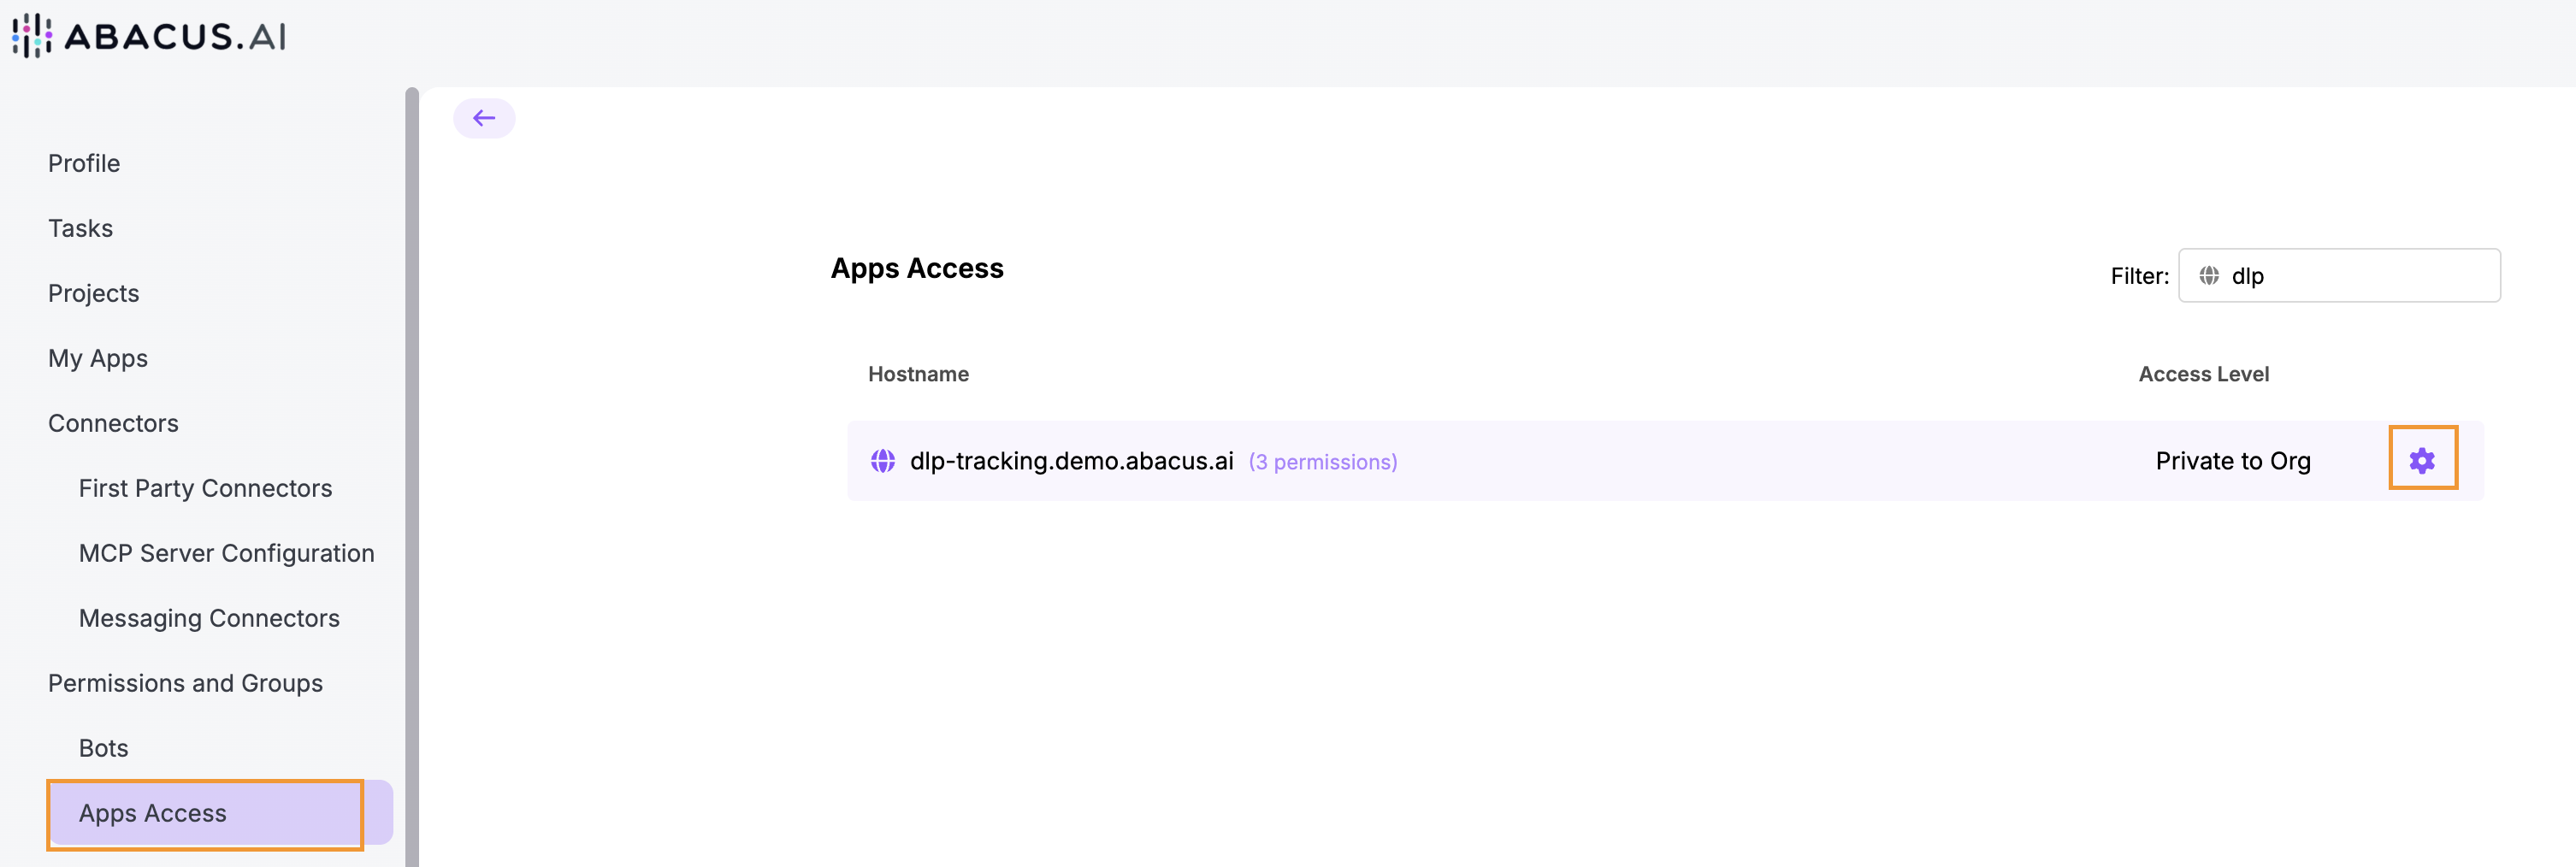
To transfer ownership of an application first navigate to the Apps Access tab found under Profile >> Permissions and Groups. Find the relevant application and click on the settings icon:
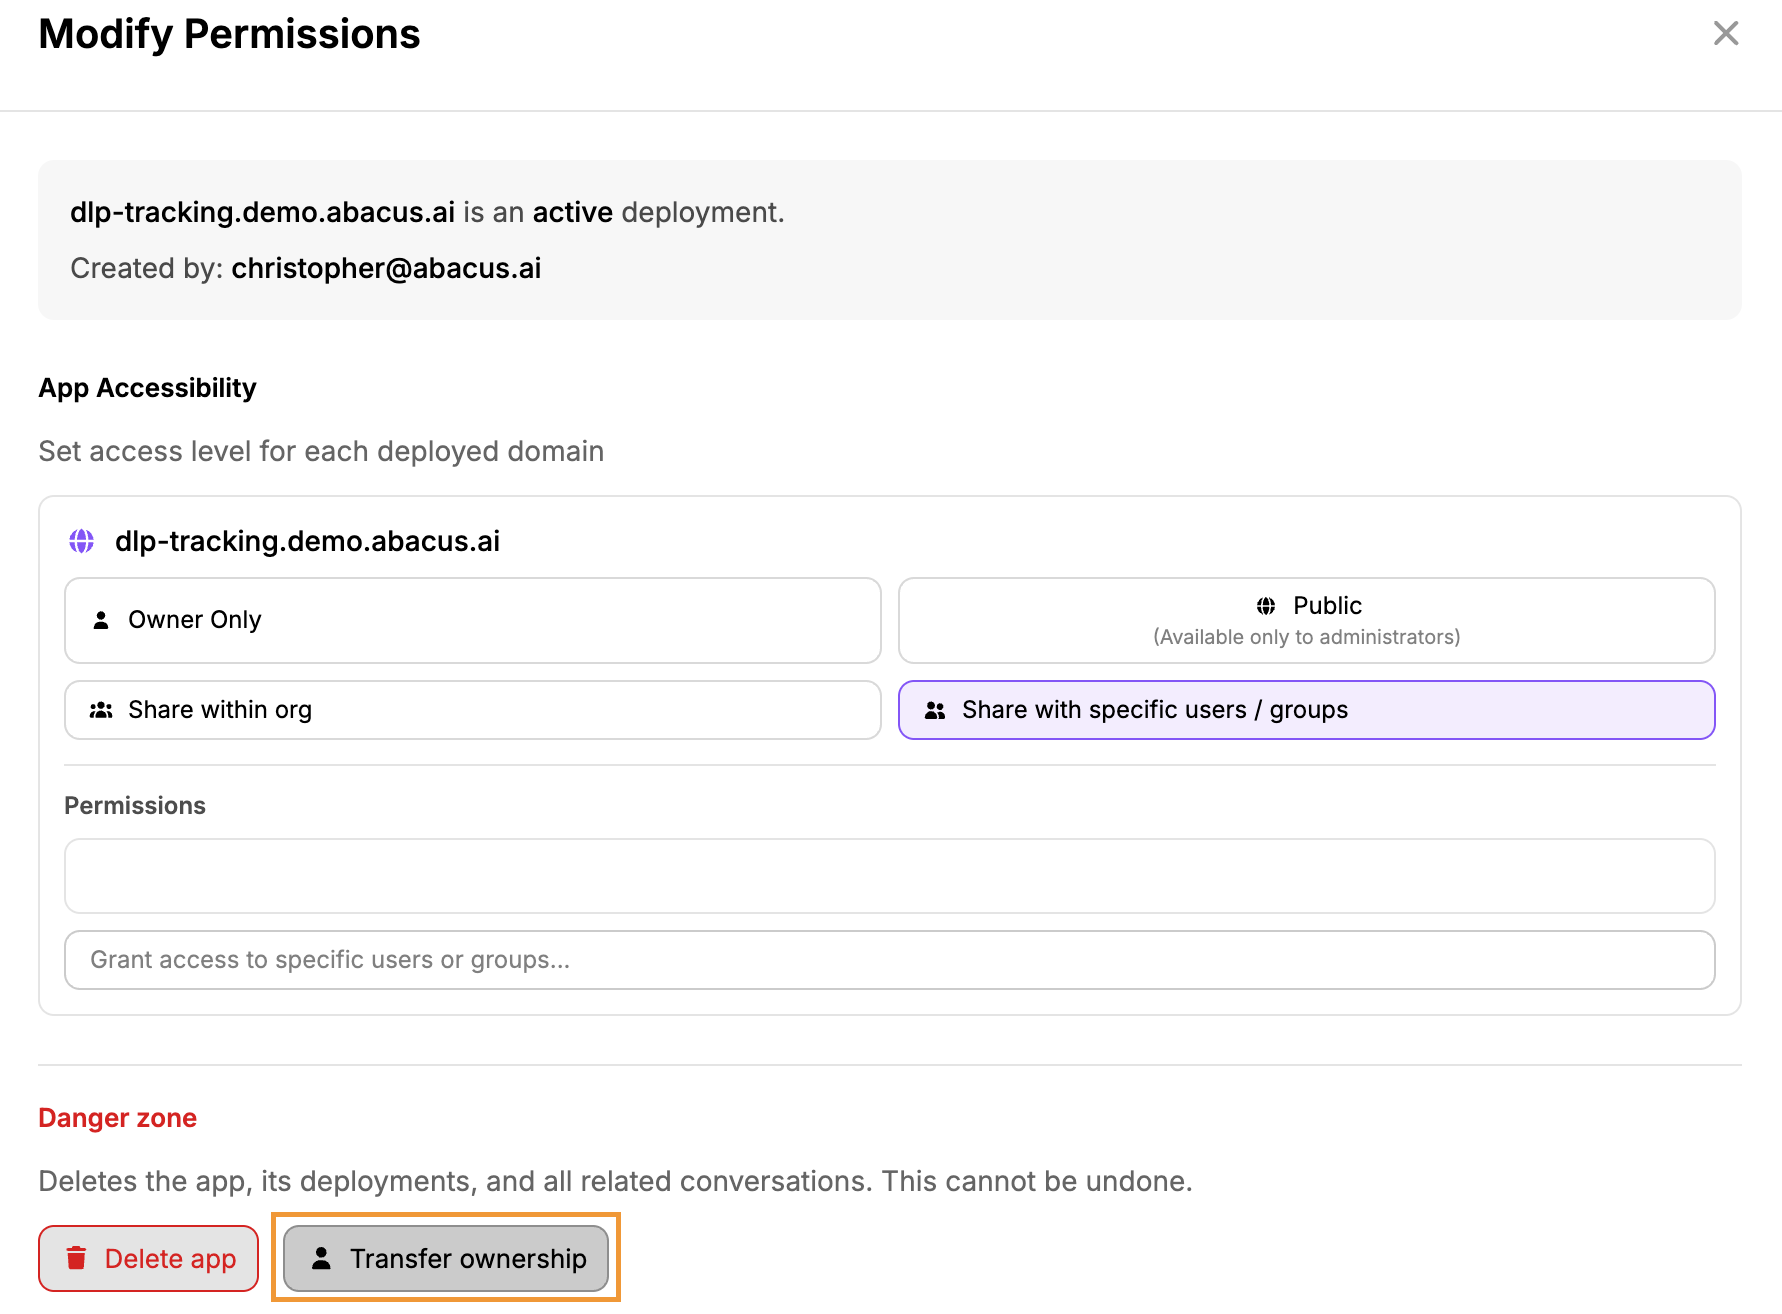
On the settings menu use the Transfer ownership button:
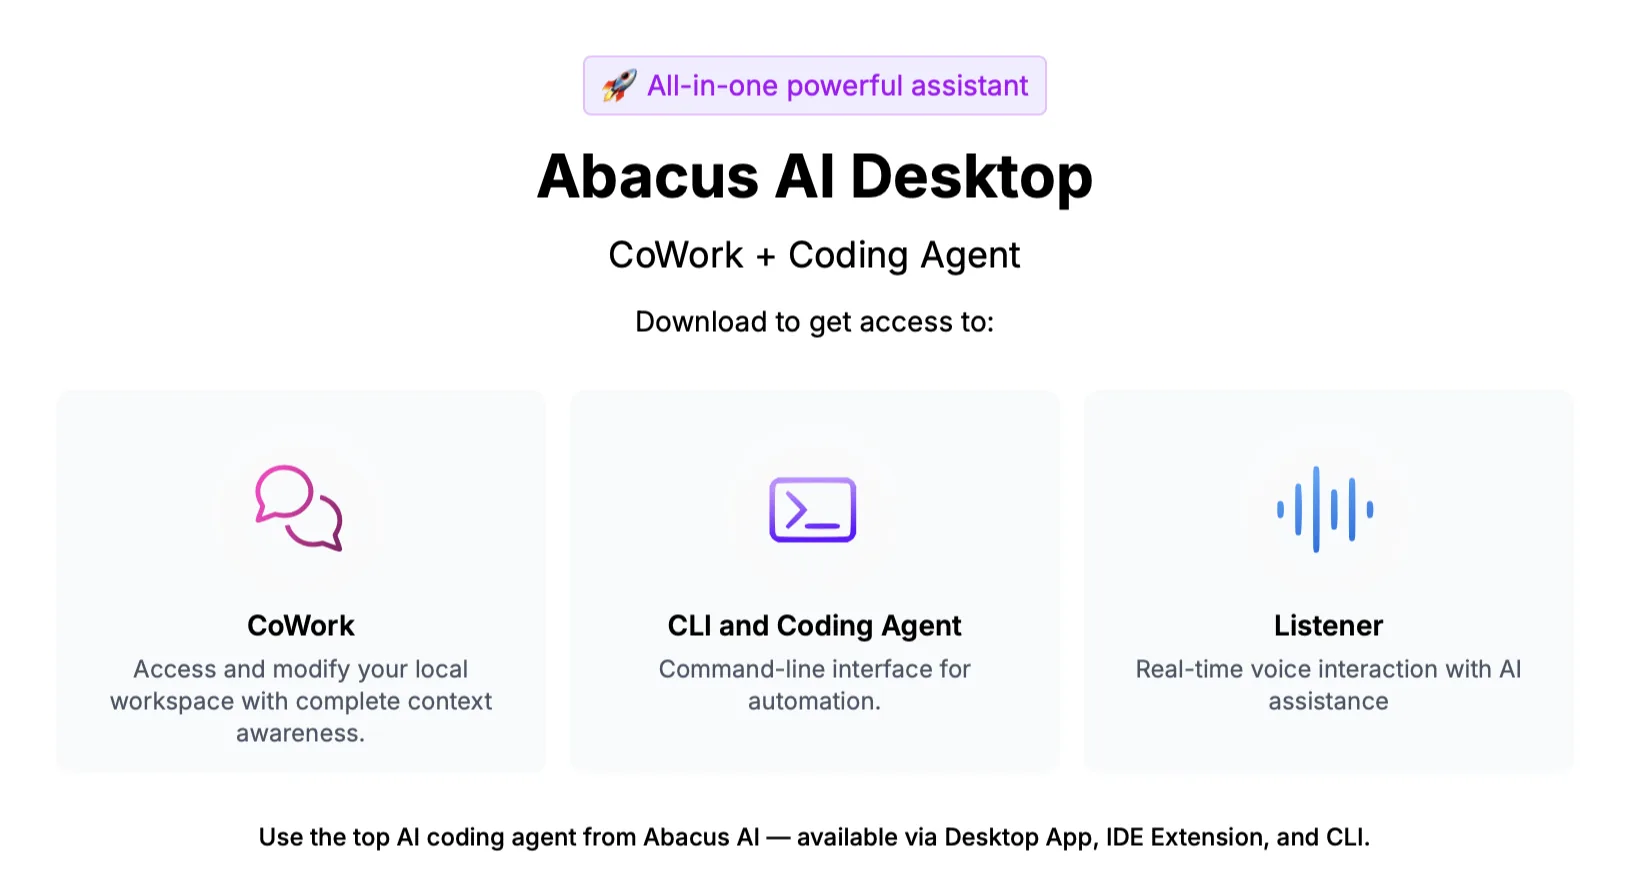
Microsoft Office Add-ins
The power of Abacus Agent is now available directly inside your main Microsoft Office applications as an Add-in
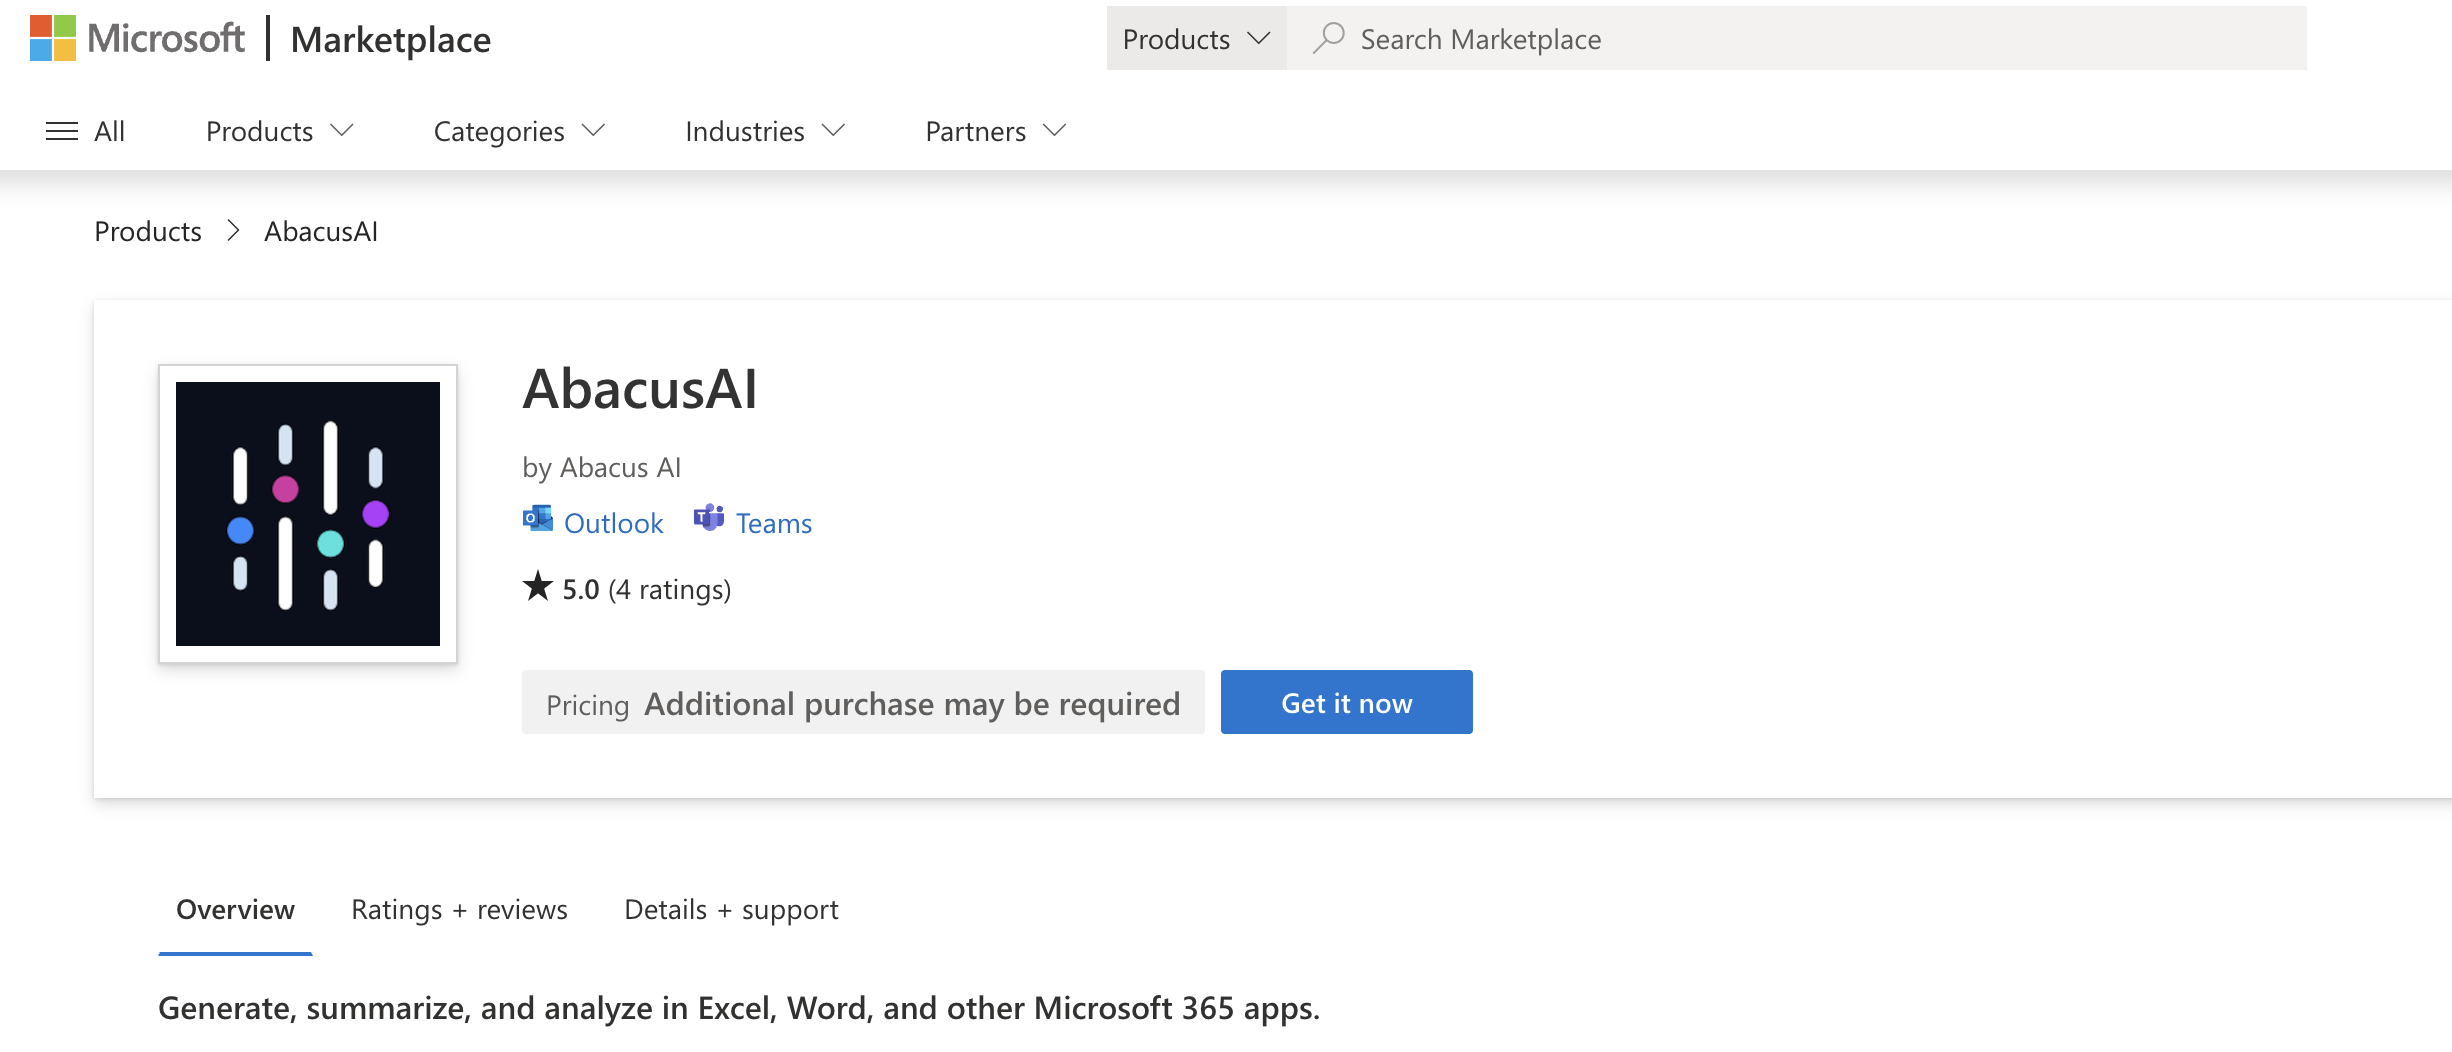
Some of the key features:
-
Excel: Read multi-tab workbooks to help you build financial models and data sheets. It updates assumptions without breaking your existing formulas and precisely tracks every cell it modifies.
-
Word: Draft new documents, summarize lengthy reports, and redline contracts. AI edits land natively as tracked changes, and the assistant can even respond to comment threads to explain exactly what it changed and why.
-
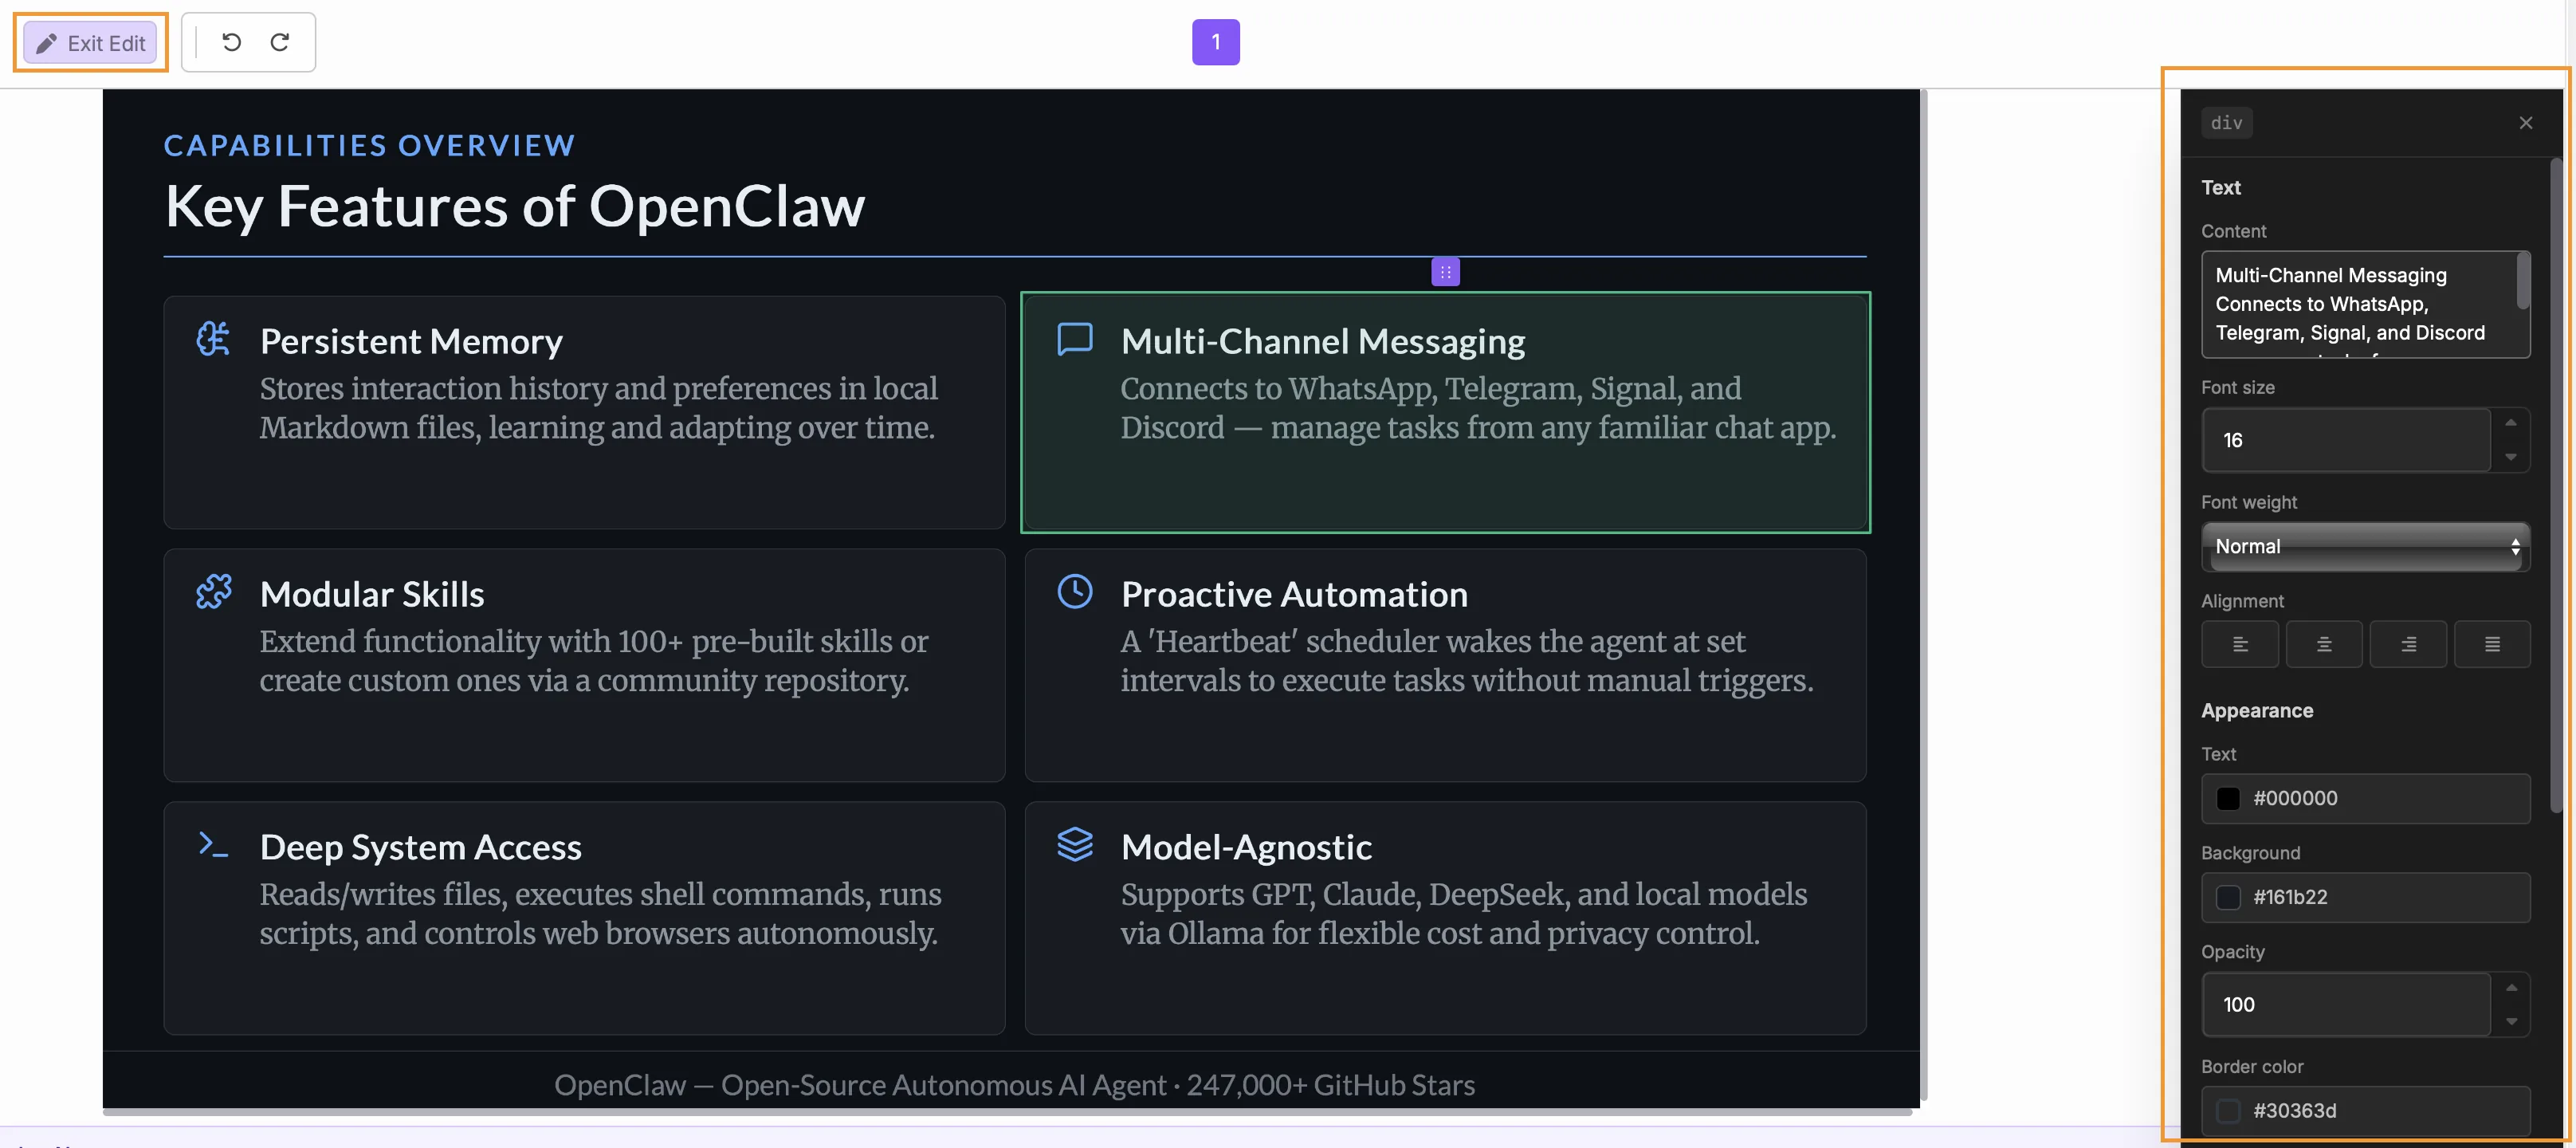
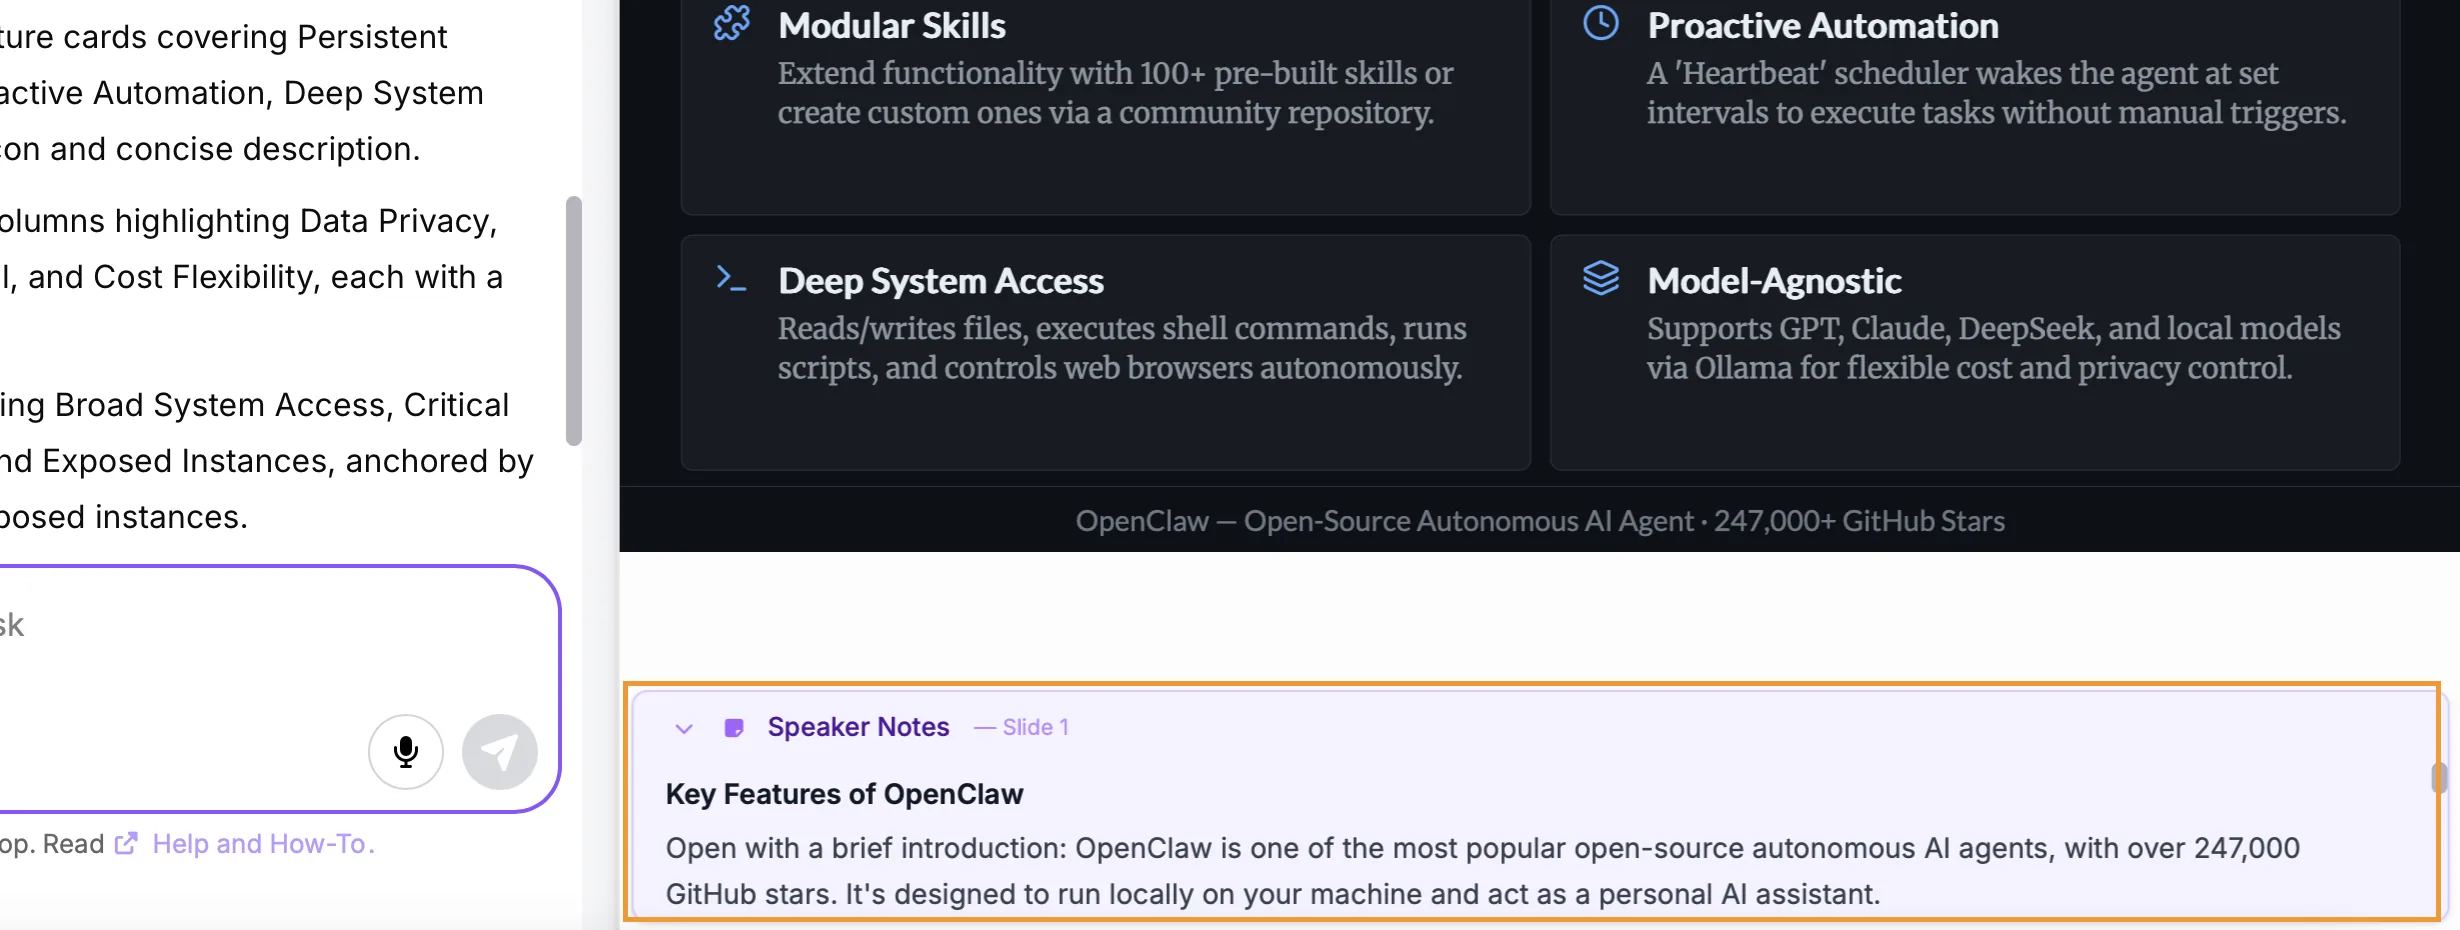
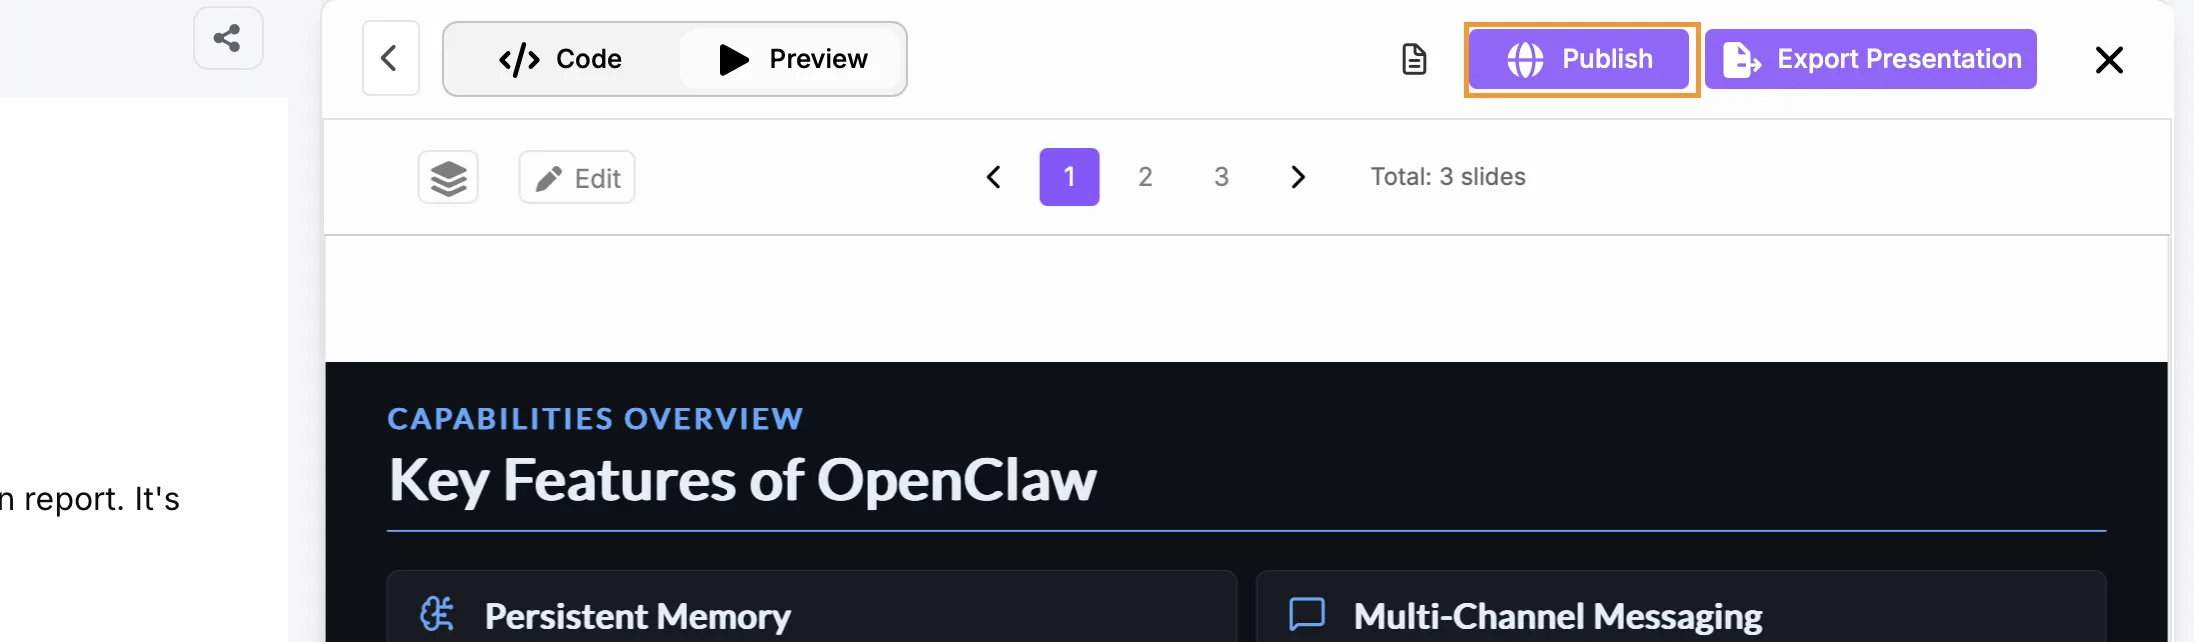
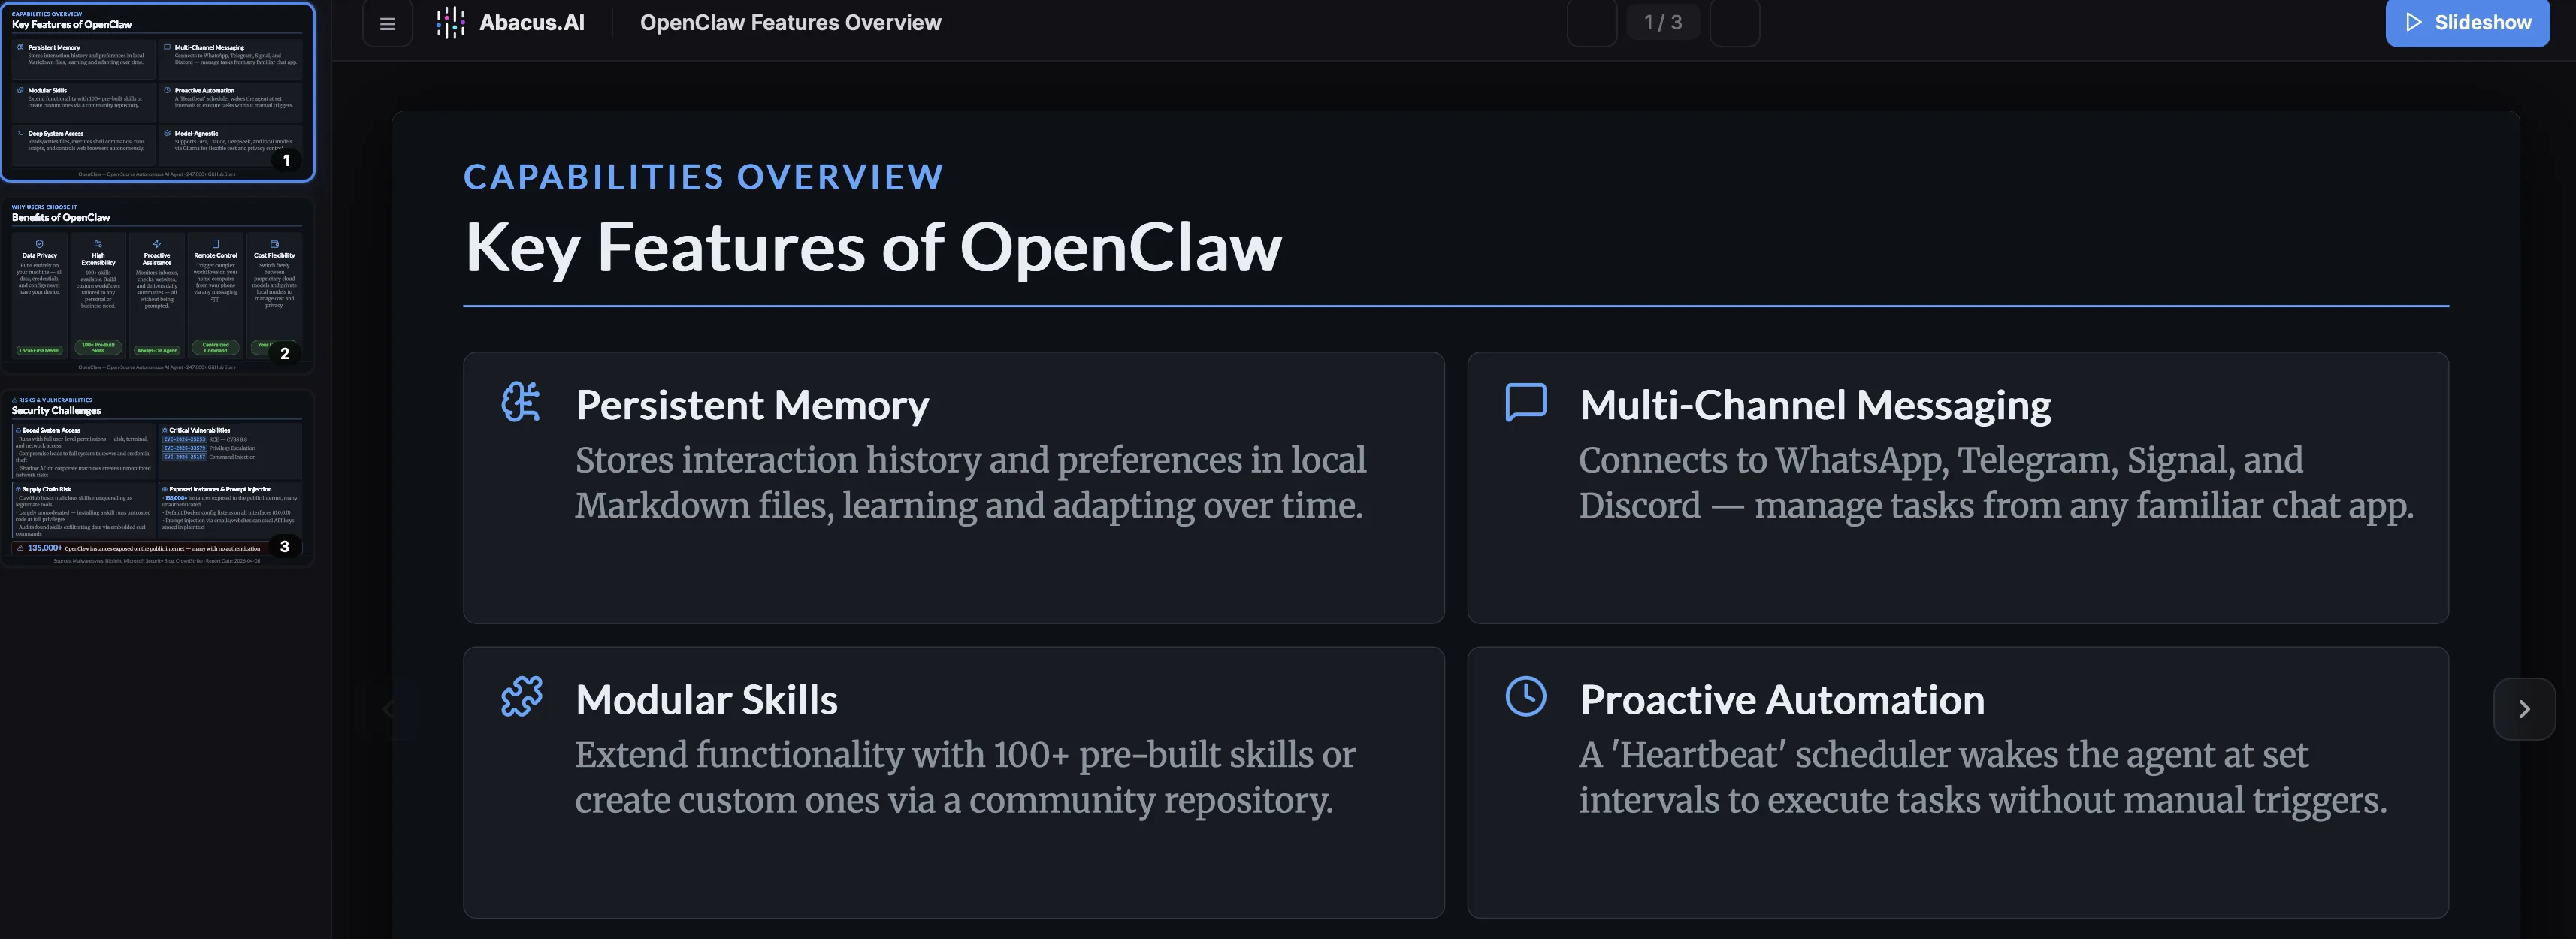
PowerPoint: Generate images, create native, fully editable charts, and restructure entire decks. The AI works inside your specific template—respecting your slide master layouts, fonts, and colors.
-
Microsoft Teams & Outlook: Summarize long email threads or chat conversations, draft context-aware replies, and collaborate faster across your entire team.
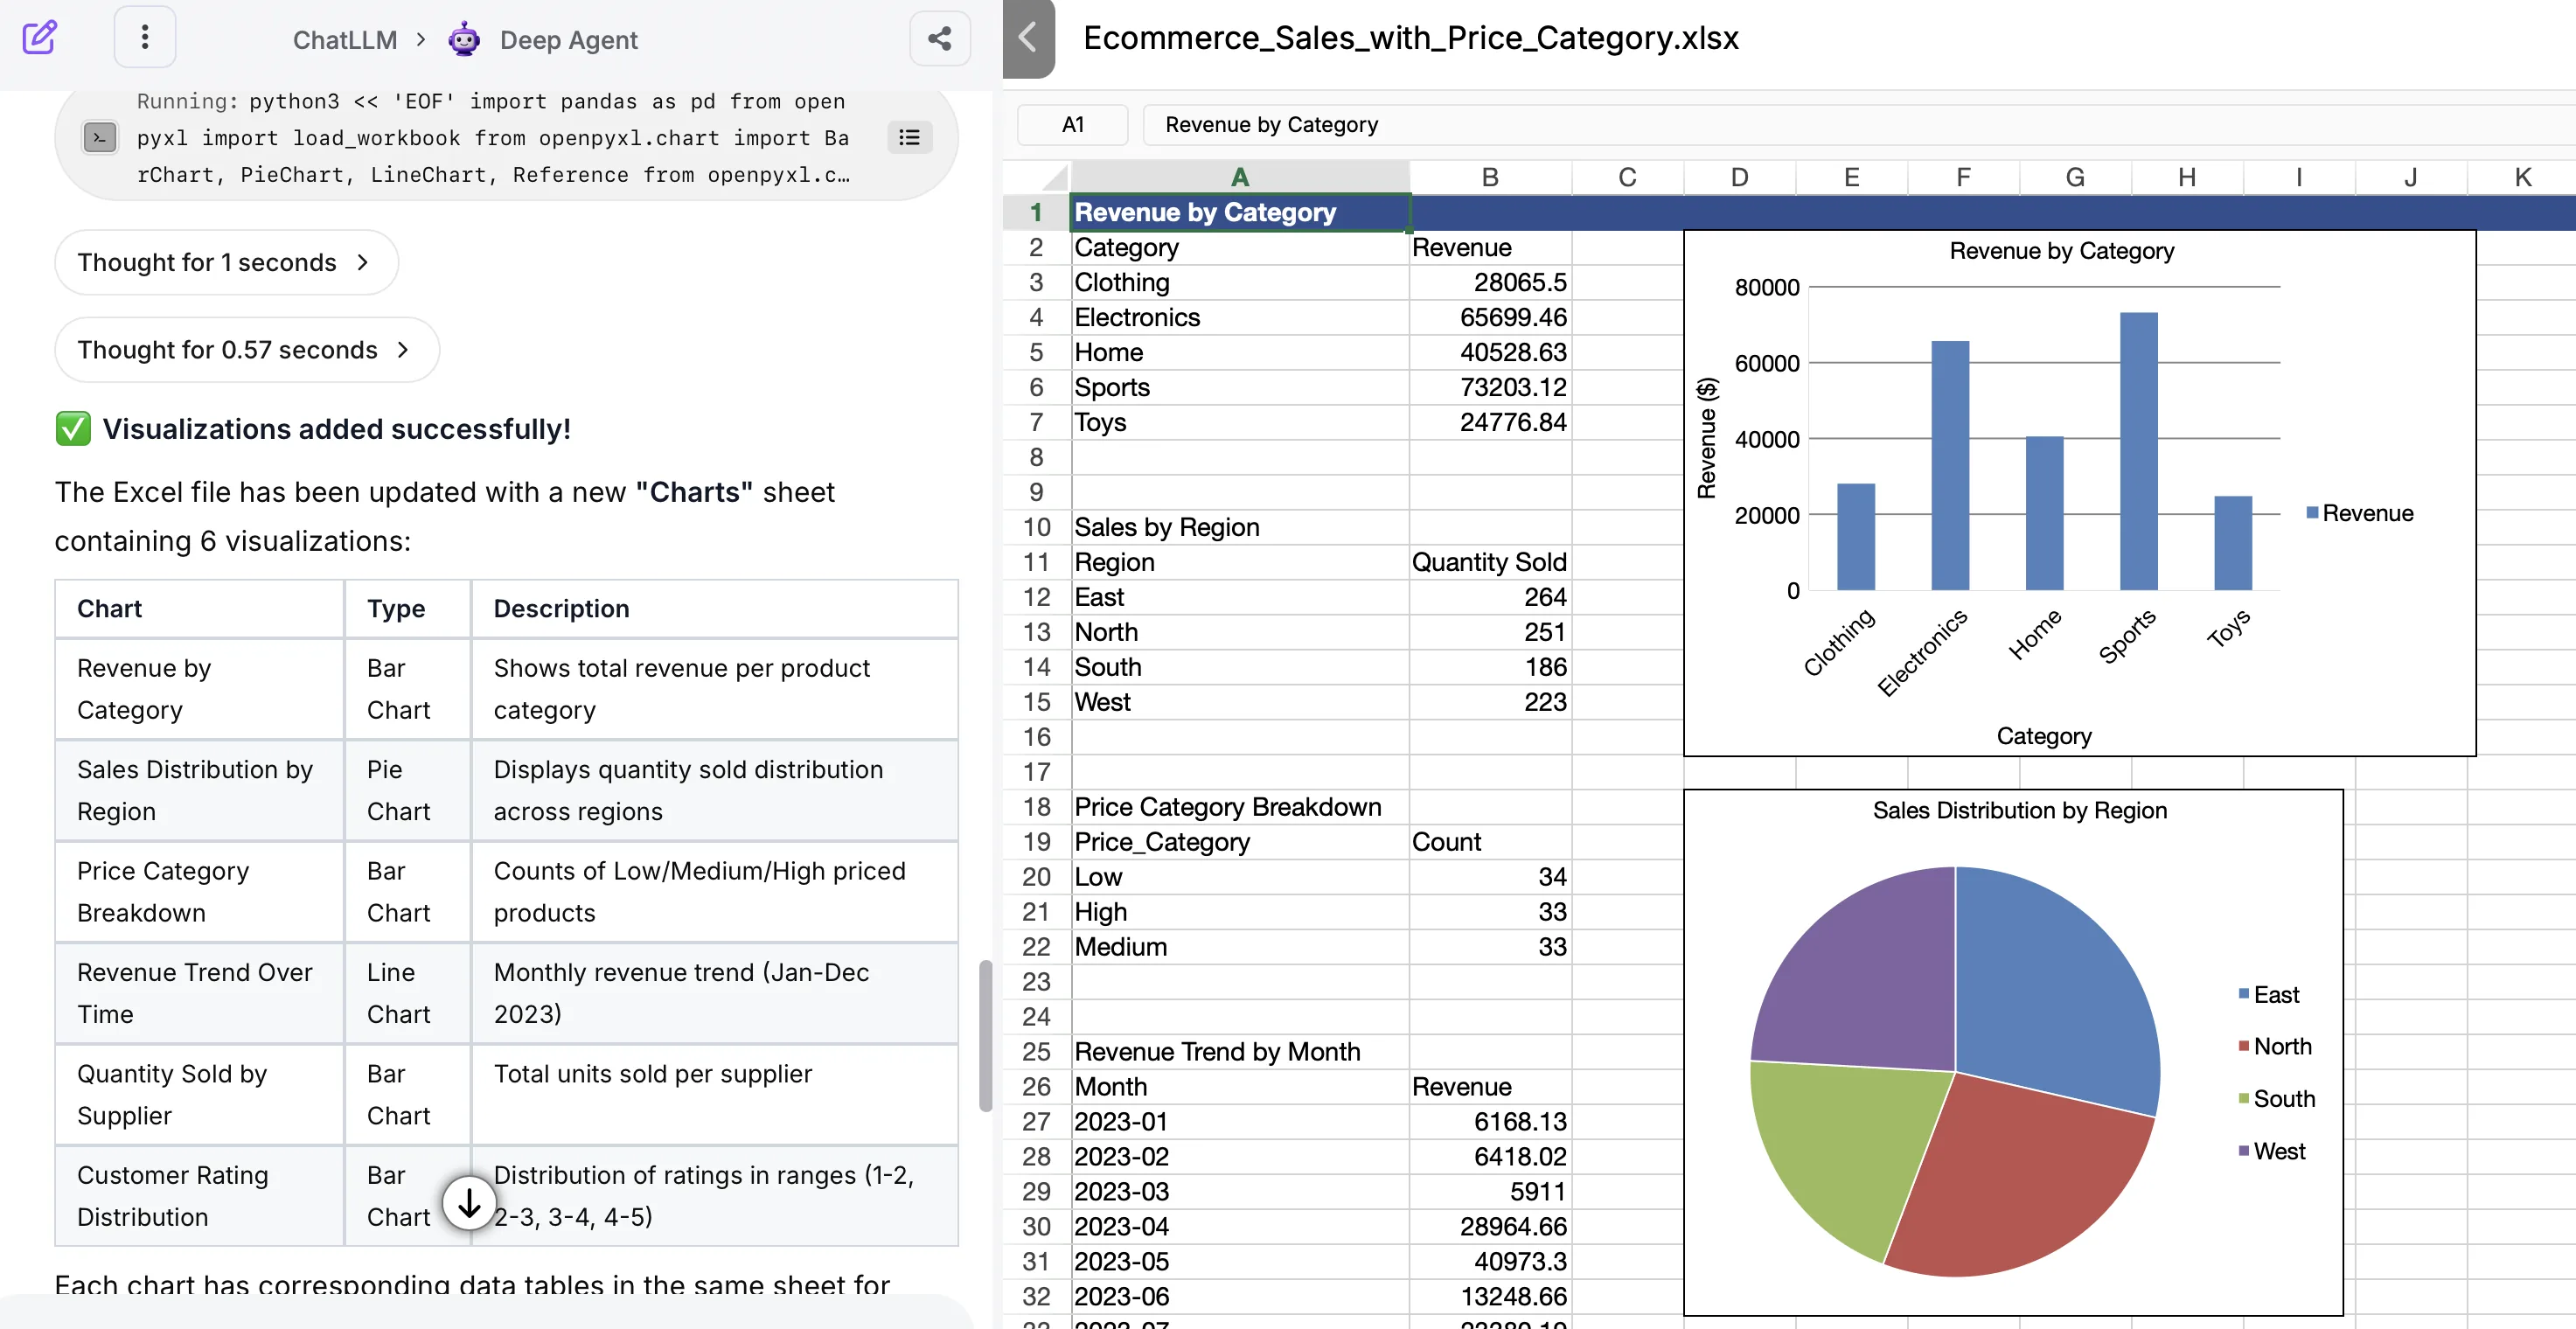
PDF Analysis Tool
We have made a significant update on how the platform conducts analysis of PDFs, allowing users to complete complex tasks with simpler models that otherwise was not possible.
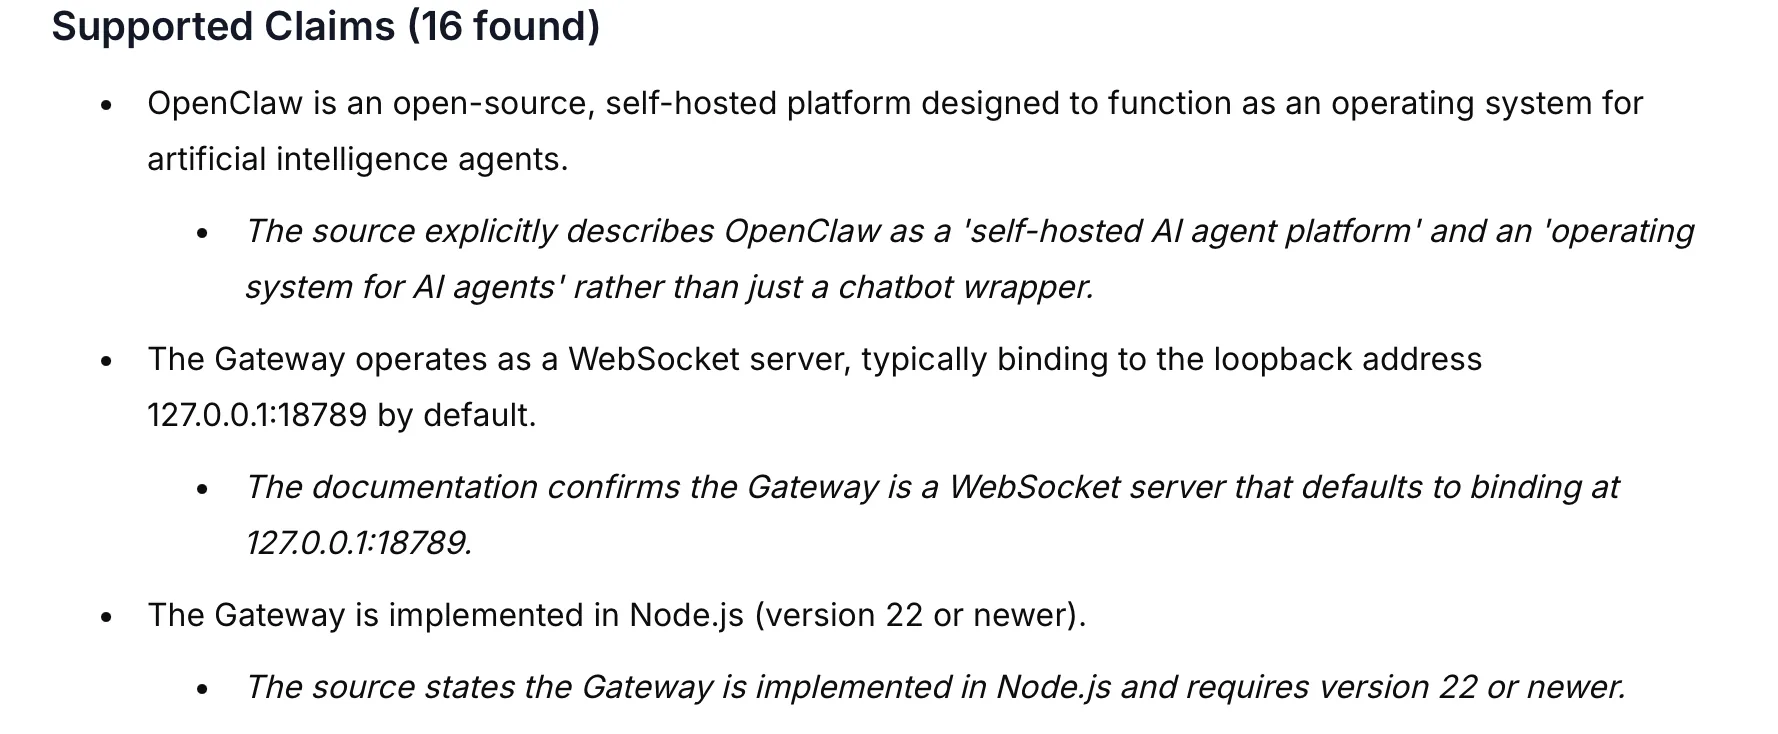
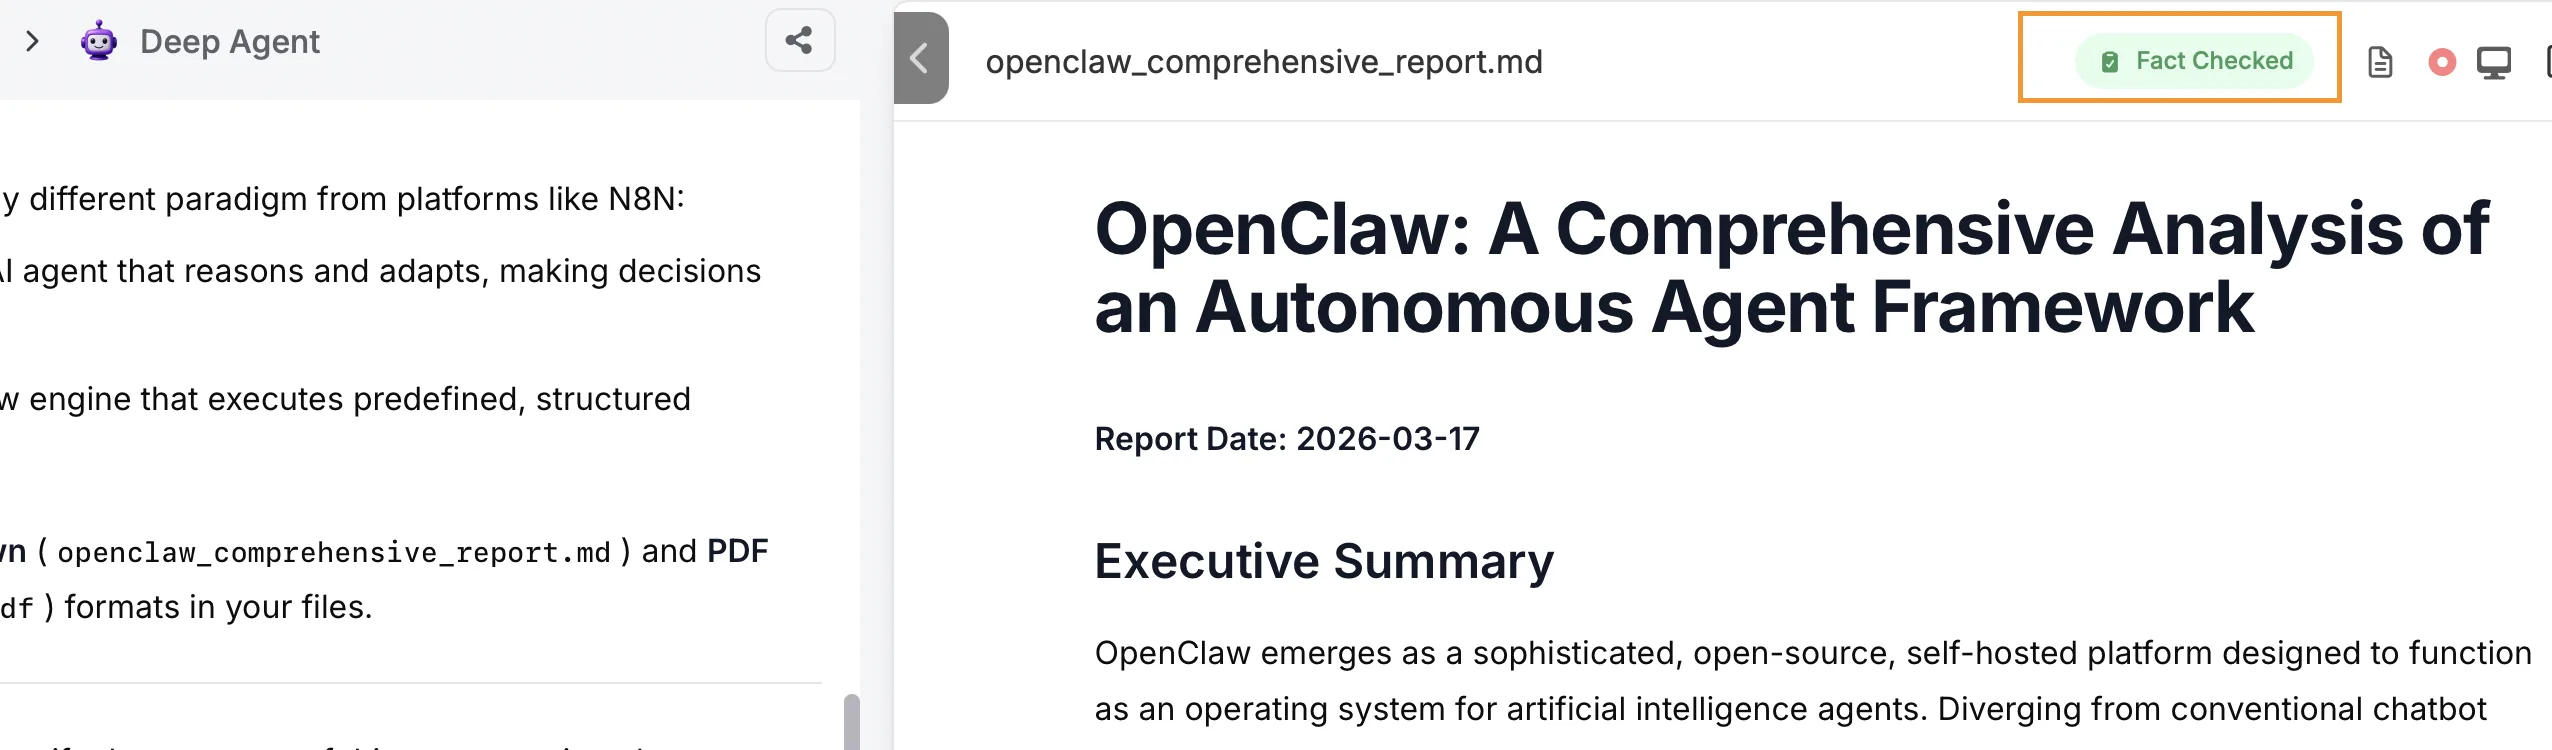
The platorm now reads and reasons over an uploaded PDF end-to-end. Ask a question about a document - or just say "summarize this" - and it returns a synthesized answer grounded in the file's contents. It works on documents that chat models normally can't handle well, including scanned/image-only PDFs, and it reads the whole document rather than just the first few pages, so it reliably picks up fine print, figures, and specific values (e.g. amounts, dates, clauses, table cells).
Some of the key features:
- Works on scanned and native PDFs, including long documents (no page limit)
- Answers whole-document questions and summaries, no just keyword lookups
- Handles multiple uploaded files and specific page ranges
- Automatically kicks in when a PDF is attached
Admin Settings Updates
A range of new admin controls have been added to the platform to help organizations manage usage limts, authentication options and monitoring.
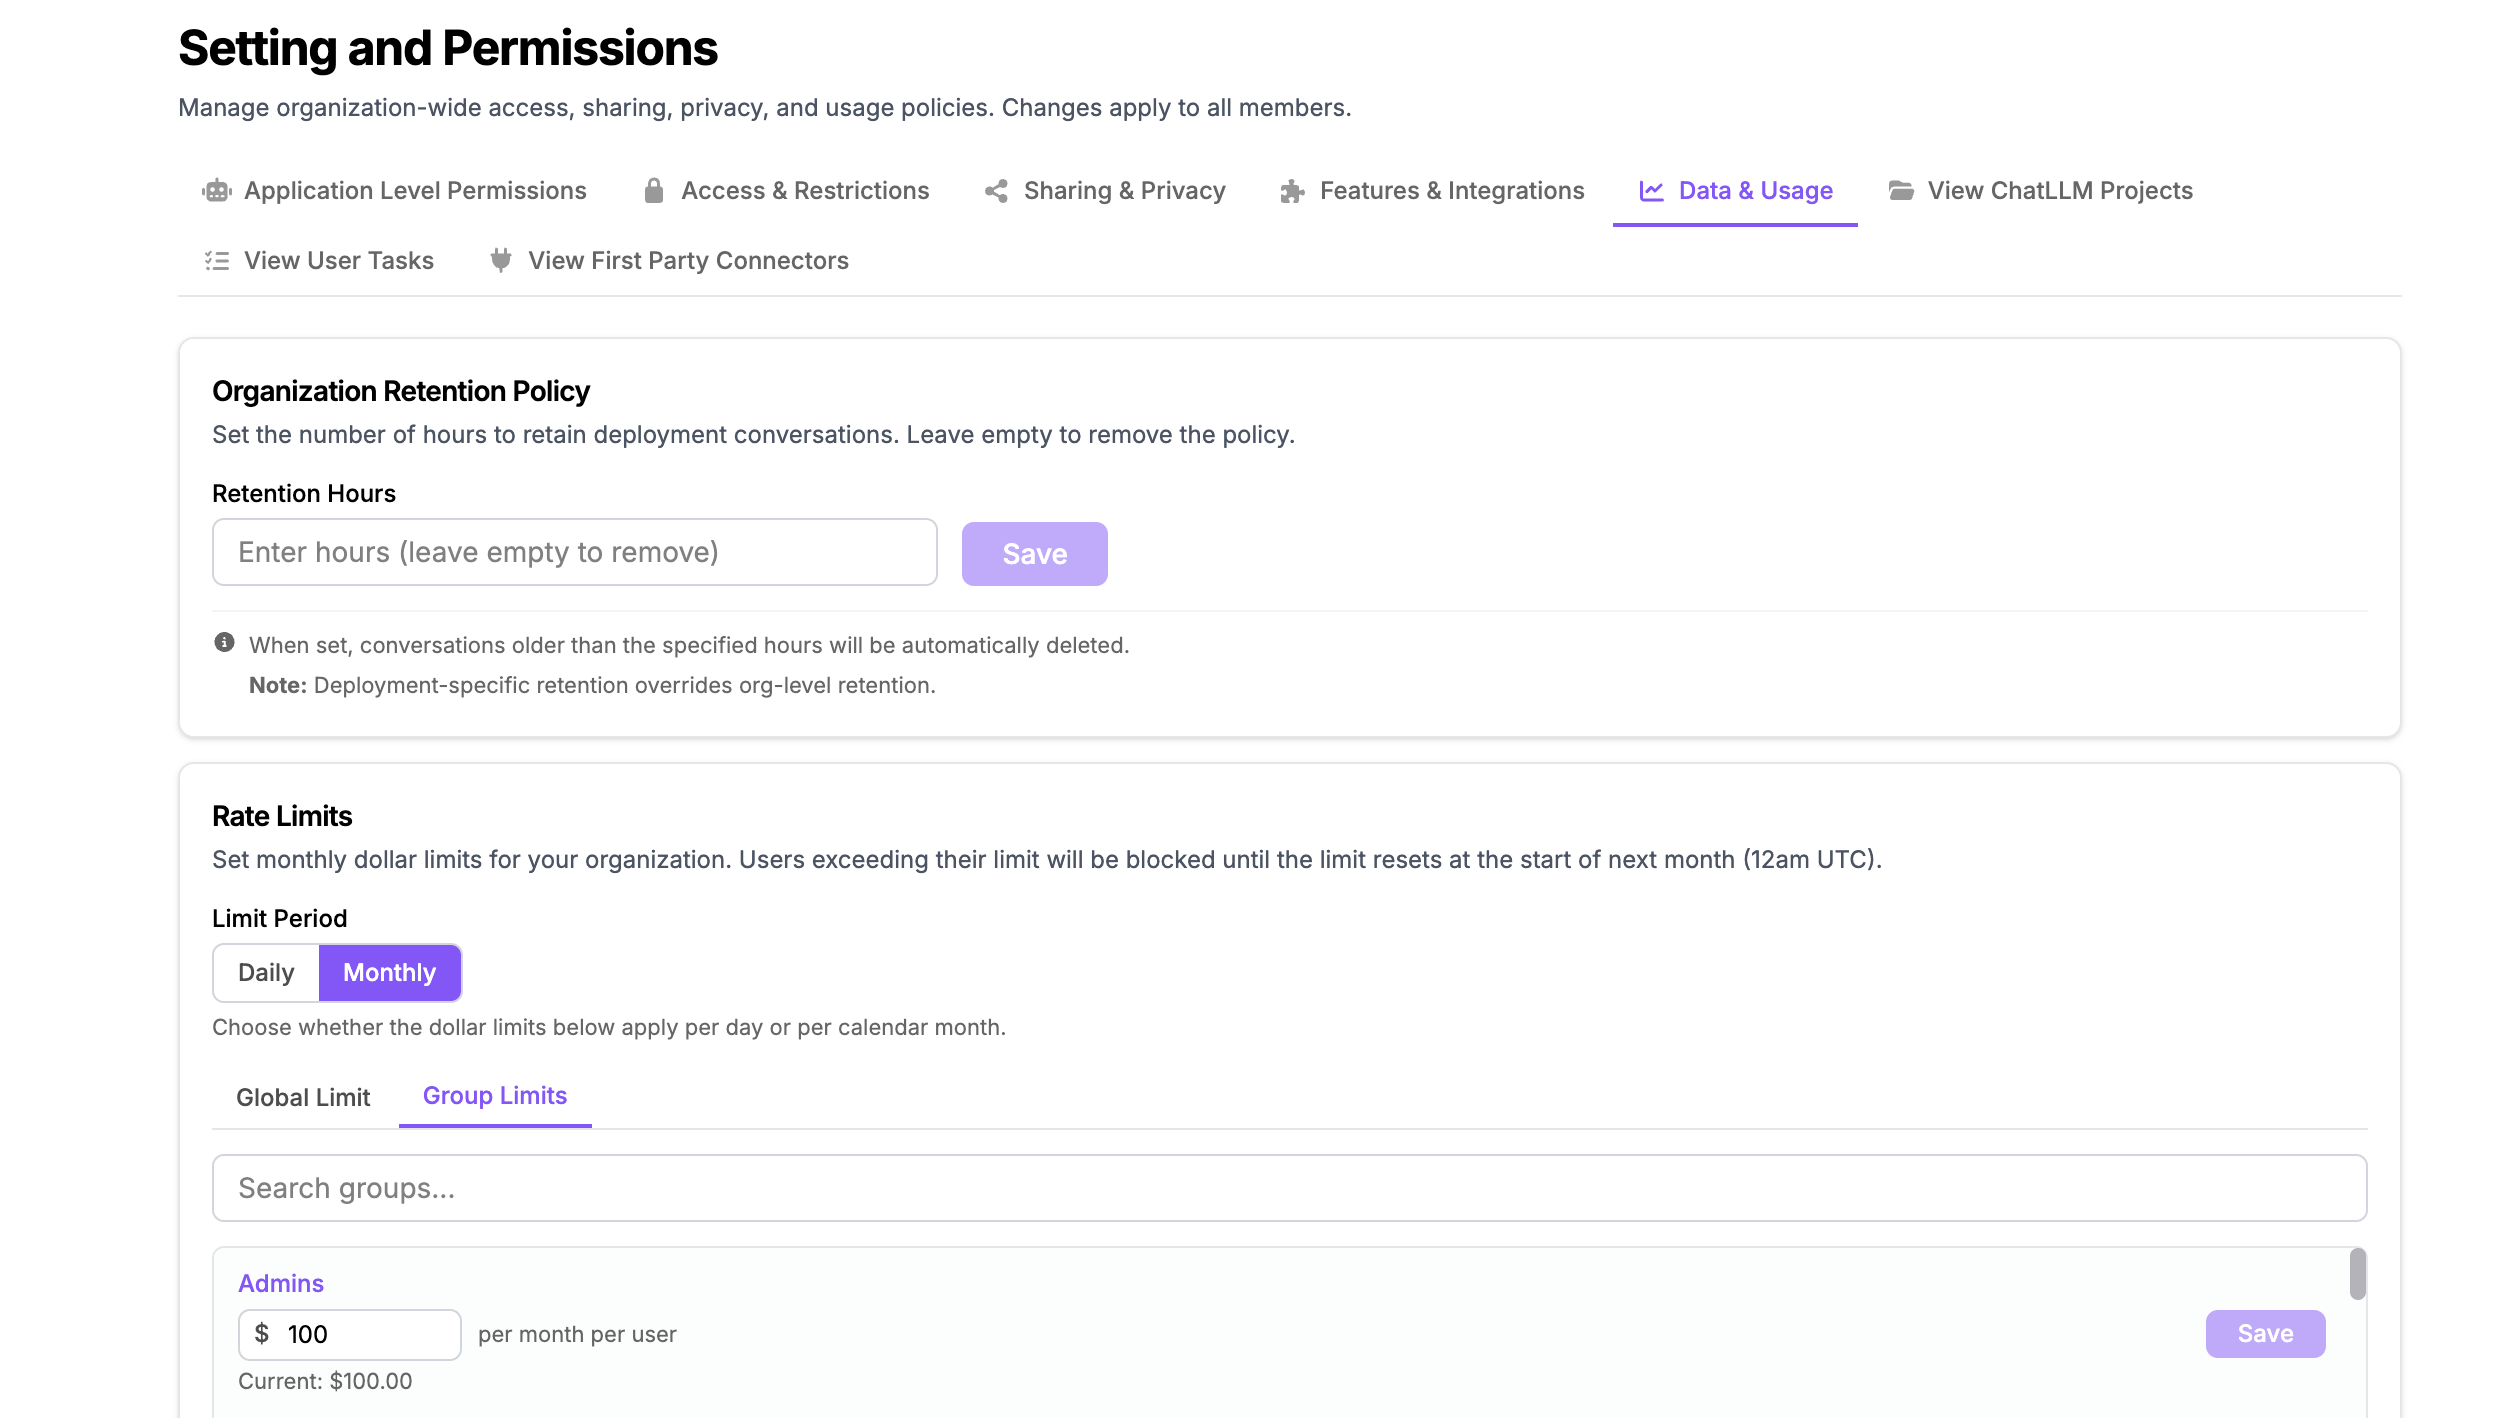
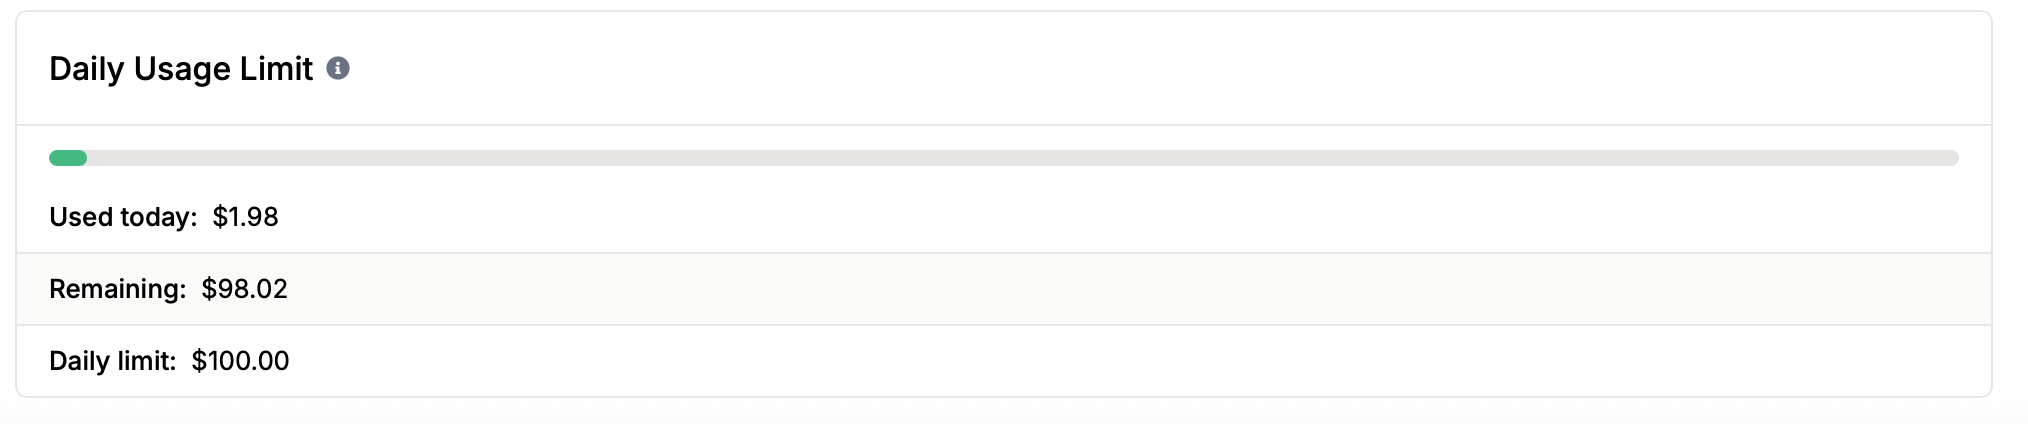
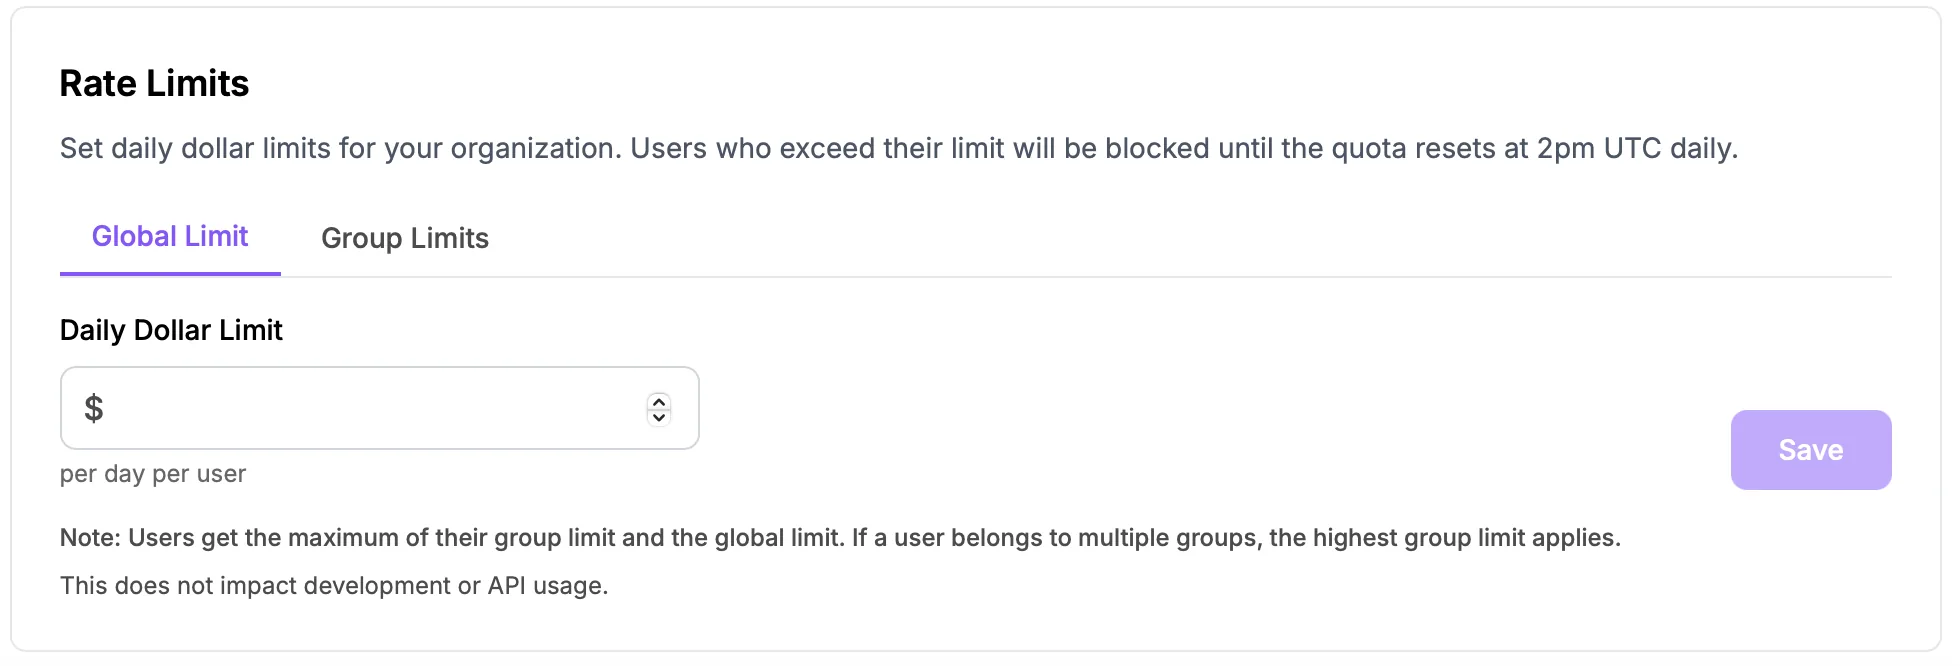
Monthly Usage Limits A new option has been added to the settings for usage limits that allows organizations to choose between setting daily and monthly limits. This can be found under the Profile >> Permissions and Groups >> Settings and Permissions >> Data & Usage menu:
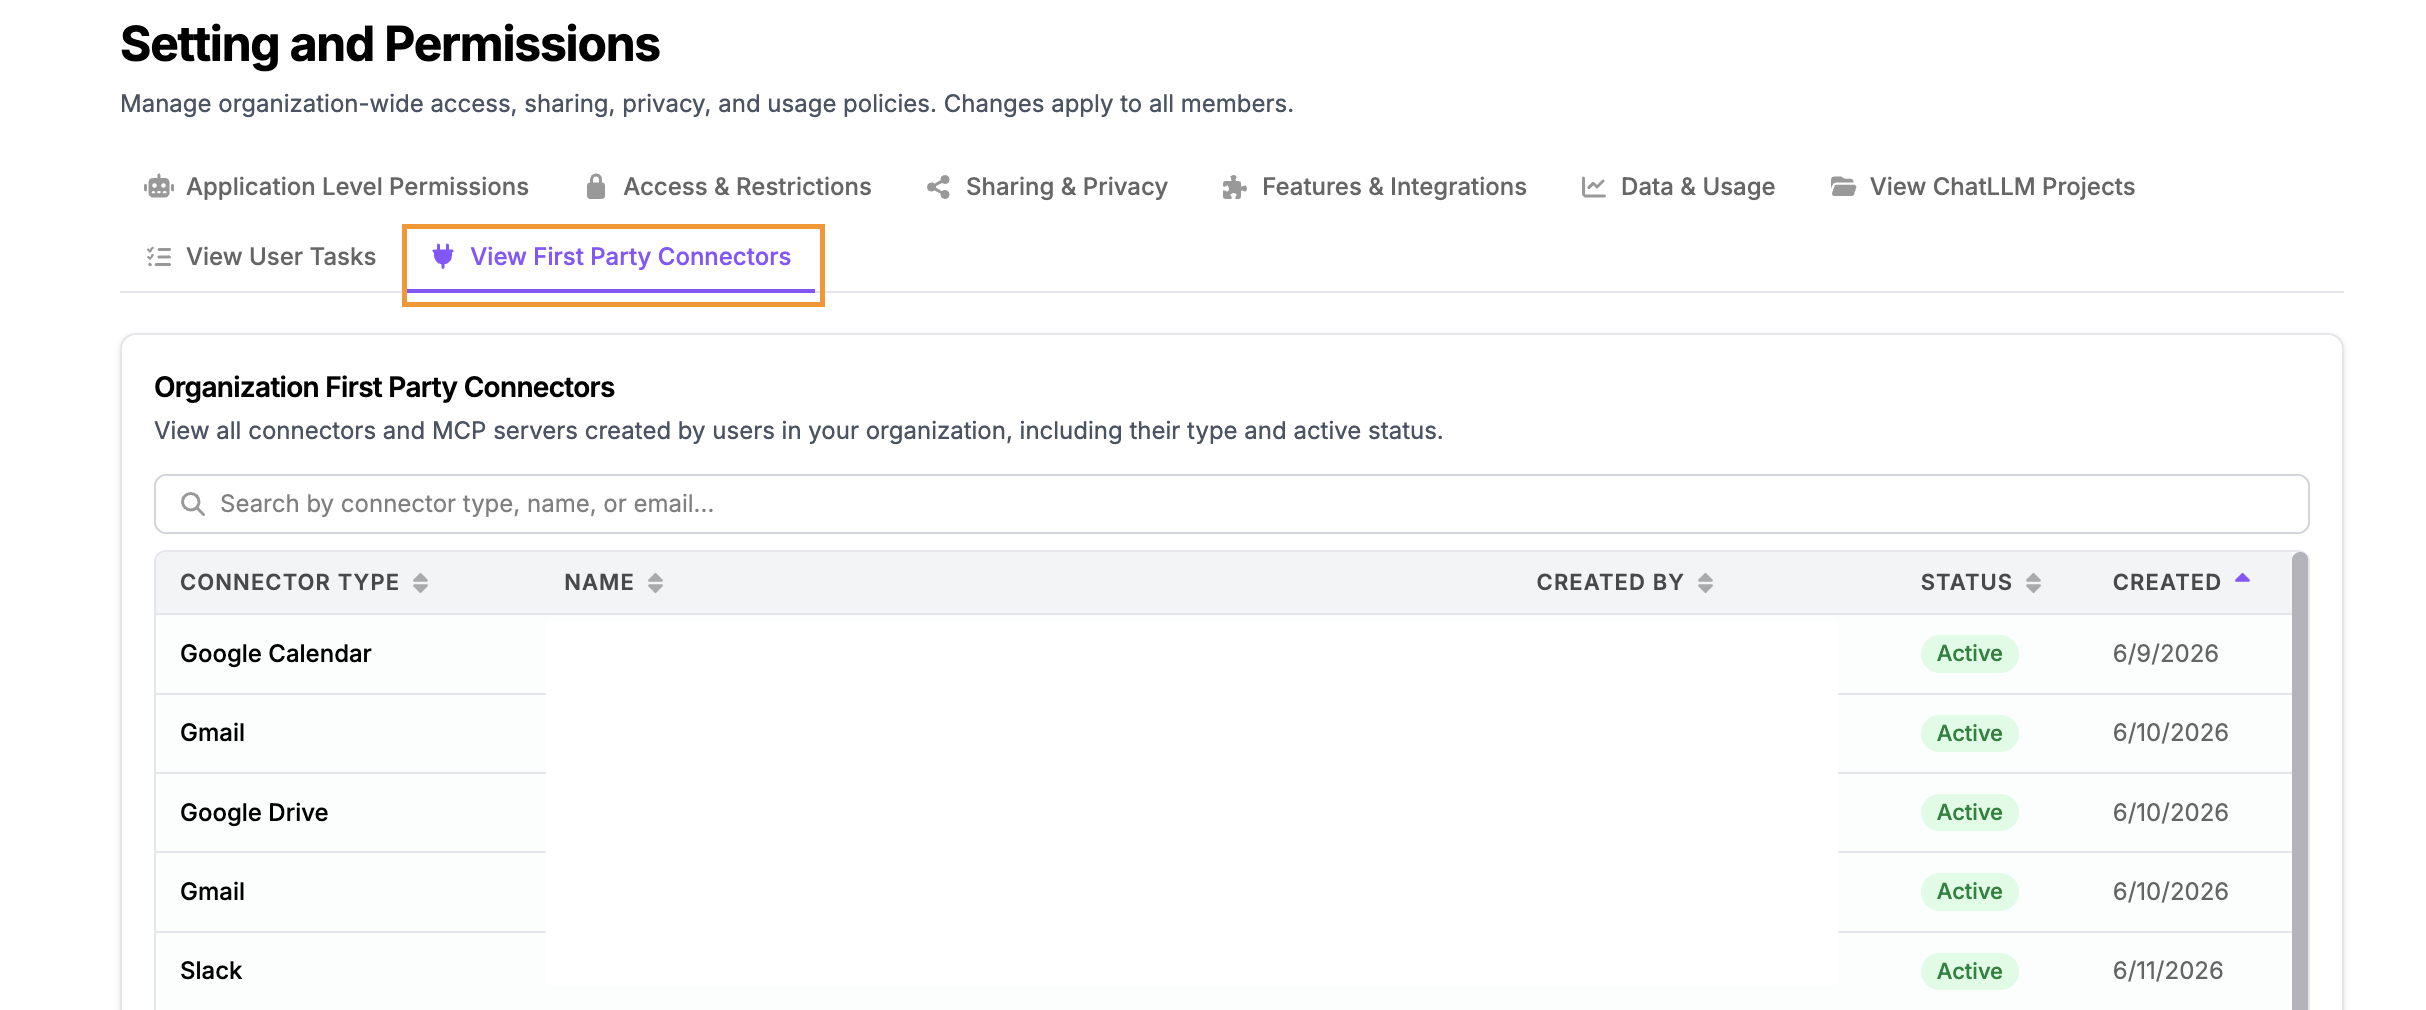
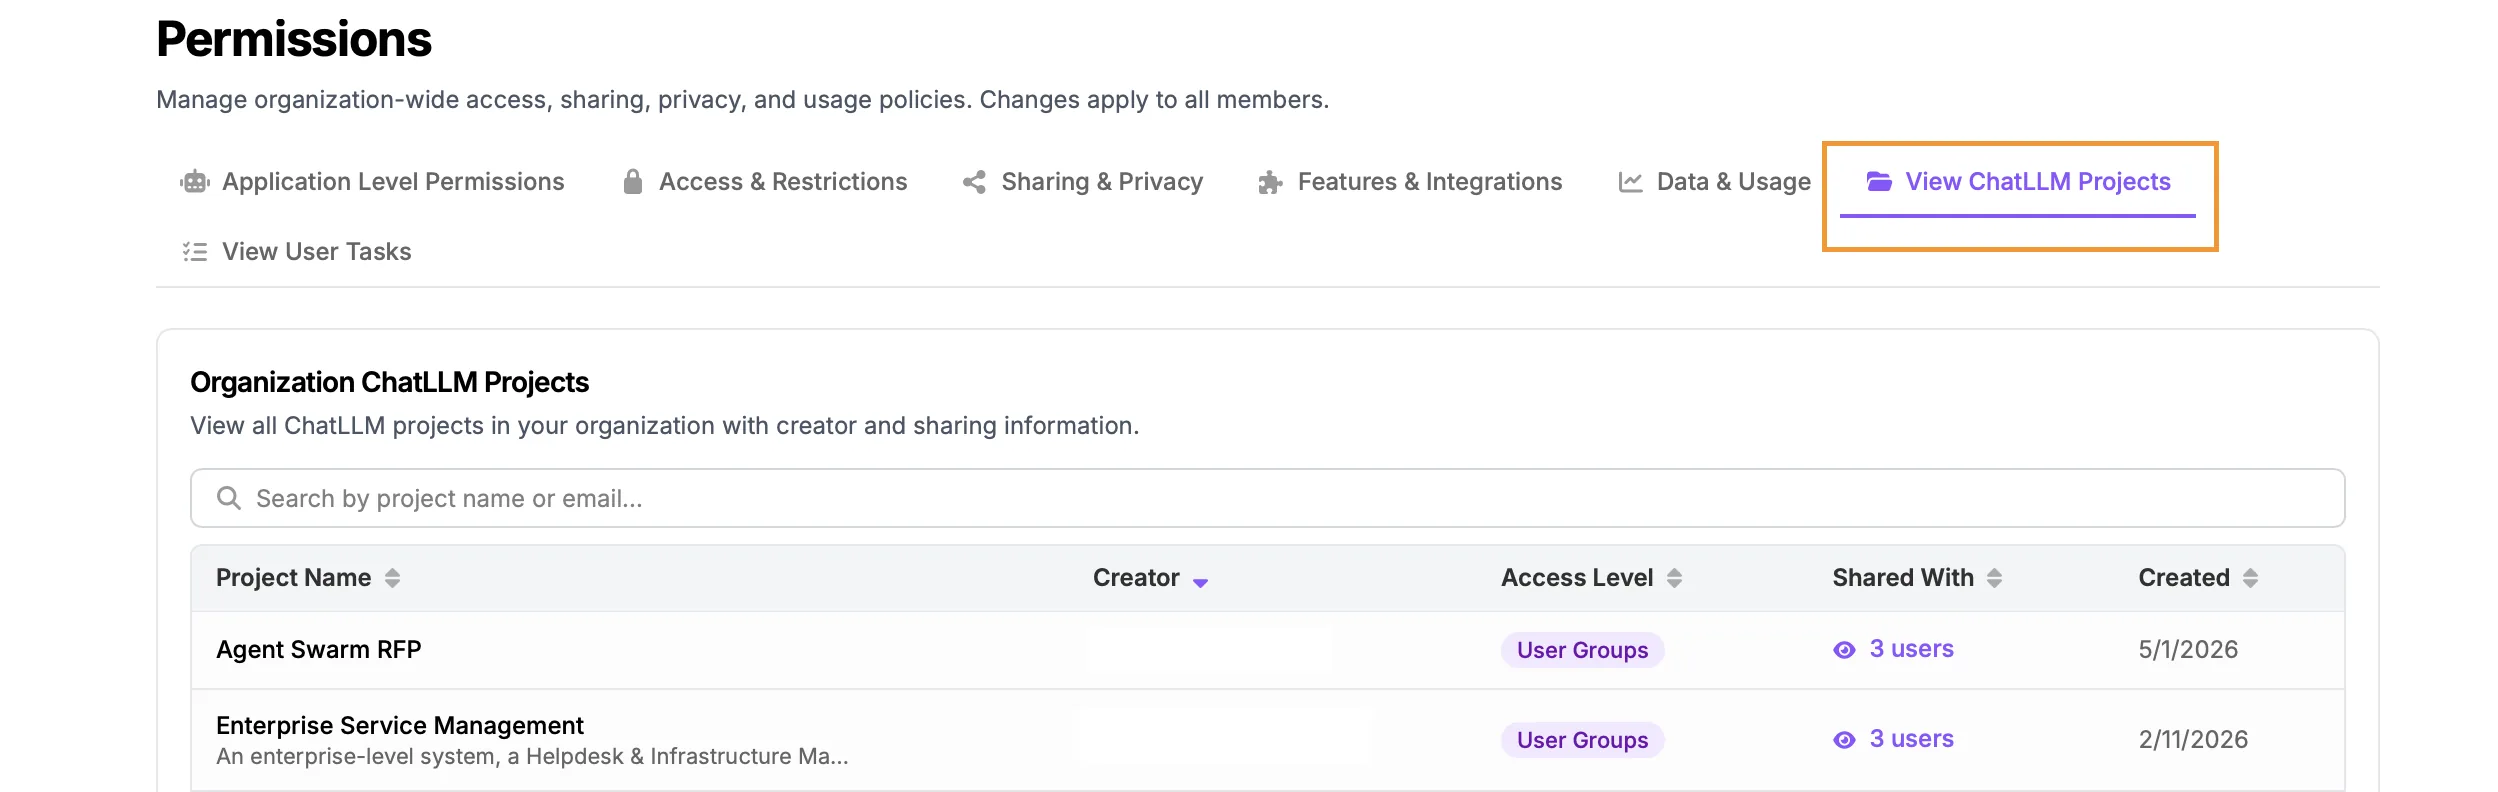
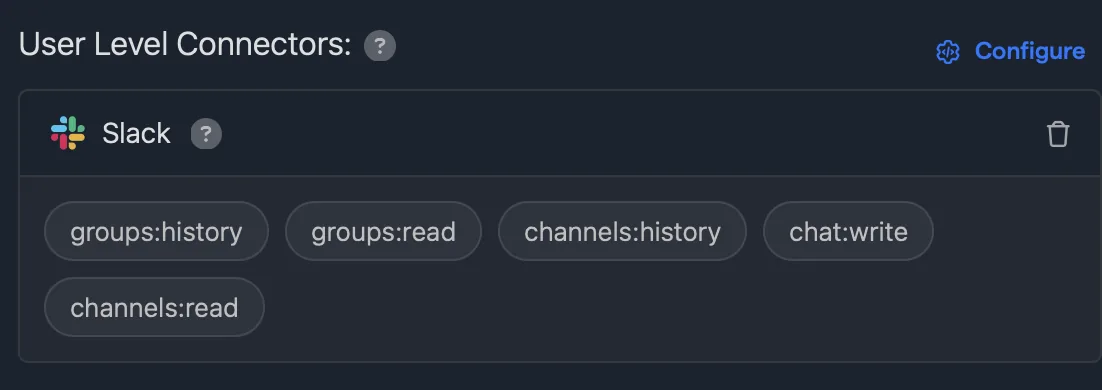
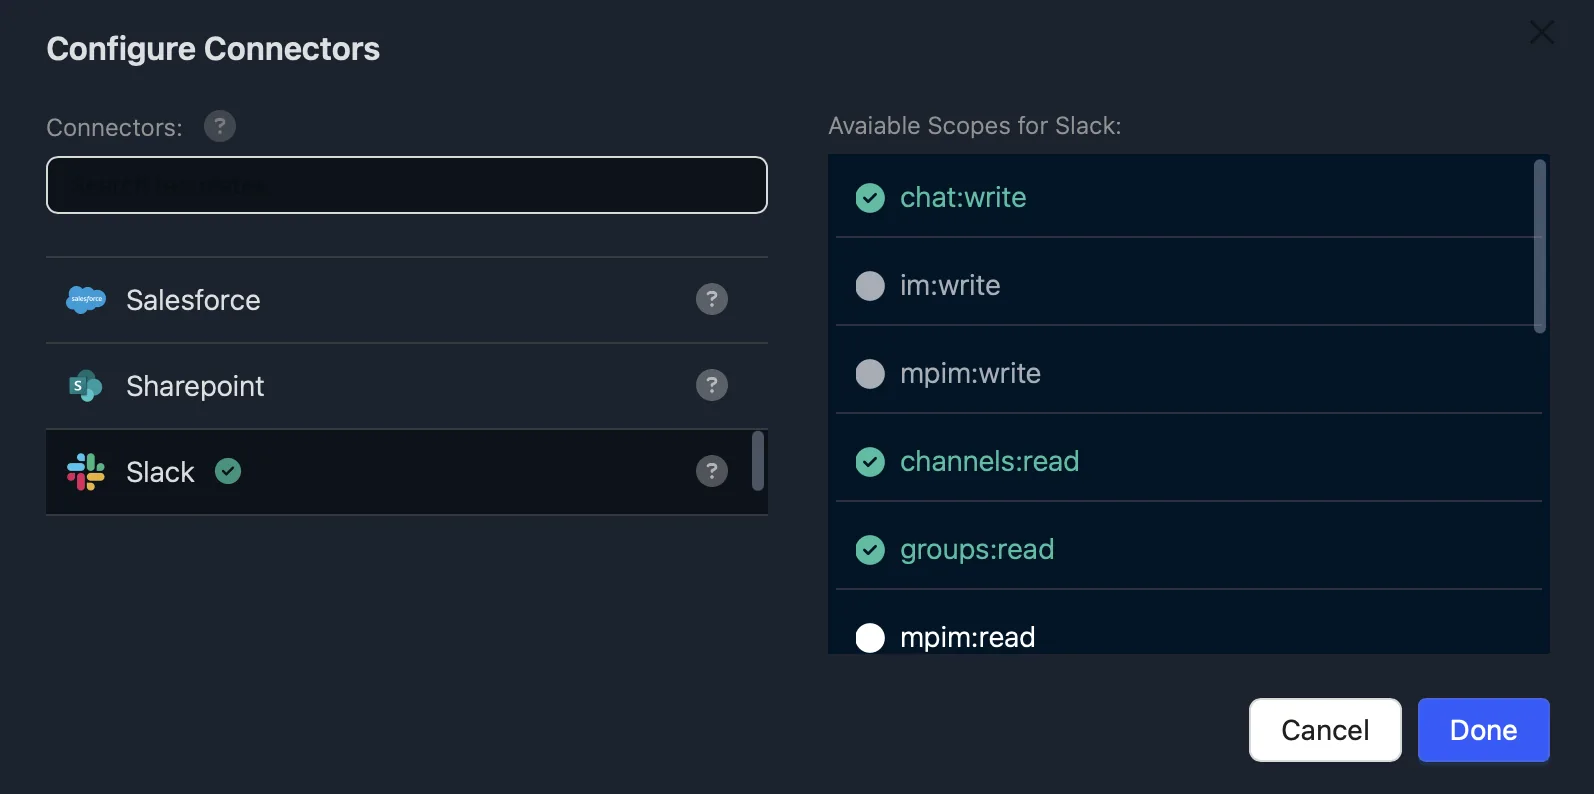
User Connectors - Admin Console To increase visibility of which First Party Connectors are being used a new admin tab has been added.
Under Profile >> Permissions and Groups >> Settings and Permissions a new tab called View First Party Connectors is available. This provides information on the connector type, person who authenticated it, current status and created date:
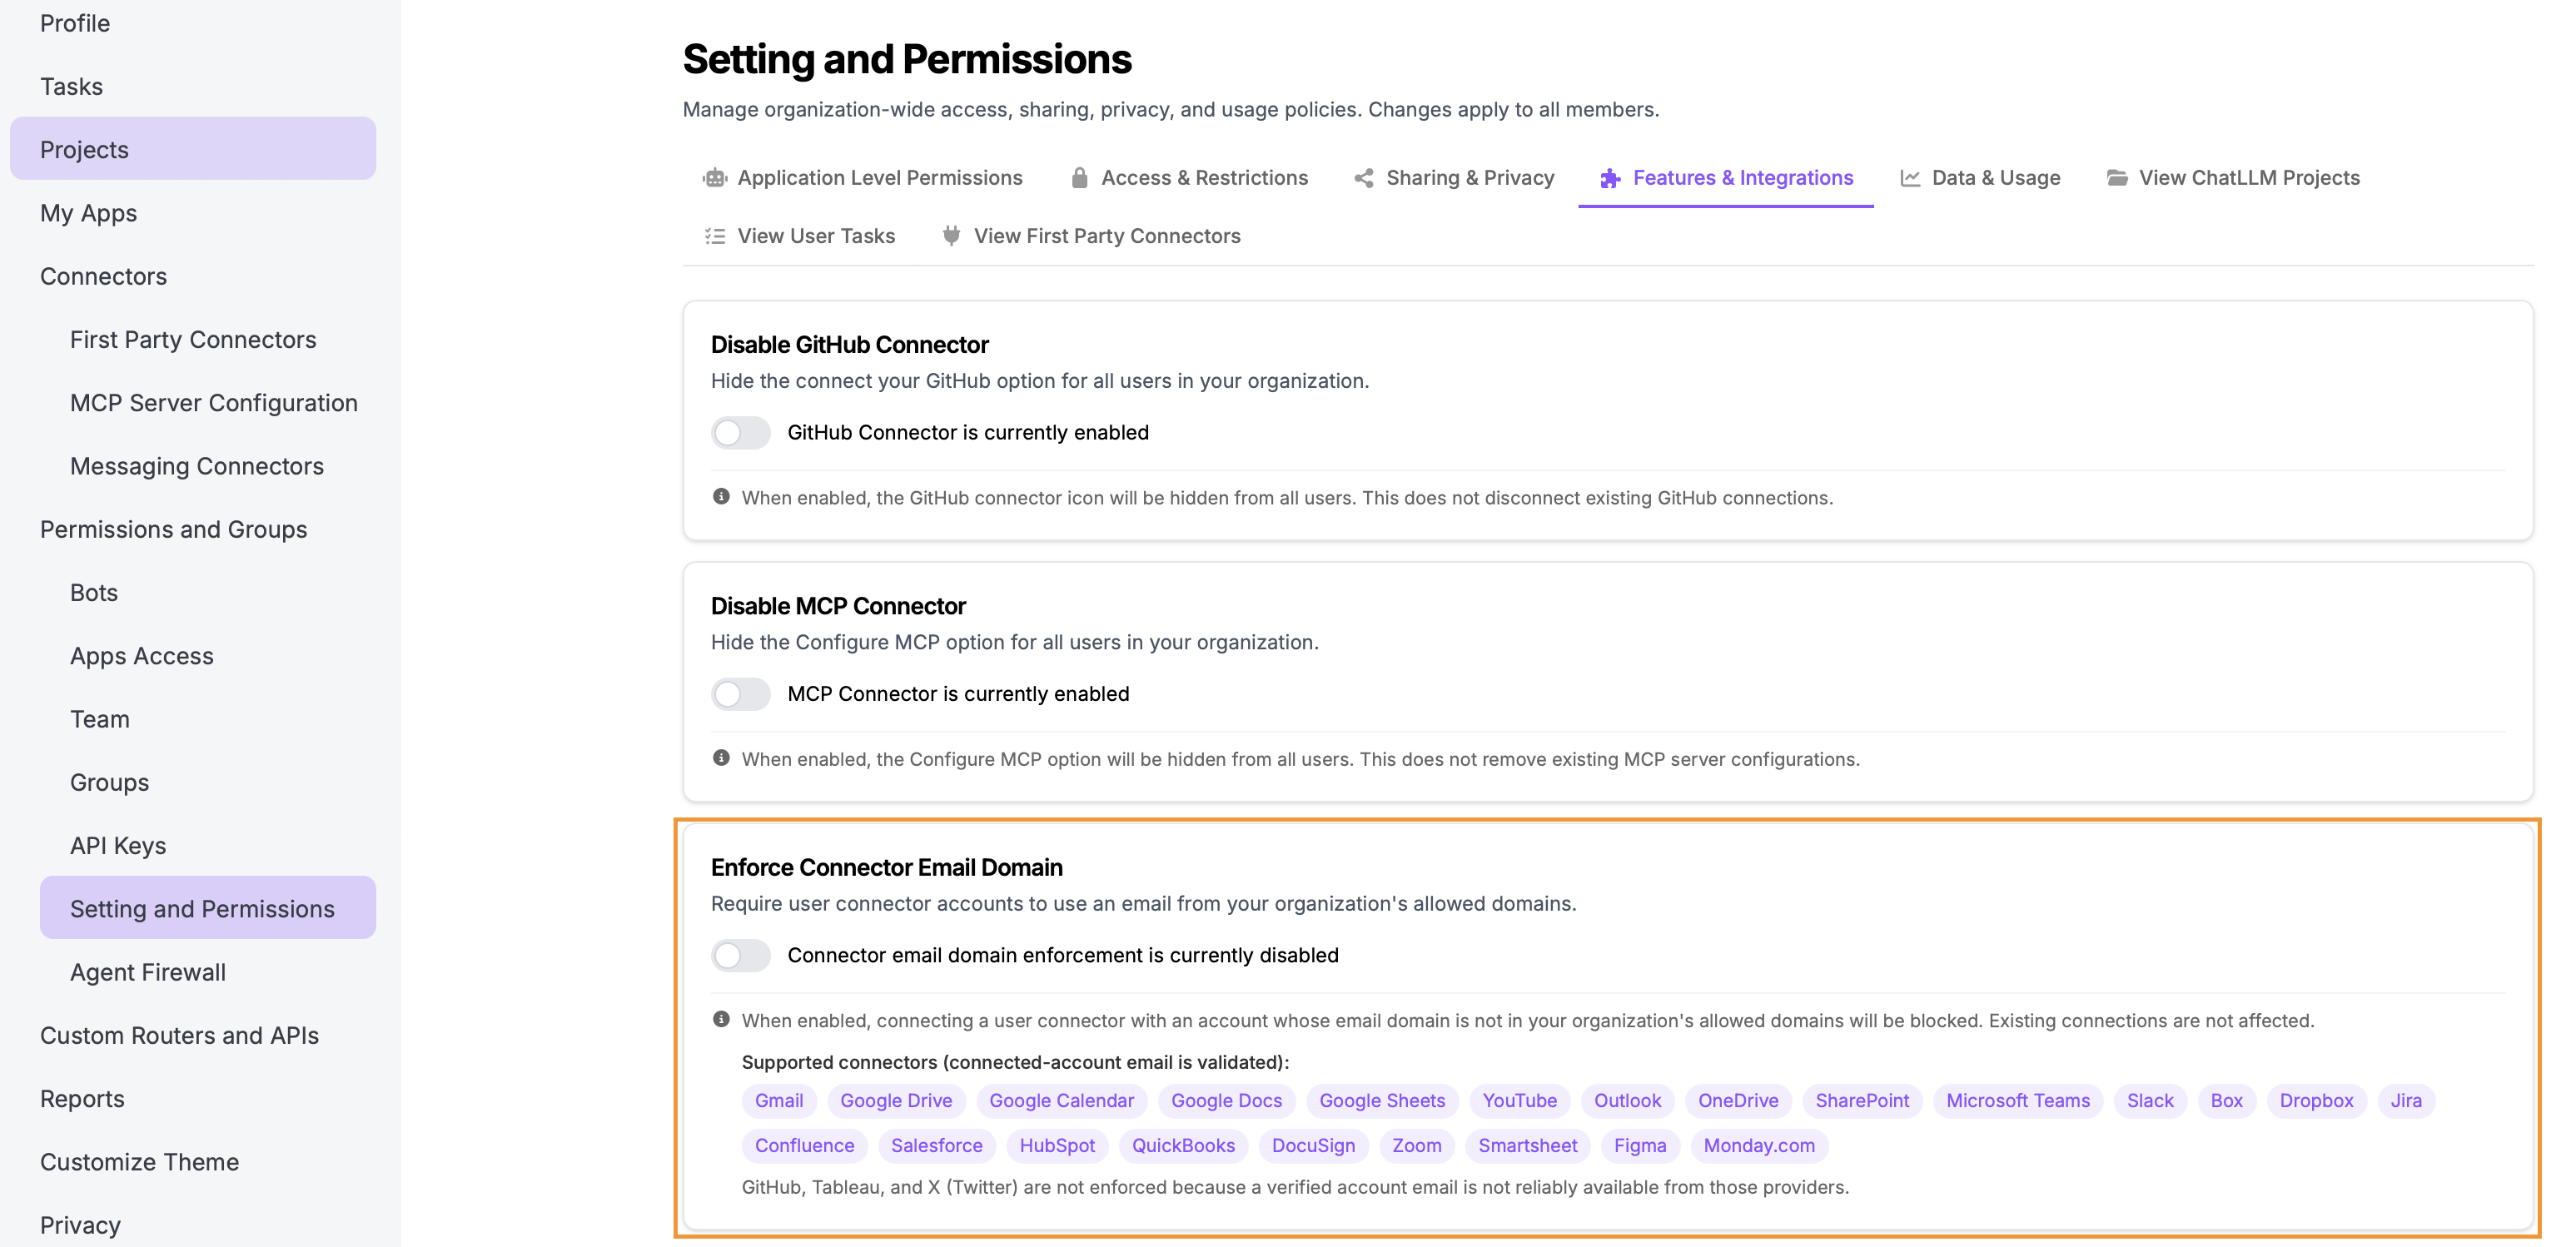
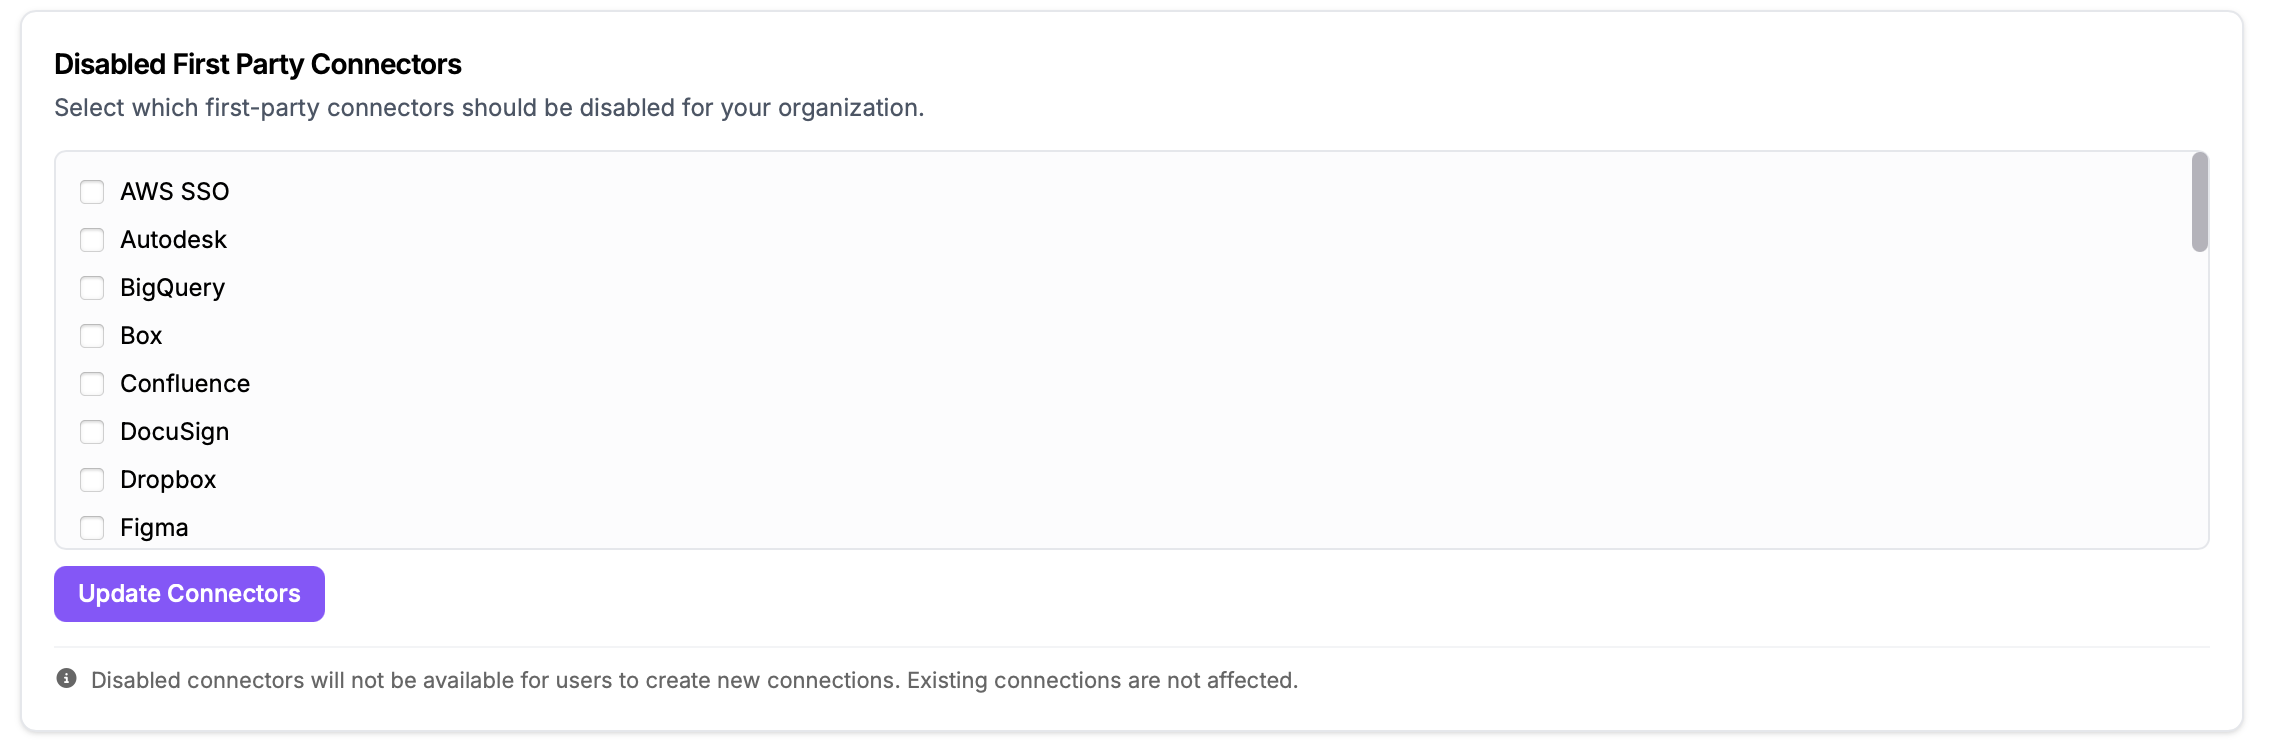
User Connectors - Email Domain Restriction A new security control, Enforce Connector Email Domain, has been added to give administrators granular control over which accounts can be used to authenticate external integrations. This feature ensures that users only connect professional or approved accounts to the platform, preventing the accidental use of personal email addresses or unapproved third-party domains when setting up connectors.
Access to this feature is found in Permissions & Groups > Setting & Permissions > Enforce Connector Email Domain:
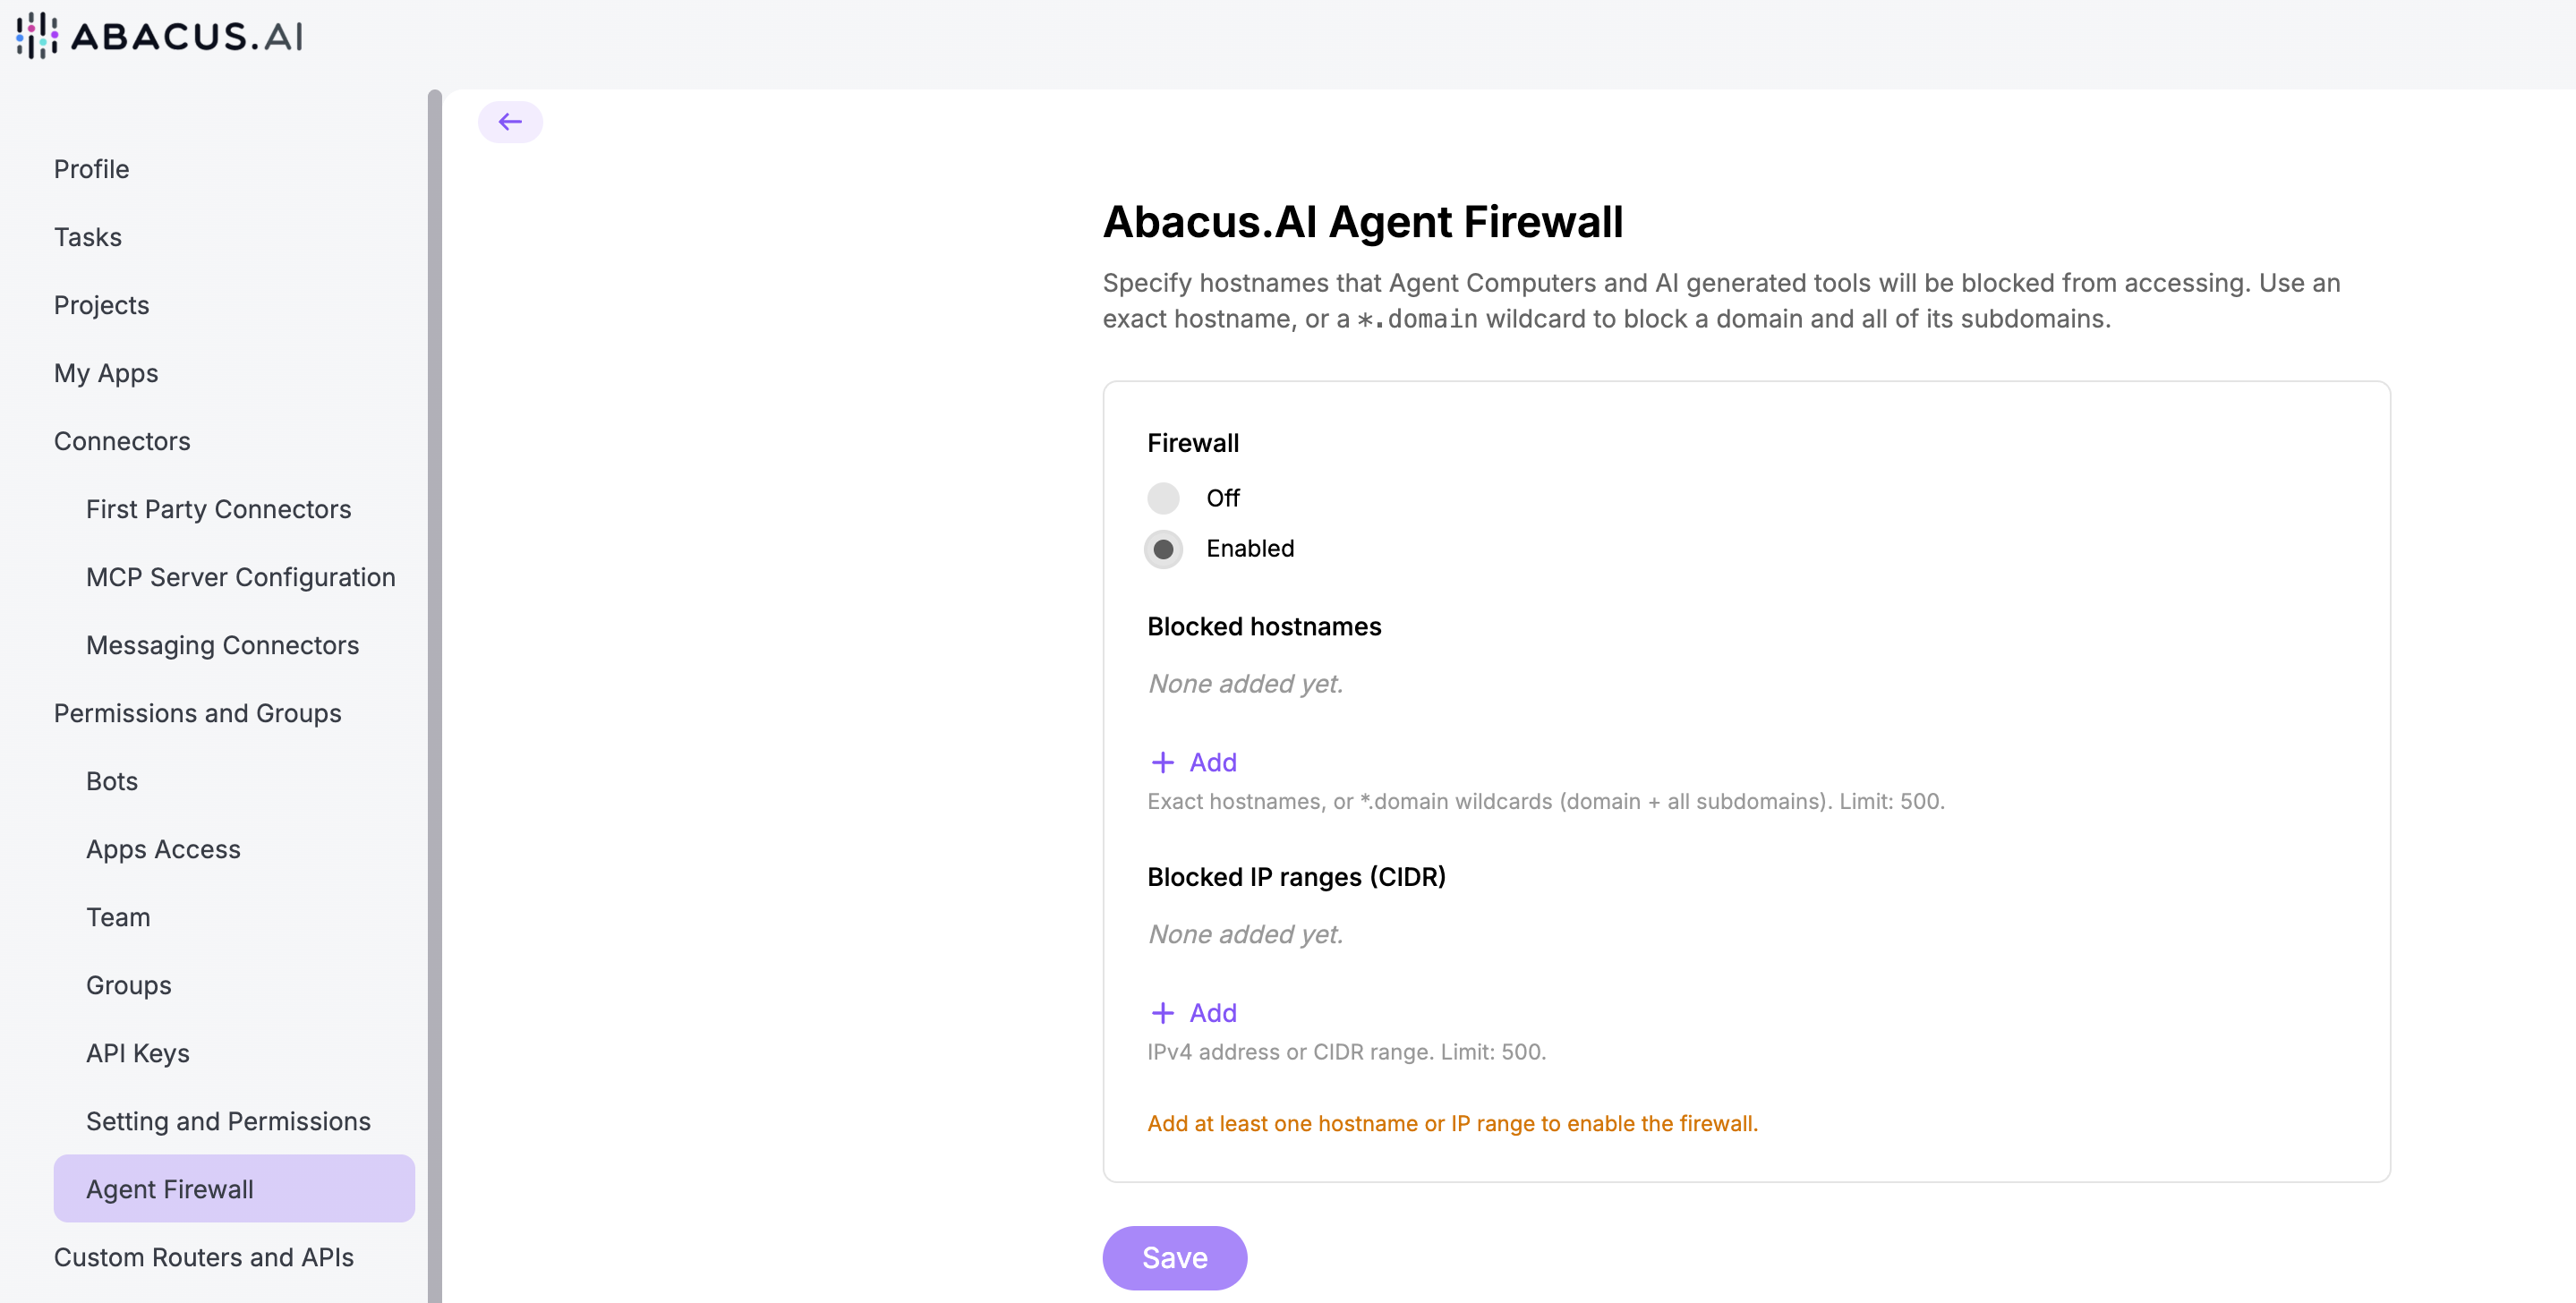
Agent Firewall This new enterprise security feature gives organizations greater control over the network access available to the Abacus AI Agent during task execution. Rather than allowing unrestricted outbound internet access, administrators can define firewall rules that limit which destinations Agent VMs are permitted to access. This enables organizations to align agent execution with their existing security and compliance requirements.
Agent Firewall settings are available under the Profile >> Permissions and Groups >> Agent Firewall menu:


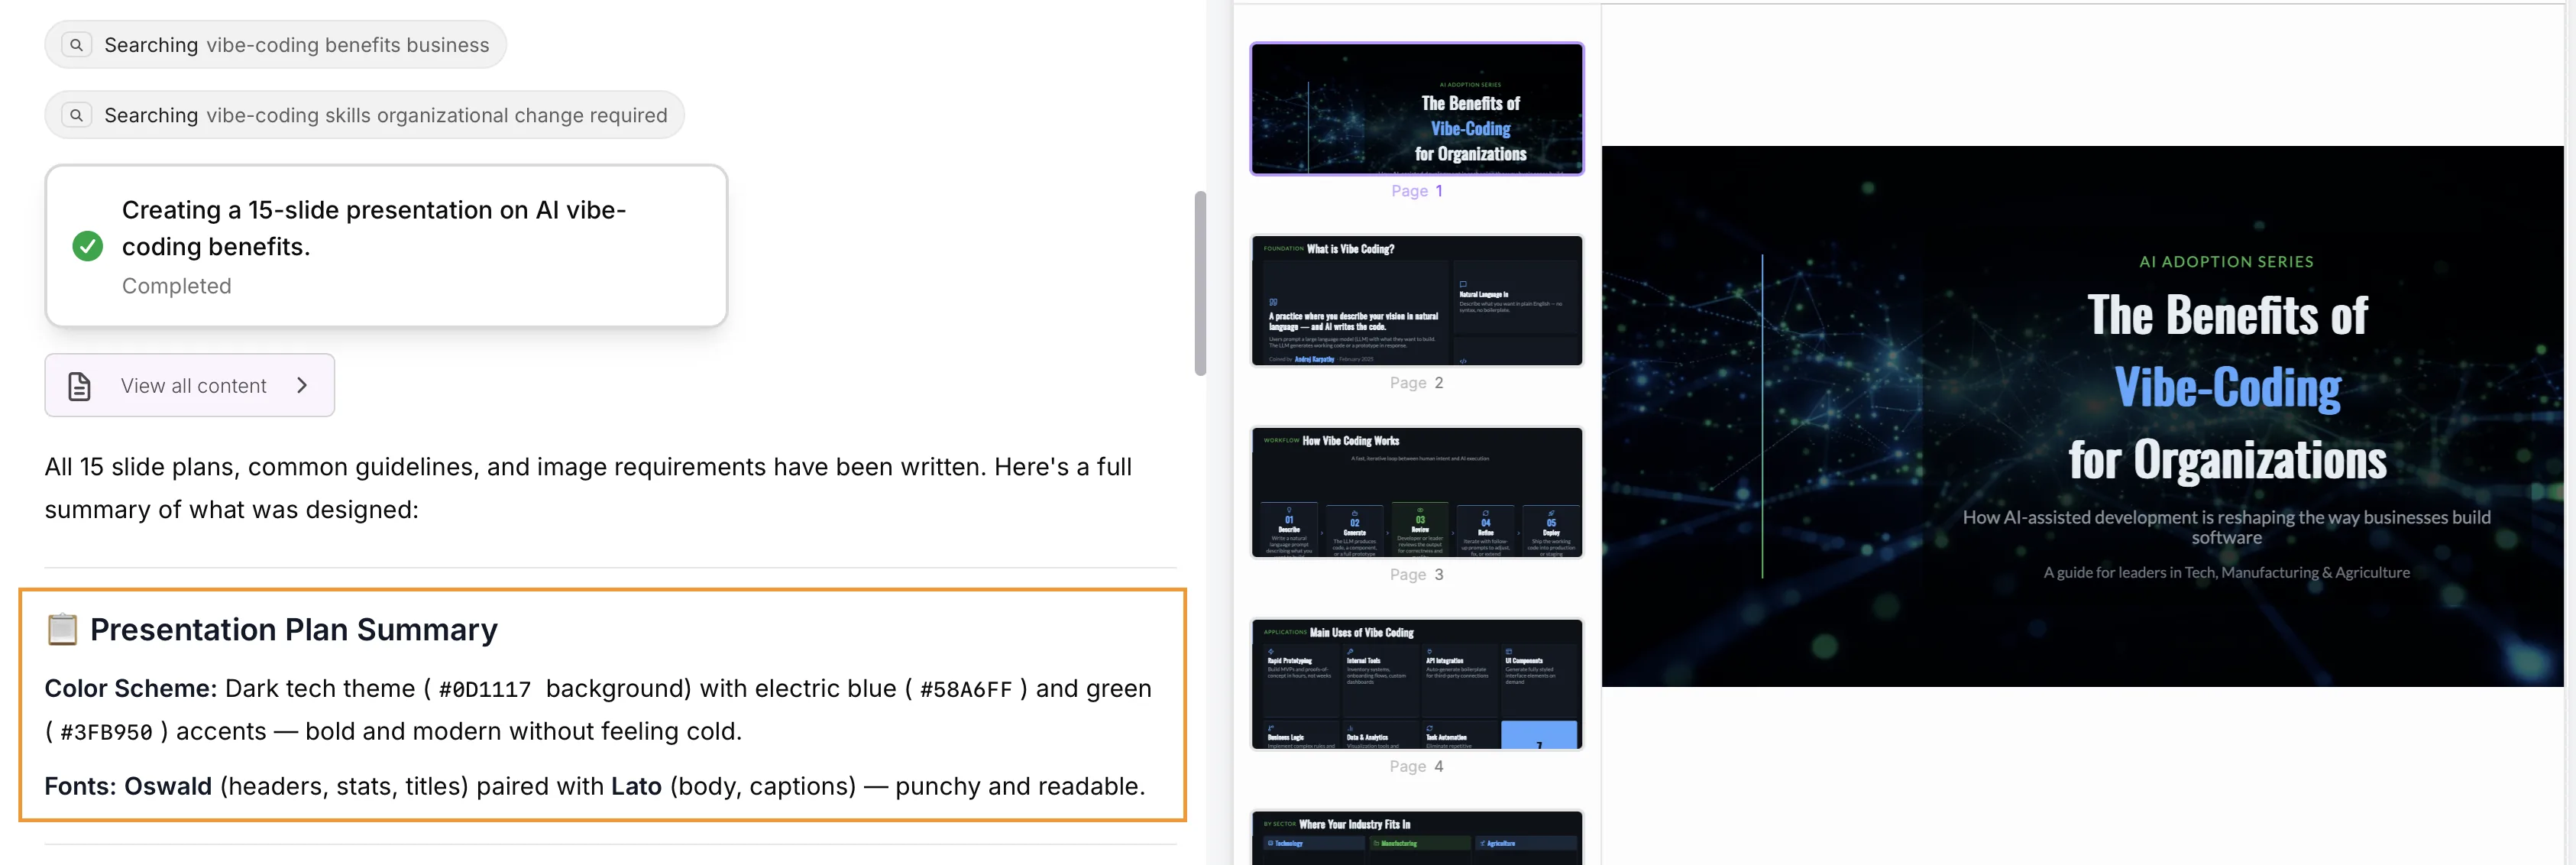
 Powerpoint Updates


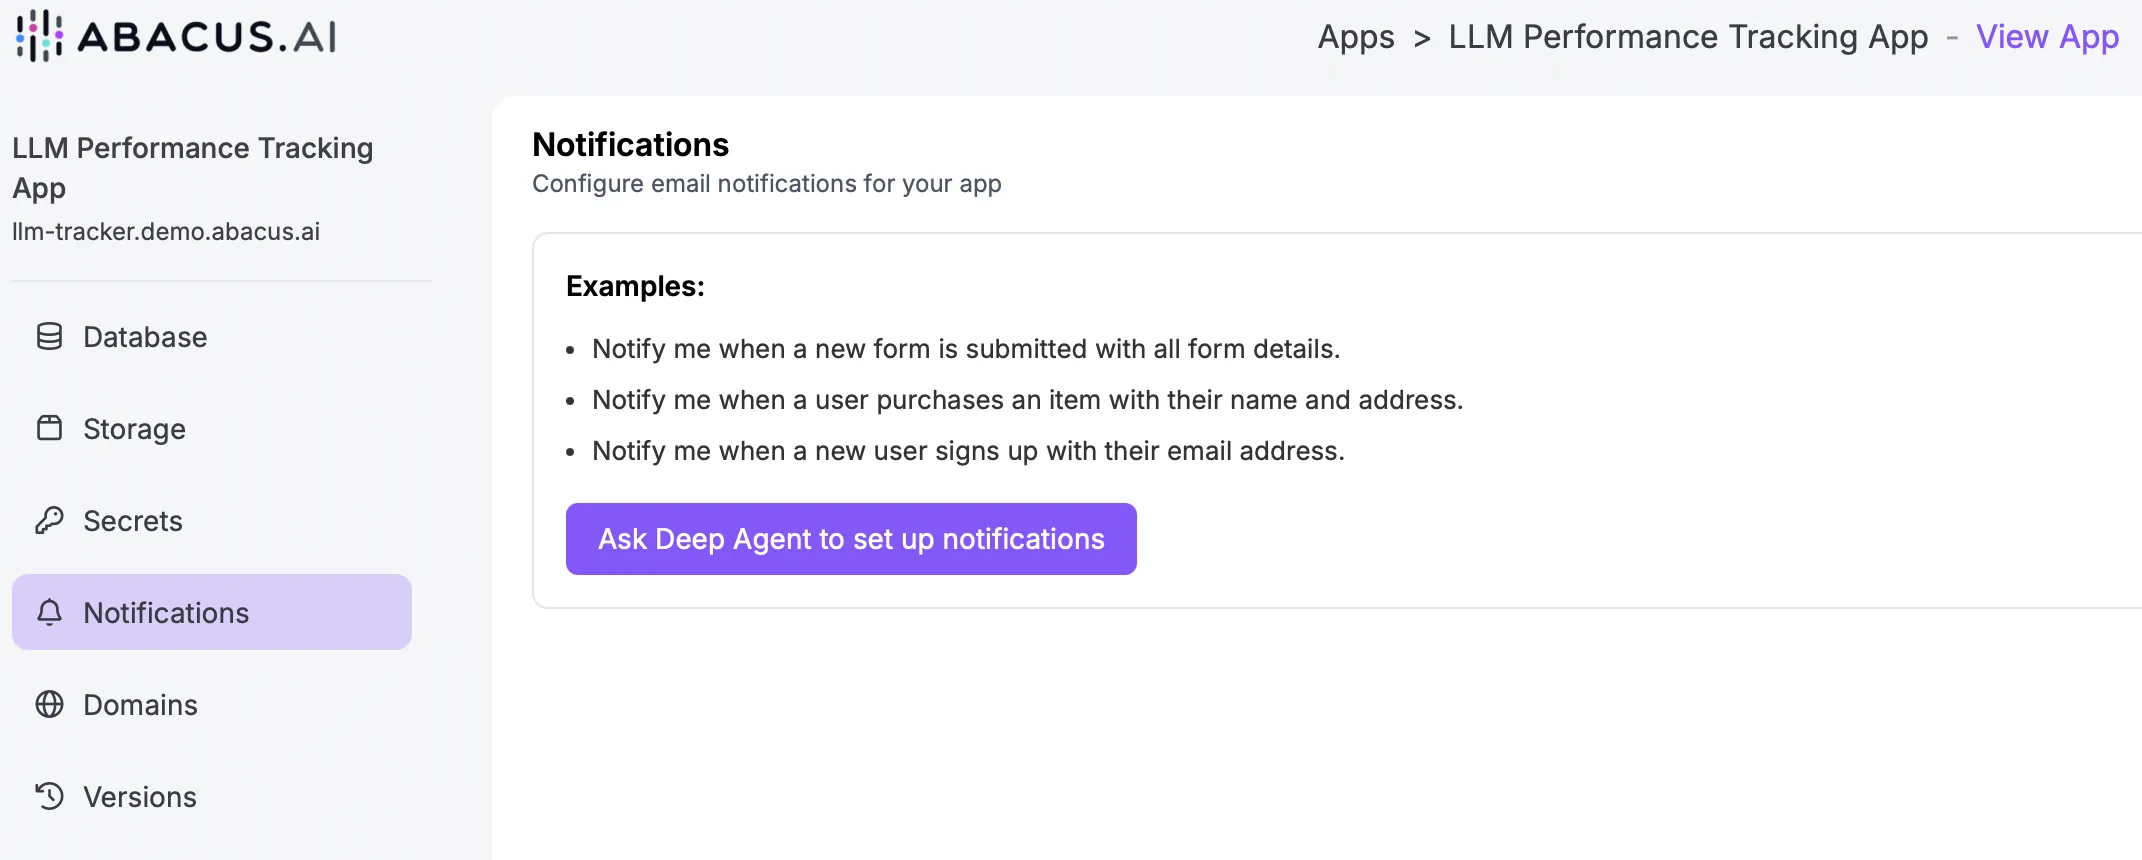
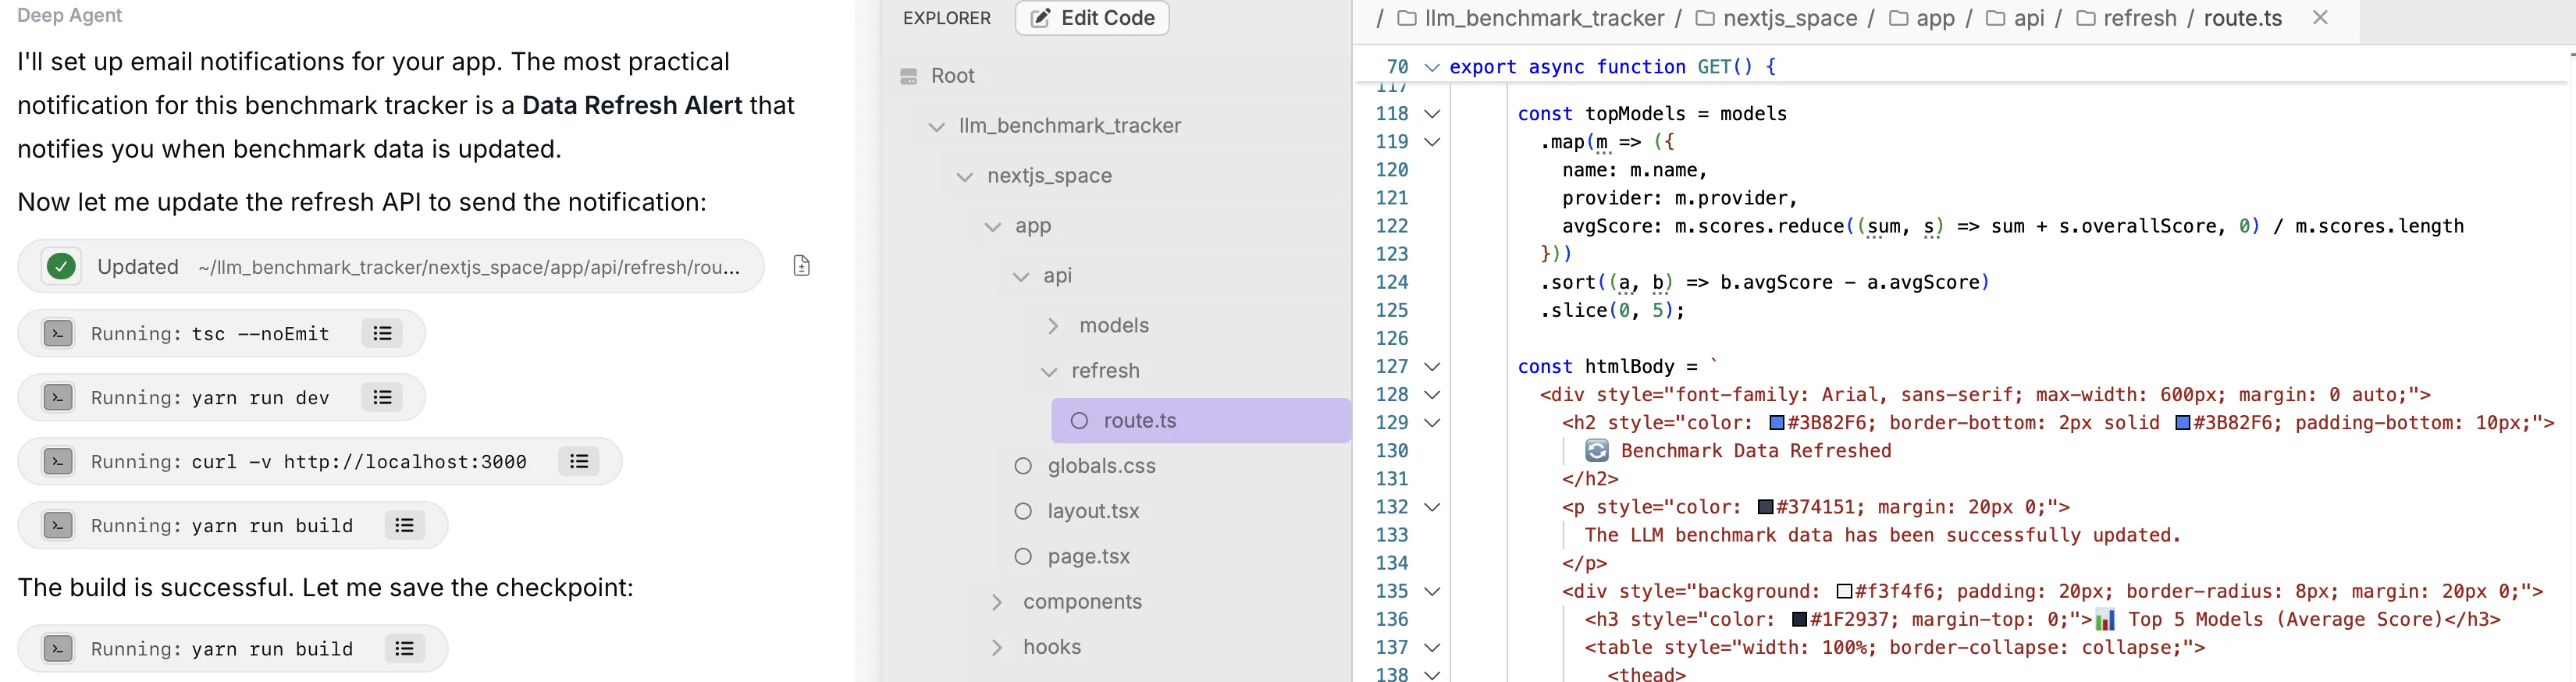
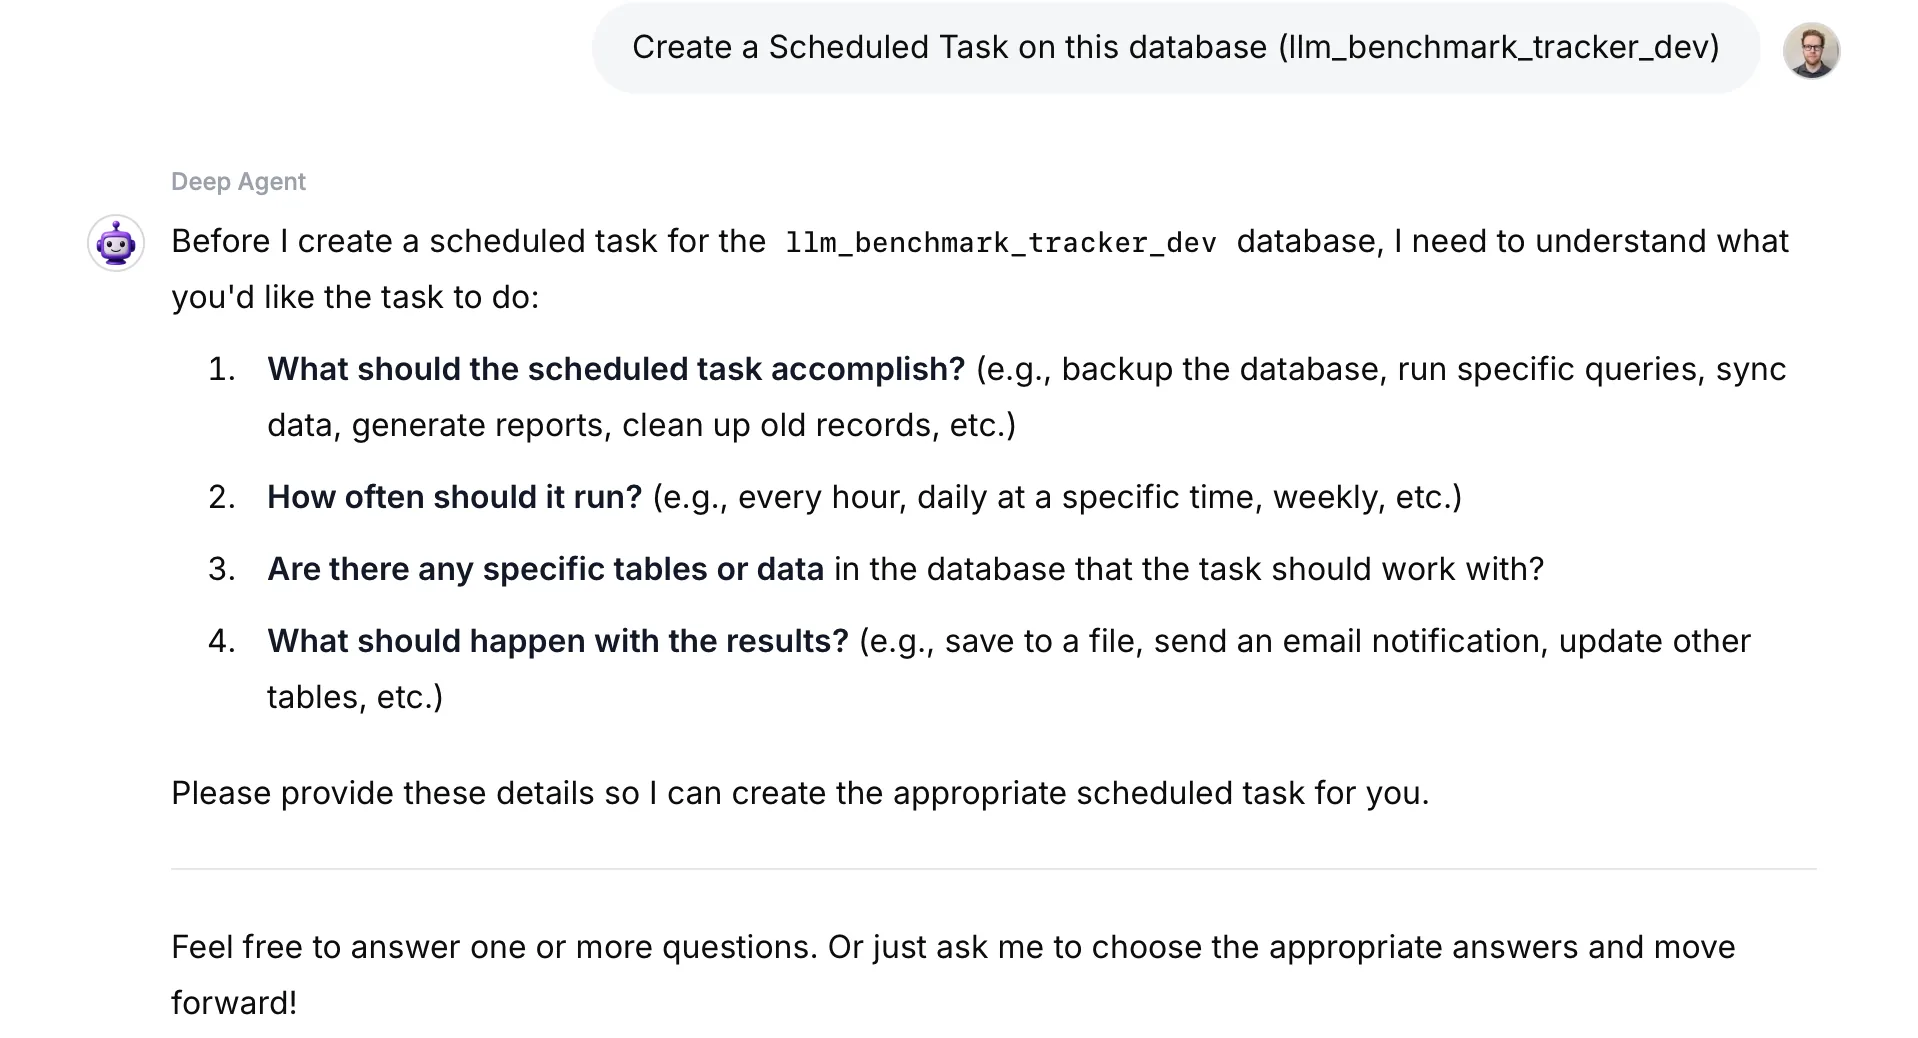 App Notifications

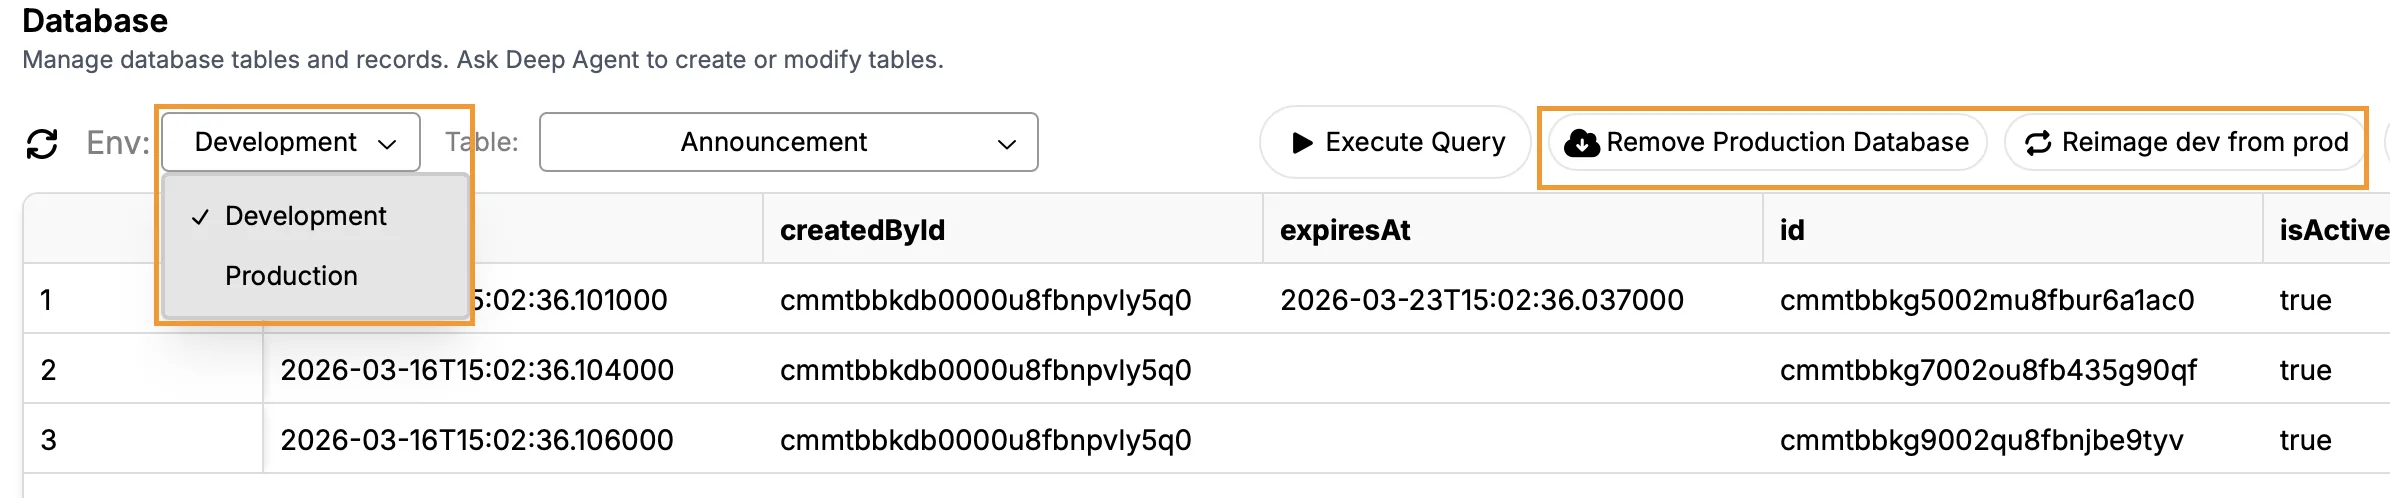
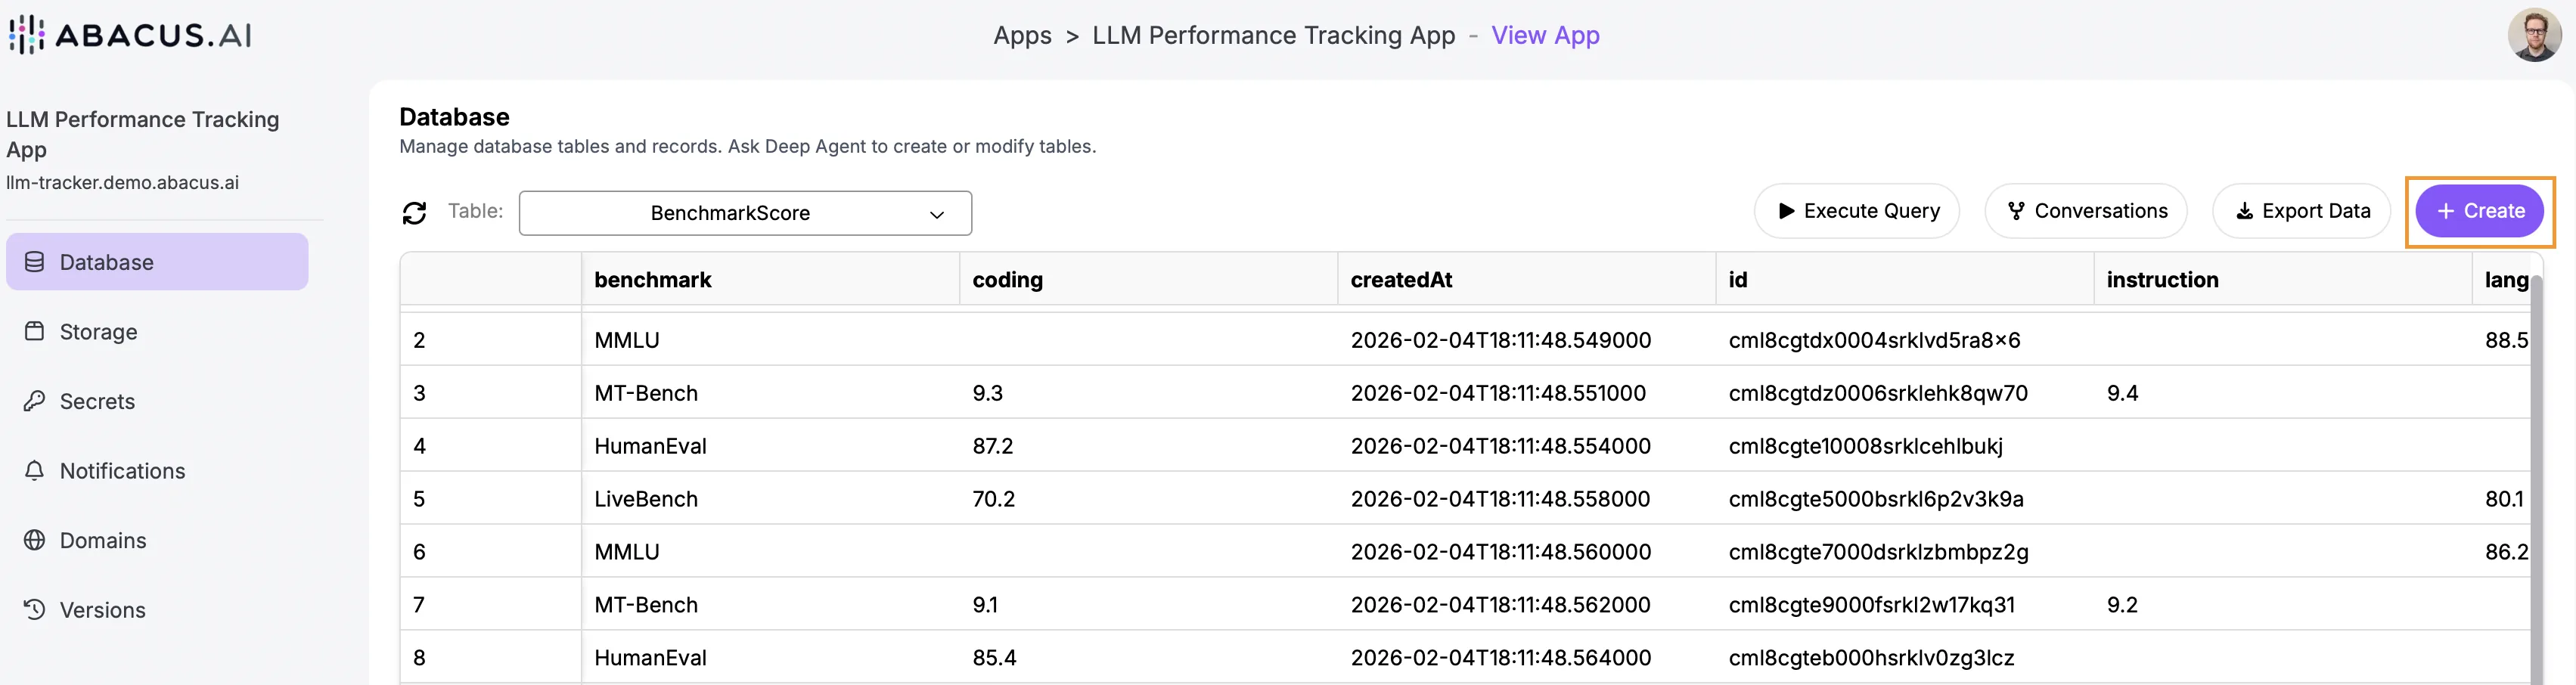
 Database Sharing

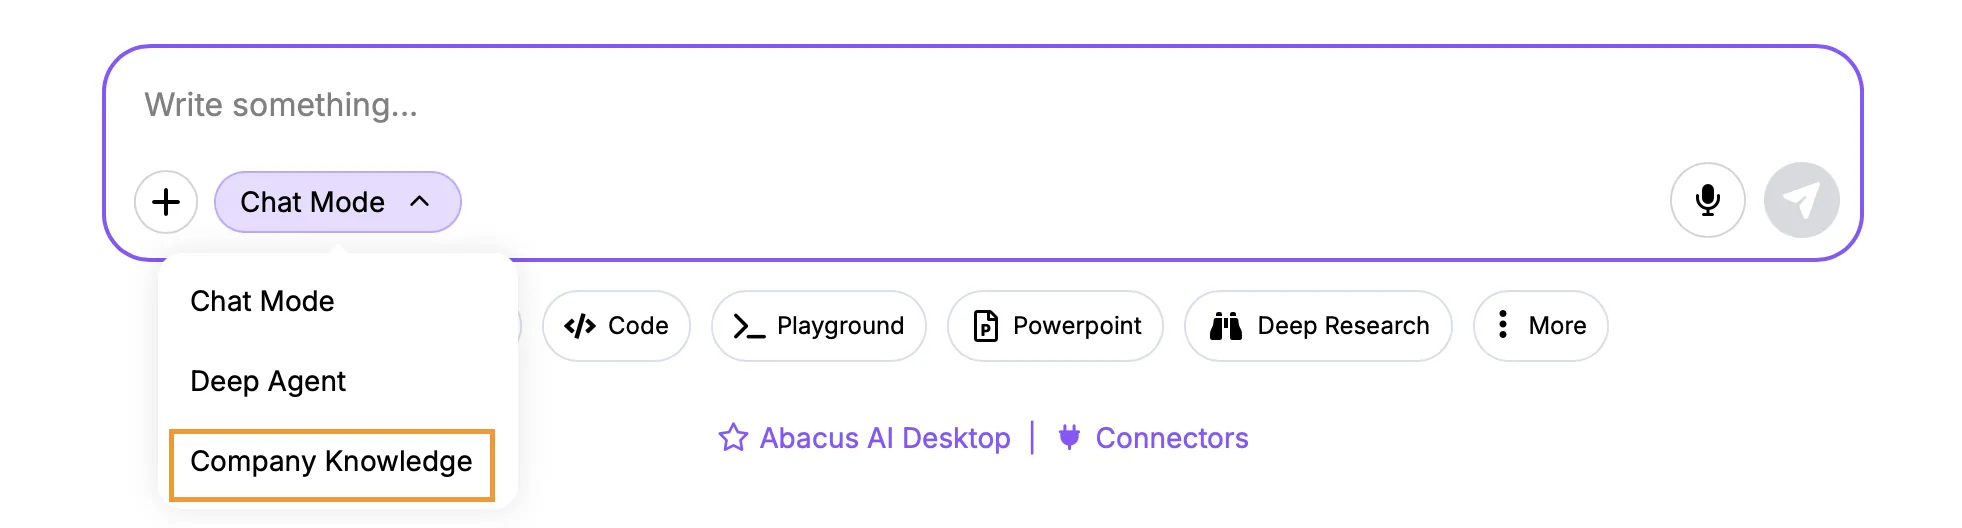
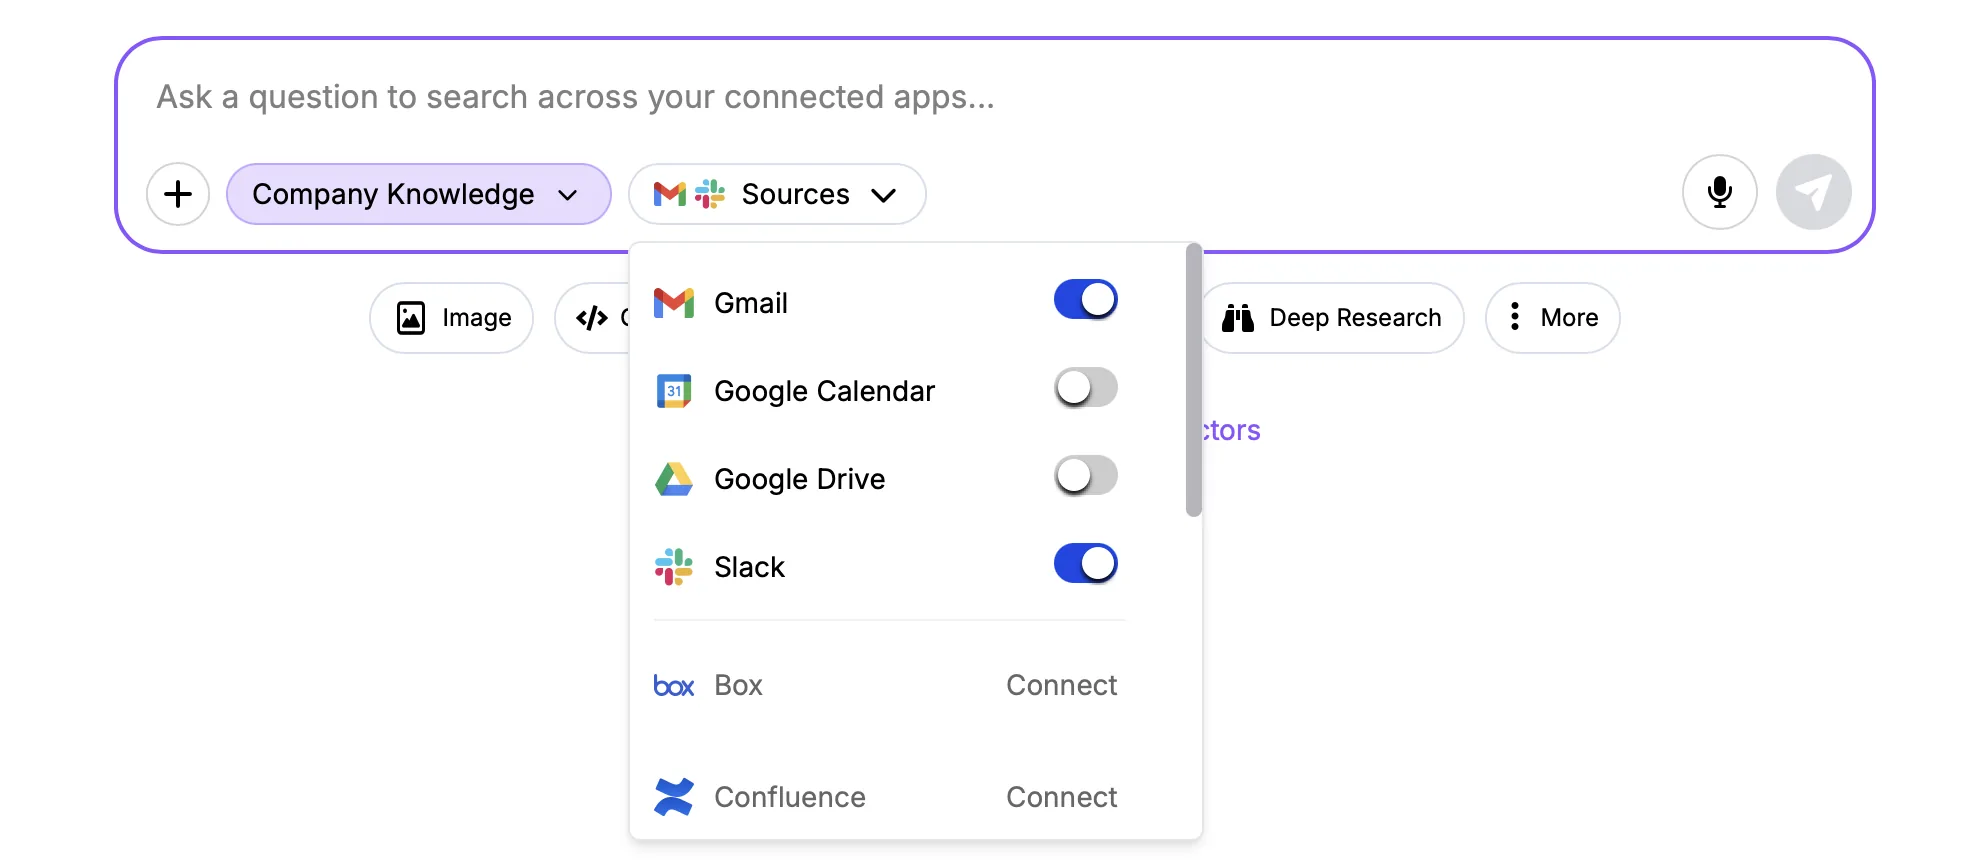
 Super Assistant
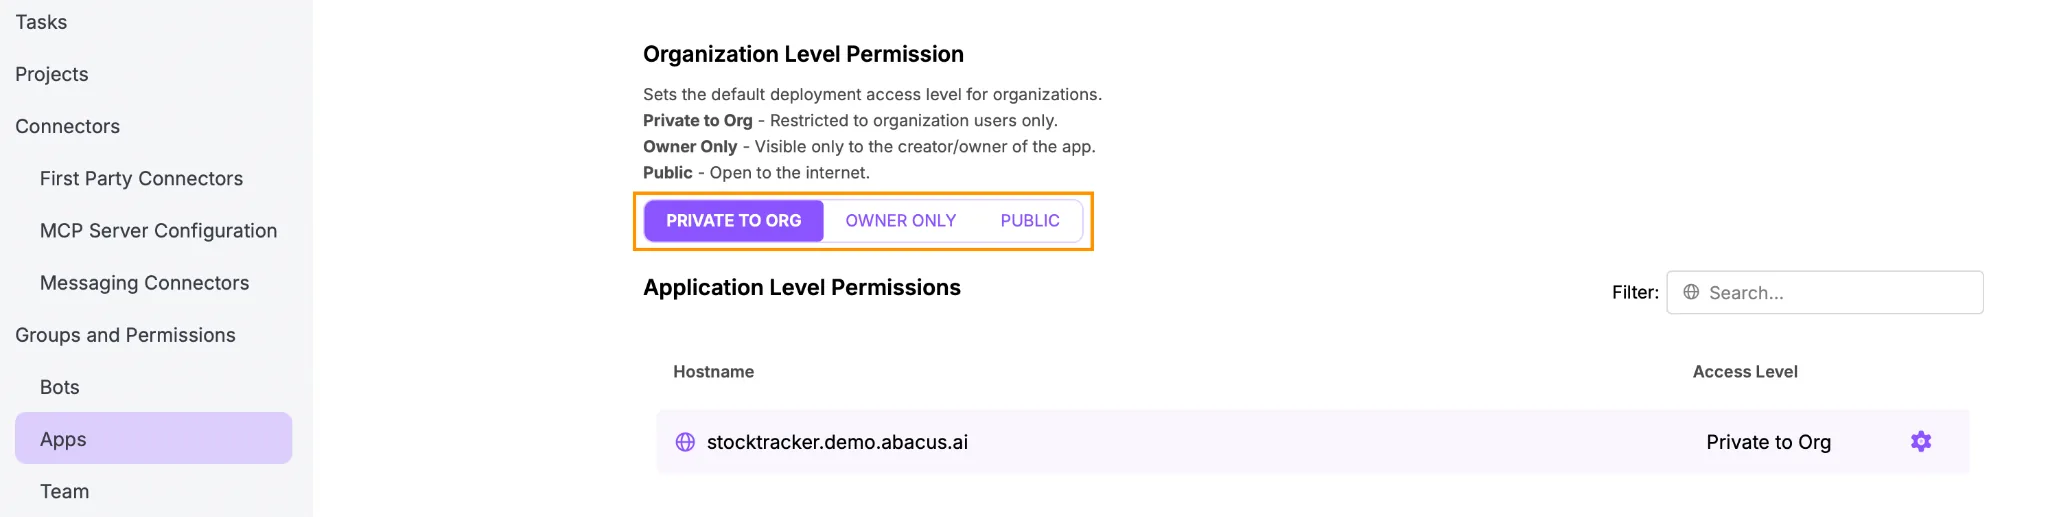

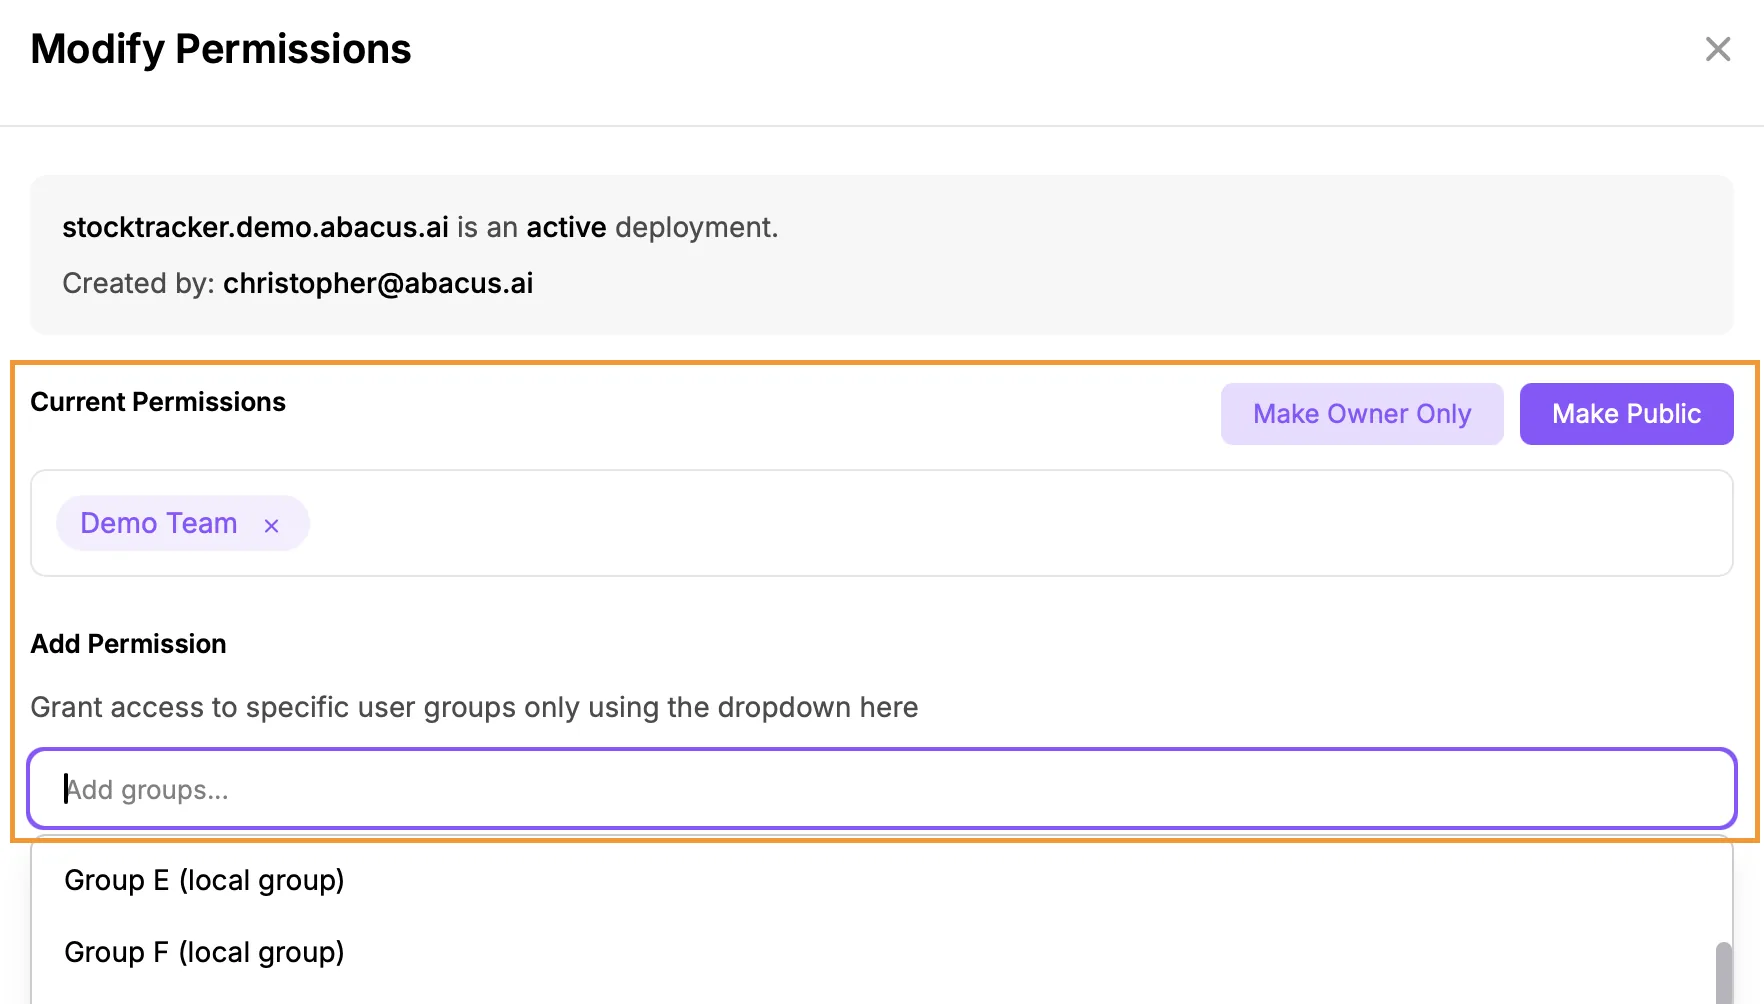 Controlling App Sharing Permissions


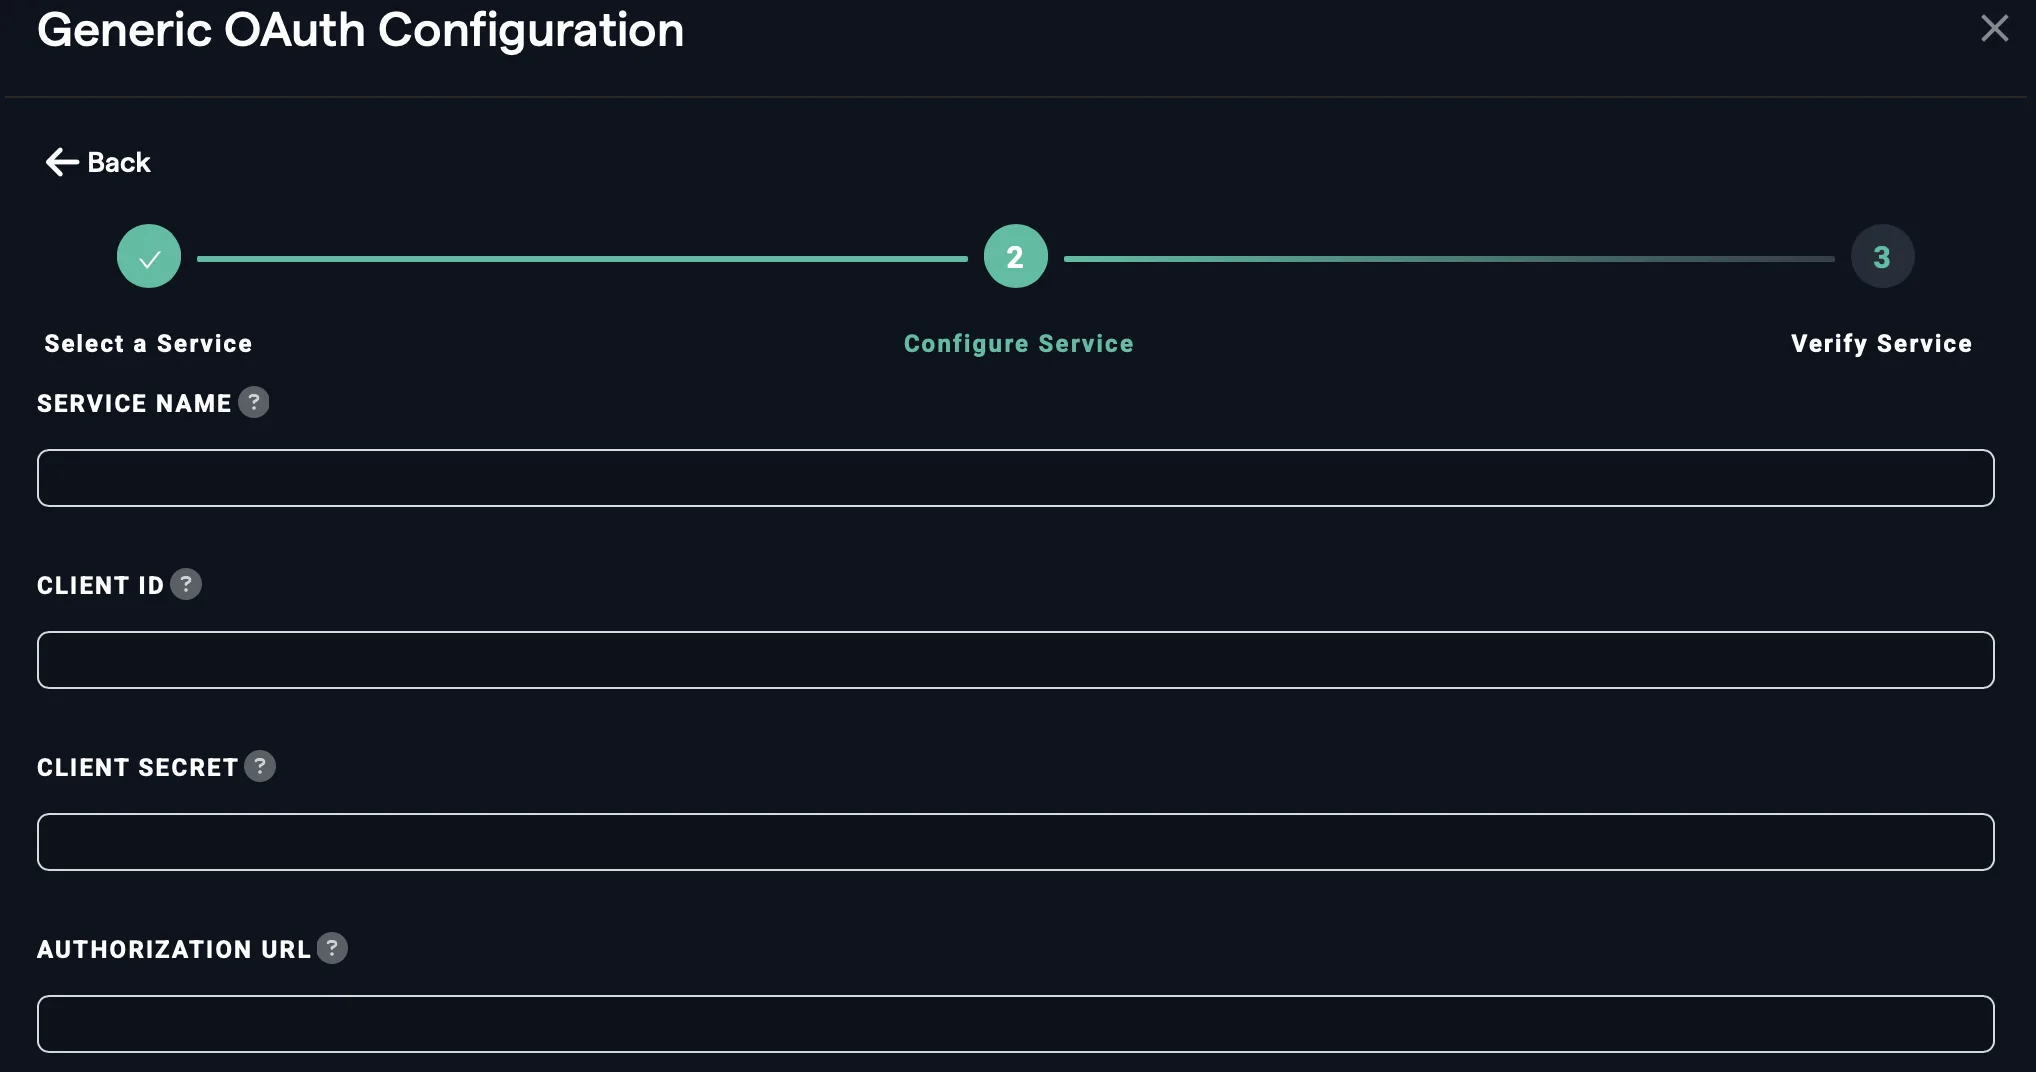
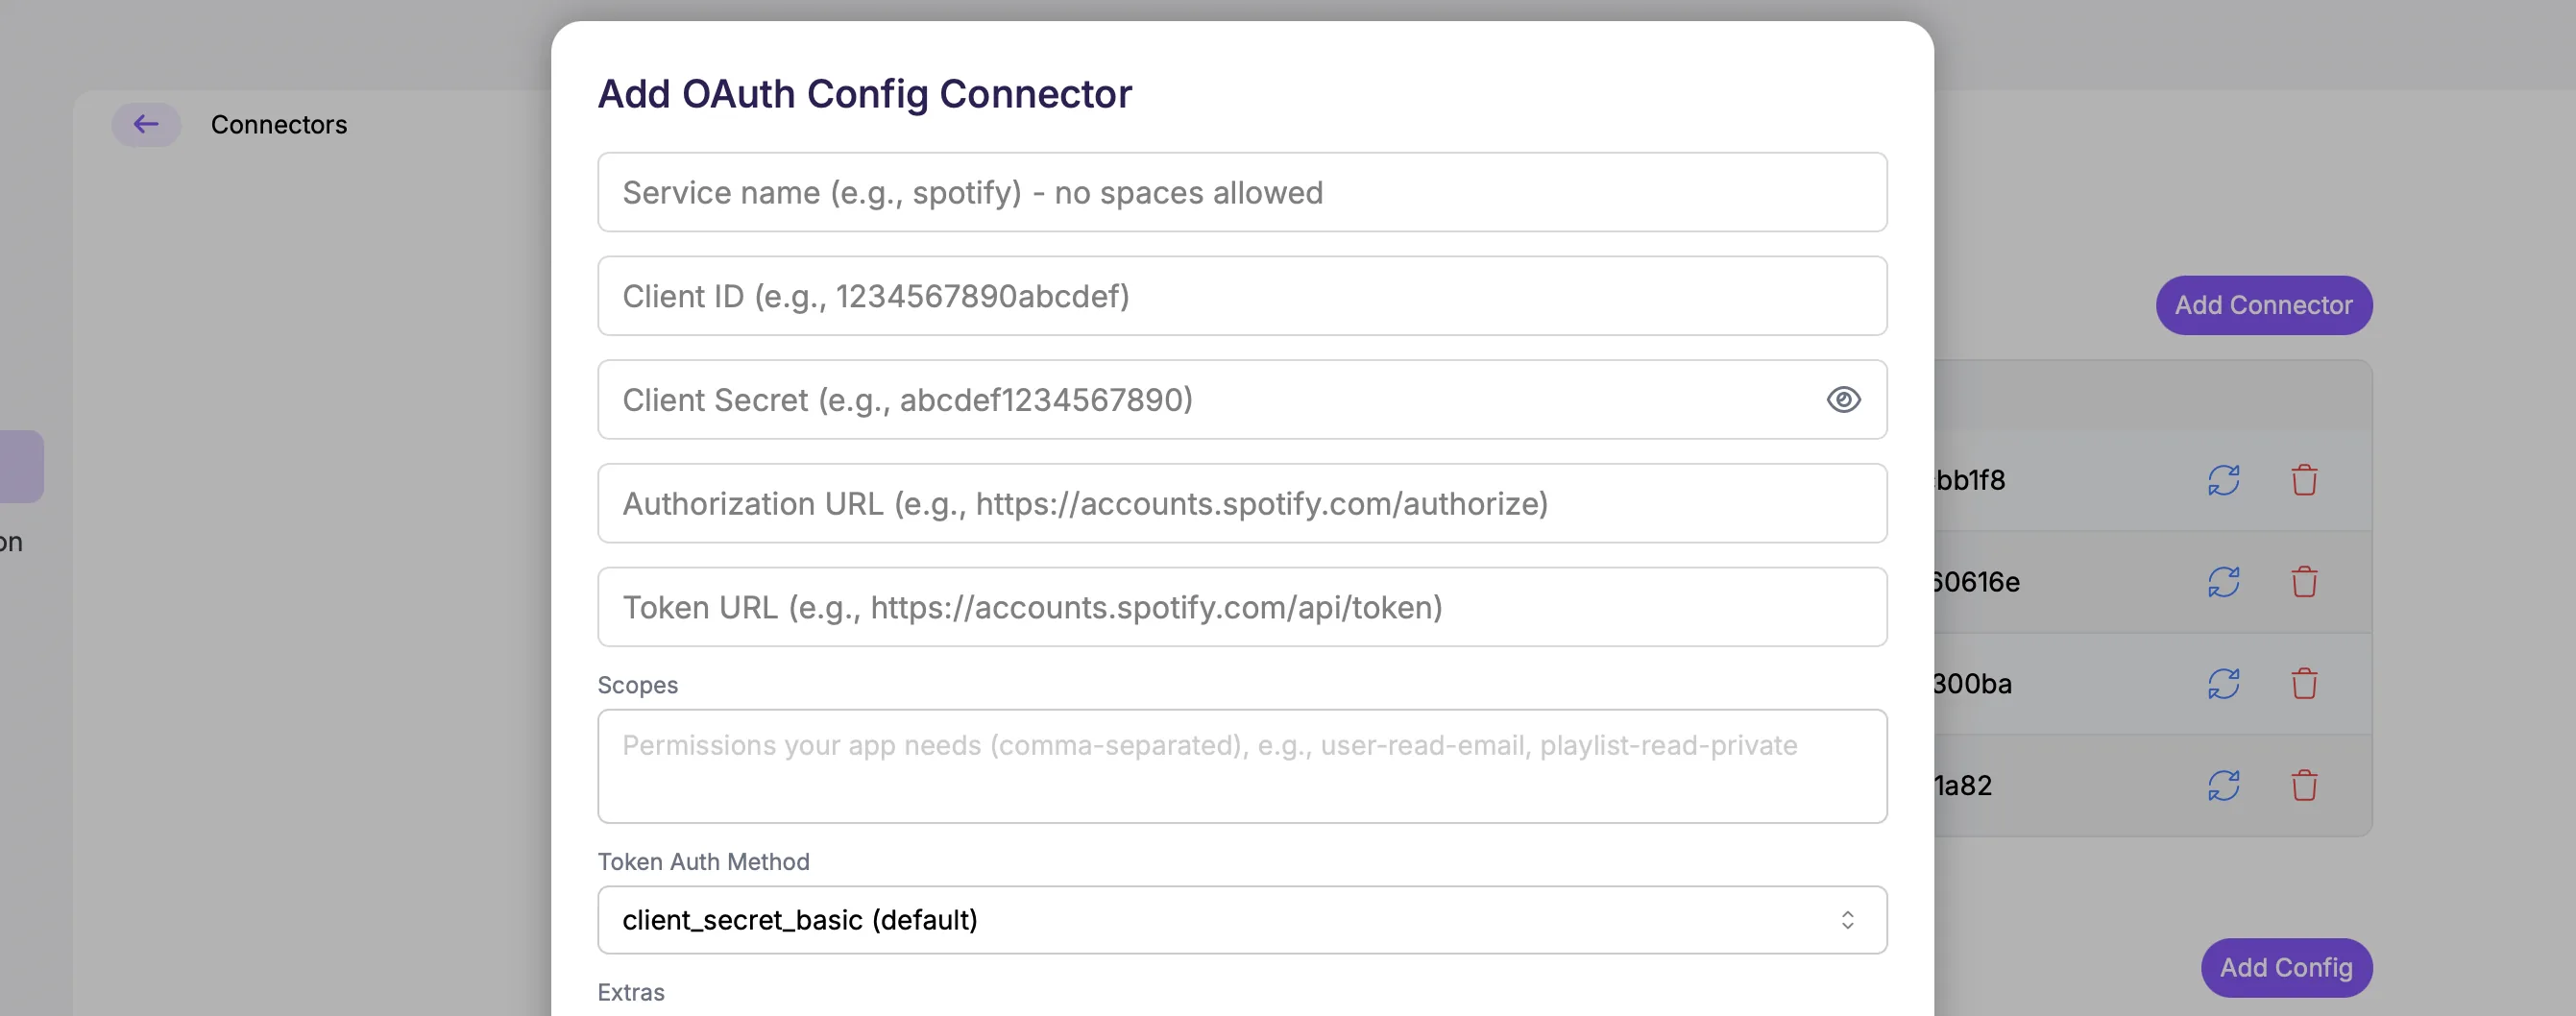
 Generic O-Auth