Snowflake User-Level Connector with RBAC Integration
Overview
This guide provides step-by-step instructions for setting up a Snowflake connector with Role-Based Access Control (RBAC) and integrating it with Abacus.AI's ChatLLM platform. This configuration enables secure, user-level access to Snowflake data through a conversational AI interface.
Prerequisites
- Access to Snowflake with appropriate permissions
- Abacus.AI account with organization-level access
- Understanding of Snowflake RBAC concepts (databases, users, roles)
Architecture Overview
The integration follows a secure RBAC flow where each user authenticates individually with Snowflake, ensuring data access is governed by their specific permissions.
Setup Process
Step 1: Create Snowflake Connector
Create a Snowflake connector at the organization level following the RBAC Flow for Snowflake documentation. Ensure you include additional details for:
Step 2: Navigate to Projects
After creating the connector, navigate to the projects page by clicking on the Abacus.AI logo.
Step 3: Create New Project
Create a new project to house your ChatLLM implementation.
Step 4: Select ChatLLM Option
Select GenAI --> Custom Chatbot option. option from the available project types.
Step 5: Configure Project Name
Enter a descriptive name for your project that reflects its purpose.
Step 6: Skip to Dashboard
Select Skip to project dashboard to proceed directly to the main project interface.
Model Training Configuration
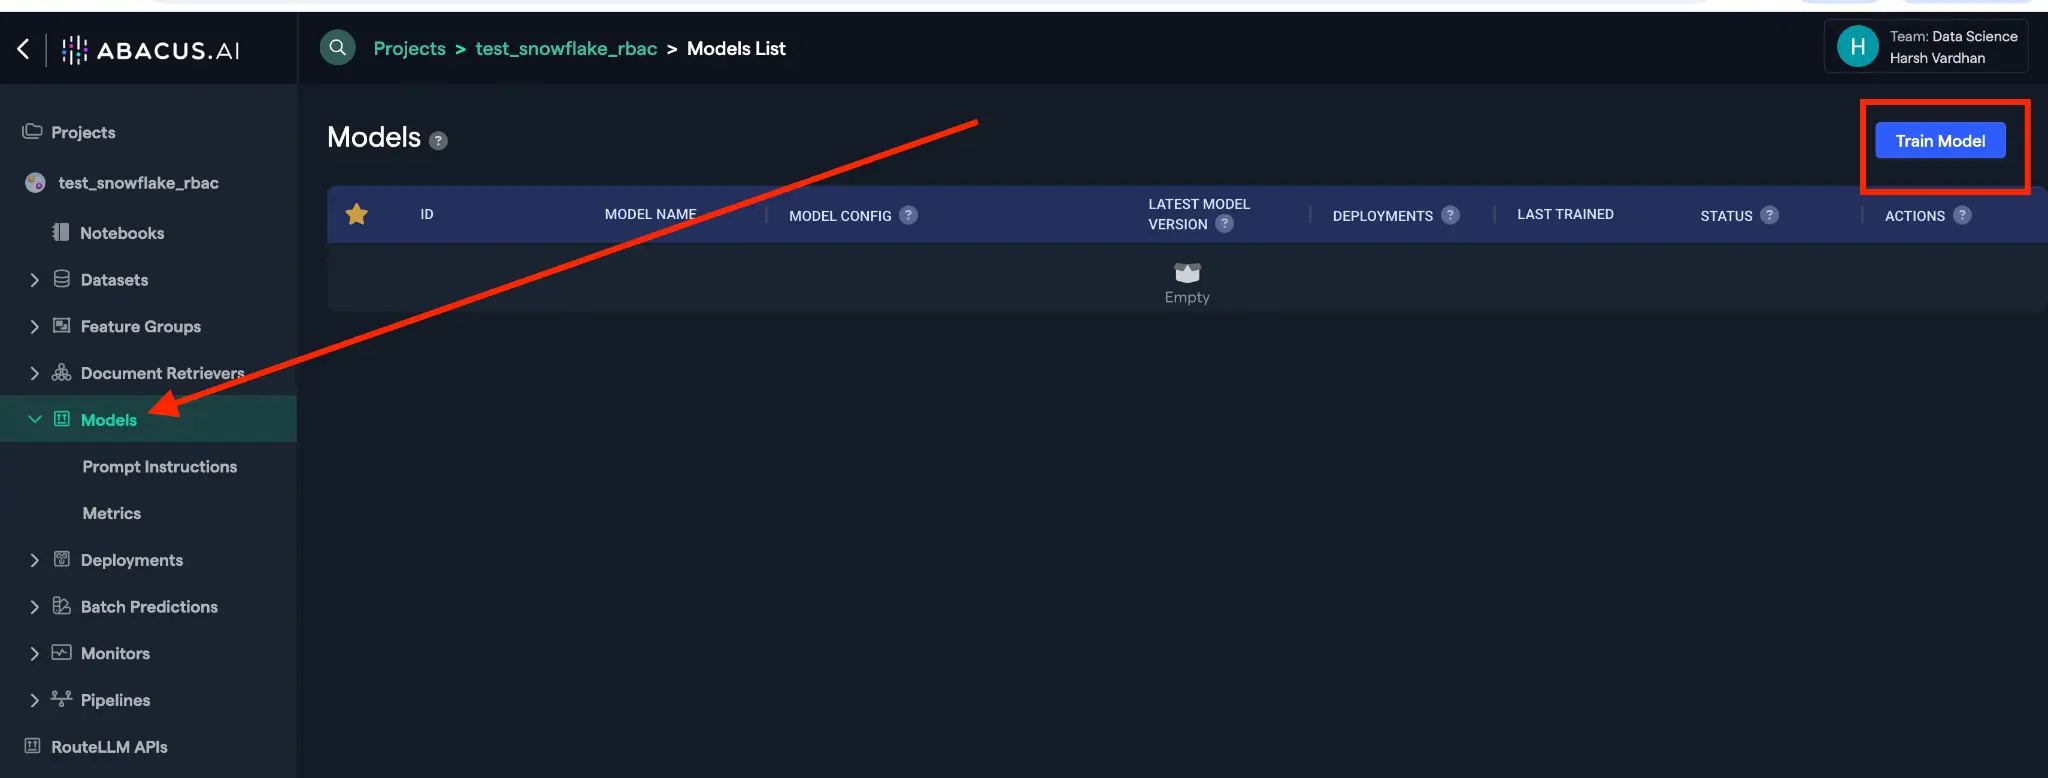
Step 7: Access Model Training
Click on the Model option in the left toolbar and select Train Model in the top right corner of the page.
Step 8: Configure Data Source
From the dropdown in Structured data source, select External Databases.
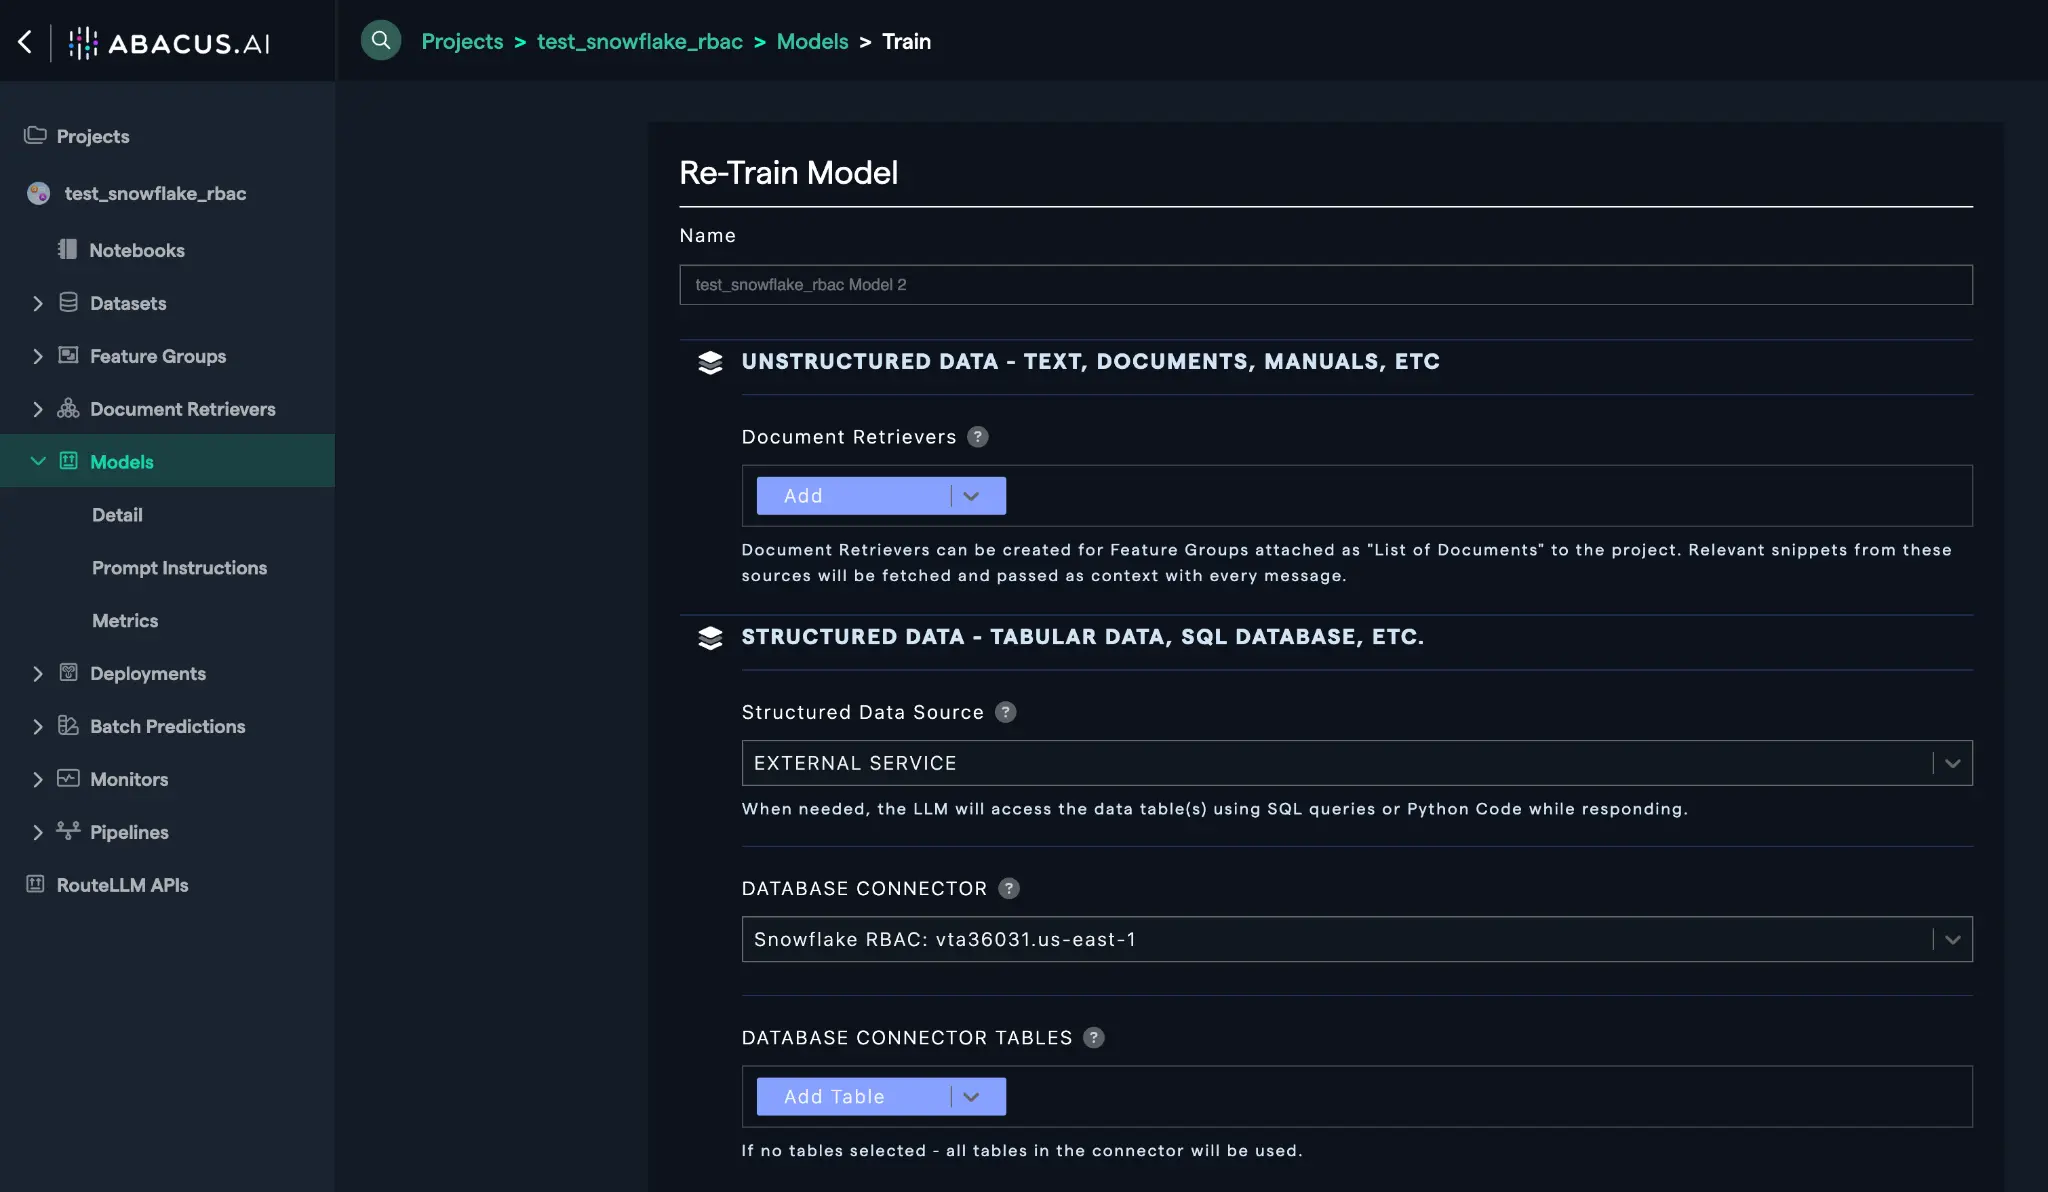
Step 9: Select Snowflake Connector
Select the connector you created in Step 1 from the dropdown menu.
Step 10: Initiate Training
Click on Train Model to begin the model training process.
Model Deployment
Step 11: Access Trained Model
Once training is complete, click on Models and select your trained model.
Step 12: Create Deployment
Click on Create a new deployment to prepare your model for production use.
Step 13: Configure Deployment Type
Select Offline Batch + Realtime deployment type and click Next.
Step 14: Name Your Deployment
Enter a user-friendly name that your end users will see and click Deploy.
Step 15: Monitor Deployment Status
Return to your model by clicking on Model and then your model name. Wait for the deployment to reach Active state, then click on the deployment name.
Testing and Usage
Step 16: Access Prediction Dashboard
Click on the Prediction Dash option under Deployment.
Step 17: Launch Chat Interface
Click on Go to Abacus.AI chat to test your bot.
Step 18: User Authentication Flow
When users enter their first question/prompt, they will be prompted to log in to Snowflake. Each user must authenticate using their individual Snowflake credentials.
The system will present the Snowflake login screen:
Step 19: Interactive Chat Experience
Once authenticated, users can interact with the chat interface to query their Snowflake data:
The system will process queries and return results based on the user's RBAC permissions:
Security Considerations
RBAC Implementation
- User-Level Authentication: Each user must authenticate individually with their Snowflake credentials
- Permission Inheritance: Users can only access data according to their assigned Snowflake roles
- Session Management: Authentication sessions are managed securely between Abacus.AI and Snowflake
Best Practices
- Role Assignment: Ensure users have appropriate roles assigned in Snowflake before accessing the chat interface
- Database Permissions: Verify that the connector has access to the necessary databases and schemas
- Monitoring: Regularly monitor usage patterns and access logs for security compliance
- Updates: Keep connector configurations updated as organizational roles and permissions change
Troubleshooting
Common Issues
- Authentication Failures: Verify Snowflake credentials and role assignments
- Data Access Errors: Check RBAC permissions for the specific user and database
- Connector Issues: Ensure the Snowflake connector configuration includes all necessary database and role details
Support Resources
- Refer to the Snowflake RBAC documentation for detailed permission management
- Contact Abacus.AI support for platform-specific issues
- Review Snowflake audit logs for access pattern analysis
Conclusion
This setup provides a secure, scalable solution for enabling conversational access to Snowflake data while maintaining strict RBAC controls. Users can interact naturally with their data through the chat interface while the system ensures they only access information according to their assigned permissions.