Connect Your Snowflake to Abacus.AI
To integrate Snowflake with Abacus.AI, you need to set up the connector and provide the necessary permissions.
This connector uses key/pair authentication.
- Setup Instructions
- RBAC Flow for Snowflake
- Setup Instructions - Snowflake Share
- How to Use the Snowflake Connector
- Troubleshooting and FAQ
Setup Instructions
-
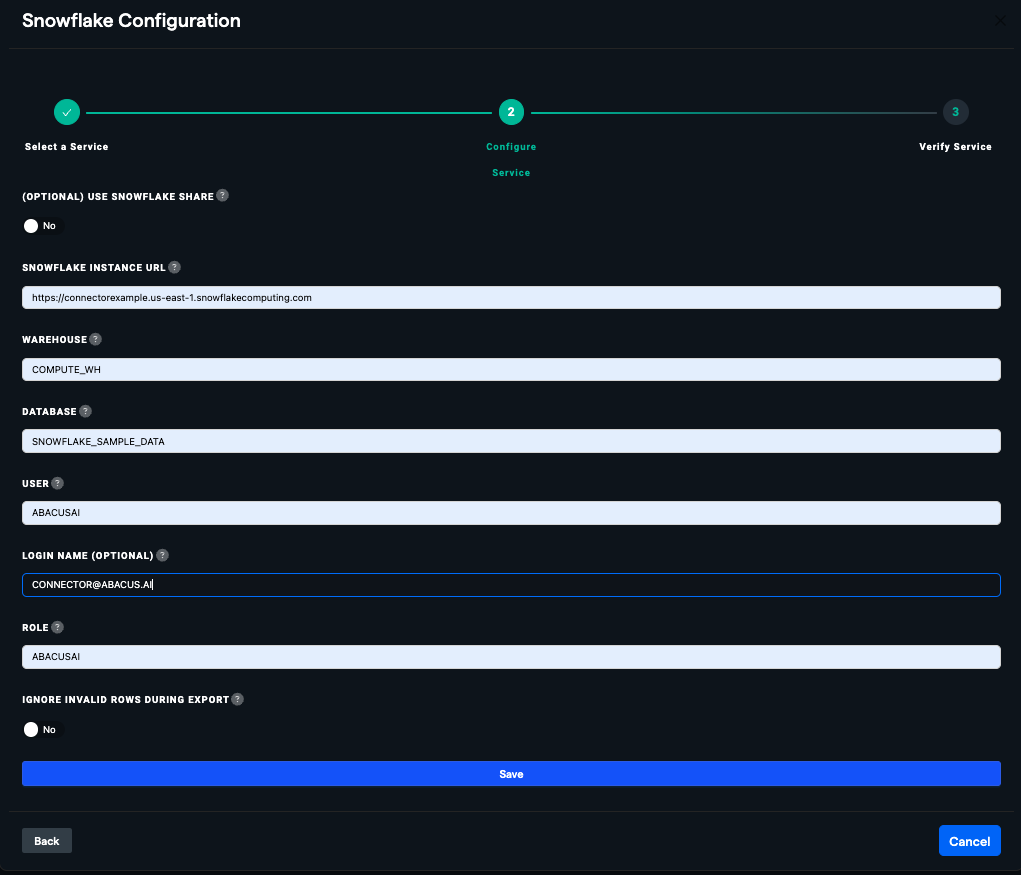
Gather Required Information:
-
SNOWFLAKE INSTANCE URL: Click on your account ID, the eight-digit alphanumeric code located at the bottom-left corner of your Snowflake homepage. Then, hover over the resulting pop-up menu to reveal the "copy account URL" button, resembling a paperclip. Your unique URL generally takes this form:
https://<domain>.<region>.snowflakecomputing.com, but may include additional components. This full URL is required for the connection.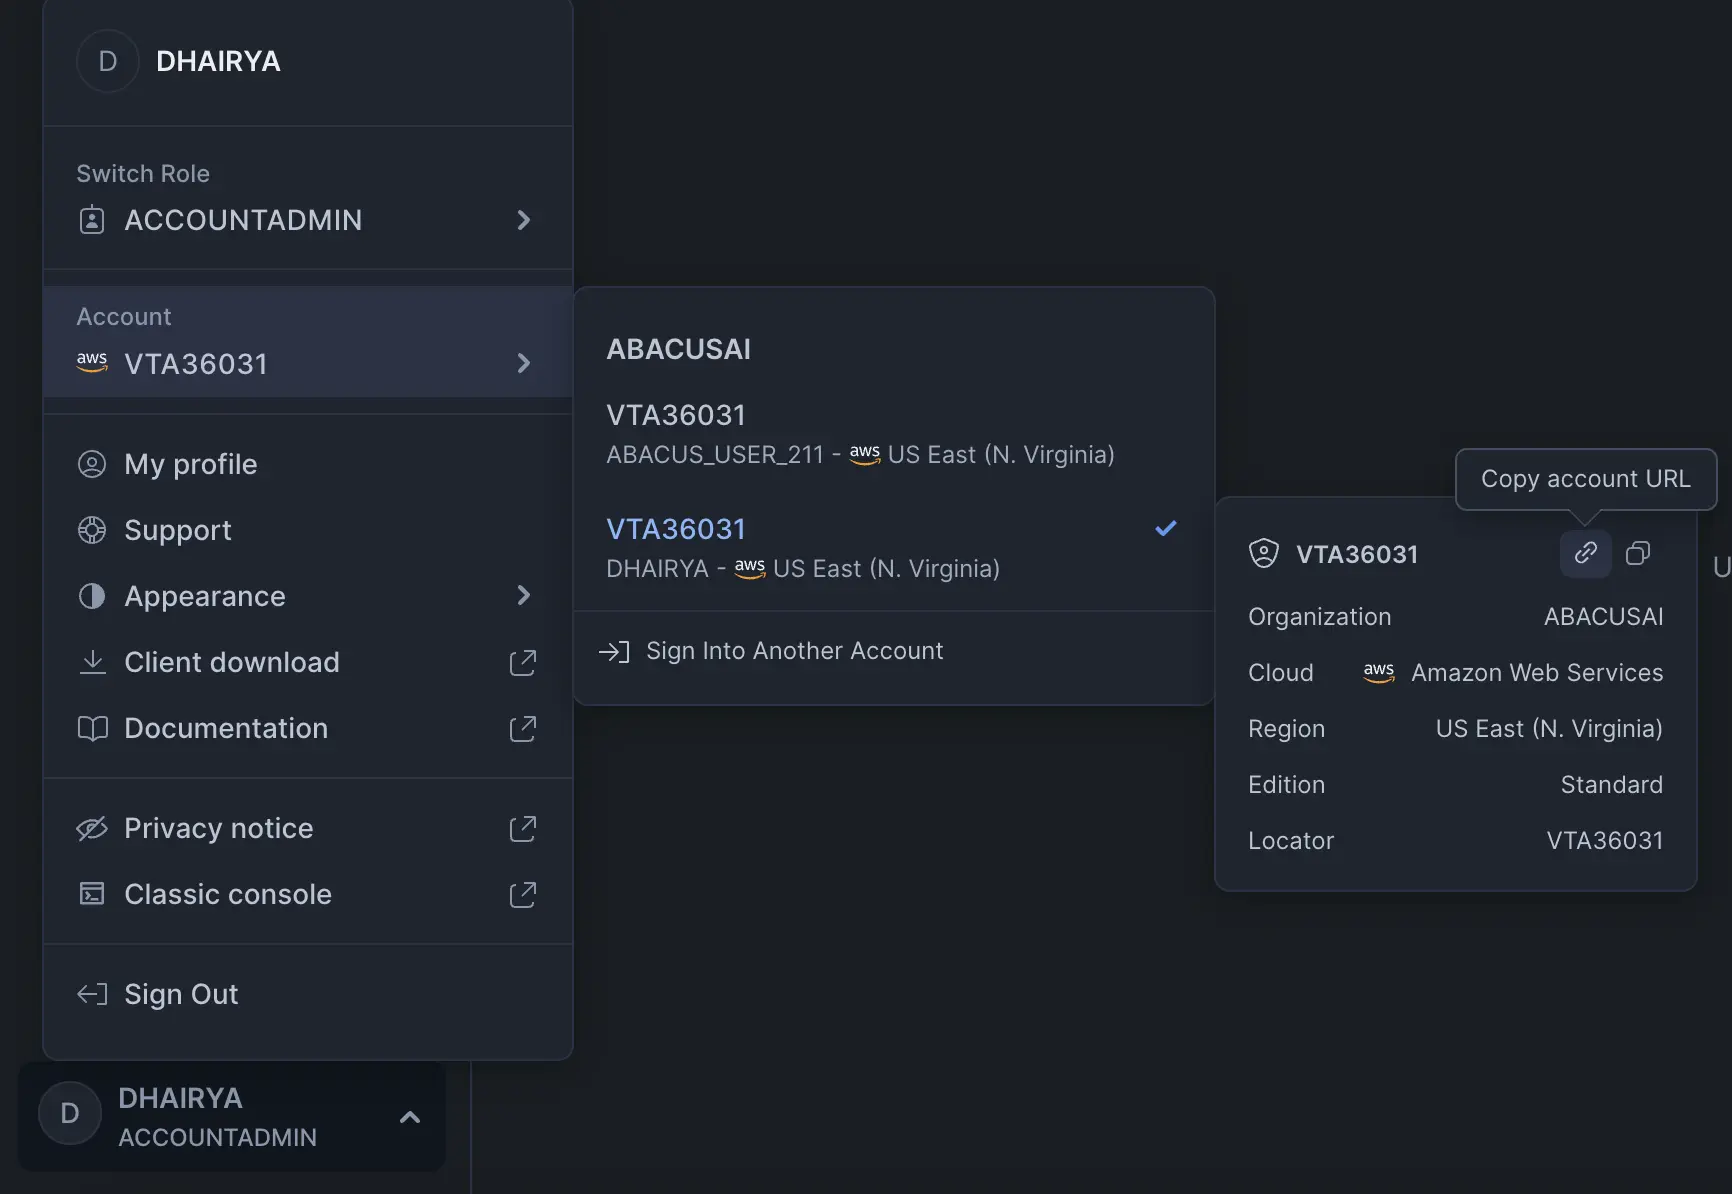
-
WAREHOUSE: Pick the Snowflake warehouse you wish to connect to. You can find the list of warehouses by using the command
SHOW WAREHOUSESin a Snowflake SQL worksheet. The warehouse is the compute resource in Snowflake.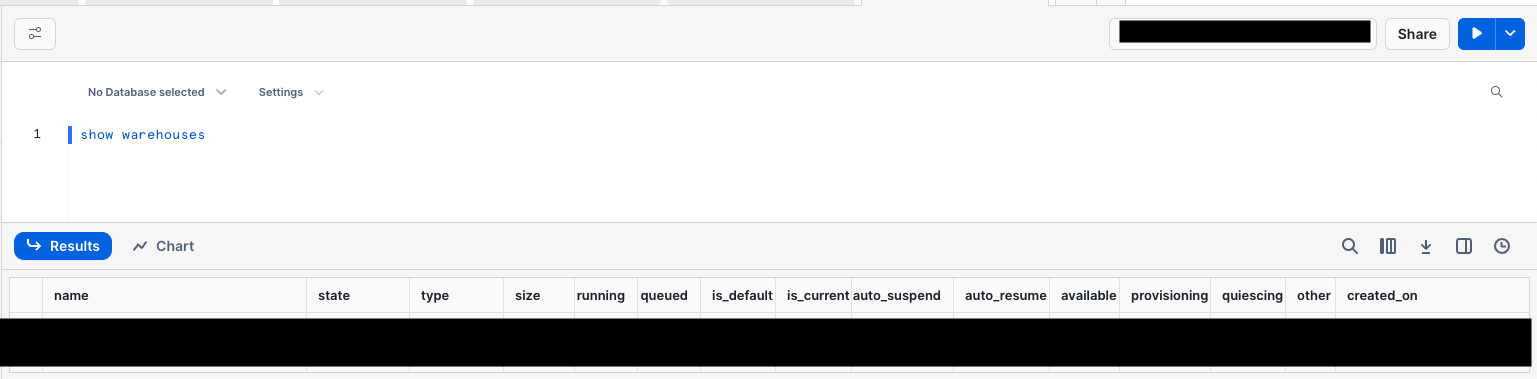
-
DATABASE: Pick the Snowflake database that houses the data you wish to access. You can find the list of databases by using the command
SHOW DATABASESin a Snowflake SQL worksheet. The database is where your data is stored.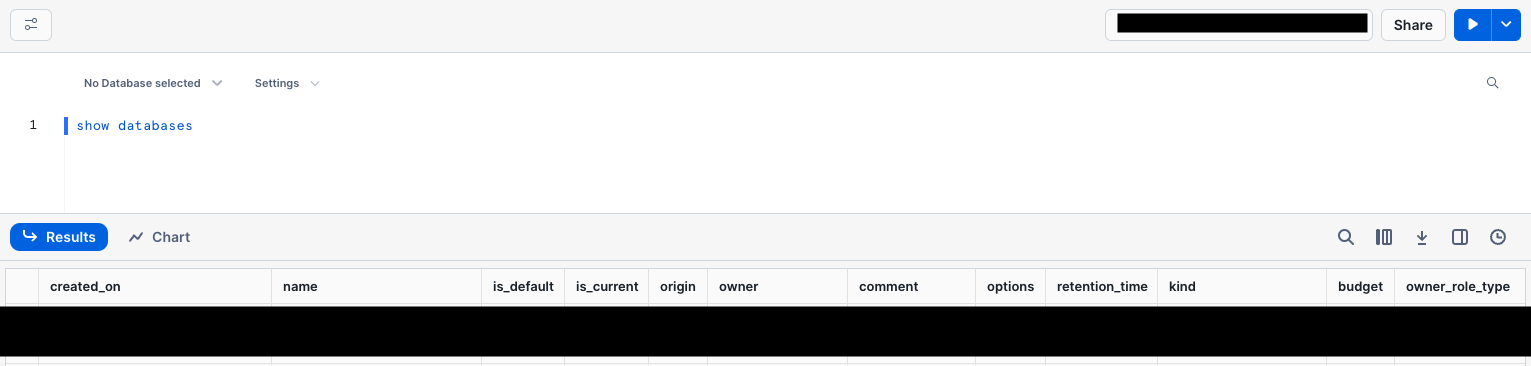
- USER: Pick any string for a unique user name to be created specifically for Abacus.AI. "ABACUSAI" is commonly used, but is not required to be the user name. This user will be used to connect to Snowflake.
- LOGIN NAME (OPTIONAL): Enter the login name if it differs from the username. This field is optional and can be left blank if the login name and username are the same.
- ROLE: Pick an existing role or choose any string as a unique name for the role you'd like Abacus.AI to occupy. Abacus.AI will generate a create statement for you to run if the role doesn't yet exist. The role defines the permissions for accessing data.
-
-
Access Abacus.AI Connected Services Dashboard:
-
Go to the Abacus.AI Connected Services Dashboard. At the top-right of the page, click "Add New Connector" and select "Snowflake".
-
-
Enter Snowflake Details:
- Fill out the gathered information into the Snowflake connector window and click
Save.
- Fill out the gathered information into the Snowflake connector window and click
-
Run Command in Snowflake:
-
You will get a pop-up with instructions to run a command in Snowflake. This command will create the necessary user and role for Abacus.AI.
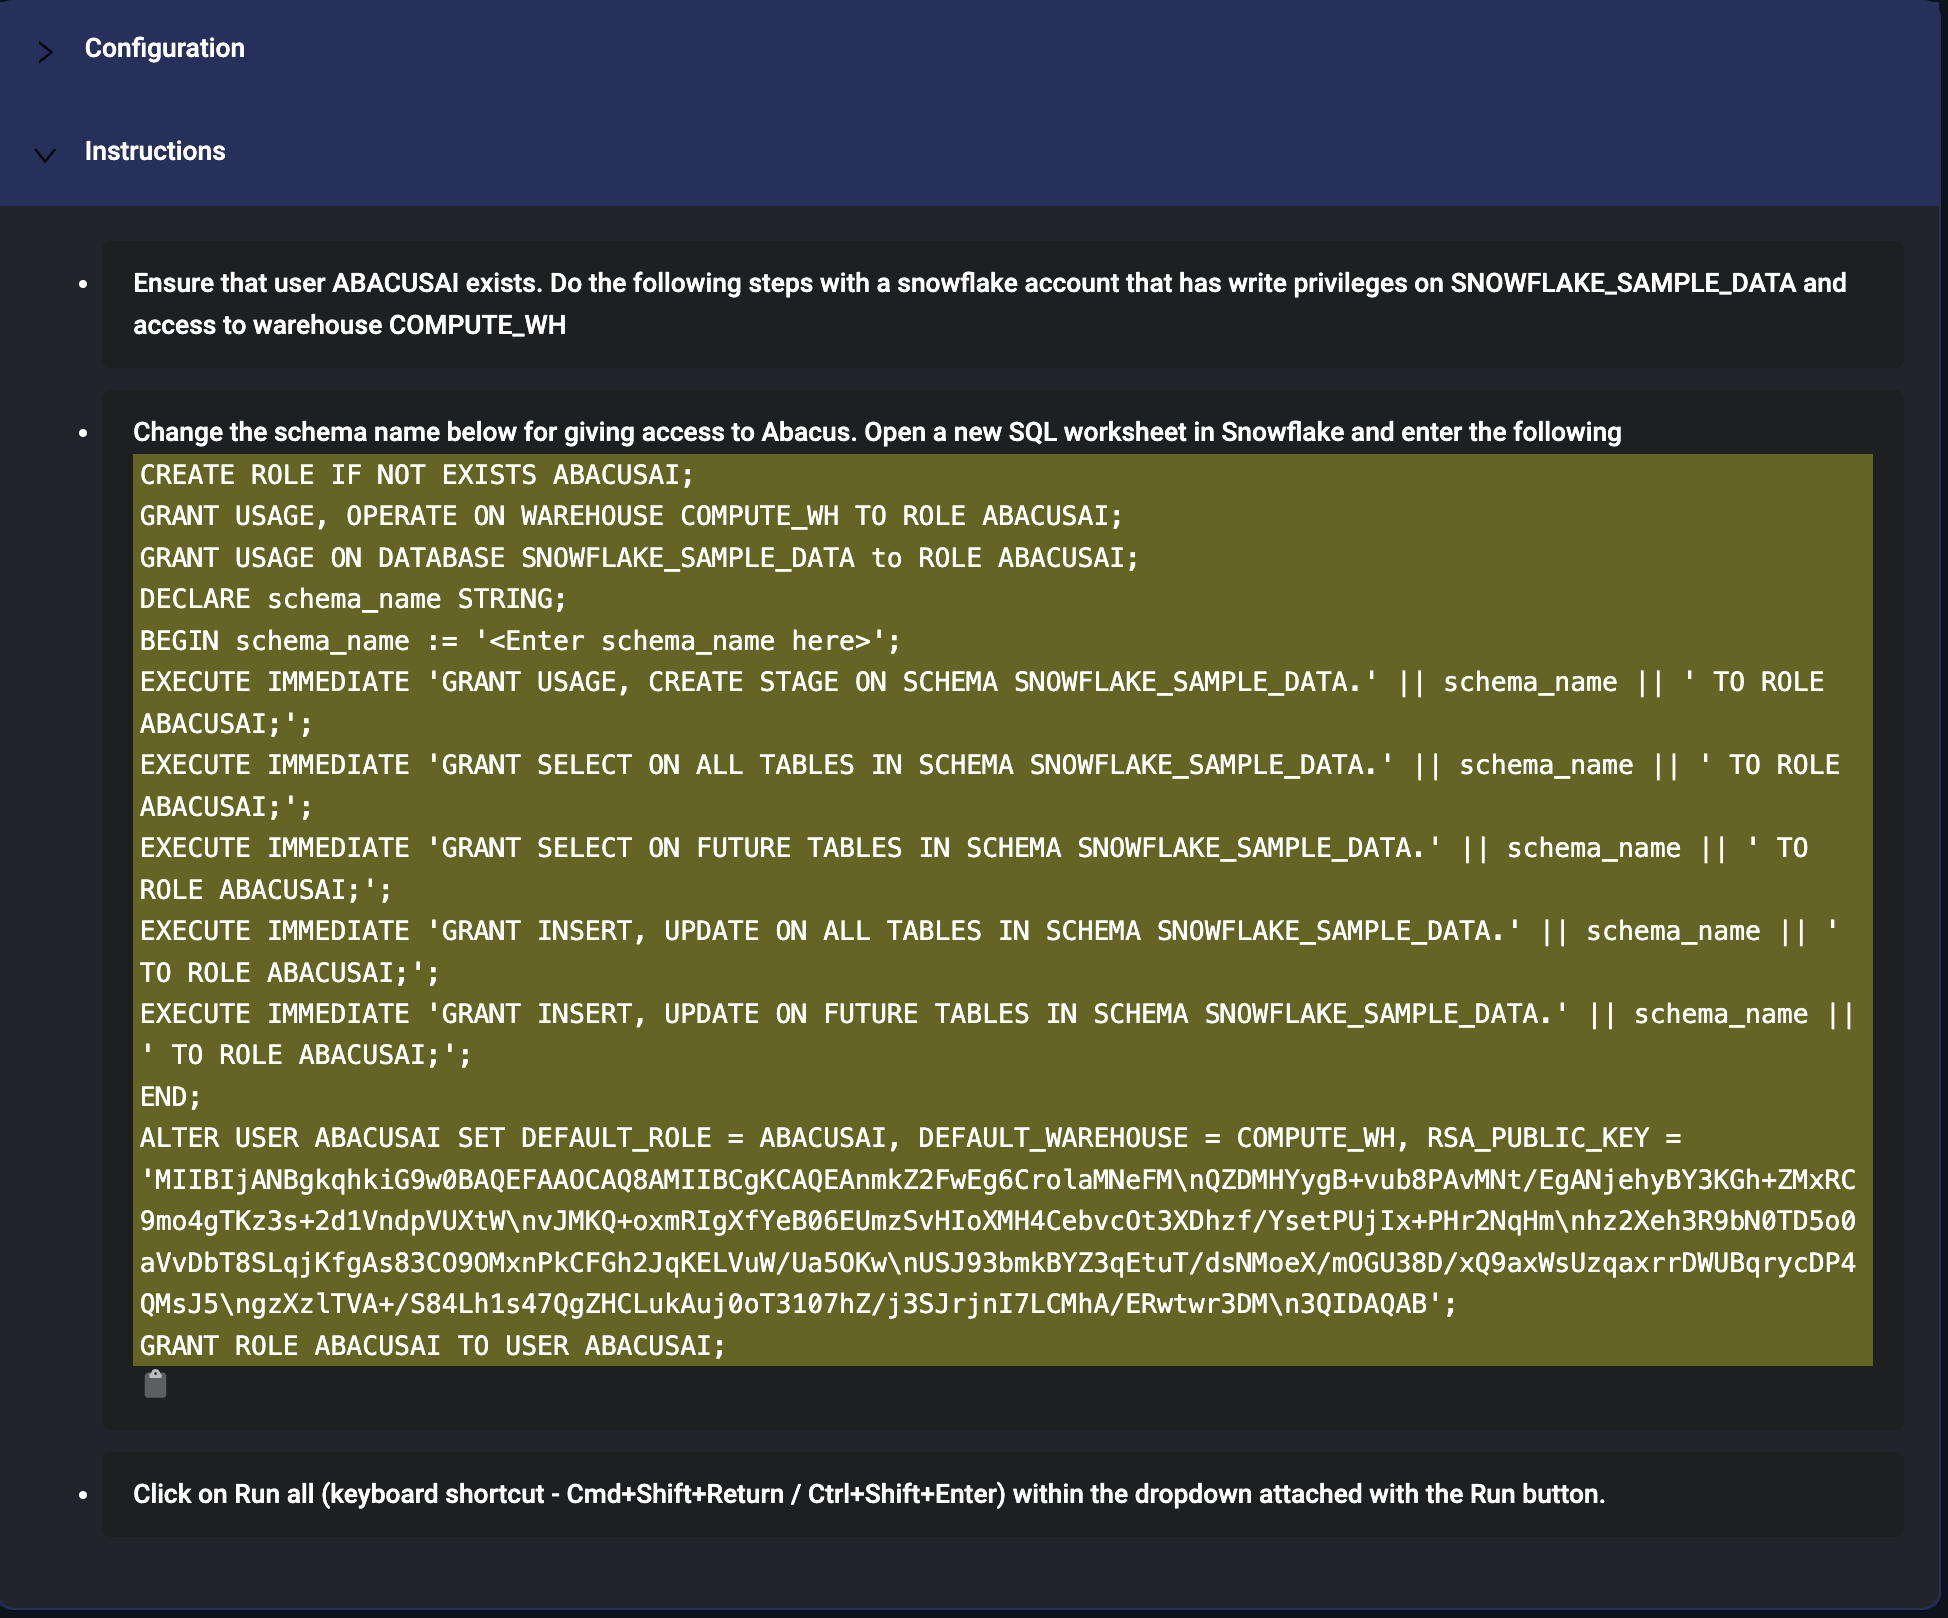
- Note: You need to have sufficient permissions to create and authorize the user and role - e.g., ACCOUNTADMIN.
-
-
Replace Schema Name:
- Replace the string
<Enter schema_name here>in the commands with a schema in your chosen database you wish to allow Abacus.AI to read from.
- Replace the string
-
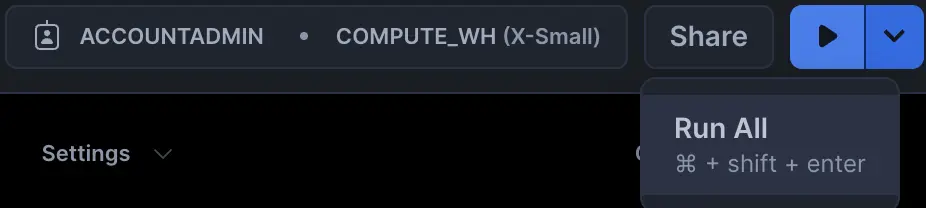
Execute Command in Snowflake:
-
Copy the command from the pop-up and paste it in your Snowflake instance. Use the "Run all" button as shown in the image.
-
-
Verify Connector Setup:
- Finally, hit the "Verify Now" button below the instructions. After this point, you will have successfully set up a Snowflake connector.
RBAC Flow for Snowflake
The Snowflake connector now supports mimicking user permissions by querying using the user’s access token. This requires each user to connect using OAuth to access a DataLLM based on a connector with RBAC enabled.
-
If you would like to use the RBAC Flow for Snowflake, enable the "ENABLE RBAC" toggle.
-
SNOWFLAKE INSTANCE URL: Click on your account ID, the eight-digit alphanumeric code located at the bottom-left corner of your Snowflake homepage. Then, hover over the resulting pop-up menu to reveal the "copy account URL" button, resembling a paperclip. Your unique URL generally takes this form:
https://<domain>.<region>.snowflakecomputing.com, but may include additional components. This full URL is required for the connection.
-
Creating client secret and client ID:
- Create a security integration.
CREATE SECURITY INTEGRATION IF NOT EXISTS abacusaiTYPE = OAUTH ENABLED = TRUEOAUTH_CLIENT = CUSTOMOAUTH_CLIENT_TYPE = 'CONFIDENTIAL'OAUTH_REDIRECT_URI = 'https://abacus.ai/oauth/callback'OAUTH_ISSUE_REFRESH_TOKENS = TRUEOAUTH_REFRESH_TOKEN_VALIDITY = 7776000COMMENT = 'abacusai snowflake security integration'- Fetch client ID and secret.
SELECT SYSTEM$SHOW_OAUTH_CLIENT_SECRETS('{security_integration_name}')- Copy the client ID and client secret, and paste them into the respective fields.
-
User Permissions in DataLLM:
- A DataLLM chat will use the permissions of the role specified for the connector by default.
- If the chat is connected to an RBAC-enabled connector, the individual user’s permissions will be used instead. This requires the user to link their account via OAuth.
-
OAuth Linking for Users:
- Each user must link their Snowflake account via OAuth to use the RBAC-enabled connector.
- The user’s Snowflake connector will appear alongside other user-level connectors in the Connectors List at
<workspace>.abacus.ai/chatllm/admin/connectors-list/.
-
RBAC Flow in Action:
- When a user queries a DataLLM connected to an RBAC-enabled Snowflake connector, the system will use the user’s access token to determine their permissions.
- This ensures that only the data the user has access to in Snowflake is queryable in Abacus.AI.
Setup Instructions - Snowflake Share
If using Snowflake Share, please follow these setup instructions:
-
Create a new Snowflake Share:
-
Within Snowflake, under "Data Products" select "Private Sharing."
-
Click "Share" and select "Create a Direct Share".
-
In the pop-up, select the data that you wish to share and provide a Secure Share Identifier for that package.
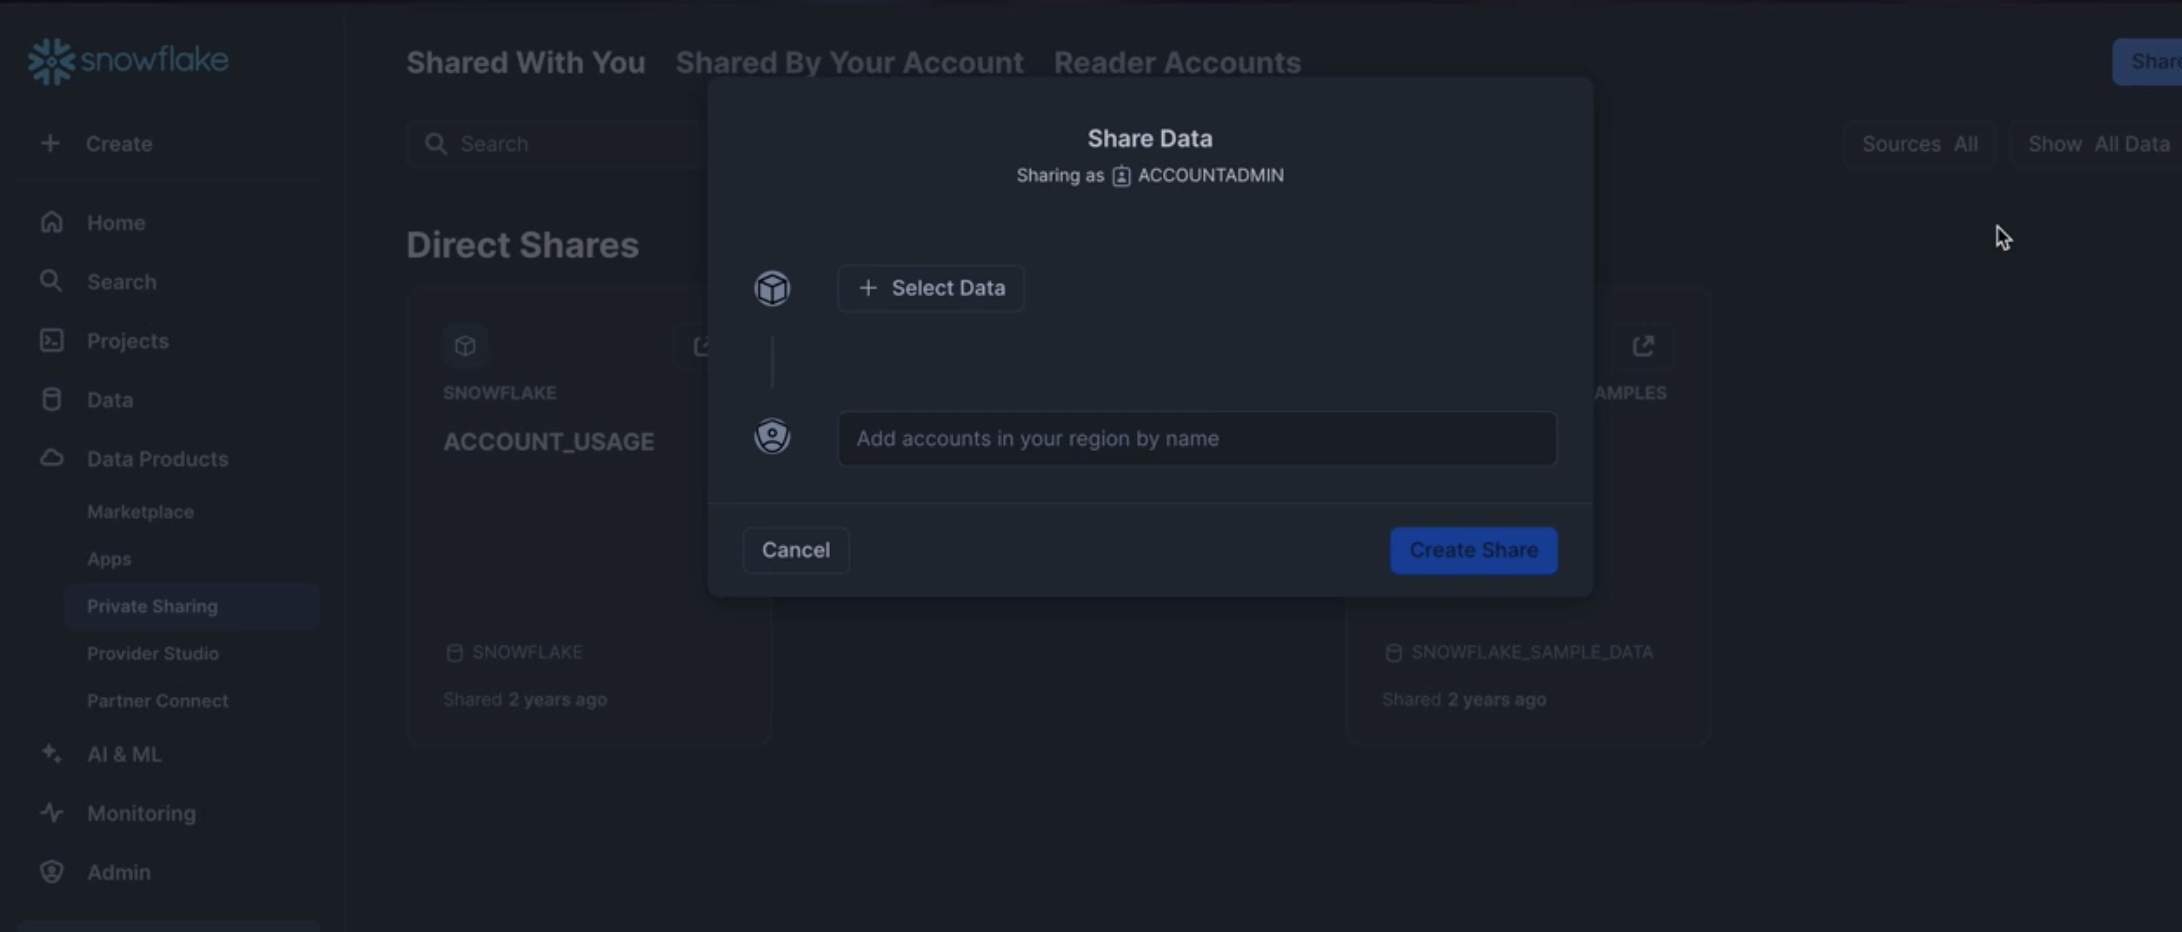
- Click "Create Share"
-
-
Gather Required Information from Snowflake:
-
Cloud Provider: Select the cloud provider hosting your Snowflake instance.
-
Cloud Region: The cloud region of the source Snowflake account.
-
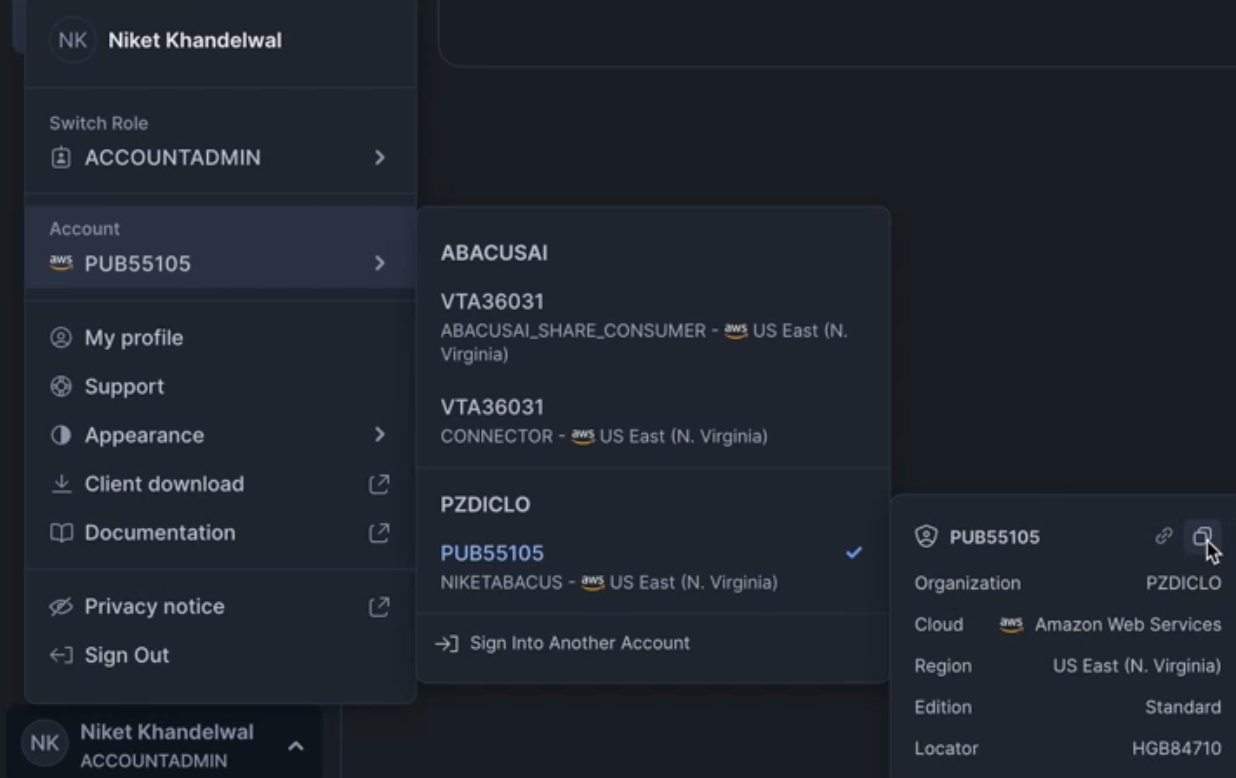
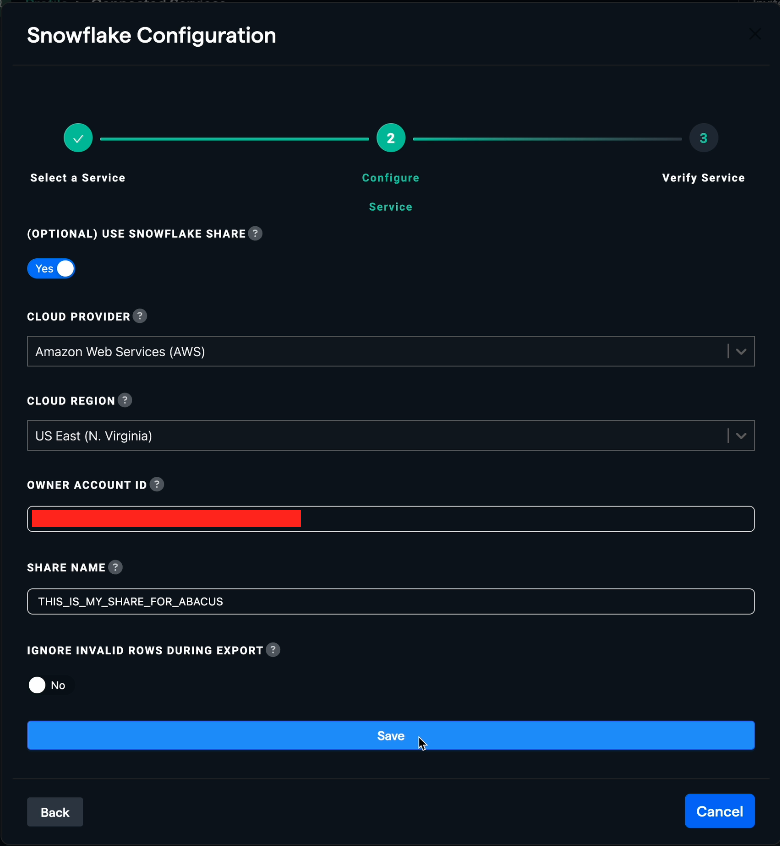
Owner Account ID: Click on your account ID, the eight-digit alphanumeric code located at the bottom-left corner of your Snowflake homepage. Then, hover over the resulting pop-up menu to reveal the "copy account identifier" button, resembling two squares.
- Share Name: The Secure Share Identifier from step 1.
-
-
Access Abacus.AI Connected Services Dashboard:
-
Go to the Abacus.AI Connected Services Dashboard. At the top-right of the page, click "Add New Connector" and select "Snowflake". Toggle "(OPTIONAL) USE SNOWFLAKE SHARE" to "Yes".
-
Enter Snowflake Details:
- Fill out the gathered information into the Snowflake connector window and click
Save.
- Fill out the gathered information into the Snowflake connector window and click
-
Run Command in Snowflake:
-
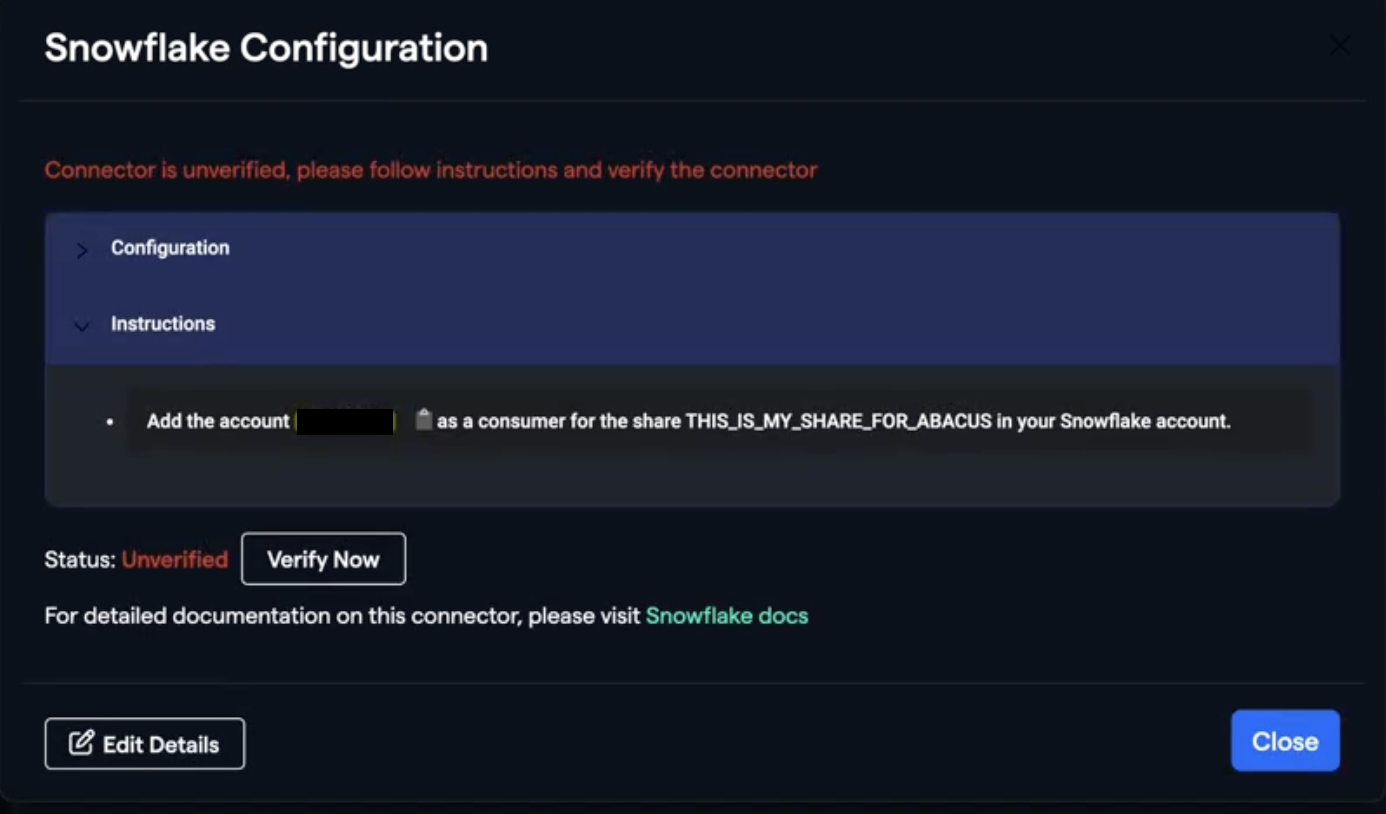
You will get a pop-up with instructions with an Account ID to add as a consumer in Snowflake.
-
-
Add Consumer:
-
Return to your Snowflake Share from step 1.
-
On the detail page of the share, next to Shared With, click on "Add Consumers."
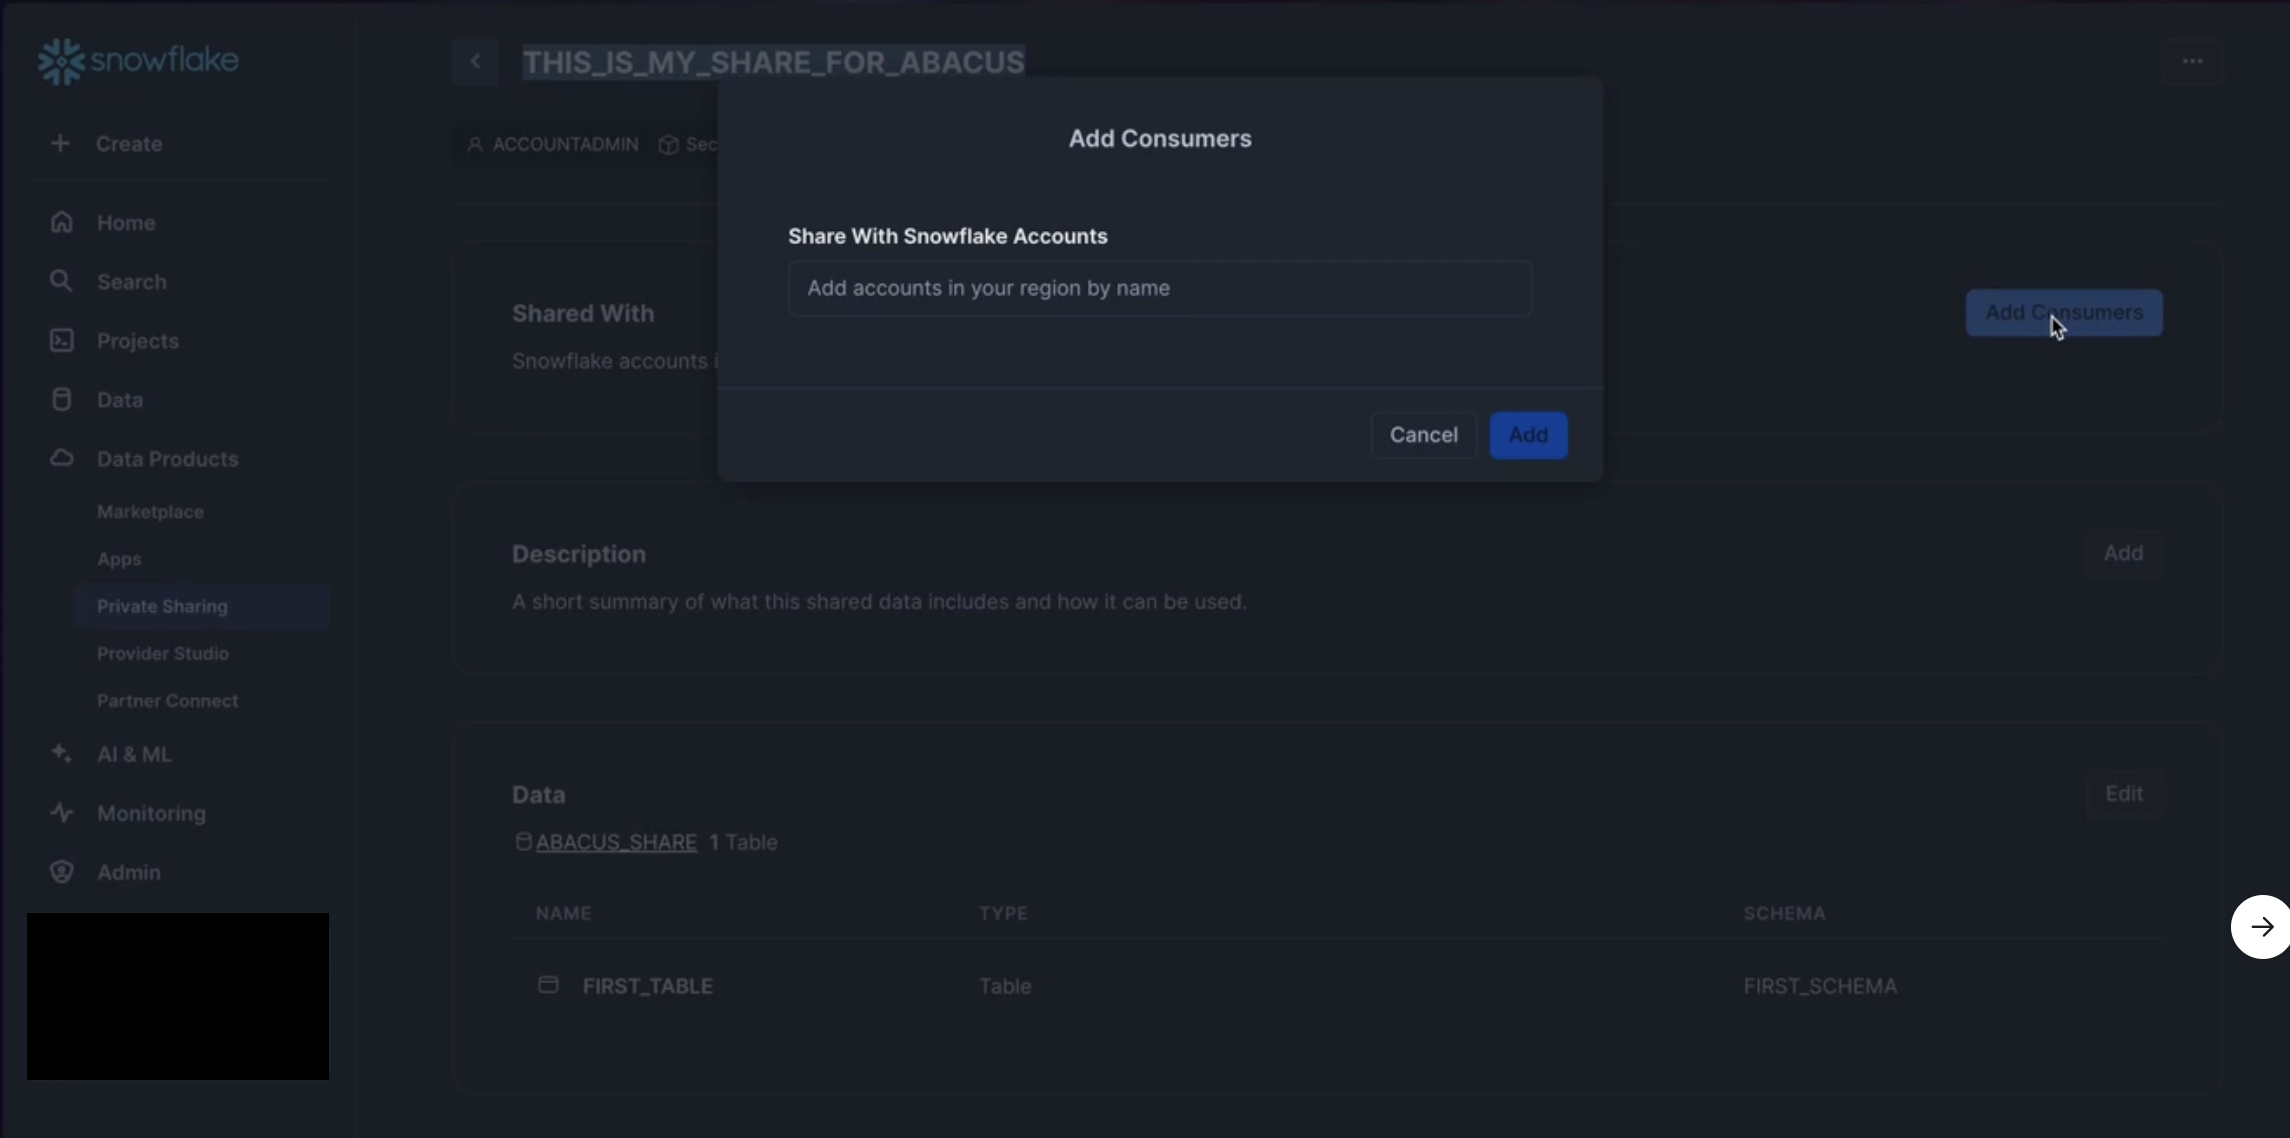
- Paste the Account ID from step 5 into the box under "Share With Snowflake Accounts."
- Click "Add"
-
-
Verify Connector Setup:
- Finally, back in Abacus.AI, hit the "Verify Now" button below the instructions in the Snowflake Configuration. After this point, you will have successfully set up a Snowflake Share connector.
How to Use the Snowflake Connector
Once the Snowflake connector is set up, you can fetch data to train models in Abacus.AI.
-
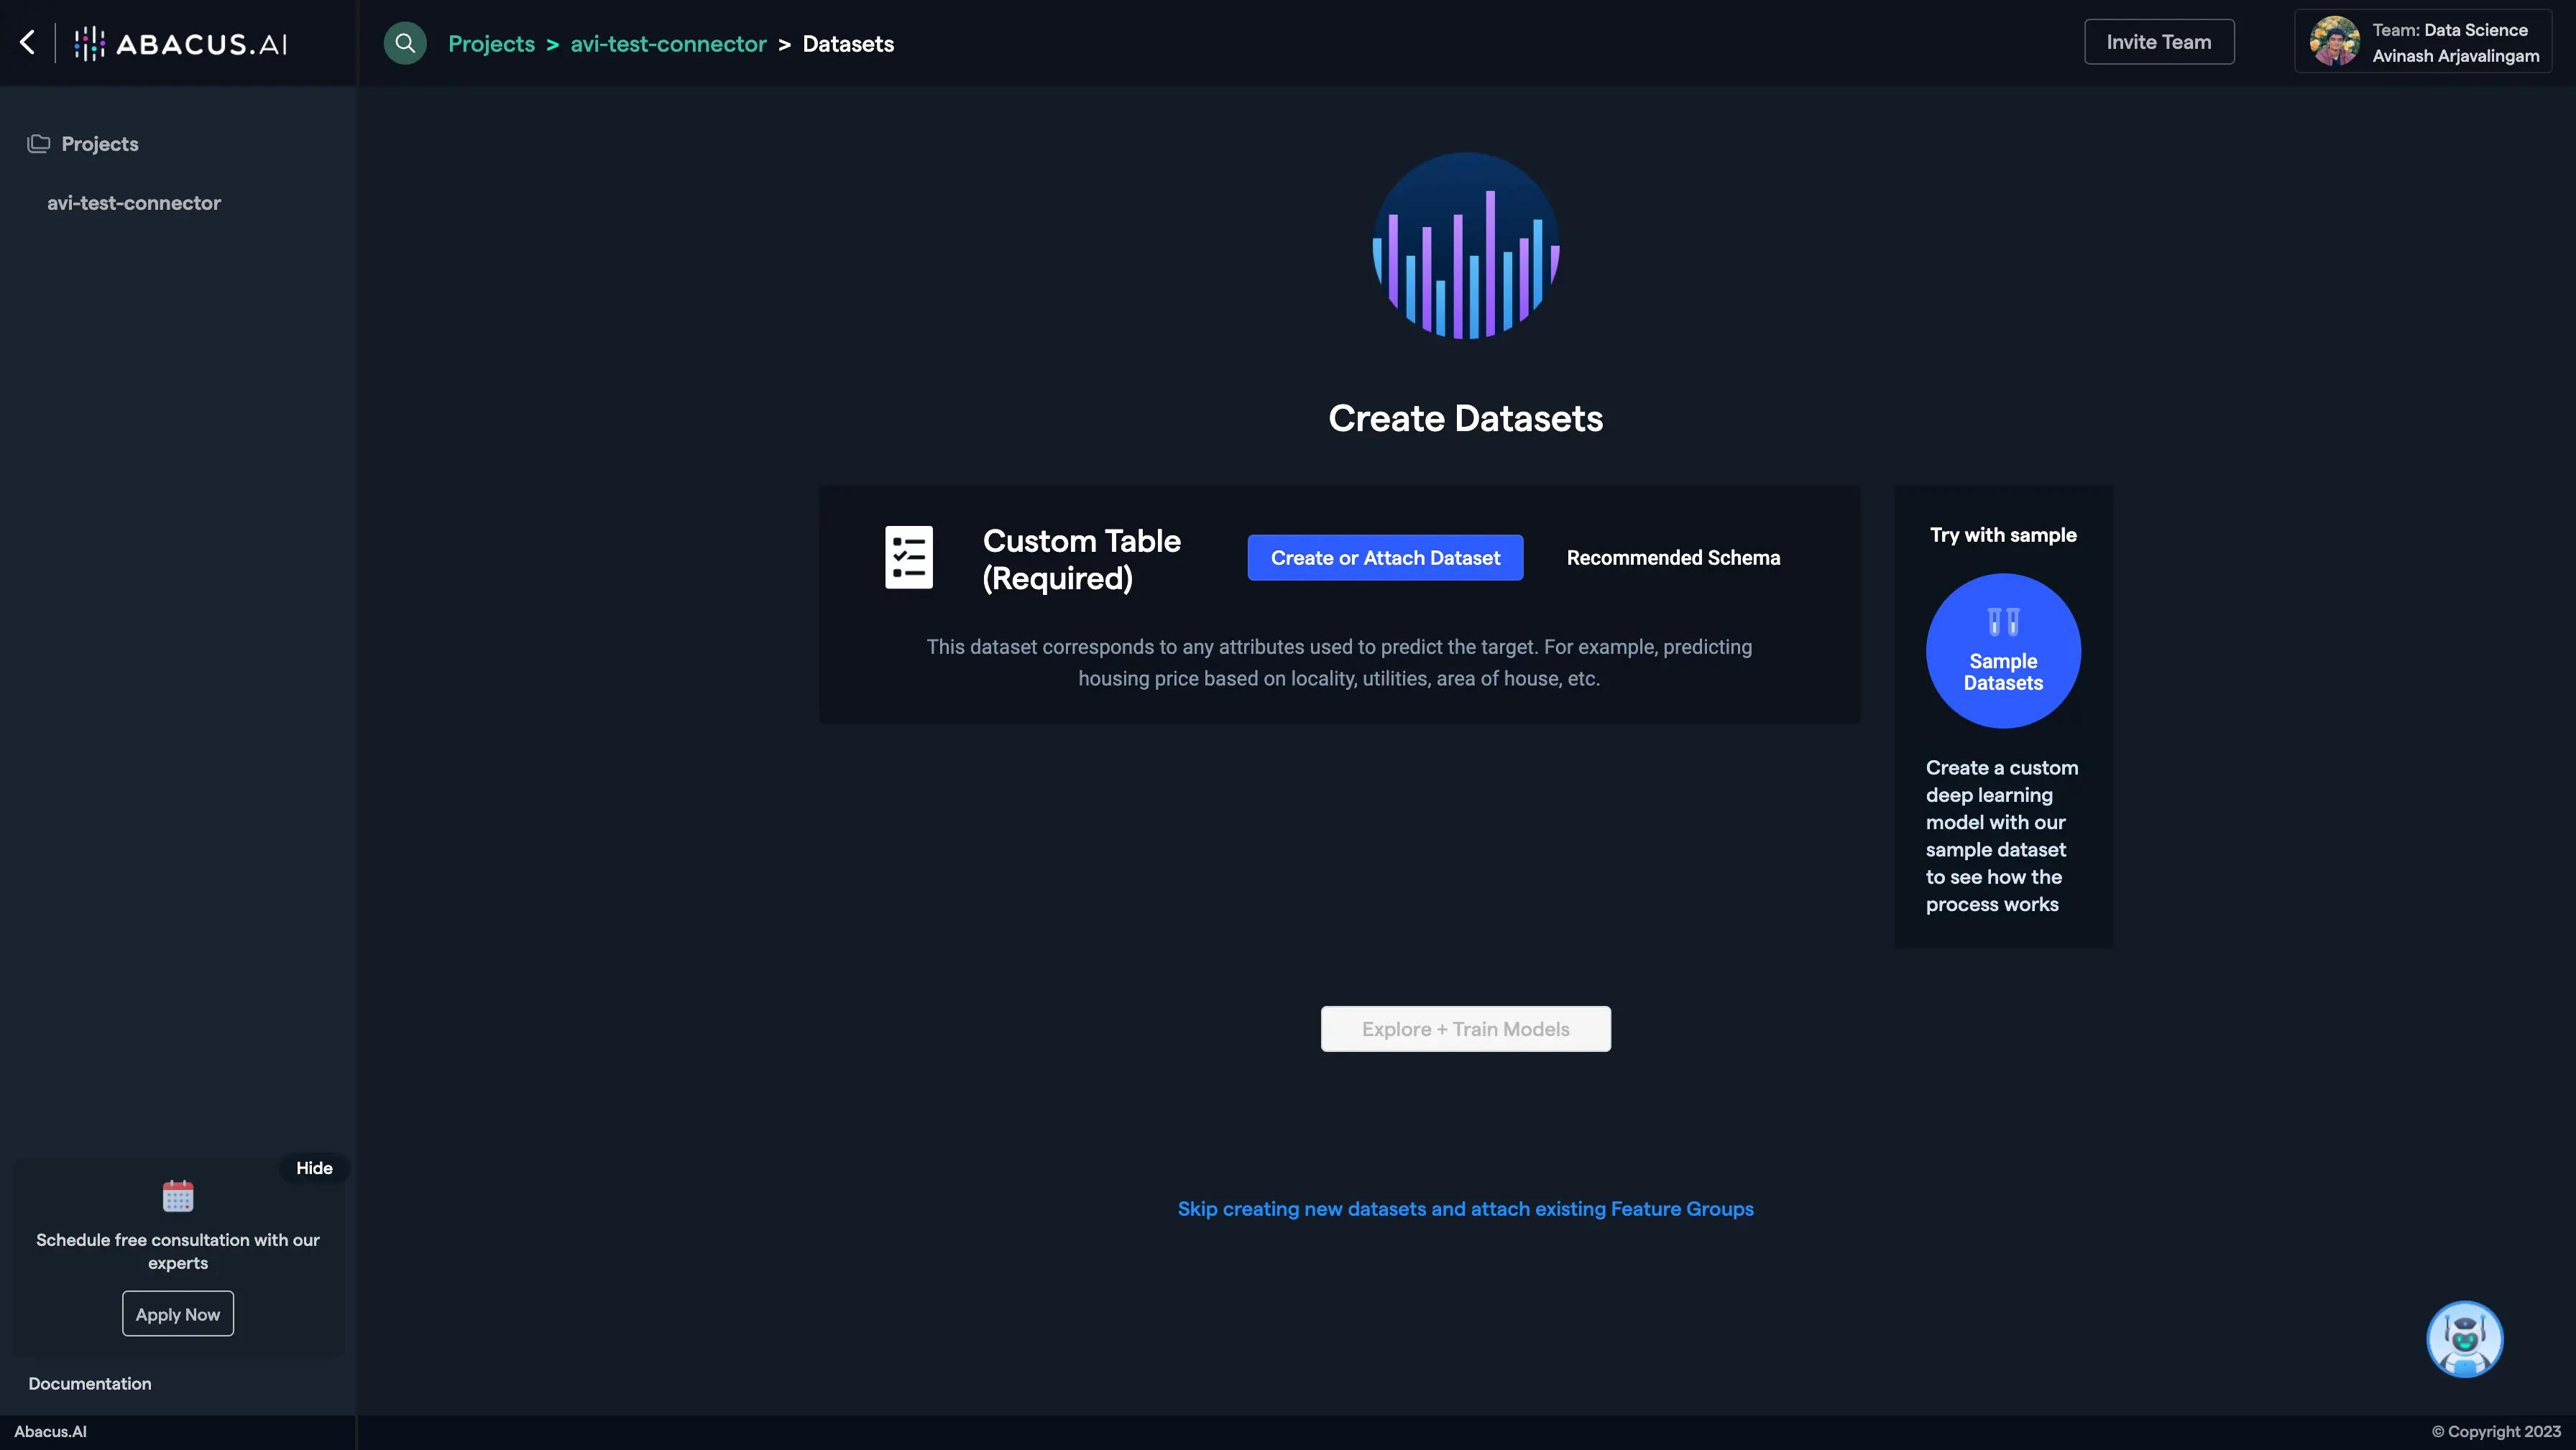
Create a New Project:
-
Create a new project and select the use case, then go to the "Datasets" tab and click "Create Dataset".
-
-
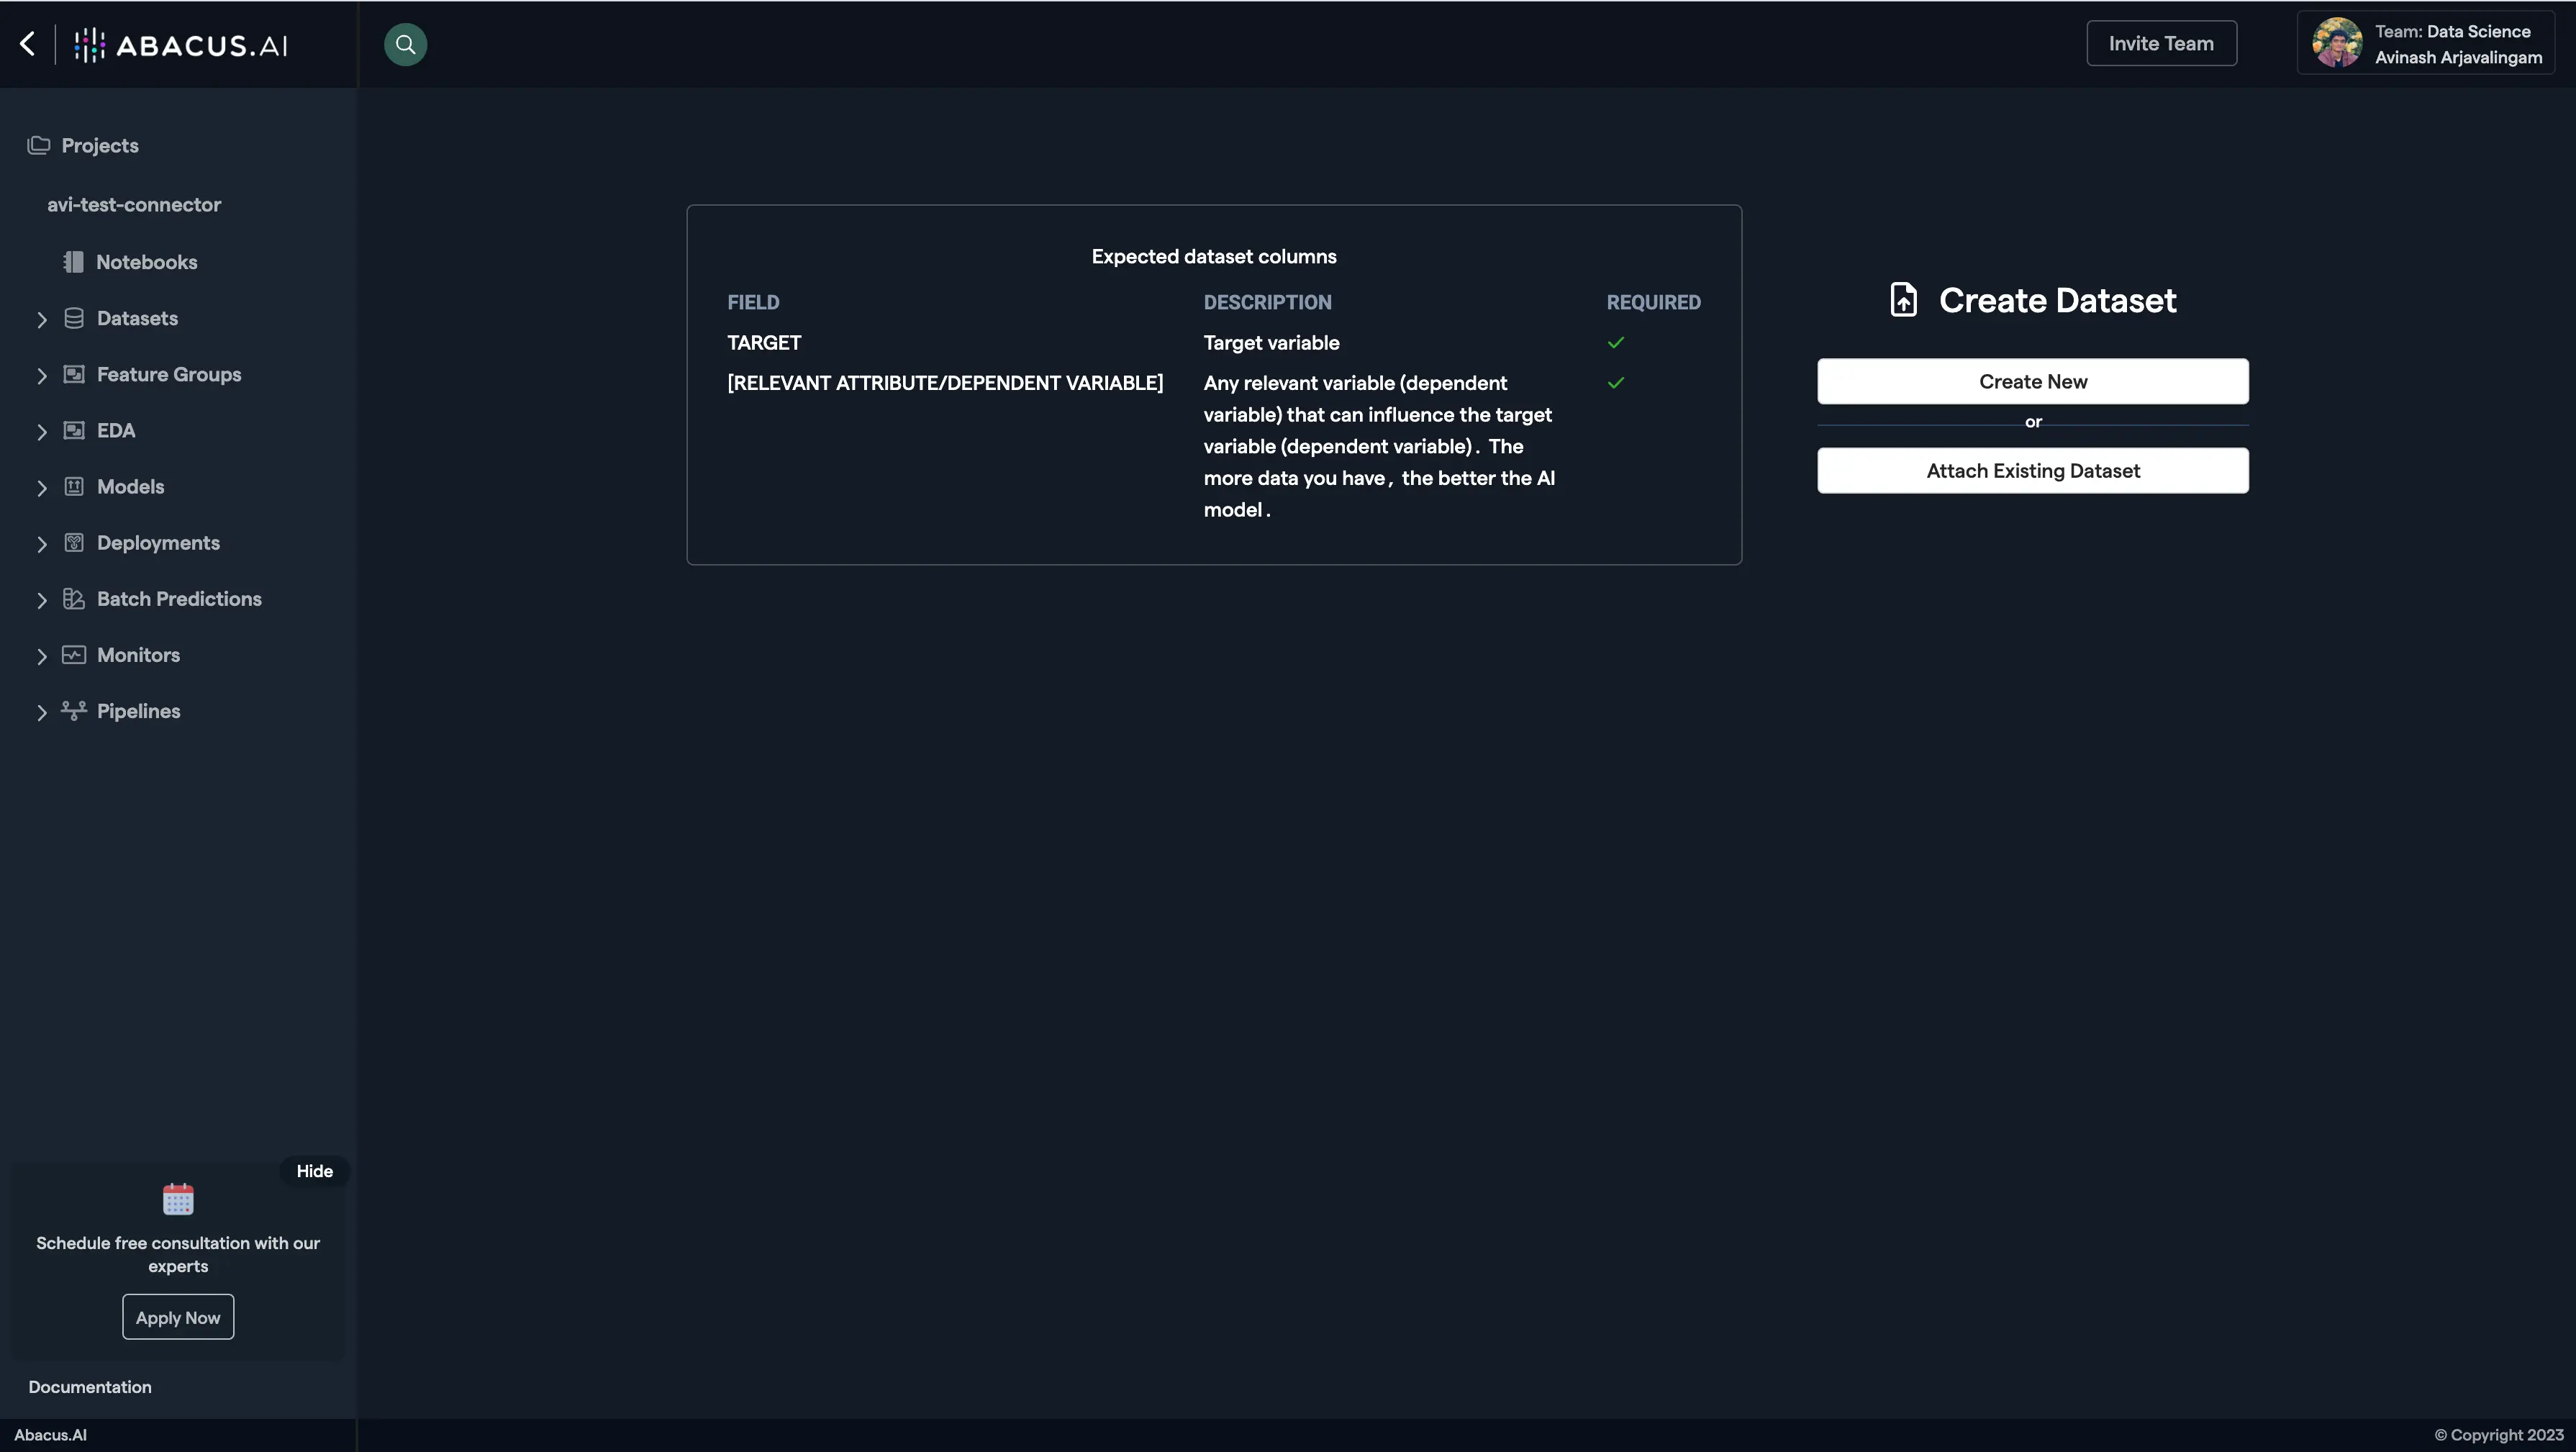
Create New Dataset:
- Click on "Create New".
-
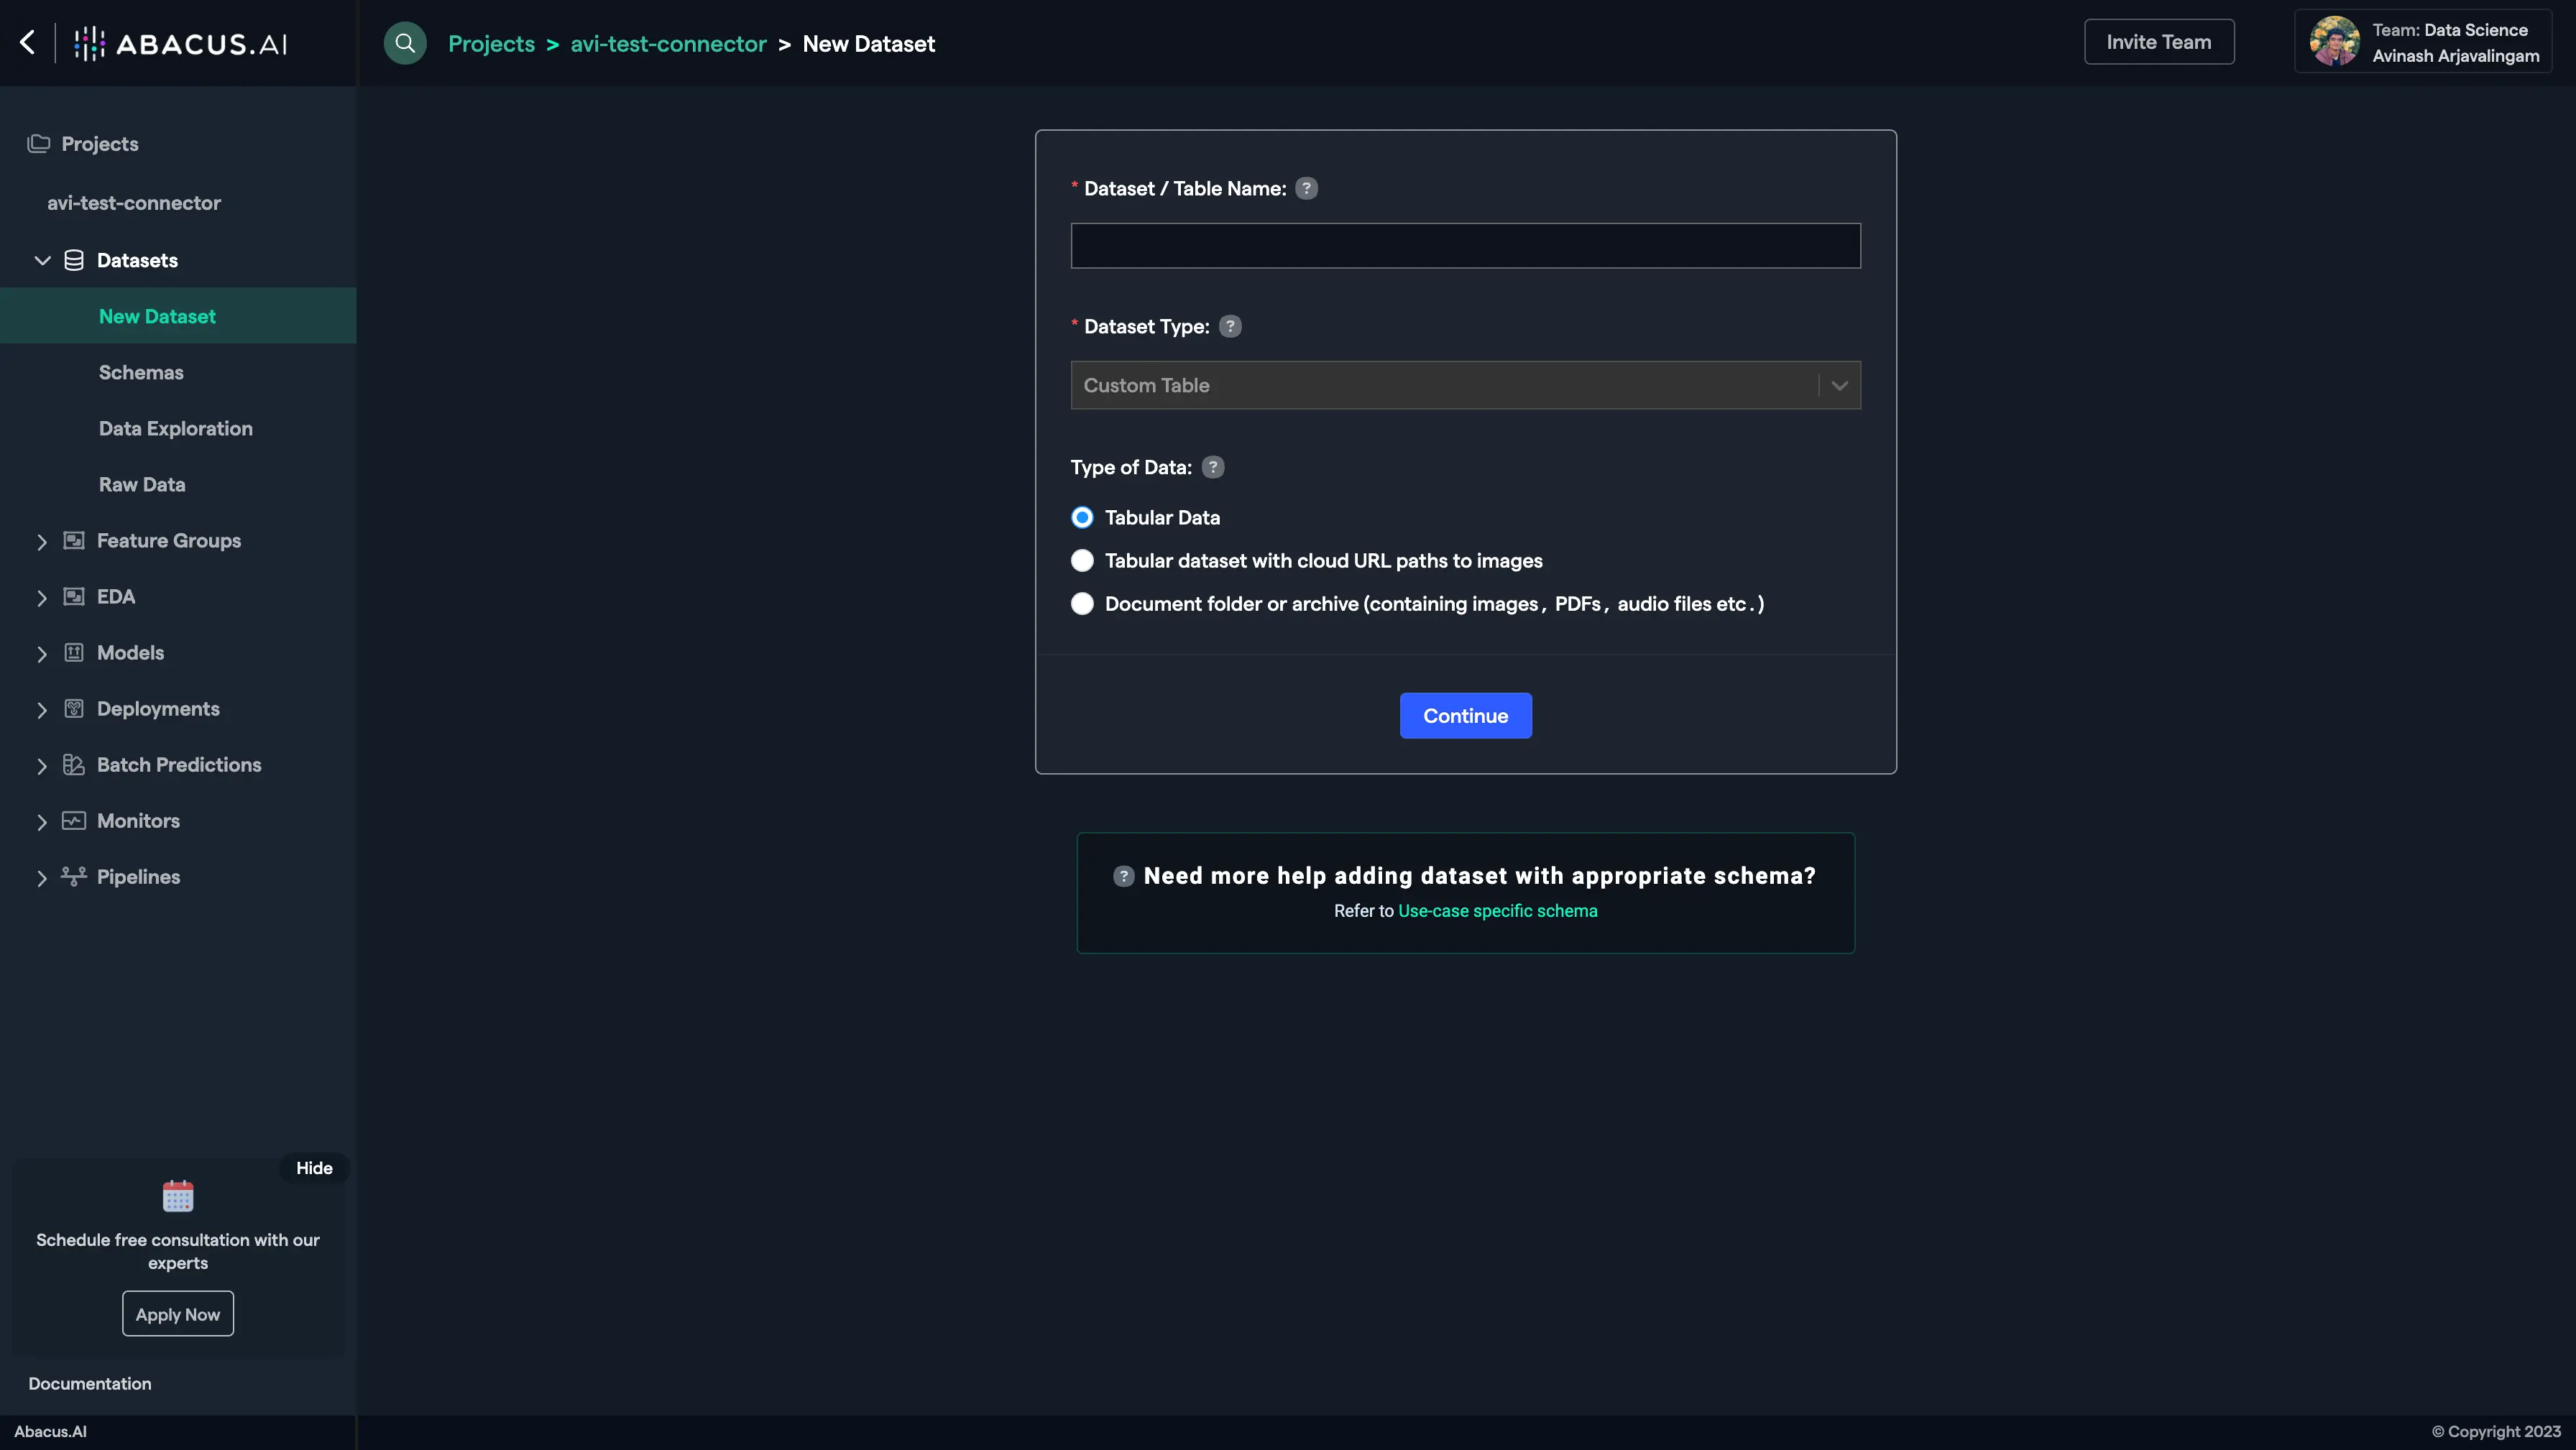
Name the Dataset:
-
Name the dataset, select the data type 'List of documents', and click "Continue".
-
-
Read from External Service:
- Choose "Read from External Service" and select your Snowflake connector under "Connected Application Connectors".
-
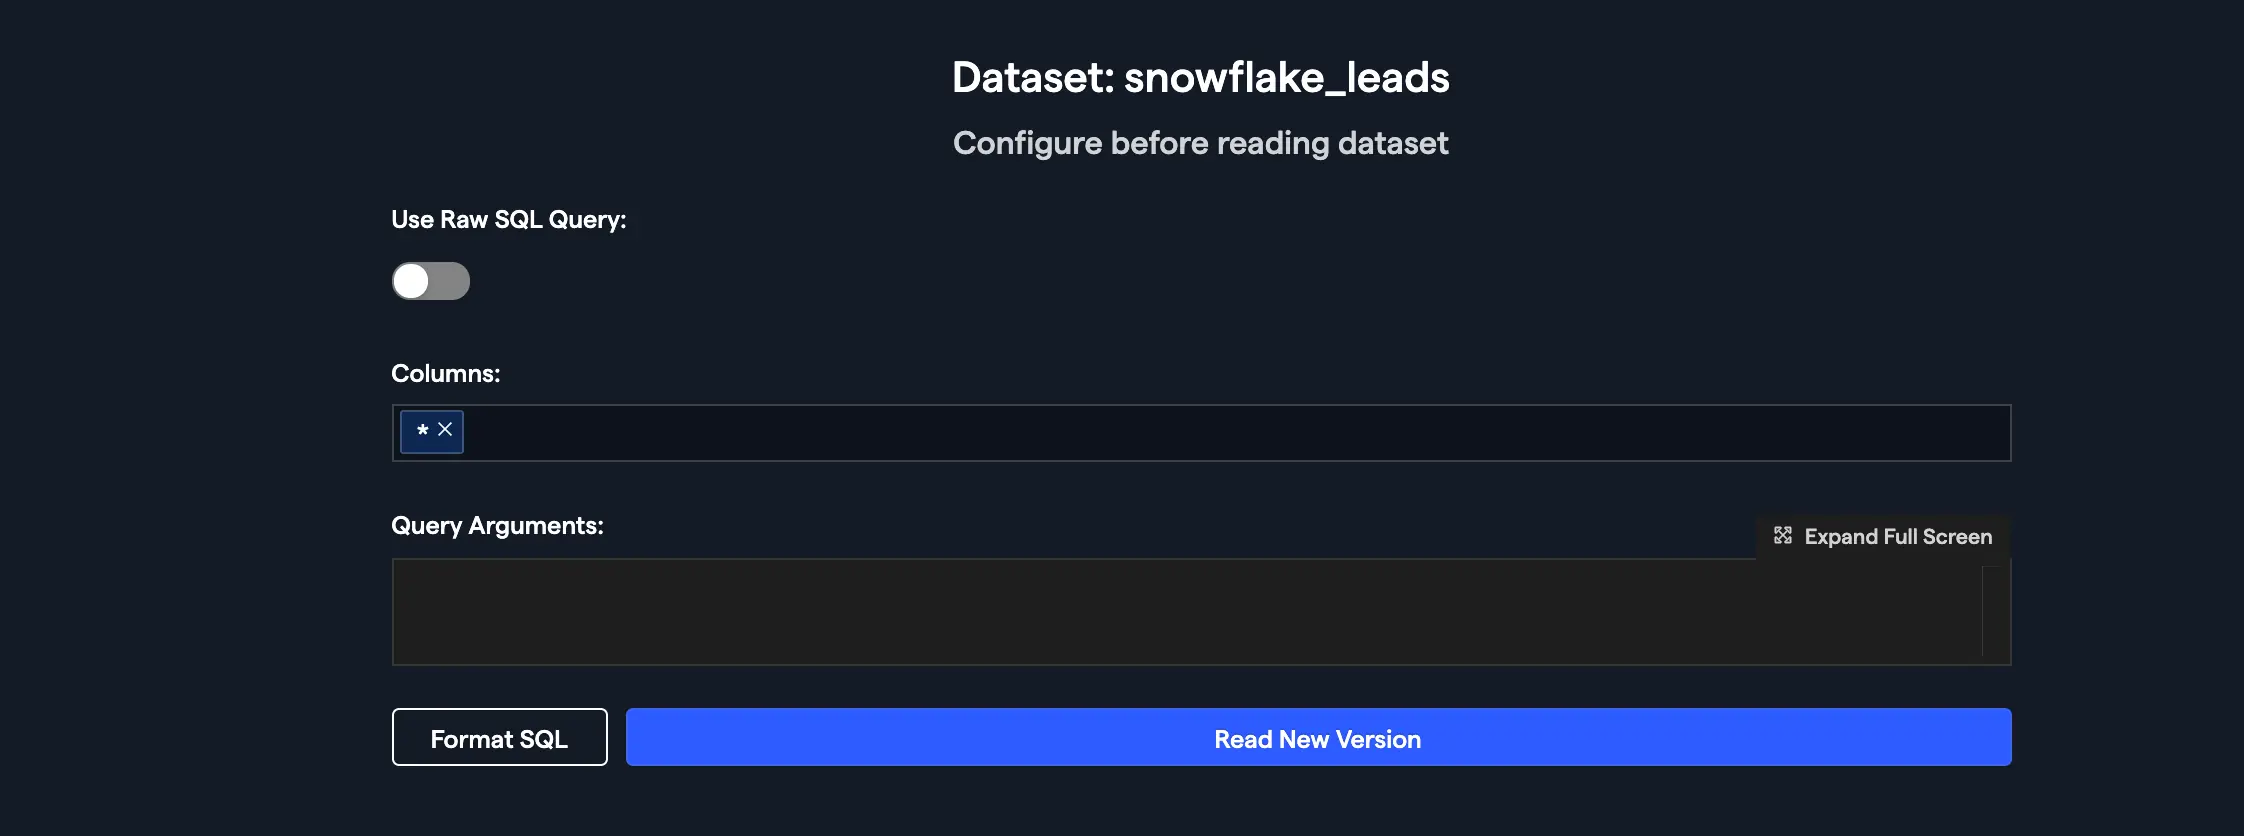
Enter Dataset Details:
- Enter the details for the Snowflake dataset you want to use.
-
Configure Schema Mapping:
-
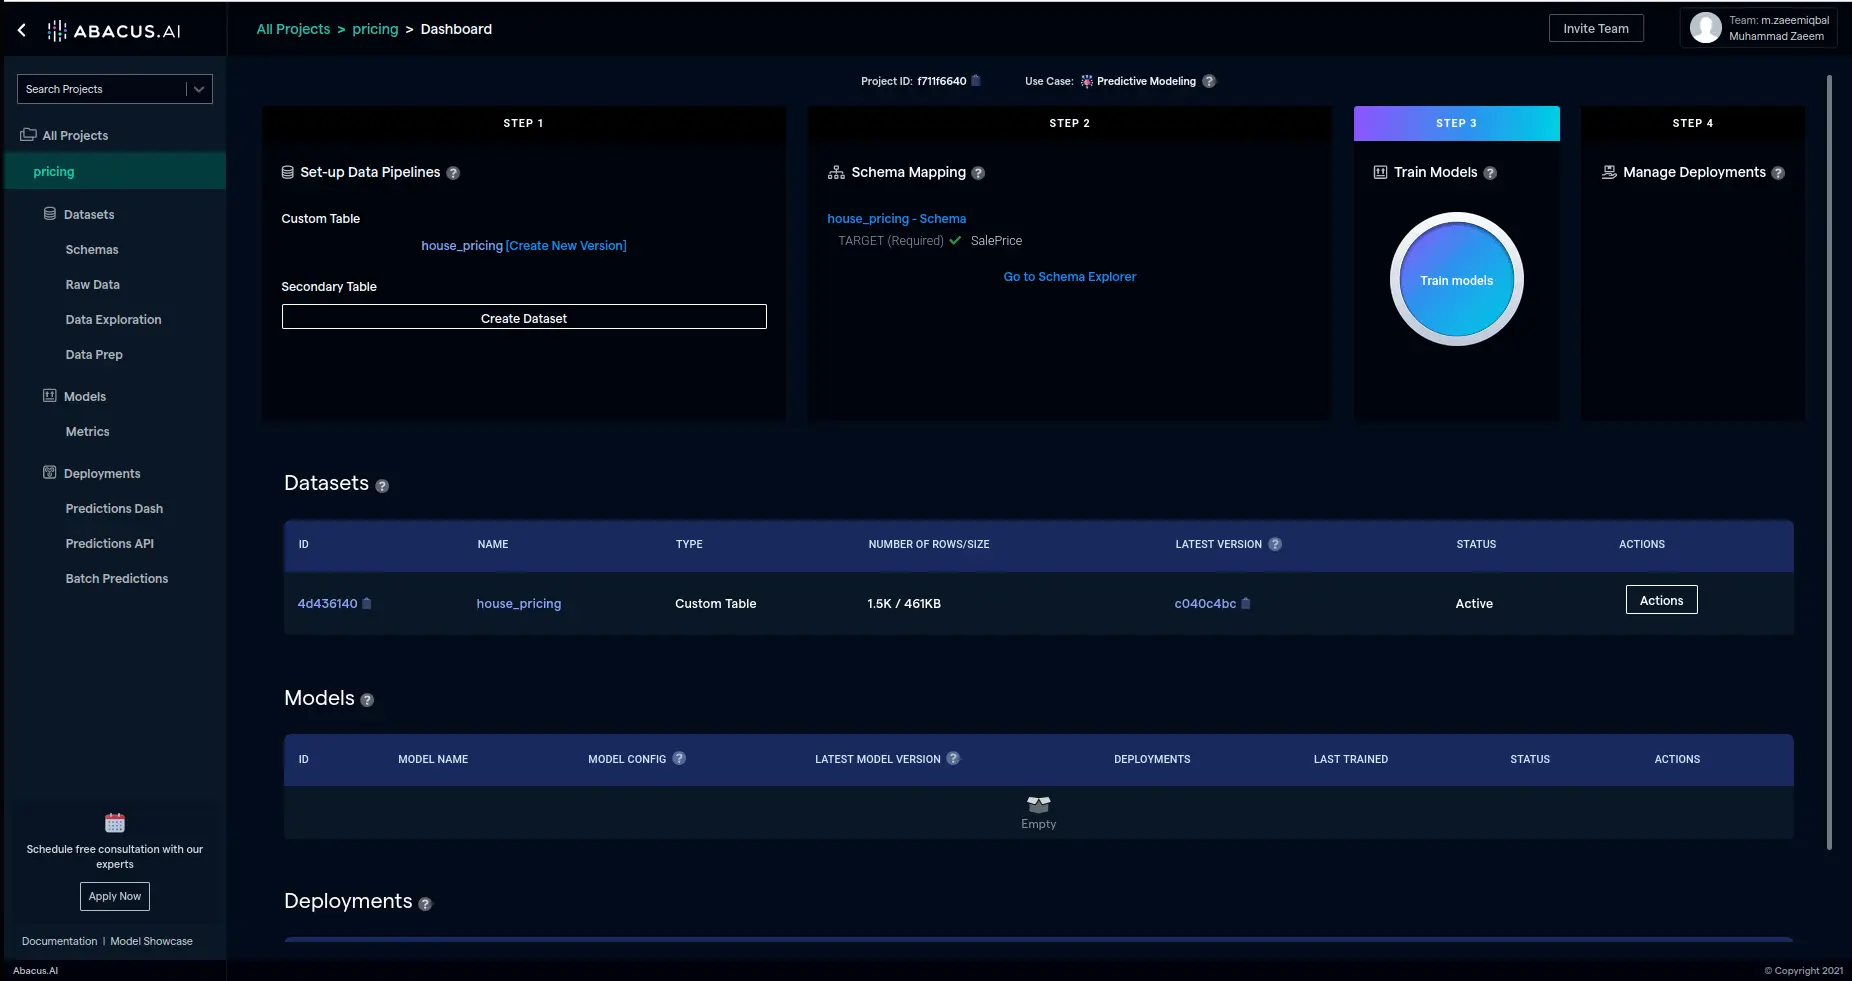
After the dataset is uploaded, configure the schema mapping and proceed to train models with the data.
Troubleshooting and FAQ for the Snowflake Connector
What happens if the underlying Snowflake table changes its schema after I've already created the dataset?
If this happens just go to the relevant dataset's page in Abacus.AI, and select Create New Dataset Version
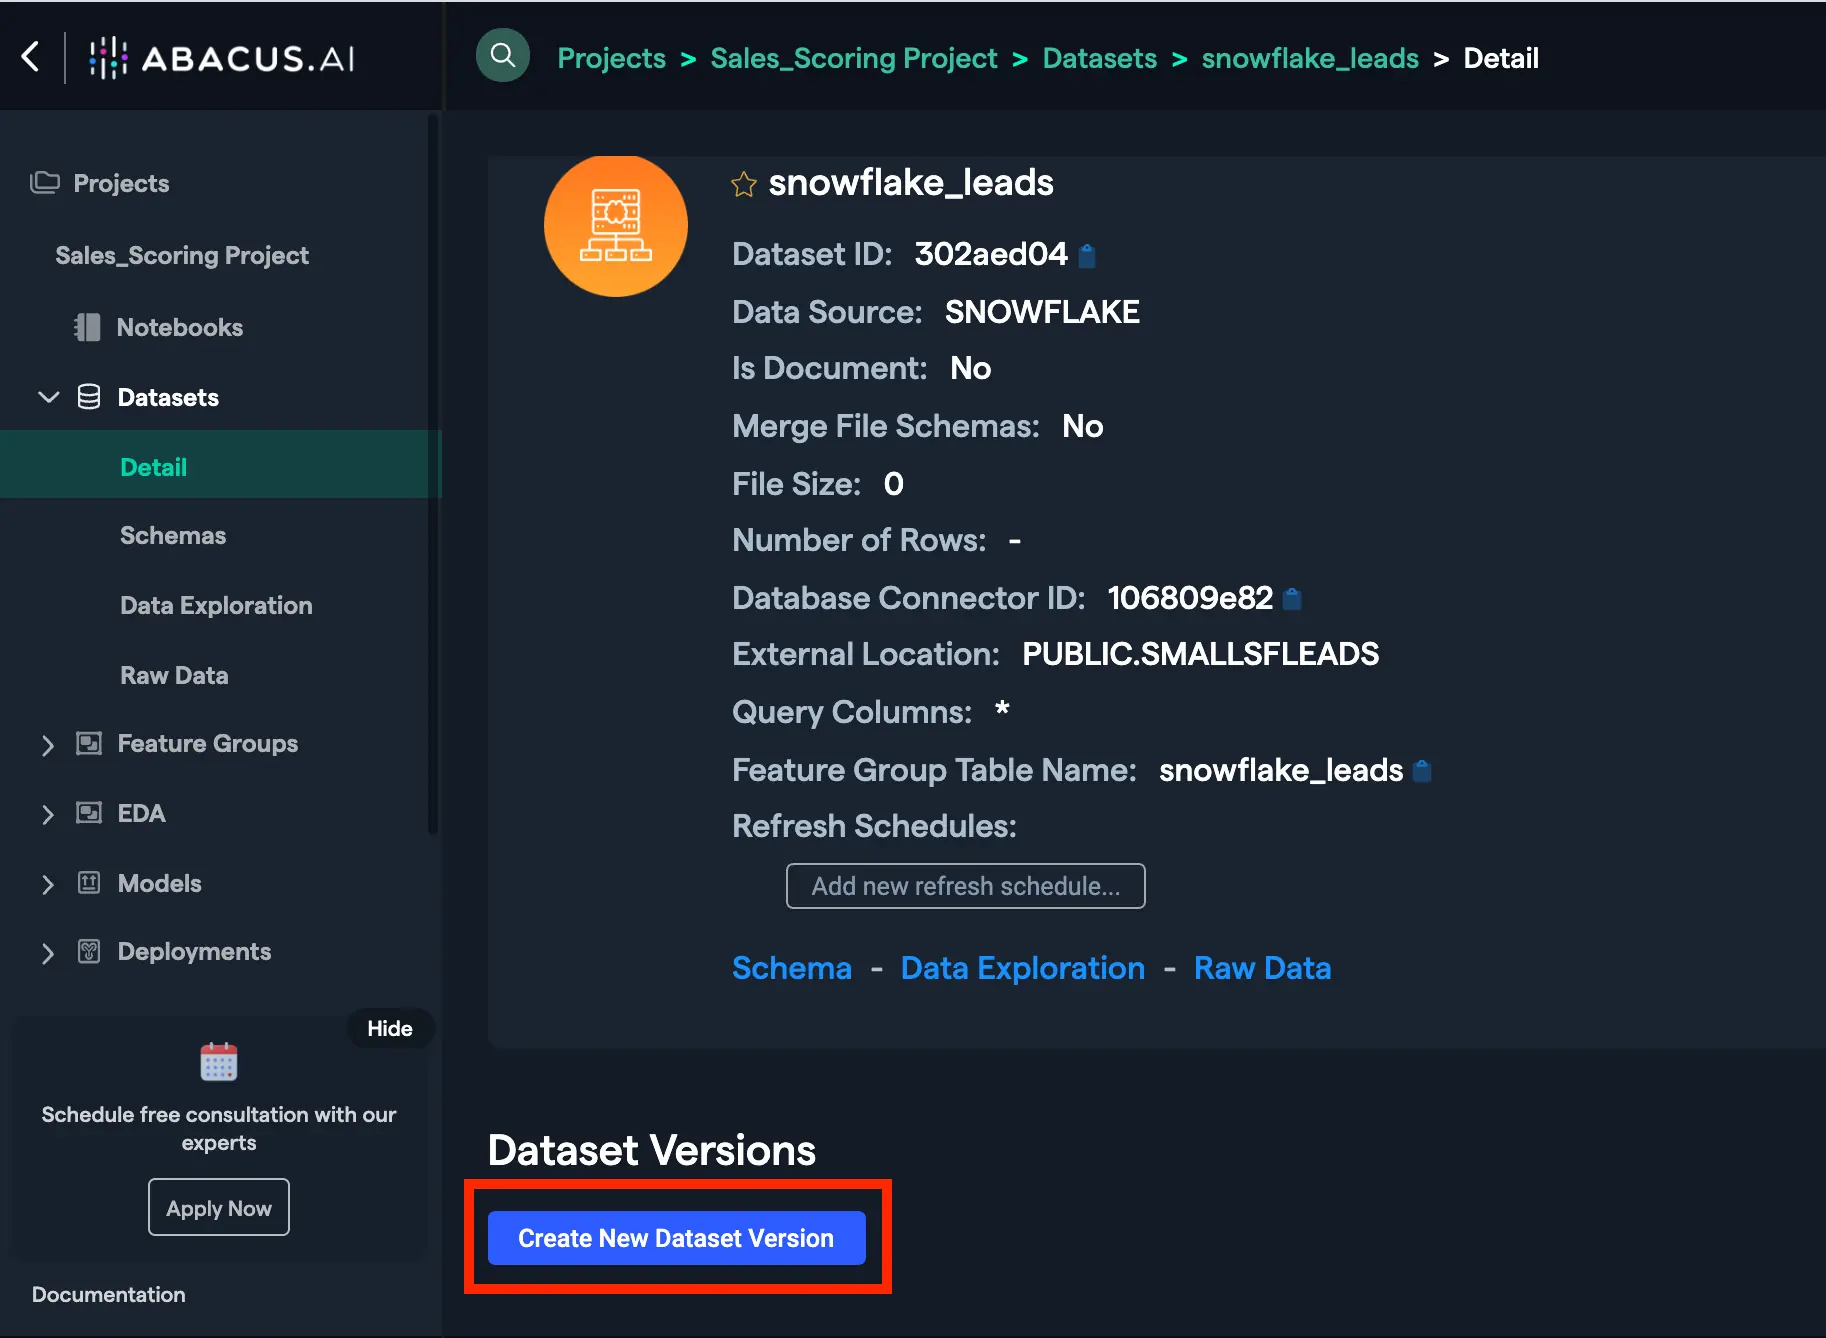
Then, on the resulting screen, you can select the columns that you would like to include. Our system will automatically detect the schema change, and if you use 'SELECT *', any changes to the schema will be reflected in the new dataset version.