Permission Aware Connectors Documentation
This documentation provides detailed instructions for connecting your data sources to Abacus.AI, managing permissions, and using the platform to build chatbots, AI Workflows, and machine learning models.
Abacus.AI ensures secure, permission-aware connections to your systems, including Microsoft Teams, Confluence, Jira, and SharePoint.
Table of Contents
- Overview
- Realtime Synced Datasets
- Supported Connectors
- Managing Permissions
- Using Your Data
- Best Practices
- Troubleshooting and FAQ
Overview
Abacus.AI allows you to connect to your organization's data sources, Microsoft Teams, Confluence, SharePoint, and Jira, while respecting user-level permissions. Once connected, you can use Abacus.AI to:
- Build chatbots and AI Workflows that interact with your data.
- Train machine learning models using real-time synced datasets.
- Analyze and extract insights from your data.
Each connector ensures that data access is scoped to the permissions of the user interacting with the platform, providing a secure and compliant environment for your organization.
Realtime Synced Datasets
Realtime synced datasets are a feature in Abacus.AI that allows for continuous, automatic updates of data from external sources into the platform. This ensures that the data in your Abacus.AI projects is always up-to-date with the latest information from your connected systems.
How Realtime Synced Datasets Work
- Connection to External Sources: Abacus.AI can establish connections with various external data sources, including project management abilities like Jira and communication platforms like Microsoft Teams.
- Automatic Synchronization: Once connected, the platform continuously monitors these sources for changes and updates. When new data is available, it's automatically synced to your Abacus.AI project.
- Data Freshness: This ensures that your models and analyses are always working with the most current data, which is crucial for accurate predictions and insights.
- Reduced Manual Work: It eliminates the need for manual data uploads or periodic batch updates, saving time and reducing the risk of human error.
Supported Connectors
Teams Transcripts Connector
The Teams Transcripts Connector enables you to integrate Microsoft Teams data, such as meeting transcripts, channel posts, and chat messages, into Abacus.AI.

Steps to Connect:
- In the Abacus.AI interface, click on your profile picture and select Manage Connectors.
- Click Add New Connector and choose Teams Transcripts.
- Log in with your Microsoft account and grant the required permissions.
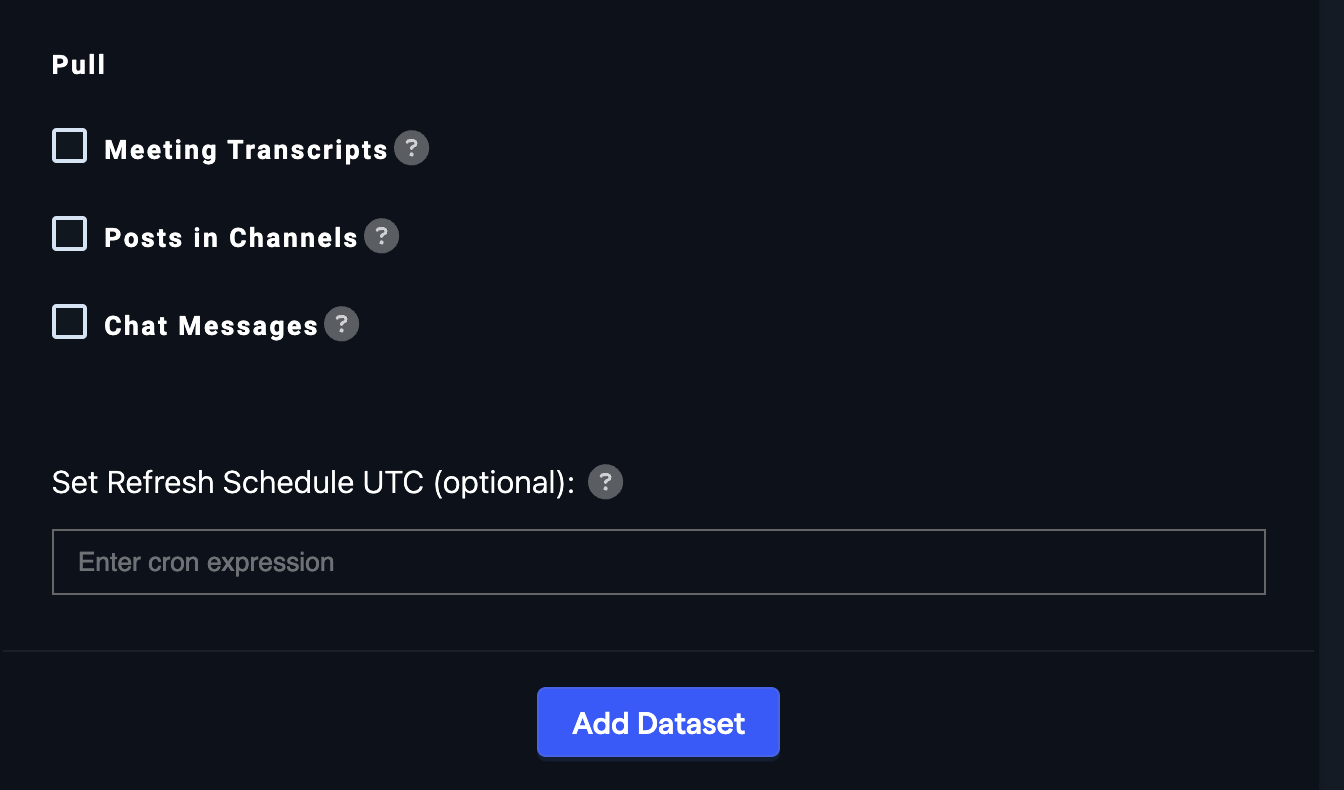
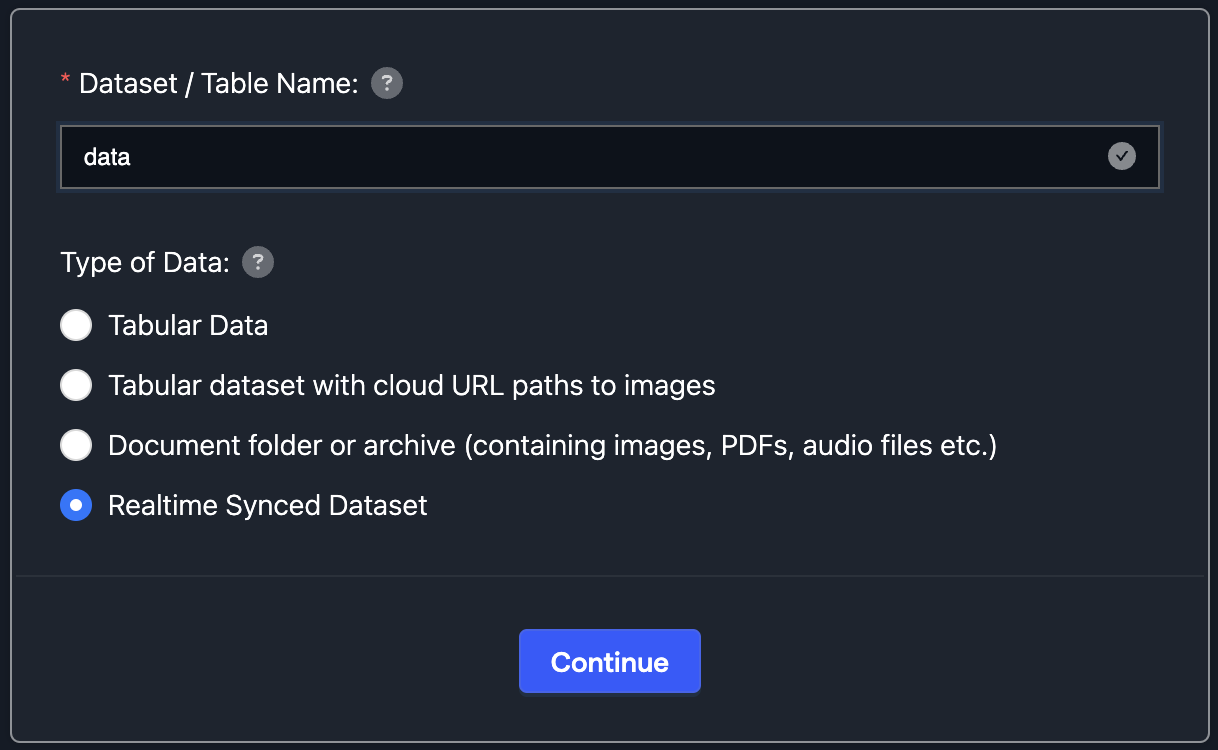
- After the connector is configured, create a new dataset and choose Realtime Synced Dataset as the Type of Data when creating a dataset.
- Select which transcripts, posts, or messages to include in the dataset. You can choose one or multiple options.
-
Meeting transcripts
-
Channel posts
-
Chat messages
Notes:
- Meeting Transcripts: Only attendees and invitees of a meeting will have permission to view the transcript.
- Connector Permissions: The connector is created with a user's credentials, so only chats and messages tied to that account will be pulled.
- Best Practices: For optimal results, make the account used for the connector a meeting attendee or organizer. Organizers or co-organizers have access to attendee data, which simplifies permissions.
View Full Teams Transcripts Documentation
Confluence Connector
The Confluence Connector allows you to pull data from Confluence spaces, including documents and attachments, into Abacus.AI.
Steps to Connect:
- Generate an API token from your Atlassian account at https://id.atlassian.com/manage-profile/security/api-tokens.
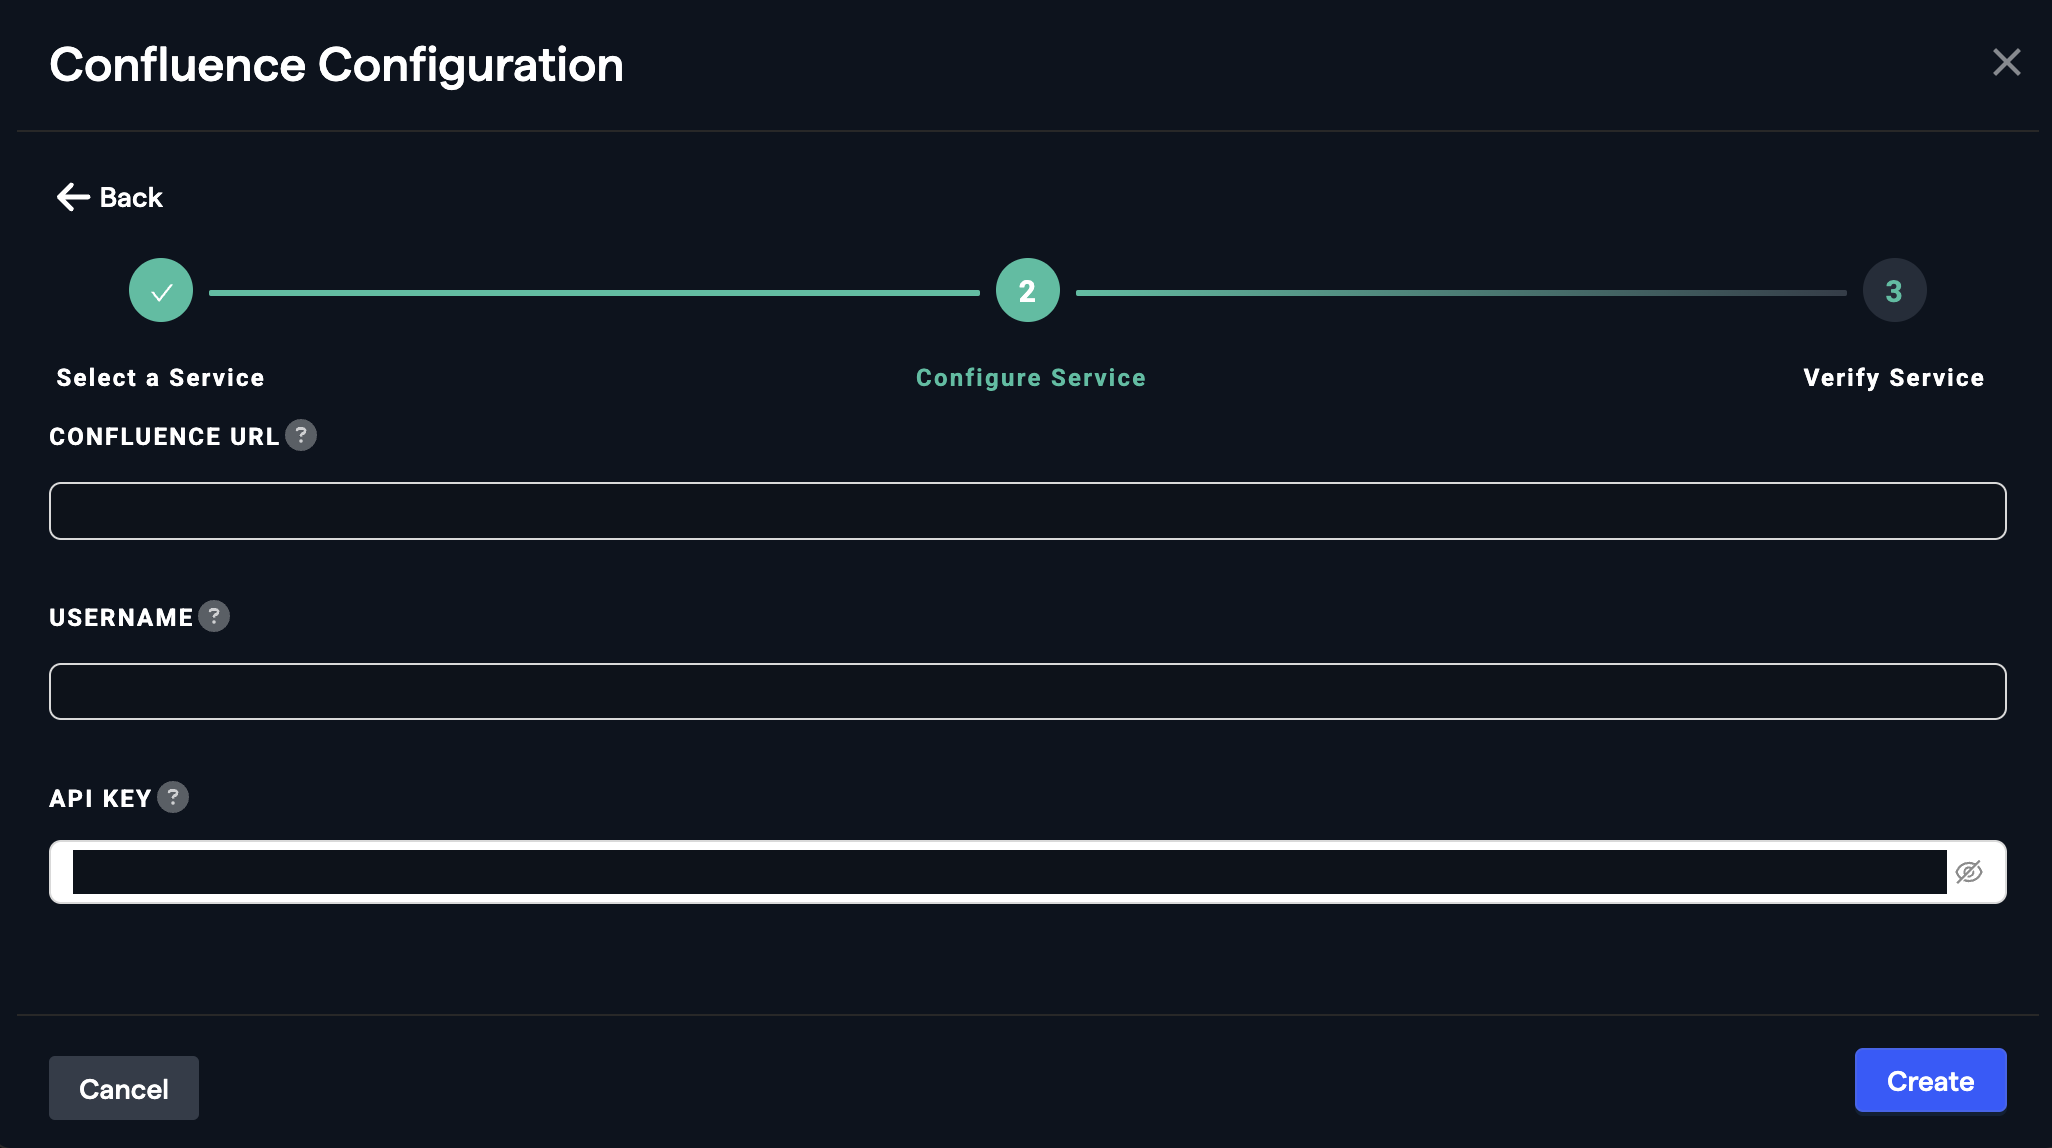
- In Abacus.AI, go to Manage Connectors and click Add New Connector.
- Select Confluence, enter the API token, and configure the spaces and data you want to sync.
- After the connector is configured, choose Realtime Synced Dataset as the Type of Data when creating a dataset.
Notes:
- Metadata: Confluence pages will include the URL as metadata in the dataset.
- Permissions: Confluence is generally not restrictive, and most pages are available to all users. If a space is internally restrictive, users should configure the connector accordingly.
View Full Confluence Documentation
Jira Connector
The Jira Connector enables you to sync Jira issues, projects, and other data into Abacus.AI for analysis and model training.
Special Requirements:
- Admin Access: You must be a Jira admin to set up the connector.
- Realtime Synced Datasets: Toggle on the option to "Allow creating realtime synced datasets" during setup. This validates that the authentication credentials are sufficient to fetch privileged data from the Jira backend. Without this, the connector and dataset may not work as expected.
Steps to Connect:
- Generate an API token from your Atlassian account at https://id.atlassian.com/manage-profile/security/api-tokens.
- In Abacus.AI, go to Manage Connectors and click Add New Connector.
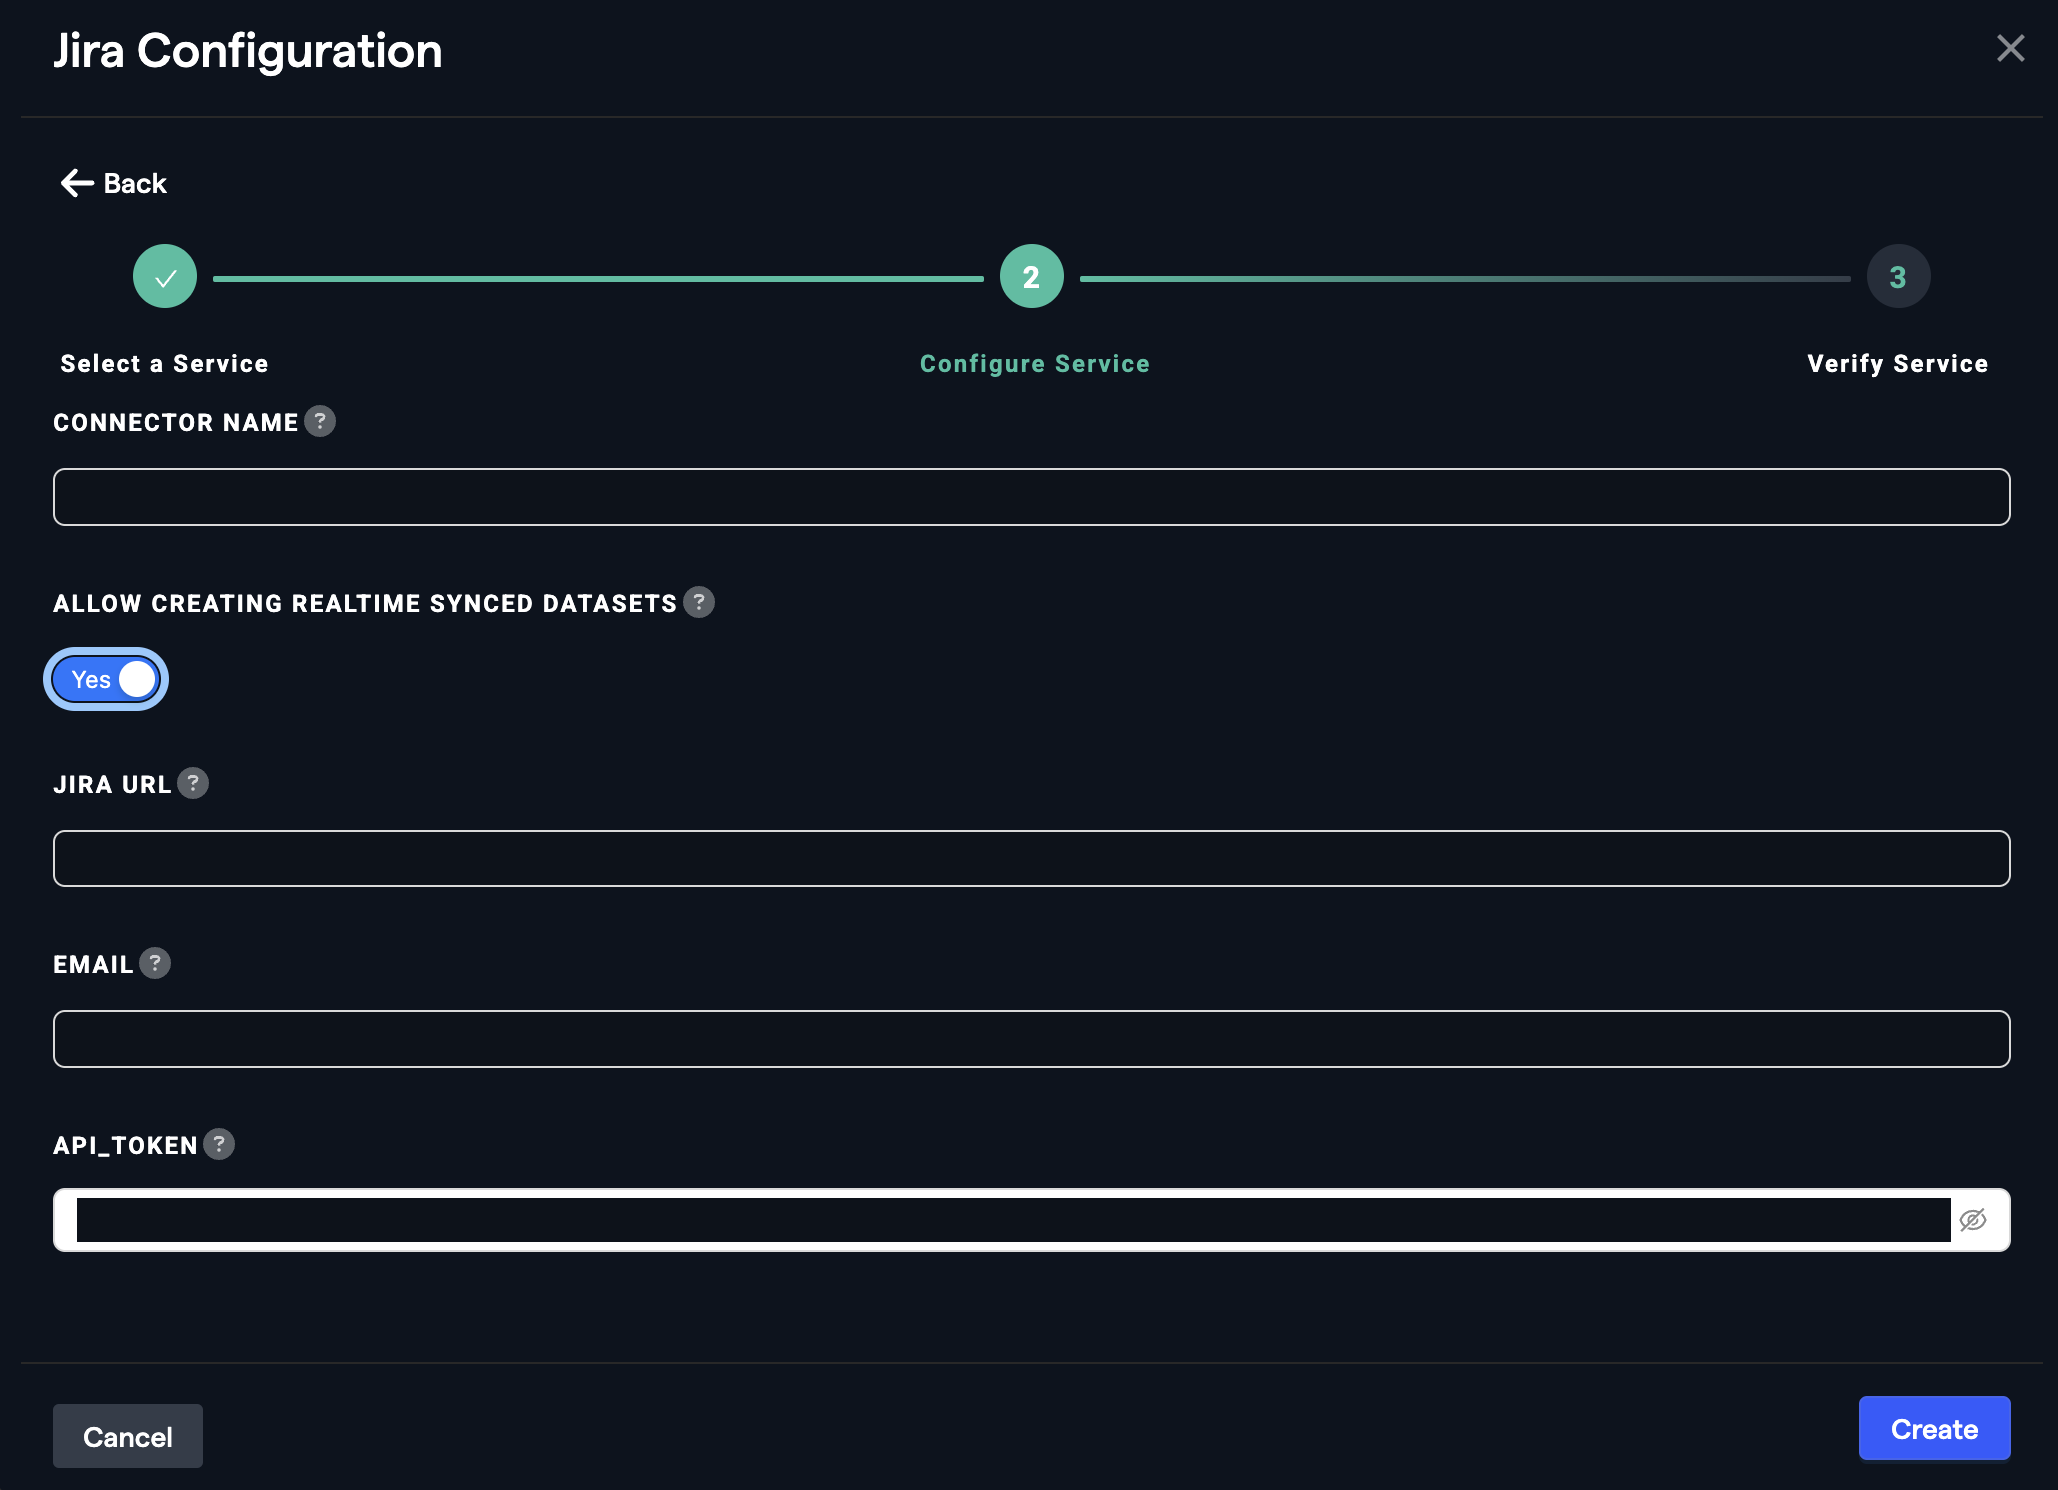
- Select Jira and provide the following:
- Connector name
- Toggle on Allow creating realtime synced datasets
- Jira URL
- Email of a user with admin credentials for Jira
- Jira API token (associated with the admin account)
- After the connector is configured, choose Realtime Synced Dataset as the Type of Data when creating a dataset.
Error Handling:
-
If you see the error message:
Invalid Connector Configuration: To create a realtime synced dataset, you must be logged in as a Jira admin; please ensure you are using the correct admin account.This indicates that the credentials provided are not sufficient (admin access is required).
Notes:
- Attachments: Attachments from Jira tickets are not stored or shown in the UI. Only the raw text of the tickets is included.
- Permission Groups: For every user in Jira, a list of permission groups determines their access. When Person A accesses data in Abacus.AI, their account is checked against these permission groups to confirm access. Permission groups can be viewed in the Organization Overview on the far left side of the screen after a realtime synced dataset connector is established.
SharePoint Connector
The SharePoint Connector allows you to pull specific files and folders from SharePoint into Abacus.AI for real-time syncing.
Steps to Connect:
- Before setting up the SharePoint Connector with OAuth, ensure that you have the necessary permissions to generate an OAuth token for accessing your SharePoint site.
- Access Connected Services Dashboard:
- Go to the Abacus.AI Connected Services Dashboard. You can click your profile in the top right and then click "Manage Connectors".
- Add New Connector:
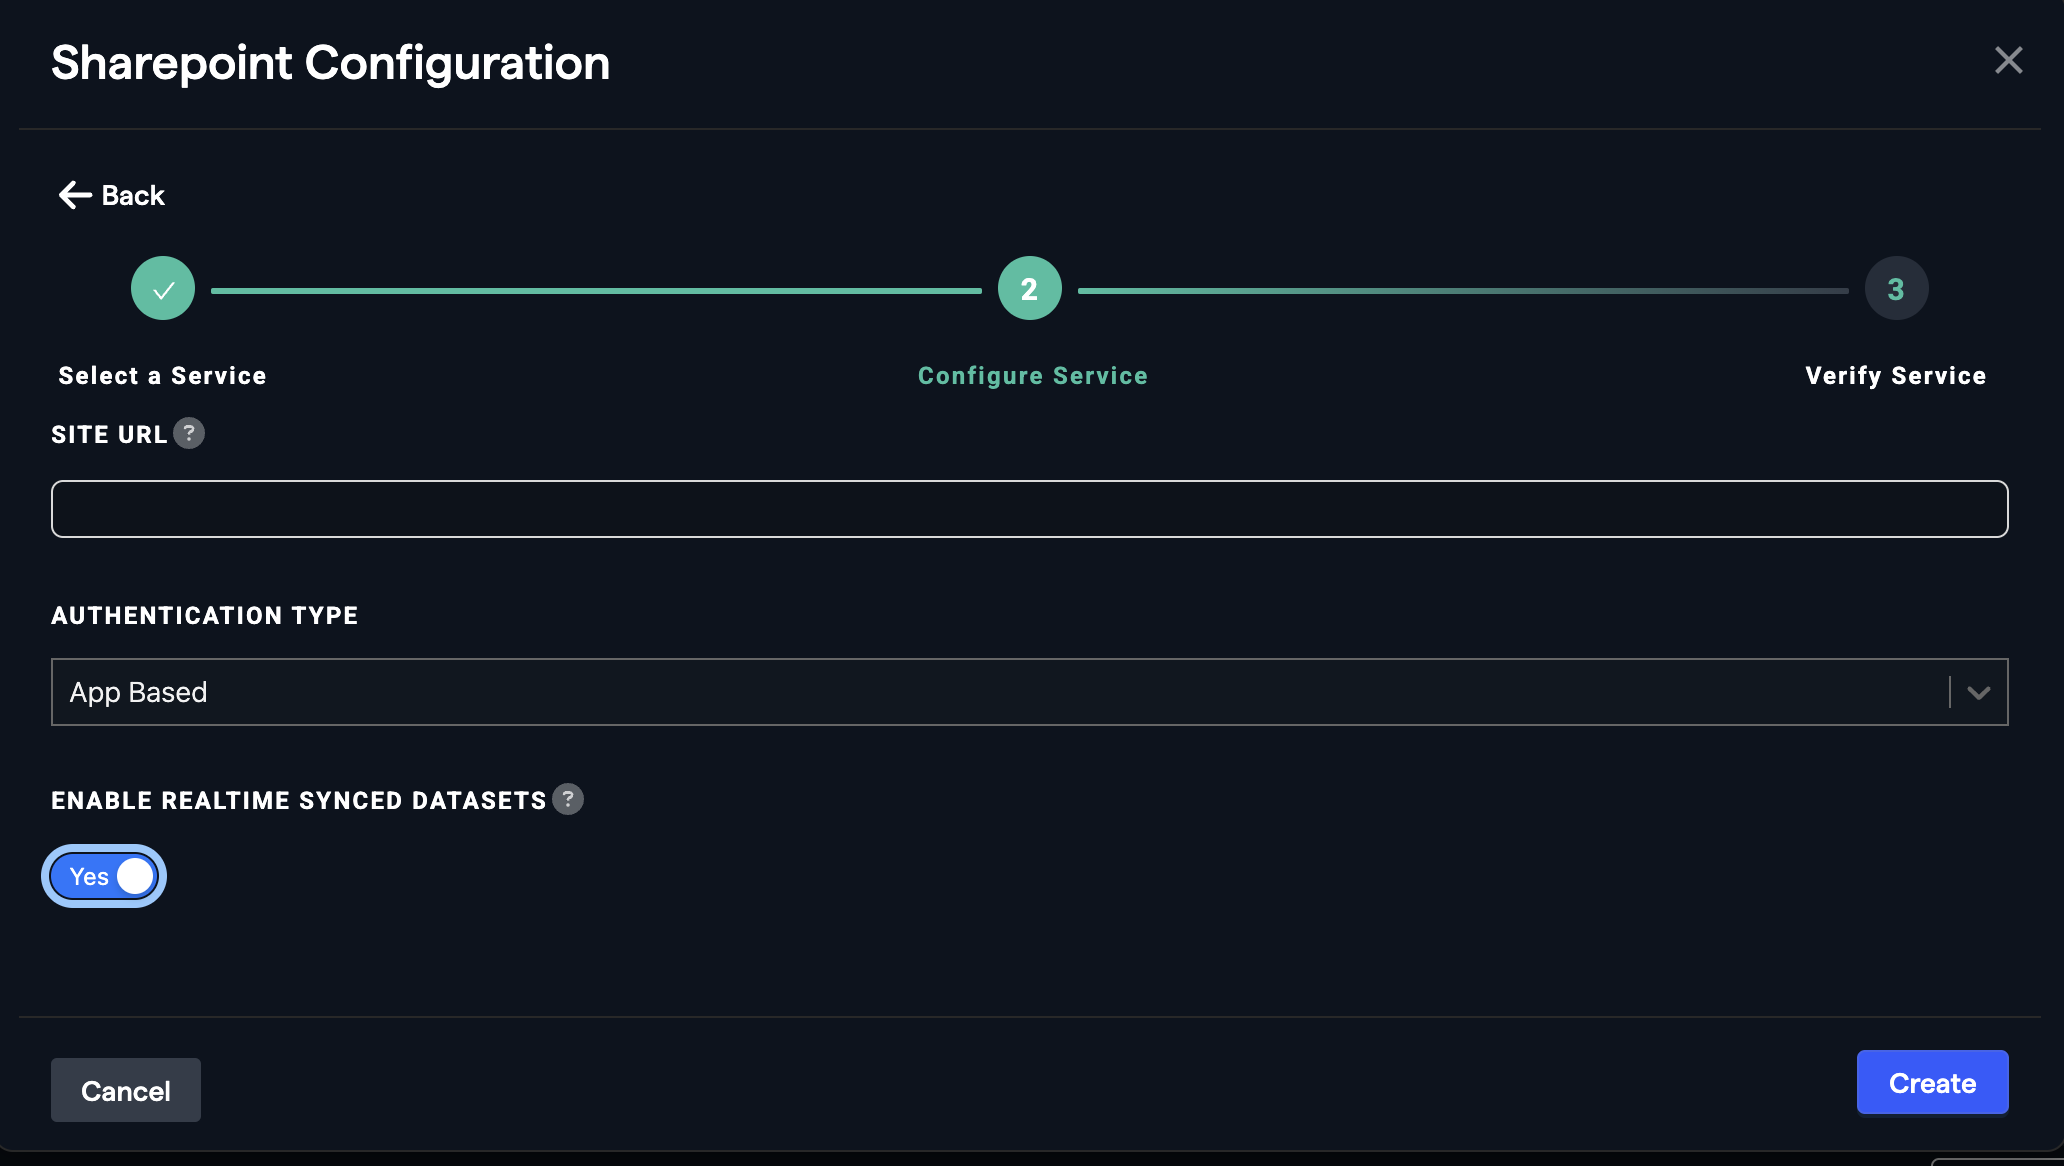
- Click on the "Add New Connector" option, select "SharePoint" from the list, enter your site URL and click on
tick markbeside the site URL.
- Click on the "Add New Connector" option, select "SharePoint" from the list, enter your site URL and click on
- Select "OAuth" from the 'Authentication Type' dropdown.
- Enable Realtime Synced Datasets (Optional):
- Toggle the "Enable Realtime Synced Datasets" option to
Yesif you want to sync datasets in real time.
- Toggle the "Enable Realtime Synced Datasets" option to
- Click on
Connect Sharepointbutton to create and save the connector.
Notes:
- Authentication Method: The real-time SharePoint connector only supports the app-based authentication method. Username/password or OAuth methods are not supported for real-time datasets.
- Data Selection: Only the files and folders selected through the application browser will be synced periodically.
- Permission Elevation: If you encounter issues with syncing, your SharePoint admin may need to elevate permissions by running specific PowerShell commands.
View Full SharePoint Documentation
Please note that the XML is different between the realtime data instructions and the regular flow.
Managing Permissions
Abacus.AI enforces strict permission controls to ensure that users can only access data they are authorized to view. Permissions are managed at the connector level and respect the access rights configured in the source system.
Key Features:
- User-Level Access: Users can only access data they have permissions for in the source system.
- Service Account Limitations: If a service account is used, it can only retrieve data it has access to, and user-level permissions are enforced within Abacus.AI.
- Granular Control: Configure which data (e.g., specific spaces, projects, or channels) is accessible through the connector.
Chatbot Permissions:
- When a user (Person A) sets up a chatbot on a dataset, the information they see within the platform is scoped to their permissions.
- When the chatbot is made live, other users (e.g., Person B) can interact with it using their own permissions. Person B does not need to create a separate chatbot.
This ensures that chatbots respect the permissions of the user interacting with them, even after deployment.
Using Your Data
Once your data sources are connected, you can leverage Abacus.AI to:
1. Create Datasets
-
Go to the Datasets tab in your project and click Create Dataset.
-
Select Realtime Synced Dataset as the Type of Data.
-
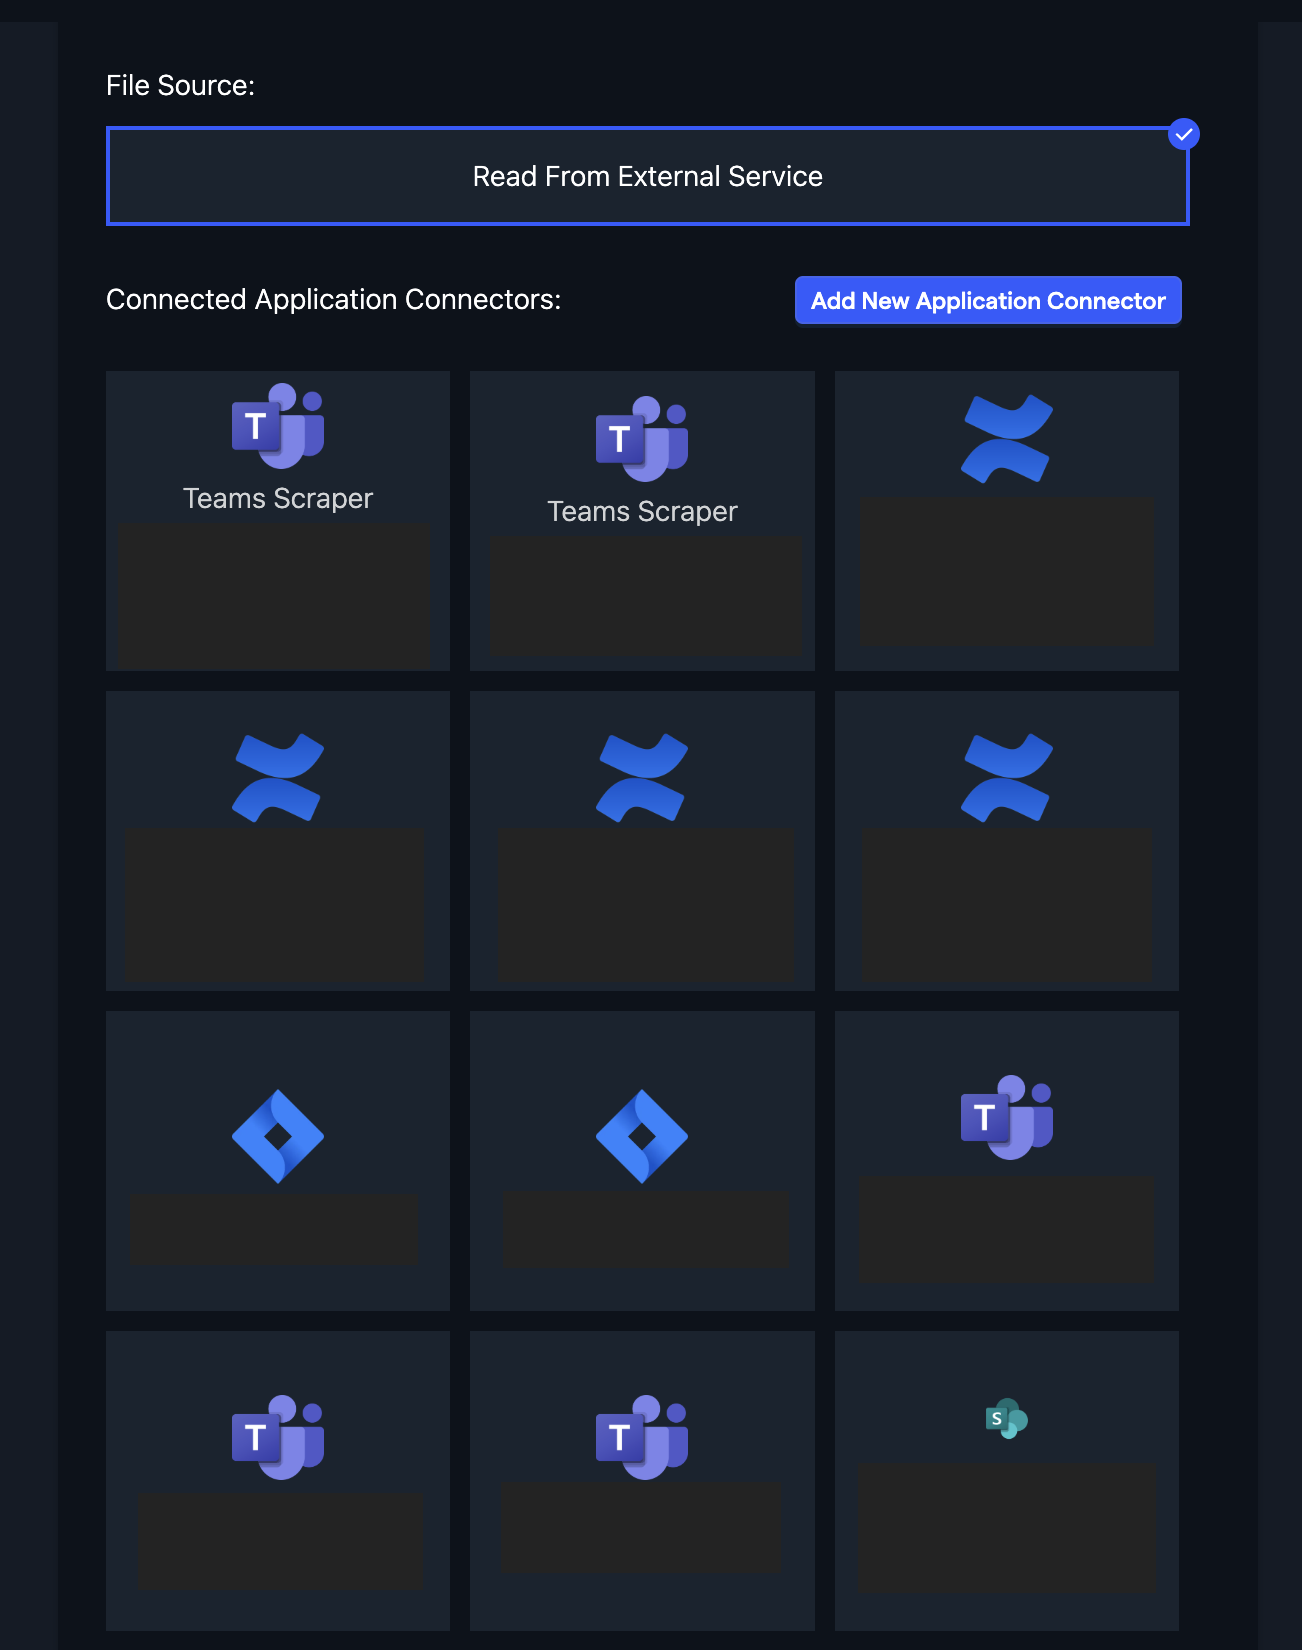
Choose the appropriate connector and configure the data import options, such as filters, fields, and advanced settings.
2. Train Models
- Use the imported datasets to train machine learning models for tasks like sentiment analysis, predictive analytics, or topic modeling.
3. Build Chatbots
- Use Abacus.AI to create chatbots that can interact with your data in real-time.
Building Chatbots
Abacus.AI makes it easy to build chatbots that interact with your connected data sources. Here's how:
Steps to Build a Chatbot:
- Create a Dataset:
- Use one of the connected data sources (e.g., Teams, Confluence, Jira) to create a dataset.
- Train the Chatbot:
- Use the dataset to train the chatbot on relevant data.
- Test the Chatbot:
- Interact with the chatbot within the platform to ensure it responds accurately.
- Deploy the Chatbot:
- Make the chatbot live so others in your organization can use it.
Example Use Cases:
- A chatbot trained on Teams meeting transcripts can answer questions about past meetings.
- A chatbot trained on Jira issues can provide updates on project progress or issue statuses.
- A chatbot trained on Confluence documents can retrieve knowledge articles or summarize documents.
- A chatbot trained on SharePoint files can provide quick access to specific project documents or summarize the contents of selected folders.
Best Practices
- Use Admin Accounts for Setup: For connectors like Jira and SharePoint, use admin credentials to ensure proper access and avoid configuration errors.
- Test Permissions: After setting up a connector, test the permissions by accessing the data as different users to ensure compliance.
- Regularly Update API Tokens: For connectors like Jira and Confluence, ensure that API tokens are renewed periodically to avoid disruptions.
- Limit Data Scope: When configuring connectors, only sync the data you need to reduce processing time and improve performance.
Troubleshooting and FAQ
Common Issues
Data Not Syncing
- Verify that the connector is properly configured and that the necessary permissions have been granted.
- Check the sync settings to ensure the data is being updated at the desired frequency.
- For SharePoint, ensure that the correct files and folders have been selected in the application browser.
Missing Data
- Ensure that the user or service account has access to the data in the source system.
- For Teams, verify that meeting transcripts are enabled and available.
- For Jira, note that the connector only pulls data from the past 120 days.
Permission Errors
- Confirm that the user has the necessary permissions in the source system.
- For Jira, ensure that the API token has the required scopes.
- For SharePoint, verify that the AppInv permissions have been correctly configured and that the XML permissions include
FullControl.
Frequently Asked Questions
What data can I sync with Permissions?
- Teams: Meeting transcripts, channel posts, and chat messages.
- Confluence: Documents, attachments, and metadata from spaces.
- Jira: Issues, projects, custom fields, comments, and watchers.
- SharePoint: Specific files and folders selected through the application browser. For example, you can sync a folder containing project documents or a specific file with real-time updates.
How often is data synced?
- Data is synced in real-time or at regular intervals, depending on the connector and configuration.
What happens if permissions change in the source system?
- Abacus.AI automatically respects the updated permissions, ensuring that users can only access data they are authorized to view.