Azure SQL User Connector Guide
This guide provides step-by-step instructions for creating and configuring an Azure SQL user connector with Abacus.AI. Azure SQL user connector supports user-level permissions, role-based access control (RBAC), and row-level security (RLS)
Prerequisites
- Access to Azure SQL Database
- Abacus.AI account with appropriate permissions
- Azure Entra ID credentials
Step-by-Step Instructions
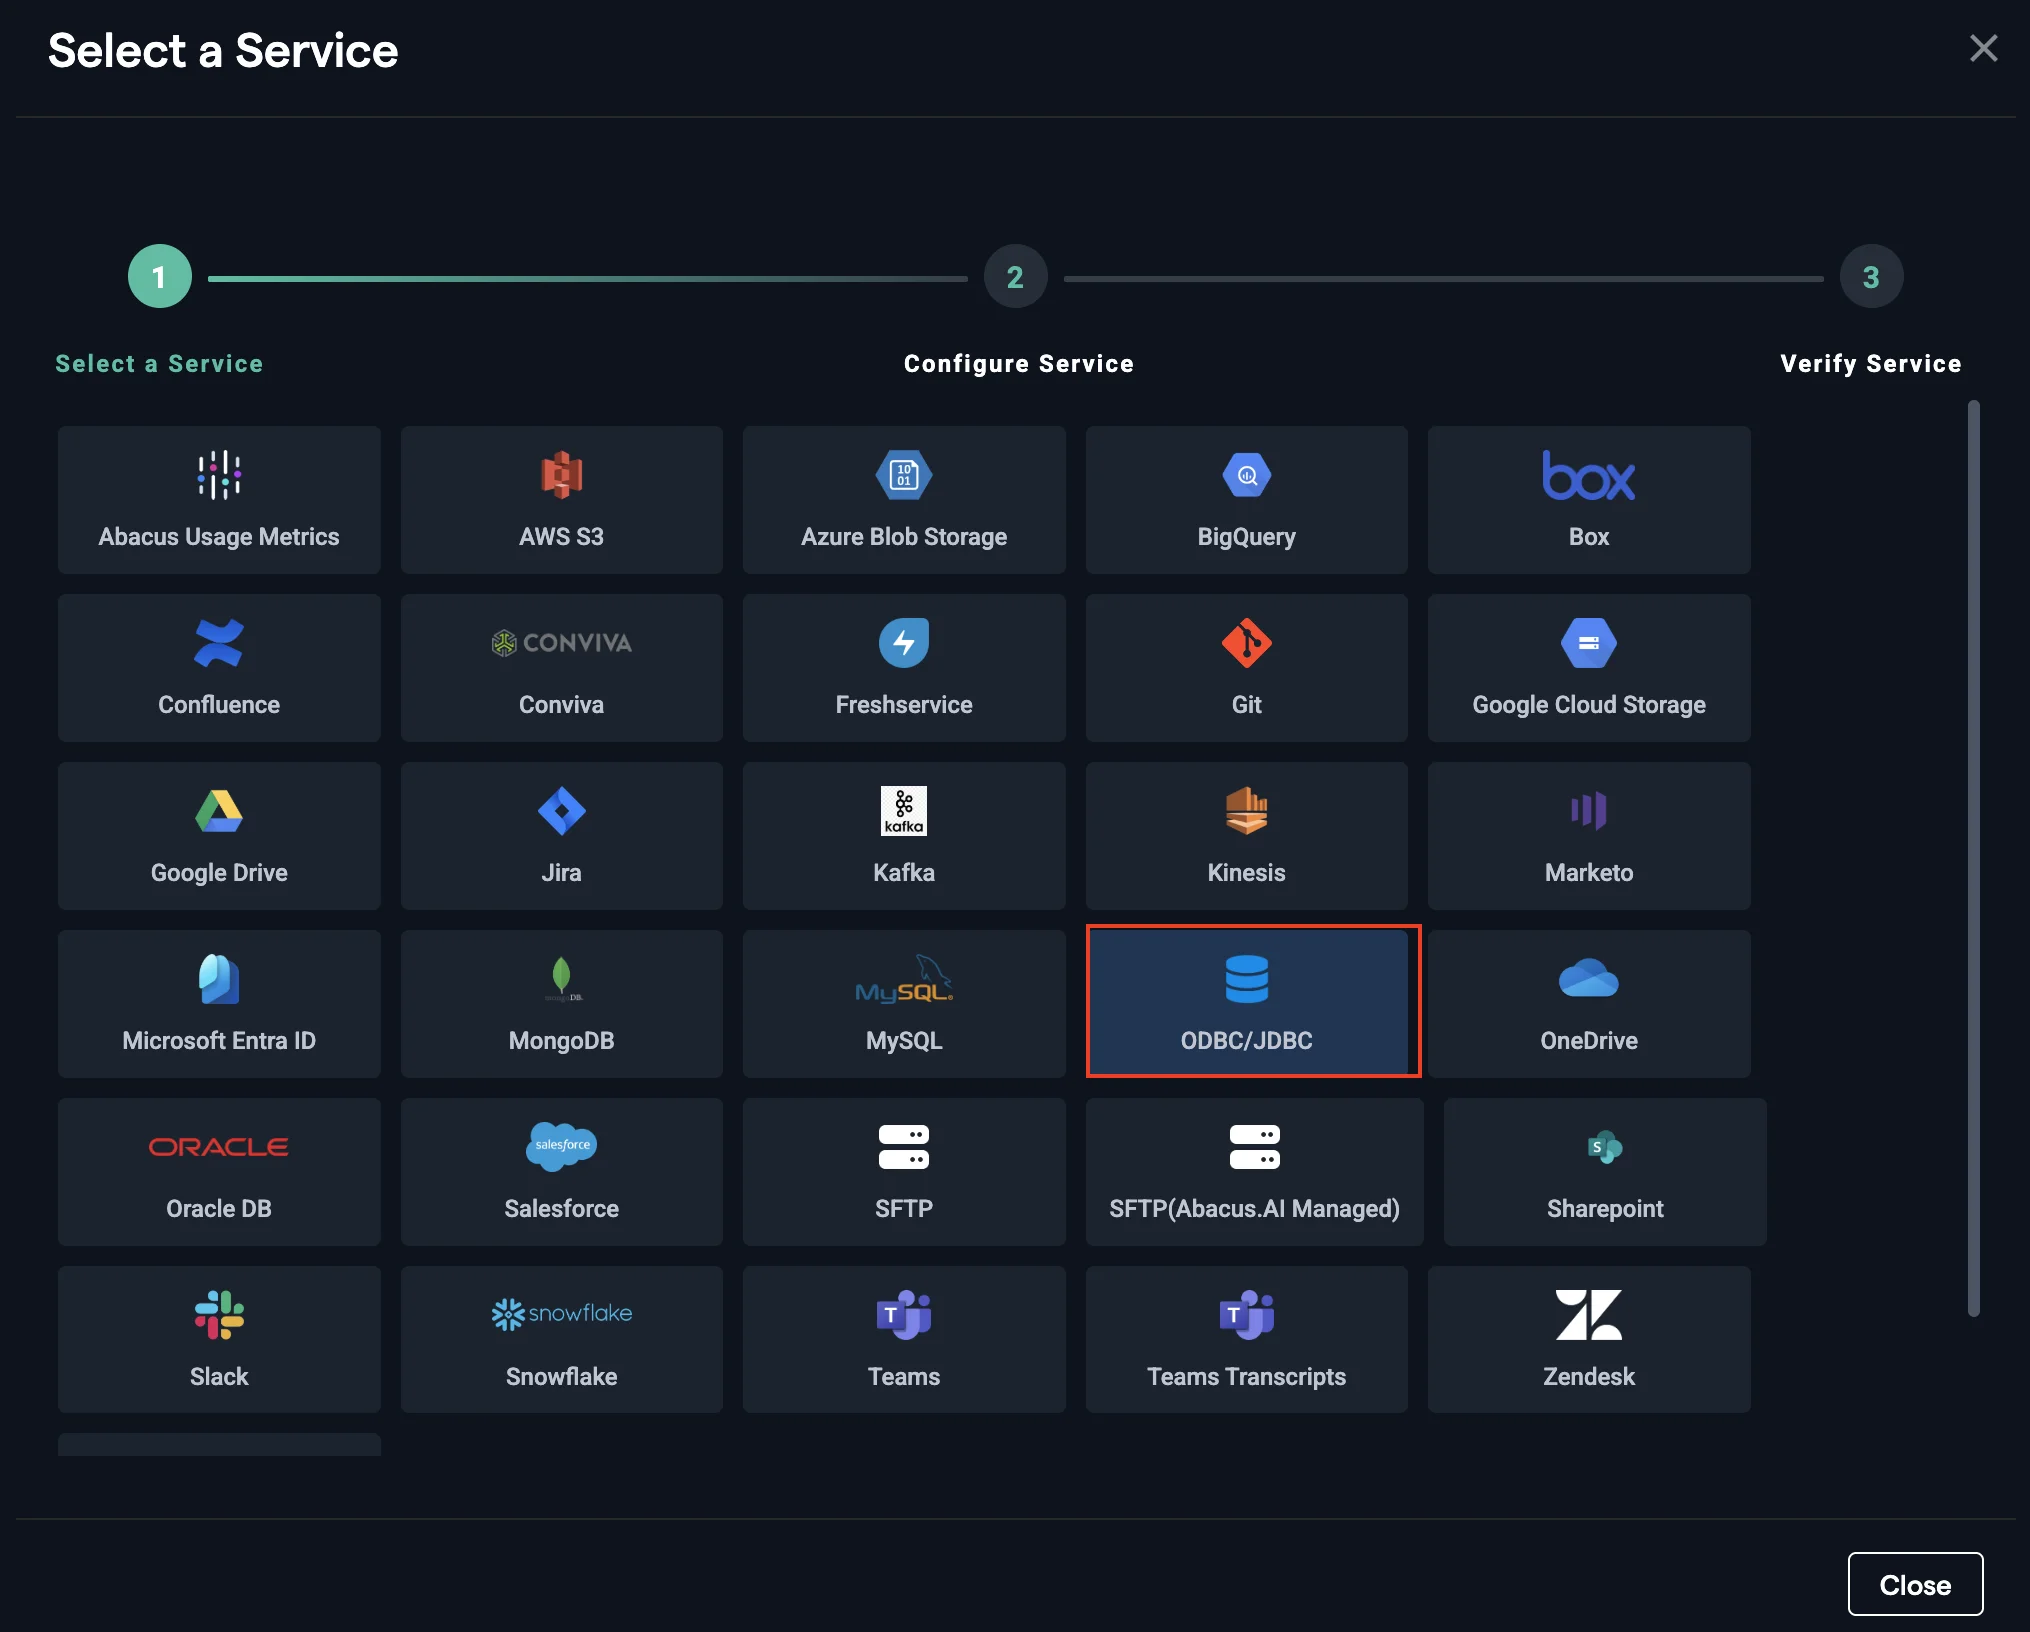
1. Create Azure SQL Connector
Create an org level Azure SQL connector using JDBC/ODBC option. Use ODBC 18 driver to connect to Azure SQL server.
2. Enable RBAC Import
Turn IMPORT RBAC toggle ON.
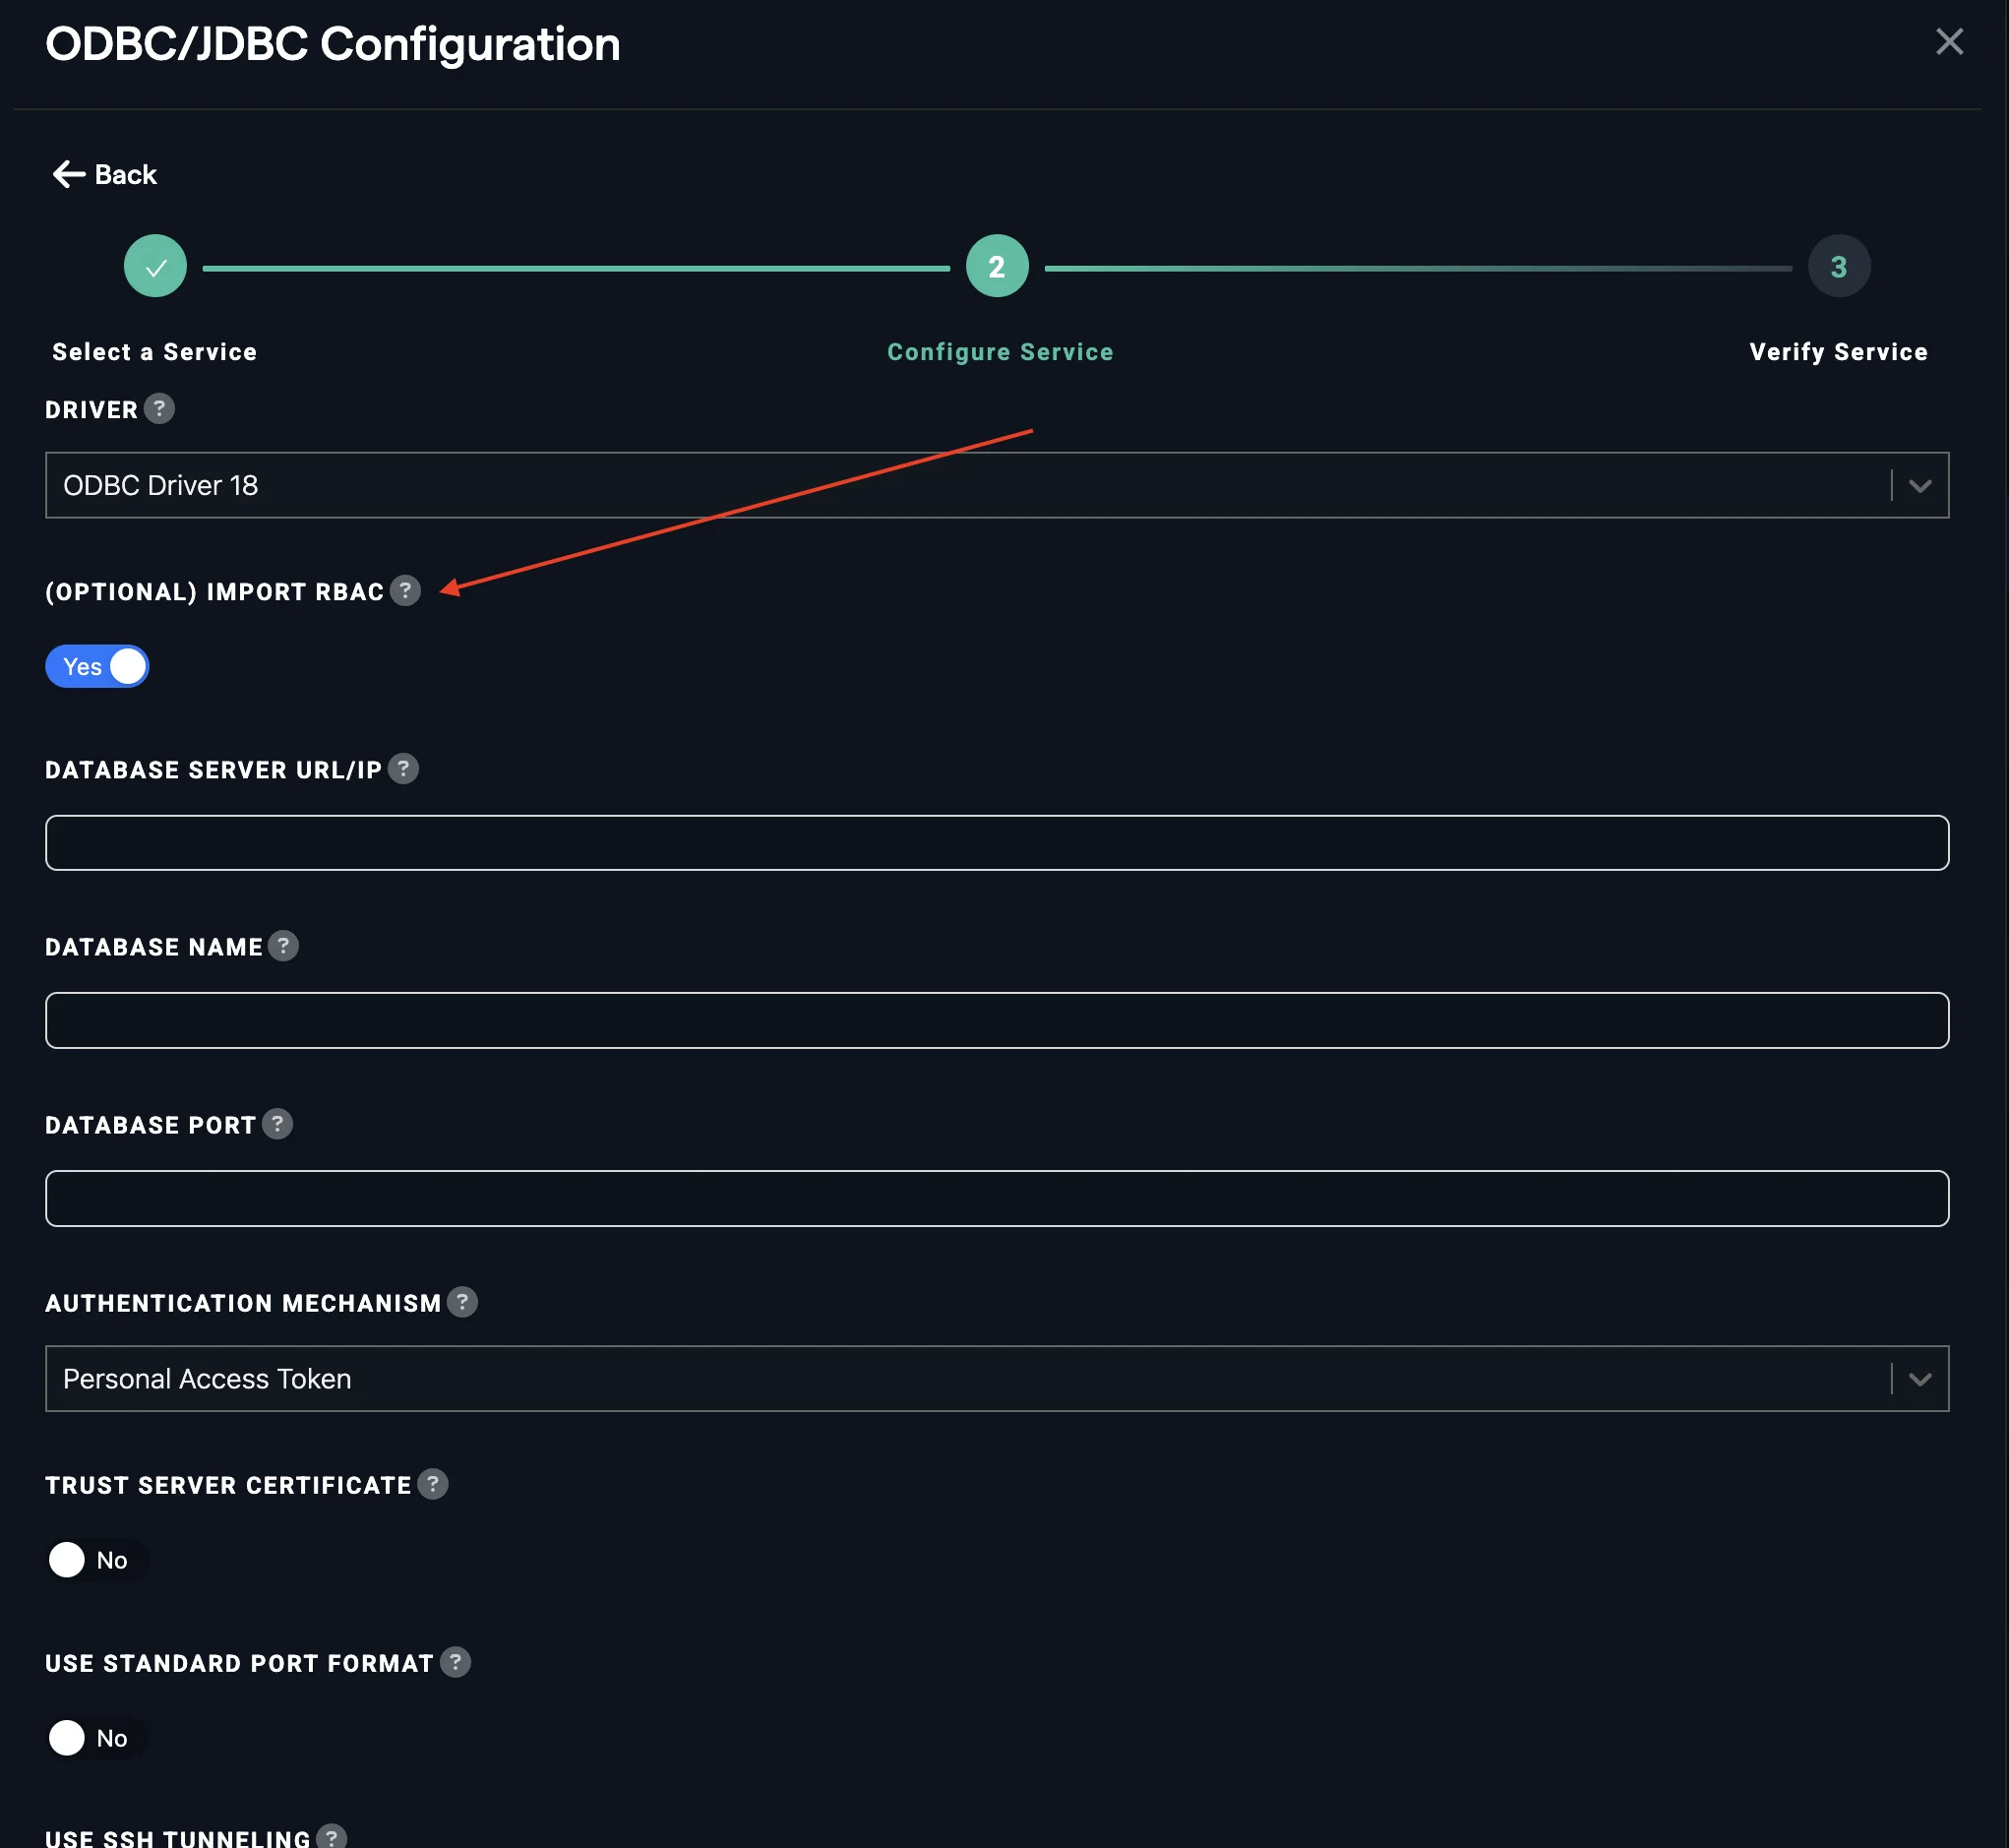
Note: Please enable the IMPORT RBAC toggle; otherwise, users will use the ODBC connection and might gain access to more data than expected.
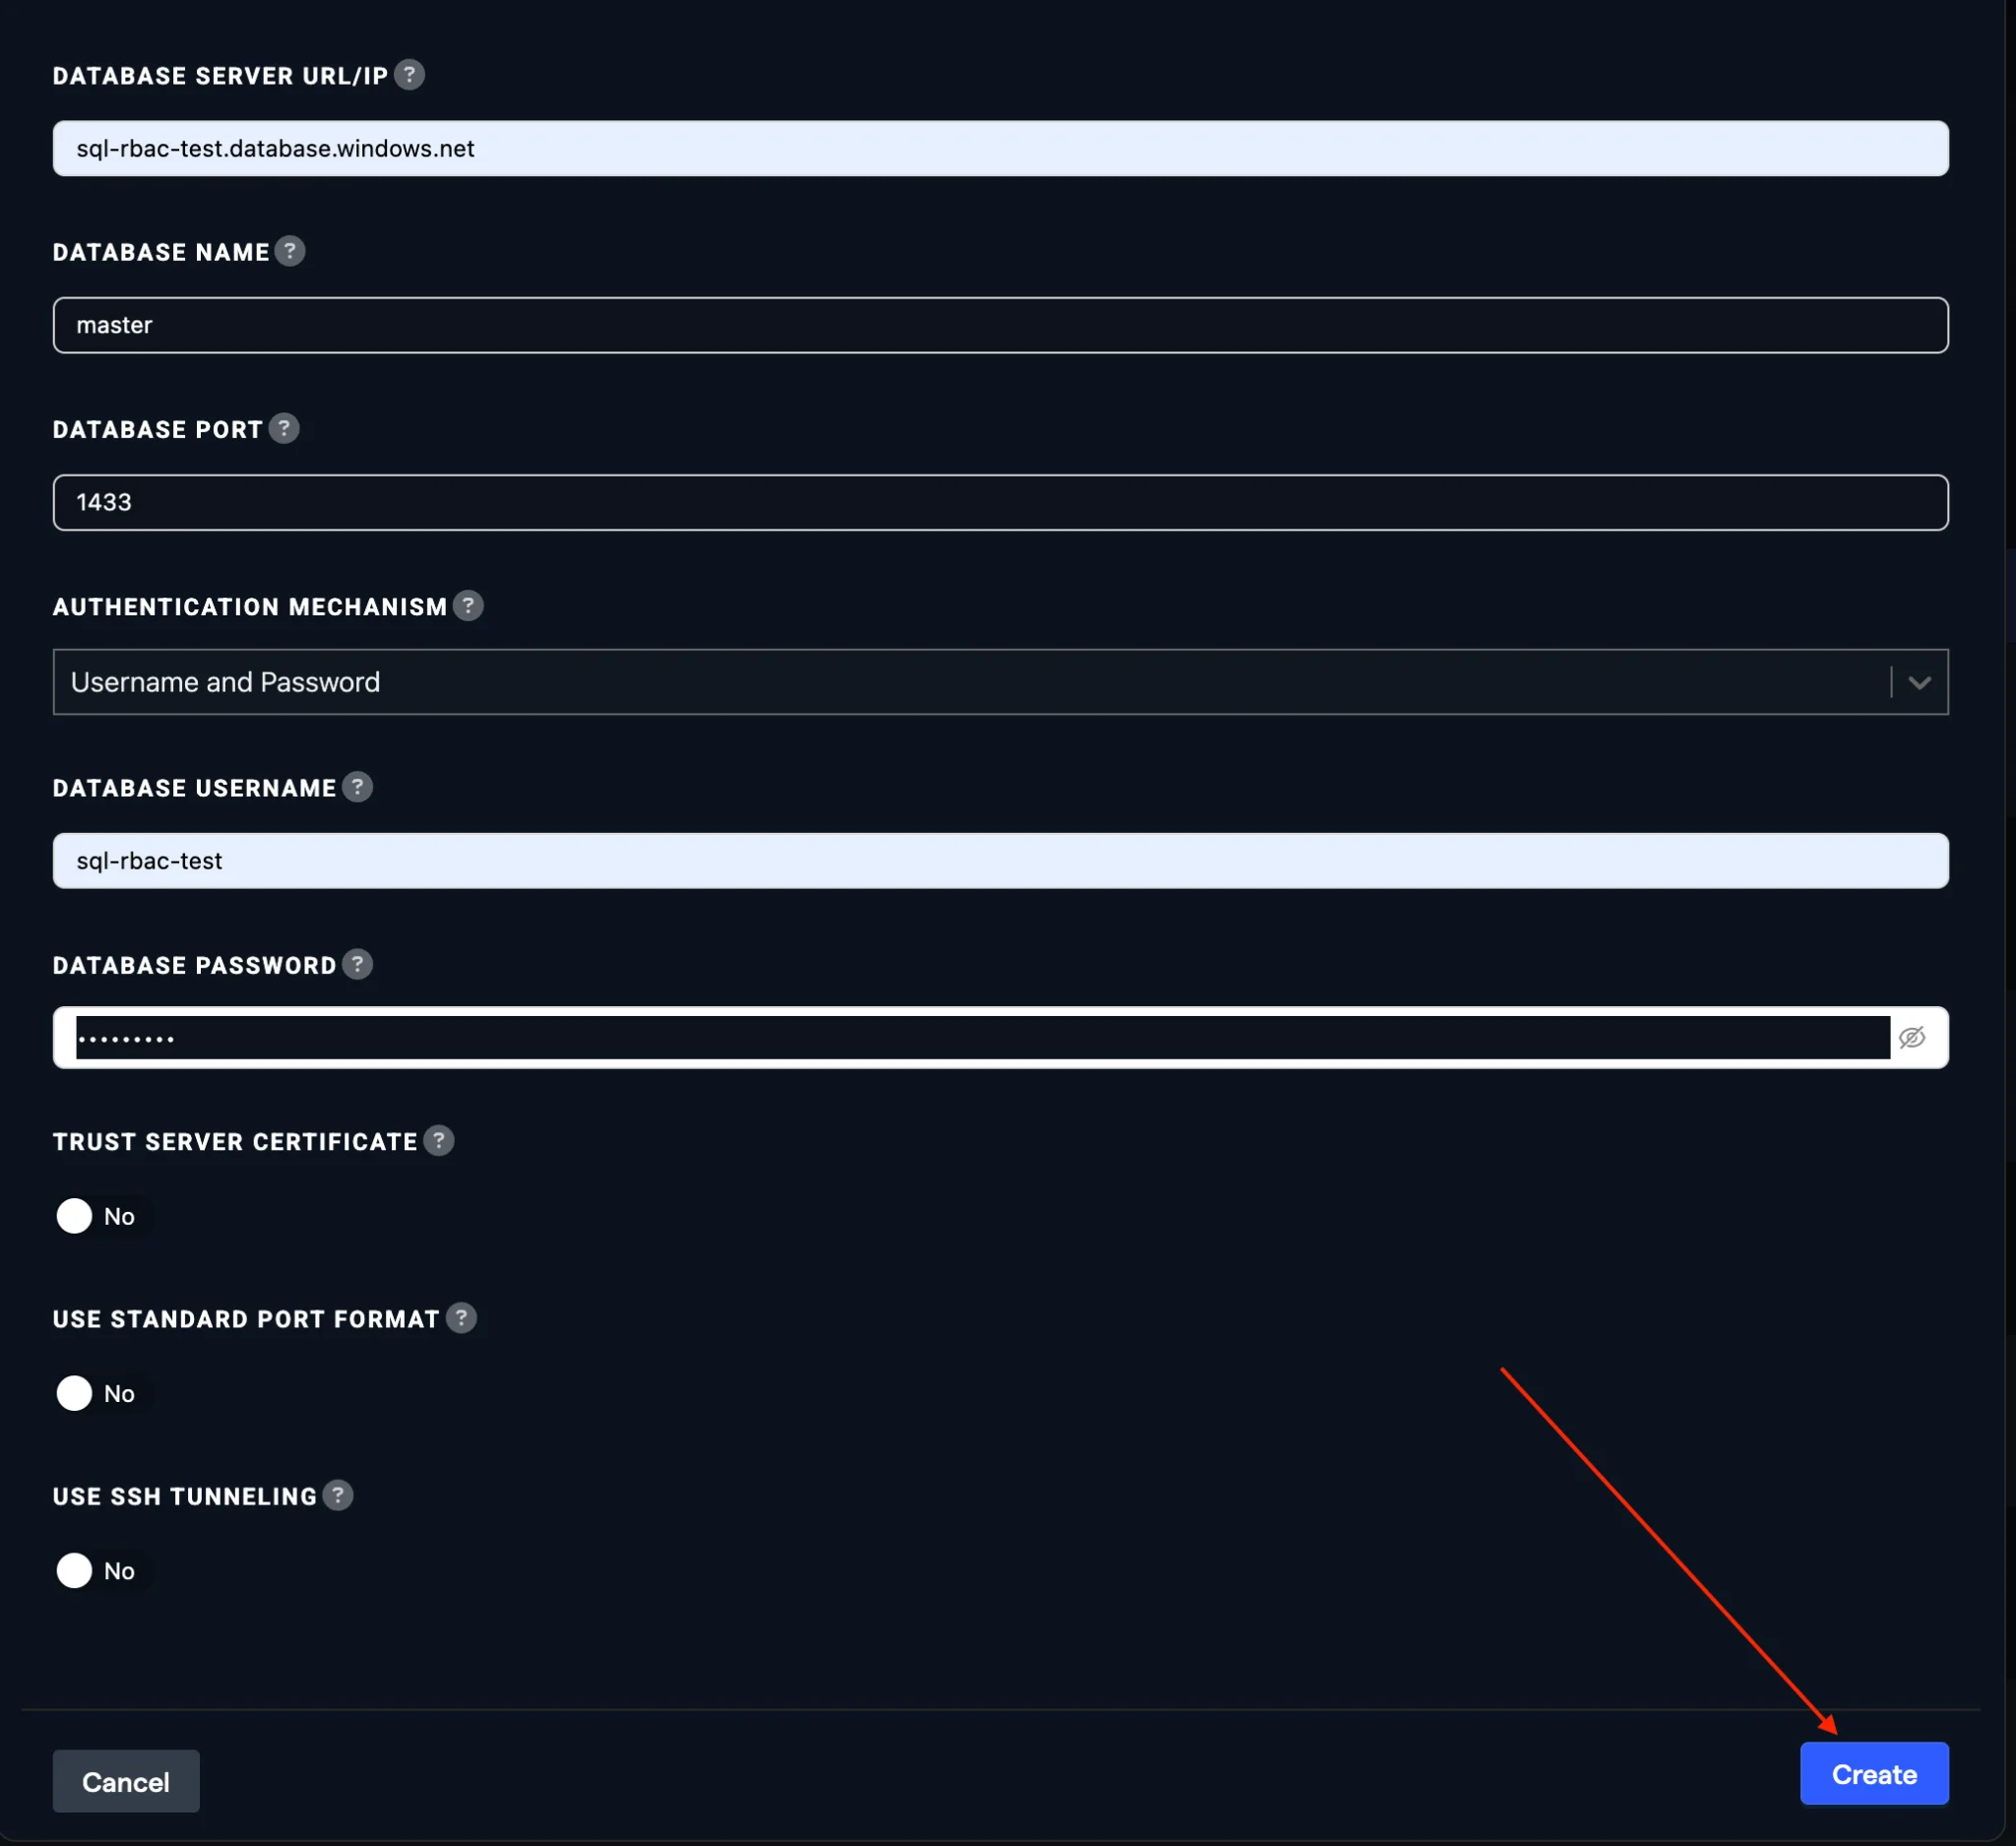
3. Configure Connection Details
Fill the details and click on CREATE.
4. Database User Setup
Create in your database and whitelist the IPs.
CREATE USER [abacus_azure_sql] FROM EXTERNAL PROVIDER;
5. Verify Connector Status
Click on Verify Now and make sure that connector is in active state.
6. Navigate to Projects
After creating the connector, please navigate to the projects page by clicking on the Abacus.AI logo.

7. Create New Project
Create a new project.
8. Select ChatLLM Option
Select GenAI --> Custom Chatbot option.
9. Enter Project Name
Enter the name of the project.
10. Skip to Dashboard
Select skip to project dashboard.
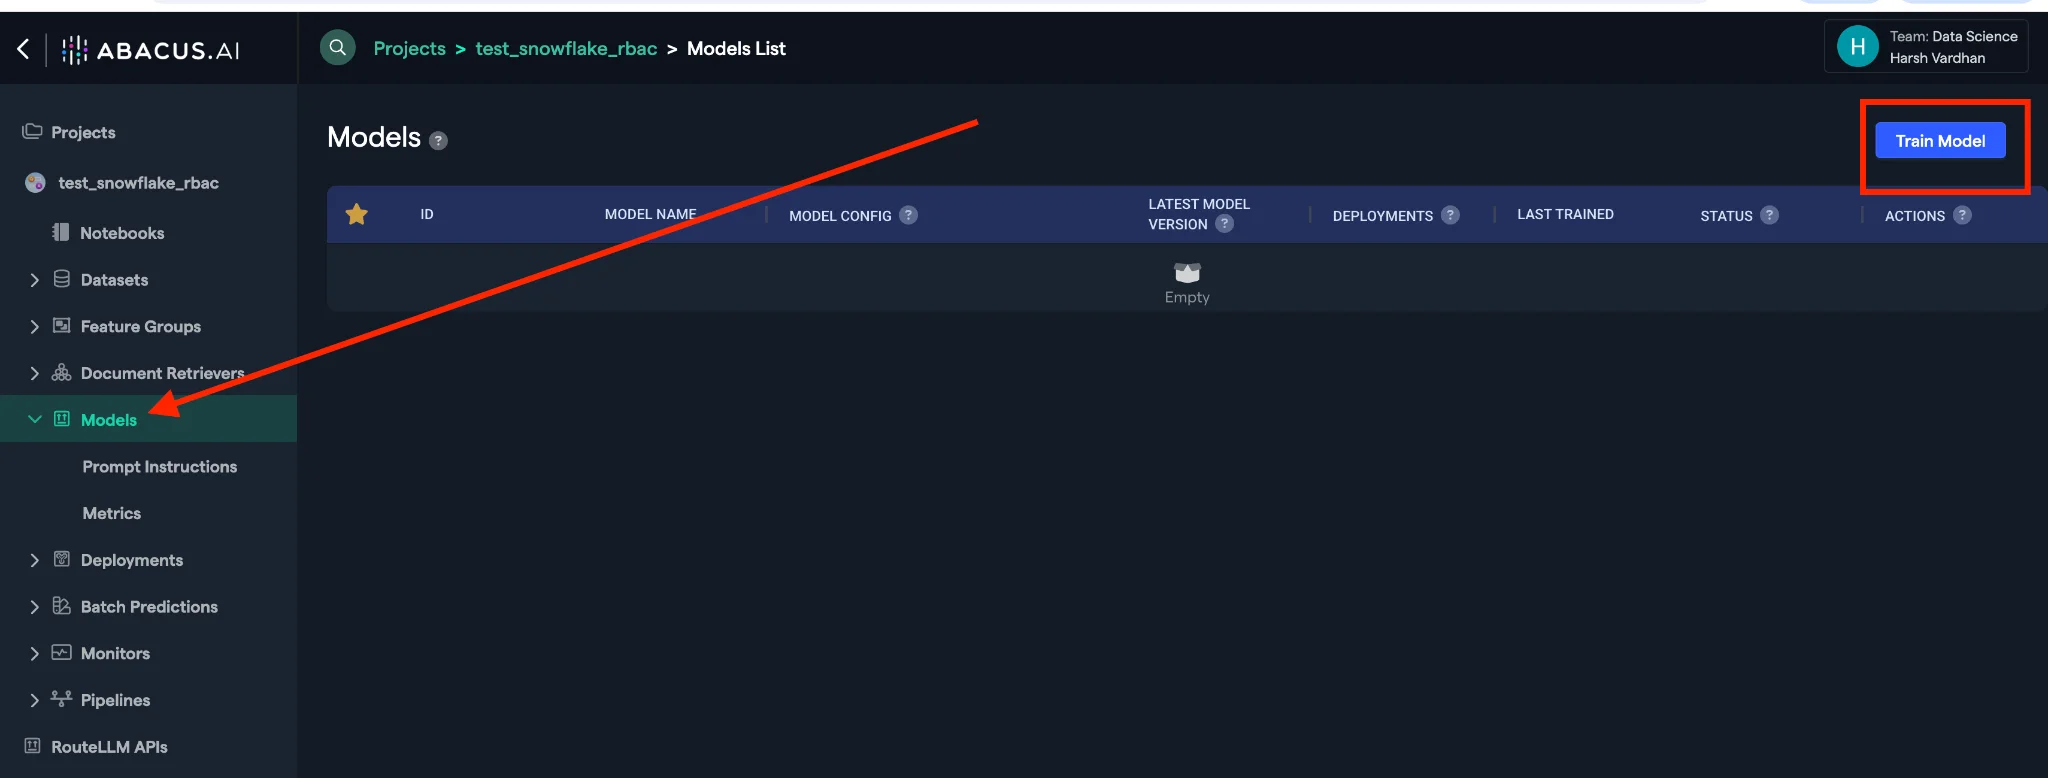
11. Access Model Training
Click on the Model option in the Left tool bar and select Train Model on the top right corner of the page.
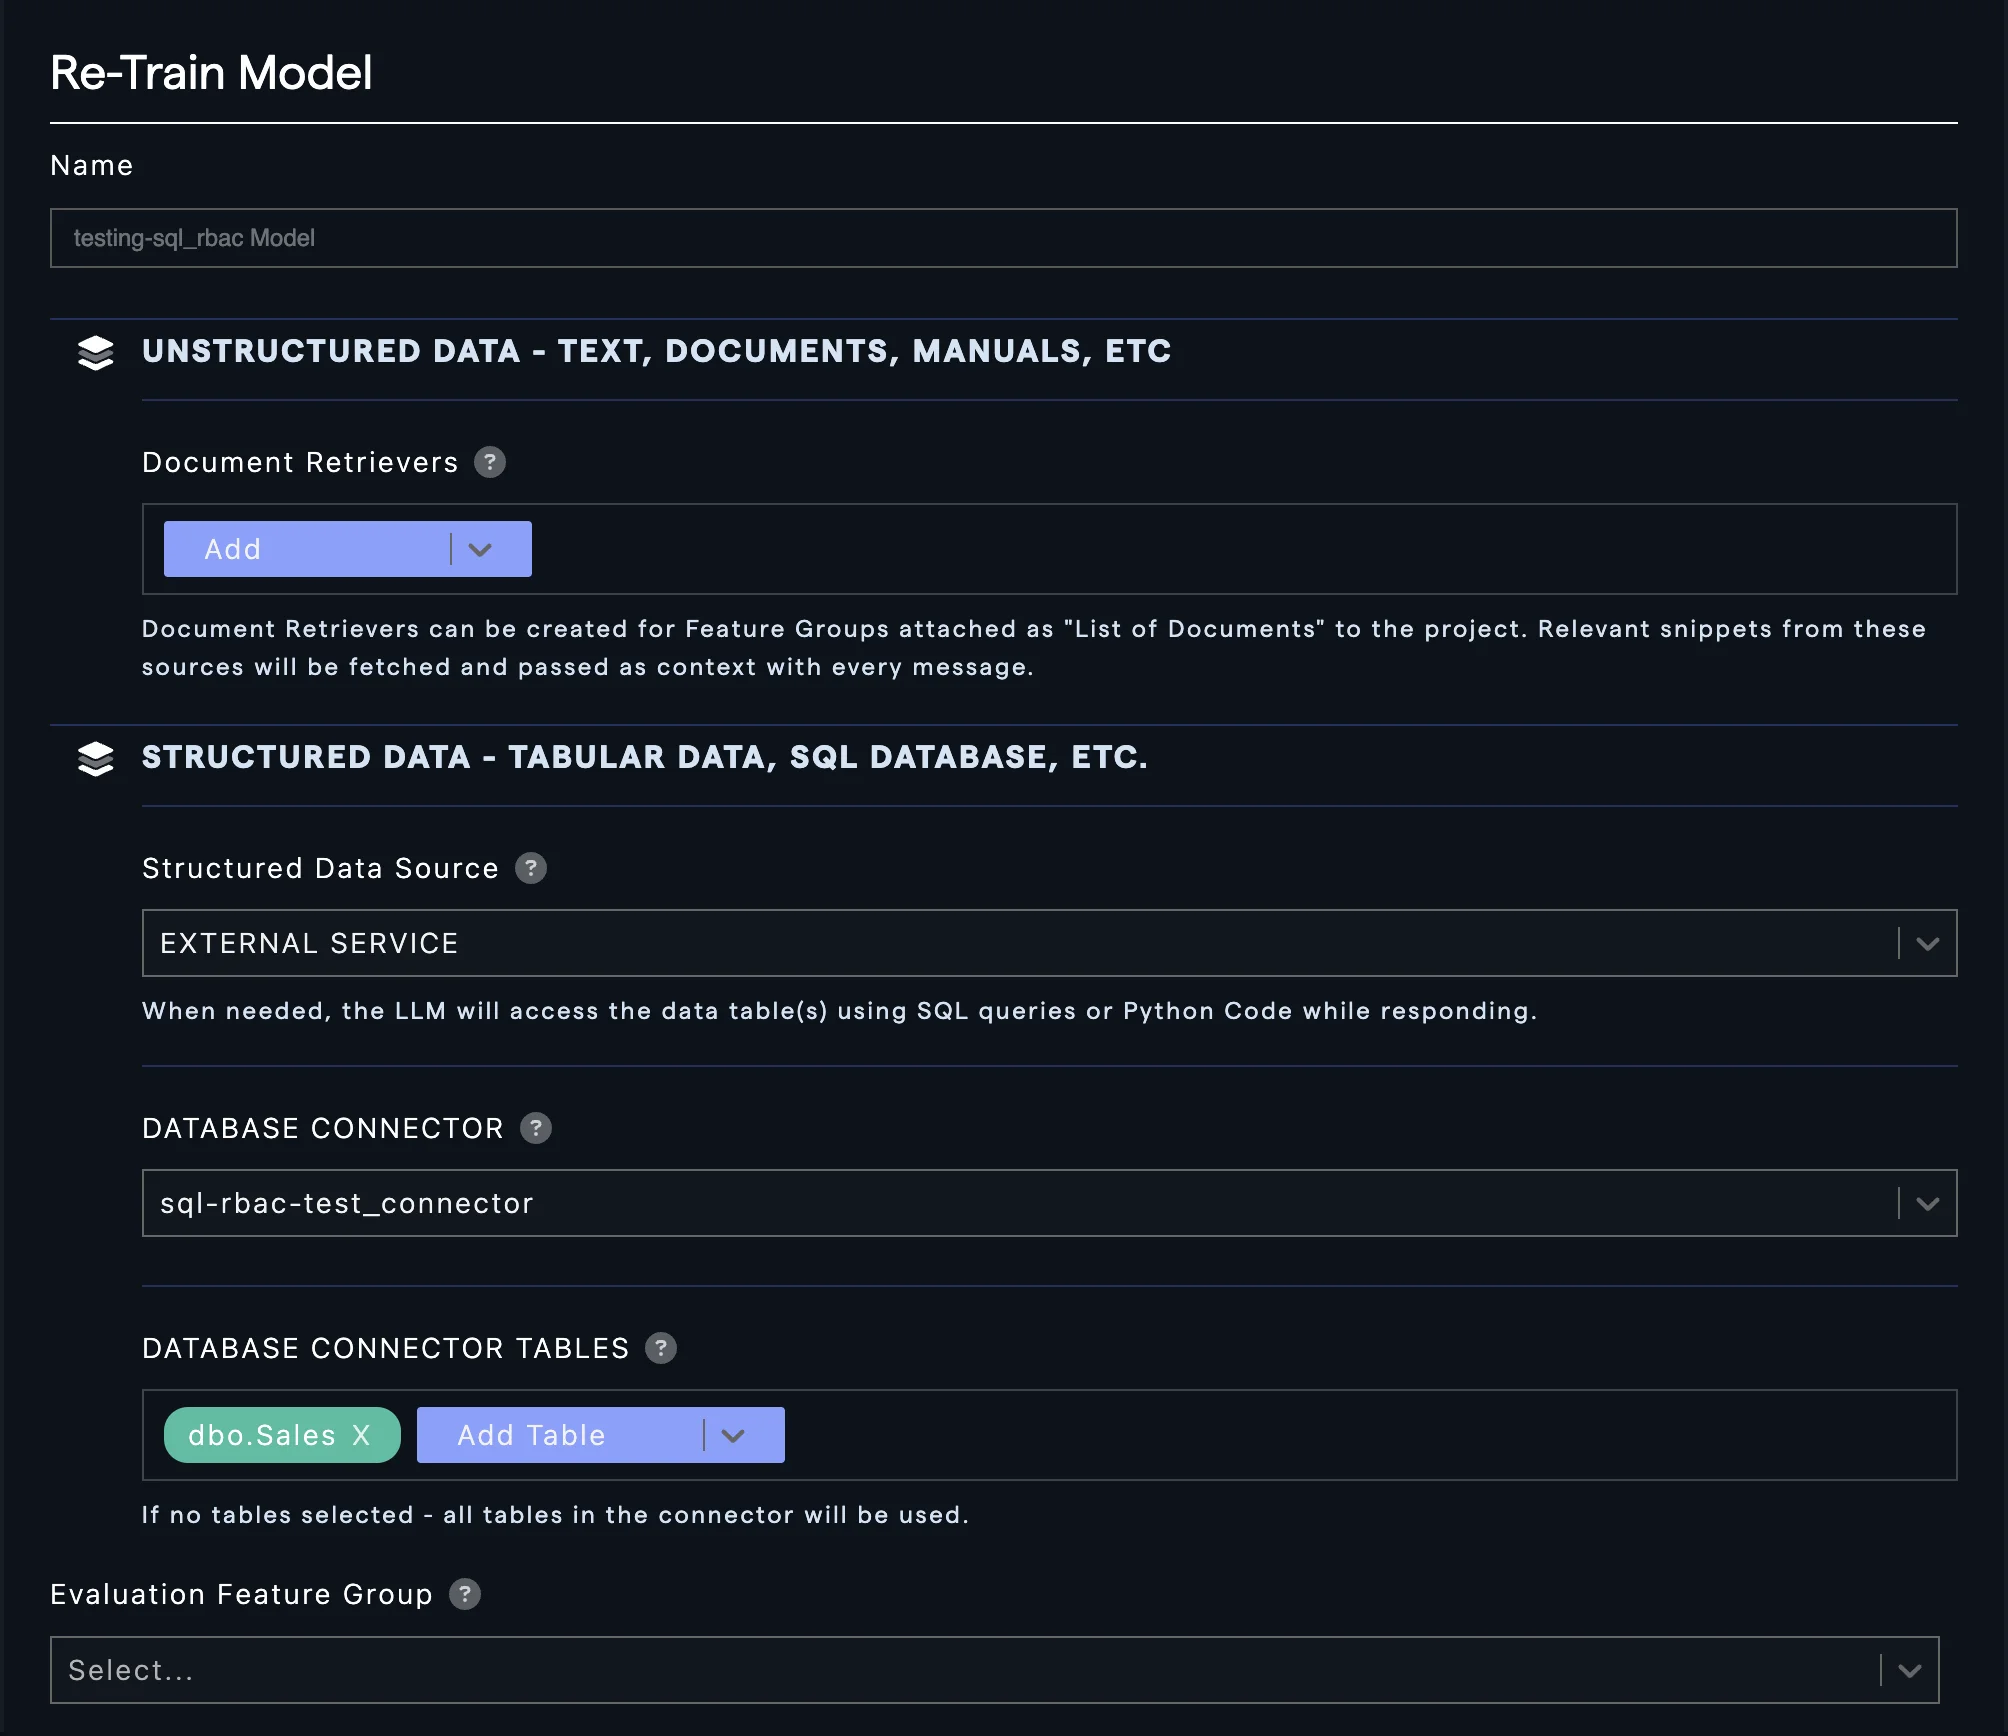
12. Select External Service
From the dropdown in Structured data source, select External Databases.
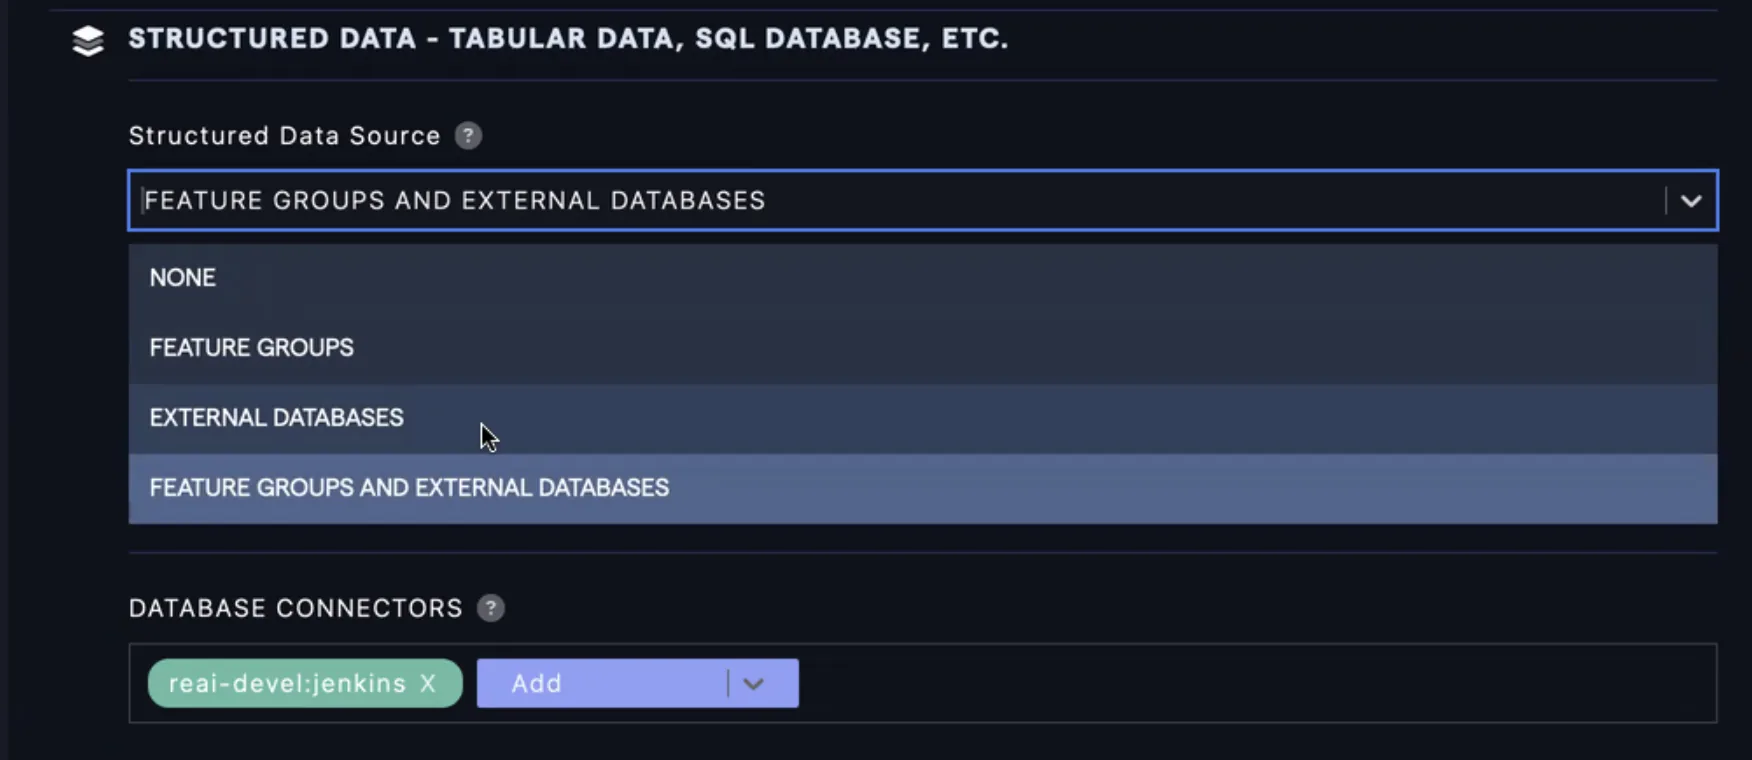
13. Select Connector and Tables
Select the connector you create in step 1 from the dropdown and add the tables that can be used for testing.
14. Train Model
Click on Train Model.
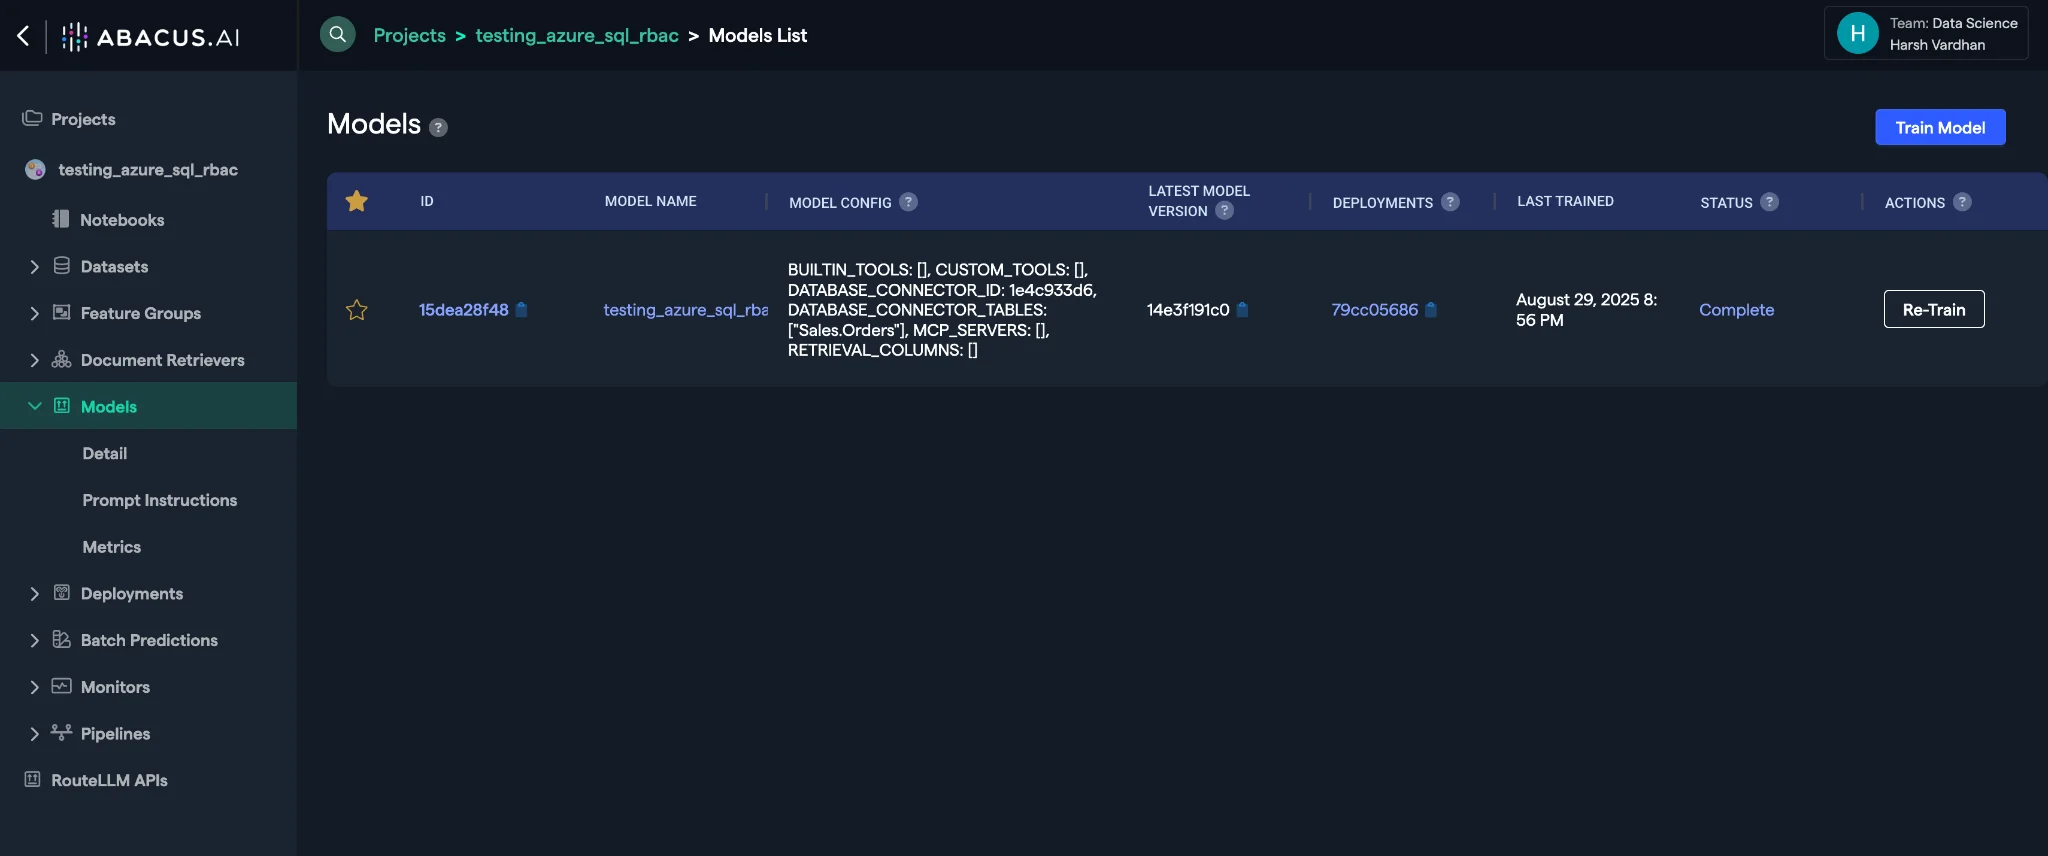
15. Access Trained Model
Once training is complete. Click on models and select your model.
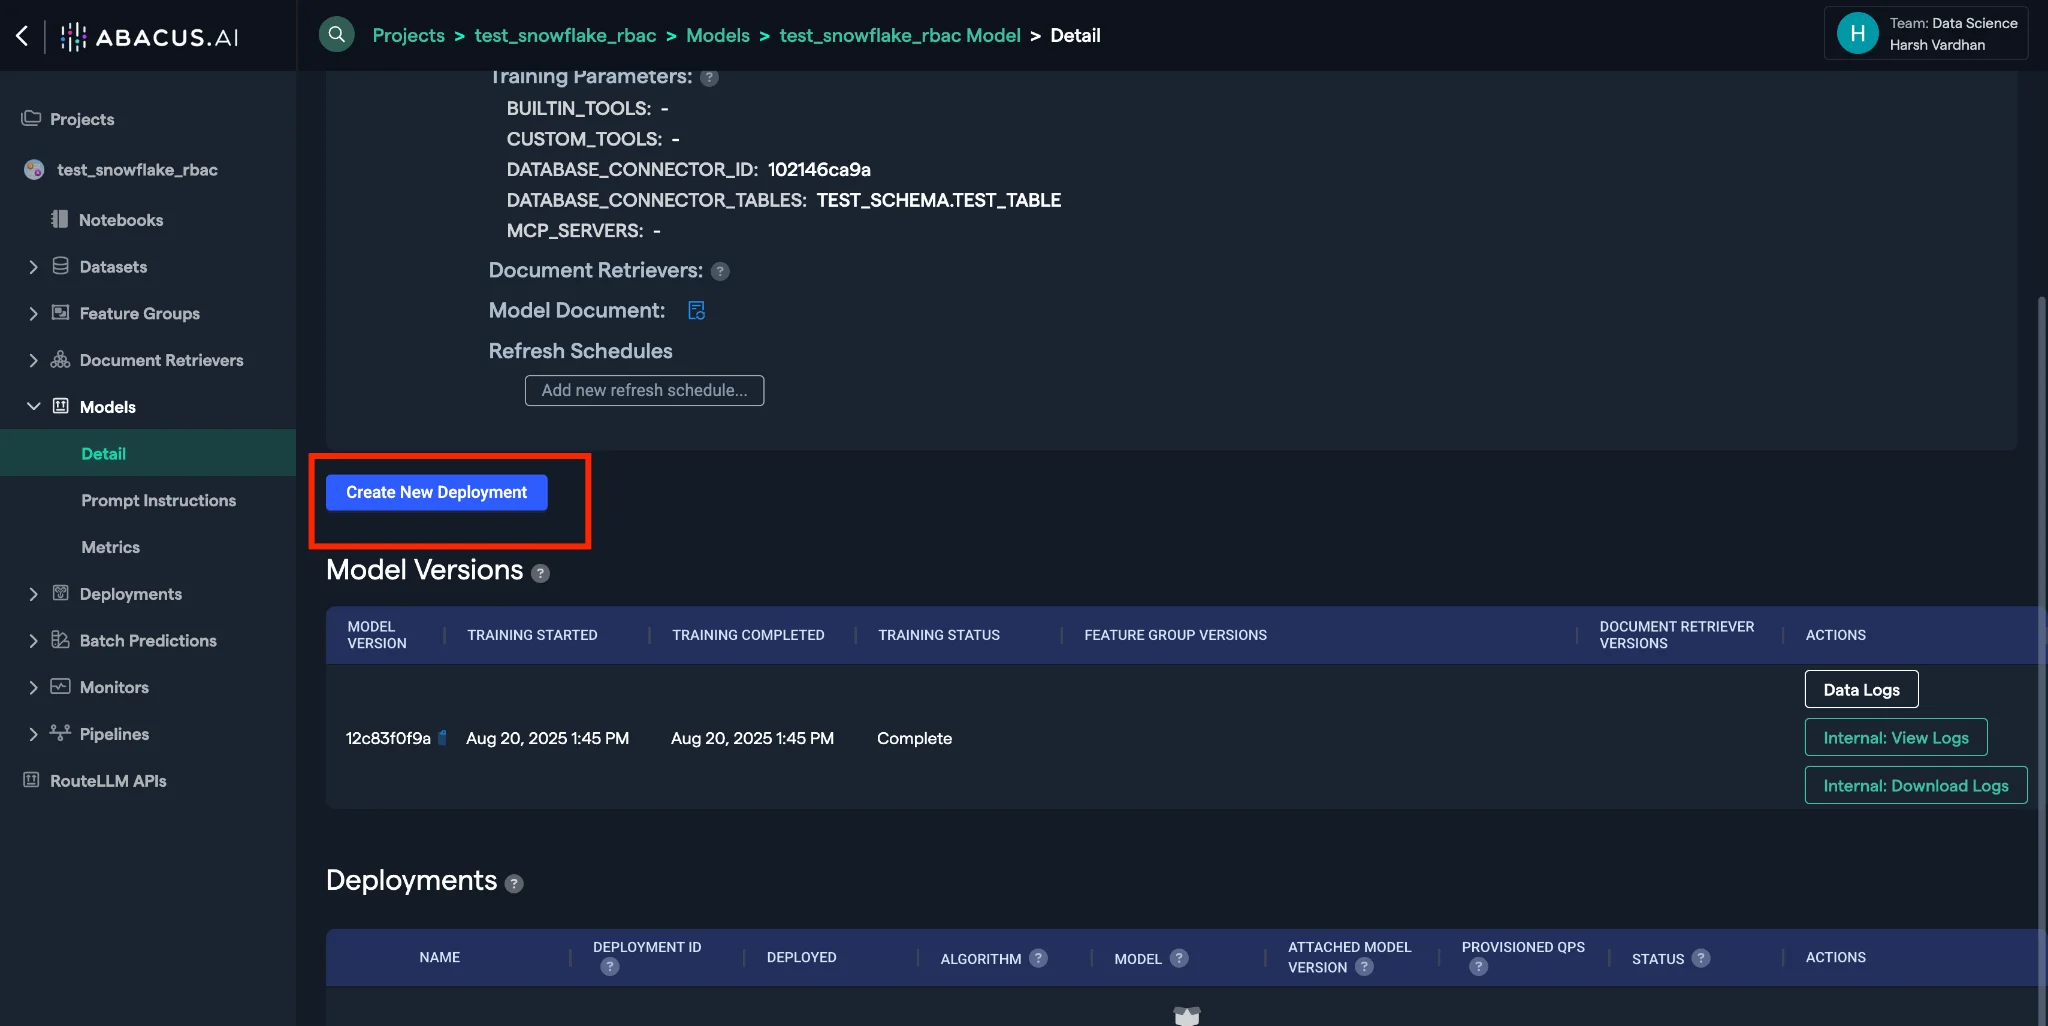
16. Create Deployment
Click on create a new deployment.
17. Select Deployment Type
Select Offline Batch + Realtime. Click on Next.
18. Configure Deployment Name
Enter the name that you want your end users to see and click on deploy.
19. Monitor Deployment Status
Go back to your model by clicking on model and then your model name. Once the deployment is in active state. Click on deployment name.
20. Access Prediction Dashboard
Click on the prediction dash option under Deployment.
21. Test the Chat Bot
Click on Go to Abacus.AI chat to test your bot.
22. Authentication and Testing
Enter your question/prompt. Each user will be asked to login to Azure SQL once. Login using your Entra ID user credentials.
Important Notes
- Ensure that your Azure SQL database is properly configured with the necessary permissions
- The ODBC 18 driver is required for optimal compatibility
- Each user will need to authenticate with their Entra ID credentials when first accessing the system
- Make sure to whitelist the appropriate IP addresses for your Azure SQL database
- The connector must be in an active state before proceeding with model training
Troubleshooting
If you encounter issues during the setup process:
- Verify that the Azure SQL connector is properly configured and active
- Check that the database user has been created correctly
- Ensure that IP addresses are properly whitelisted
- Confirm that Entra ID authentication is working properly
This completes the setup process for the Azure SQL RBAC user connector with Abacus.AI.