Custom Chatbots
Overview
This tutorial shows how to create a Custom Chatbot in the Abacus Developer Platform.
To follow this tutorial, ensure you have followed these steps:
- Log in to the Abacus developer platform
- Create a new project of type "Custom Chatbots"
- Provide a name, and click on
Skip to Project Dashboard.
If you are having trouble creating a new project, follow this guide
What are Custom Chatbots?
A Custom Chatbot is an out-of-the-box conversational AI Agent that can be connected to:
- Vector stores: Created from ingested data, either uploaded or through an org level connector
- Built in tools: Utilising one of our user connectors like Jira, Outlook, Sharepoint, Confluence, Gmail, etc.
- Structured data: Text-to-SQL capabilities for database queries
- Custom tools: Your own custom tools that the LLM can invoke on demand
Steps to Train a Model
For this tutorial, we will be building a Chatbot that will combine some specific documents from Sharepoint as well as our built-in Jira Tool. After it's done, users would be able to ask questions like:
- What is our Policy on x? (Sharepoint)
- Can you show me my open tickets? (Jira Tool)
Step 1: Ingest data into the platform (Optional)
This step involves ingesting data into the platform to create datasets that will be used for training the chatbot models.
Depending on the Custom Chatbot you are trying to build, the data ingestion may vary:
- For RAG Chatbots, you can either:
- Manually upload documents using a .zip folder
- Create a connection to one of your data sources (for instance, Sharepoint) and ingest the documents directly
- Use a user connector and search documents on the fly
- For DataLLM (text-to-SQL Chatbots), you can either:
- Use a feature group
- Use an
External Database- Which will execute SQL on top of your databases directly - Use a combination of platform feature groups and external databases.
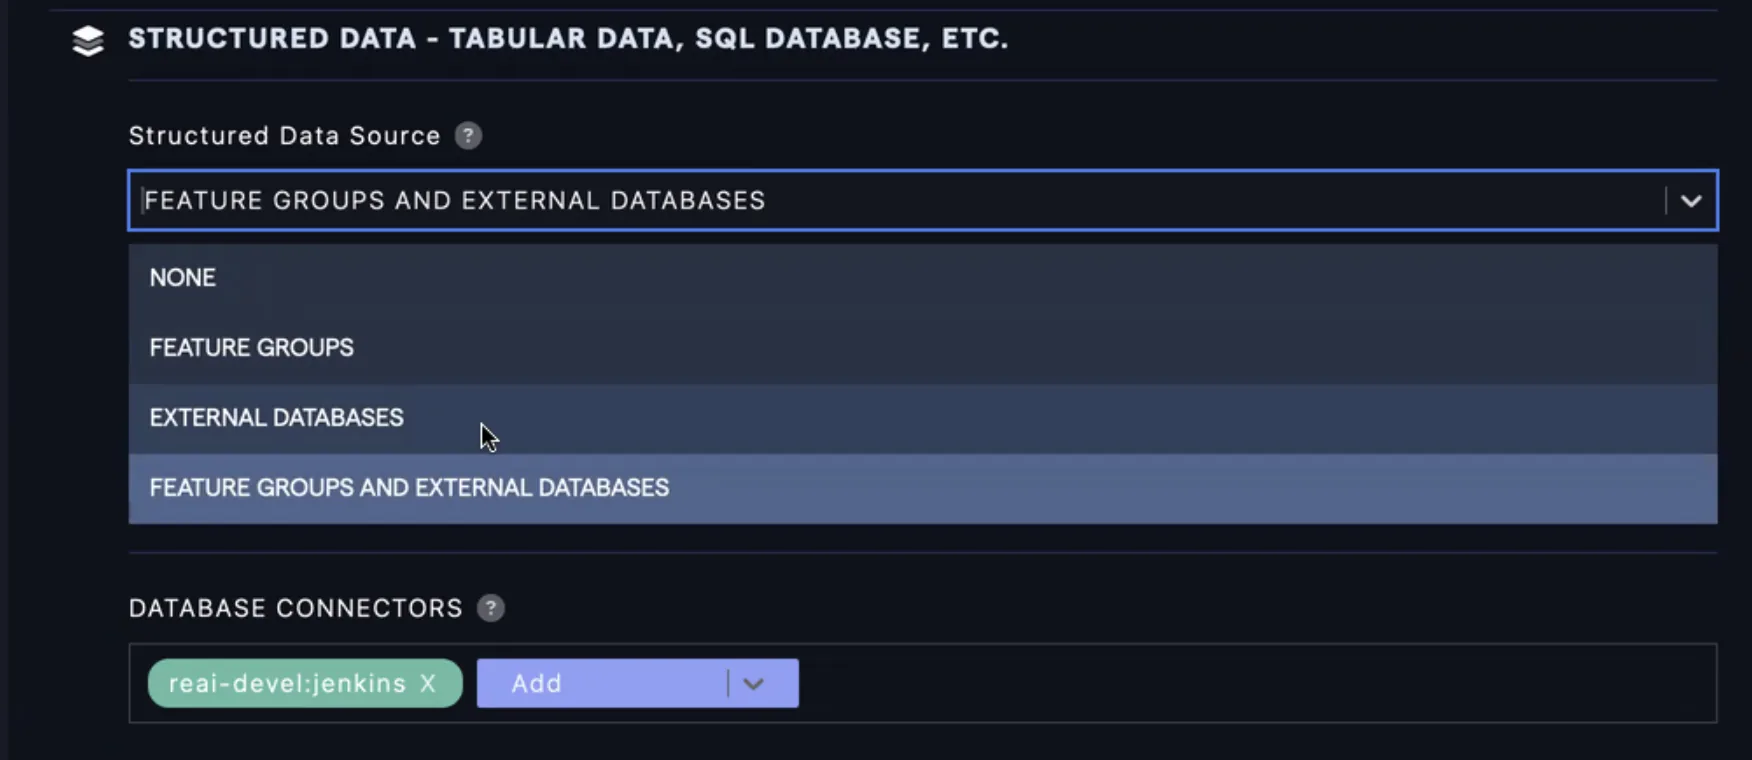
If you are having trouble deciding whether you need to upload data or not, Skip to this section of the document first.
Once you are ready to upload data, follow these steps:
- Click on
Datasetswithin the project page on the left side panel. - Click on
Create Dataseton the top right corner. - IMPORTANT: Provide a name and choose the
List of Documentsfeature group type
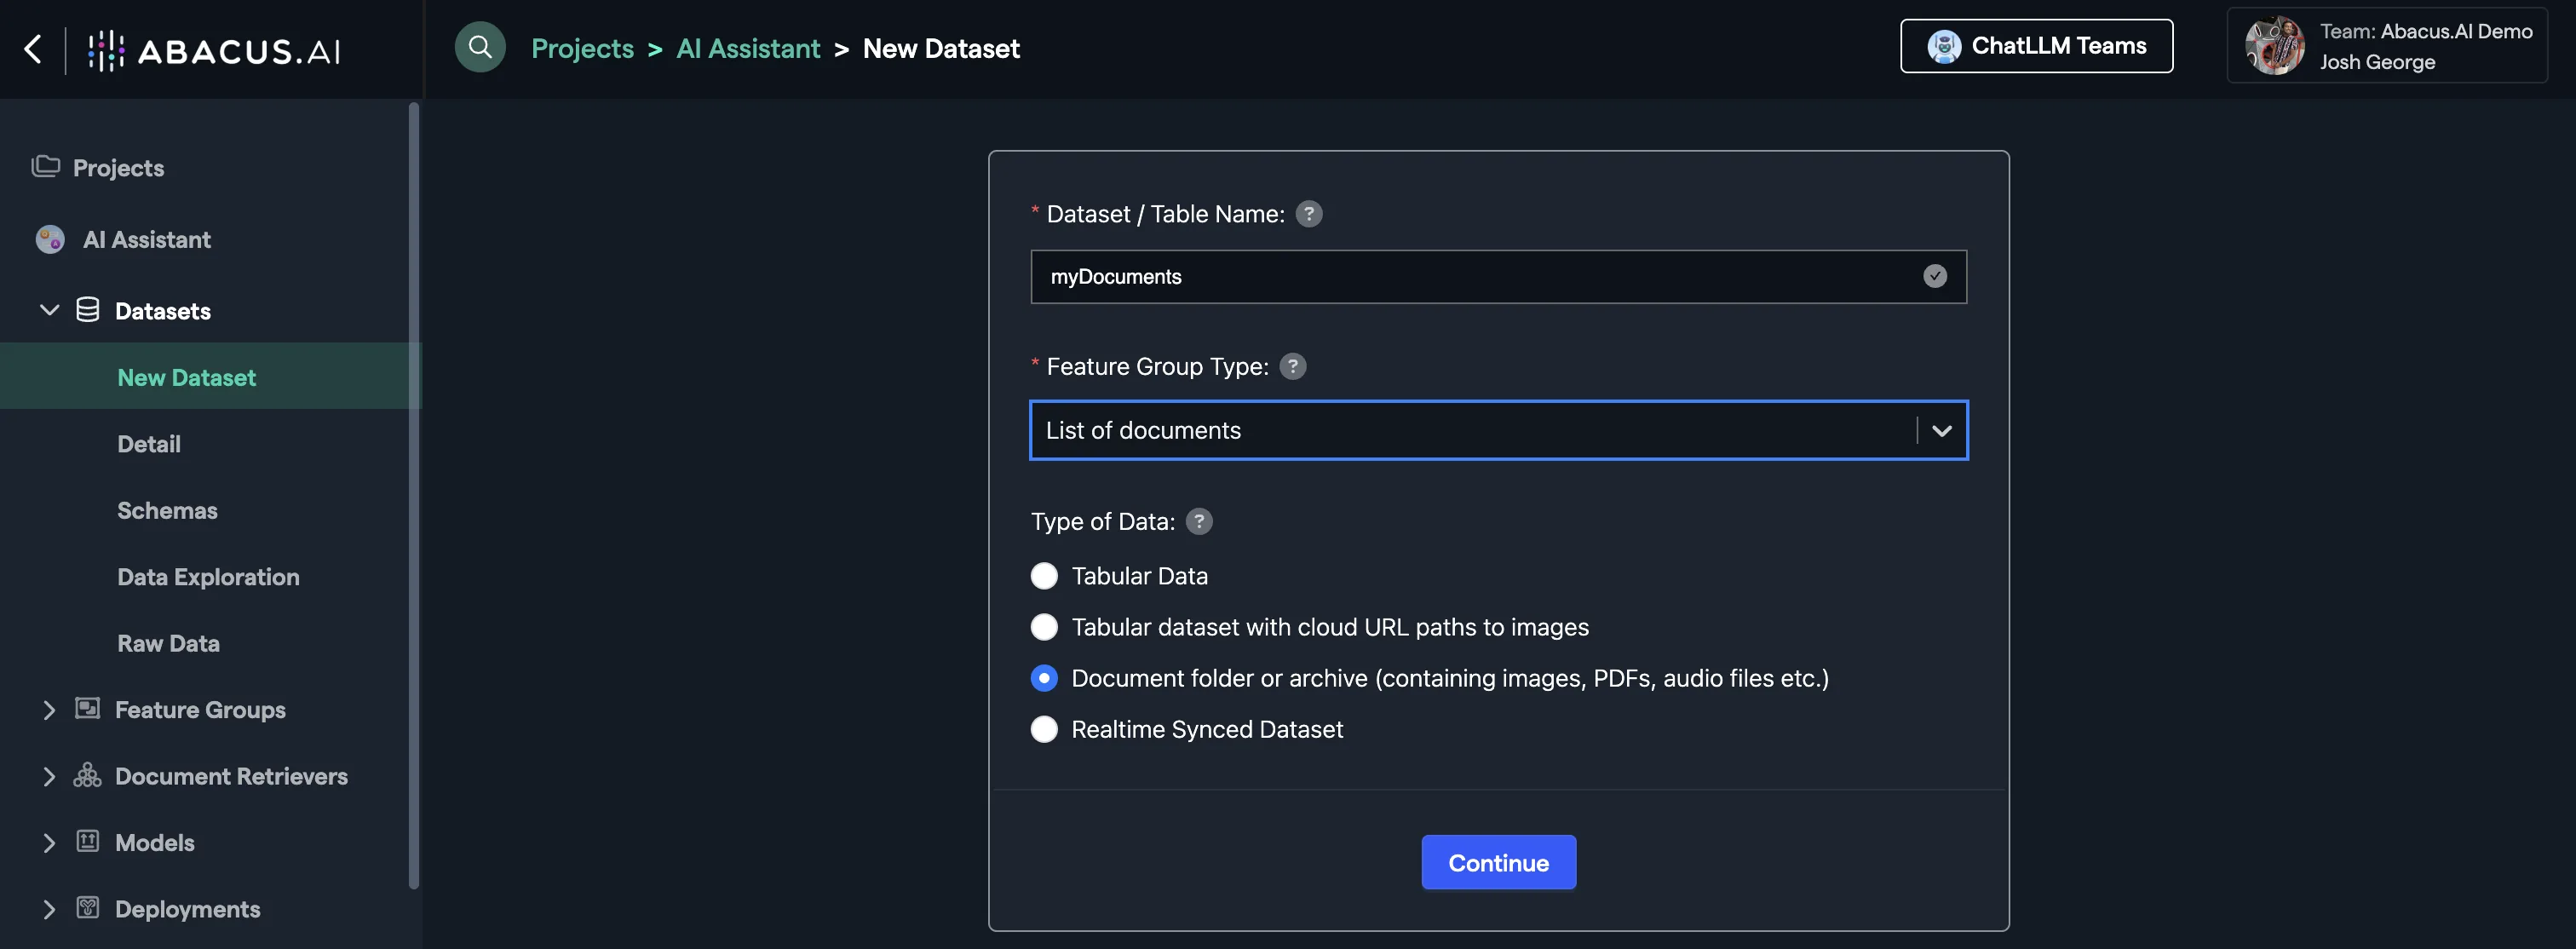
Choose whether you want to use a file upload or an external service, and then follow the setup wizard to completion.
Example: Read from External Service (Sharepoint)
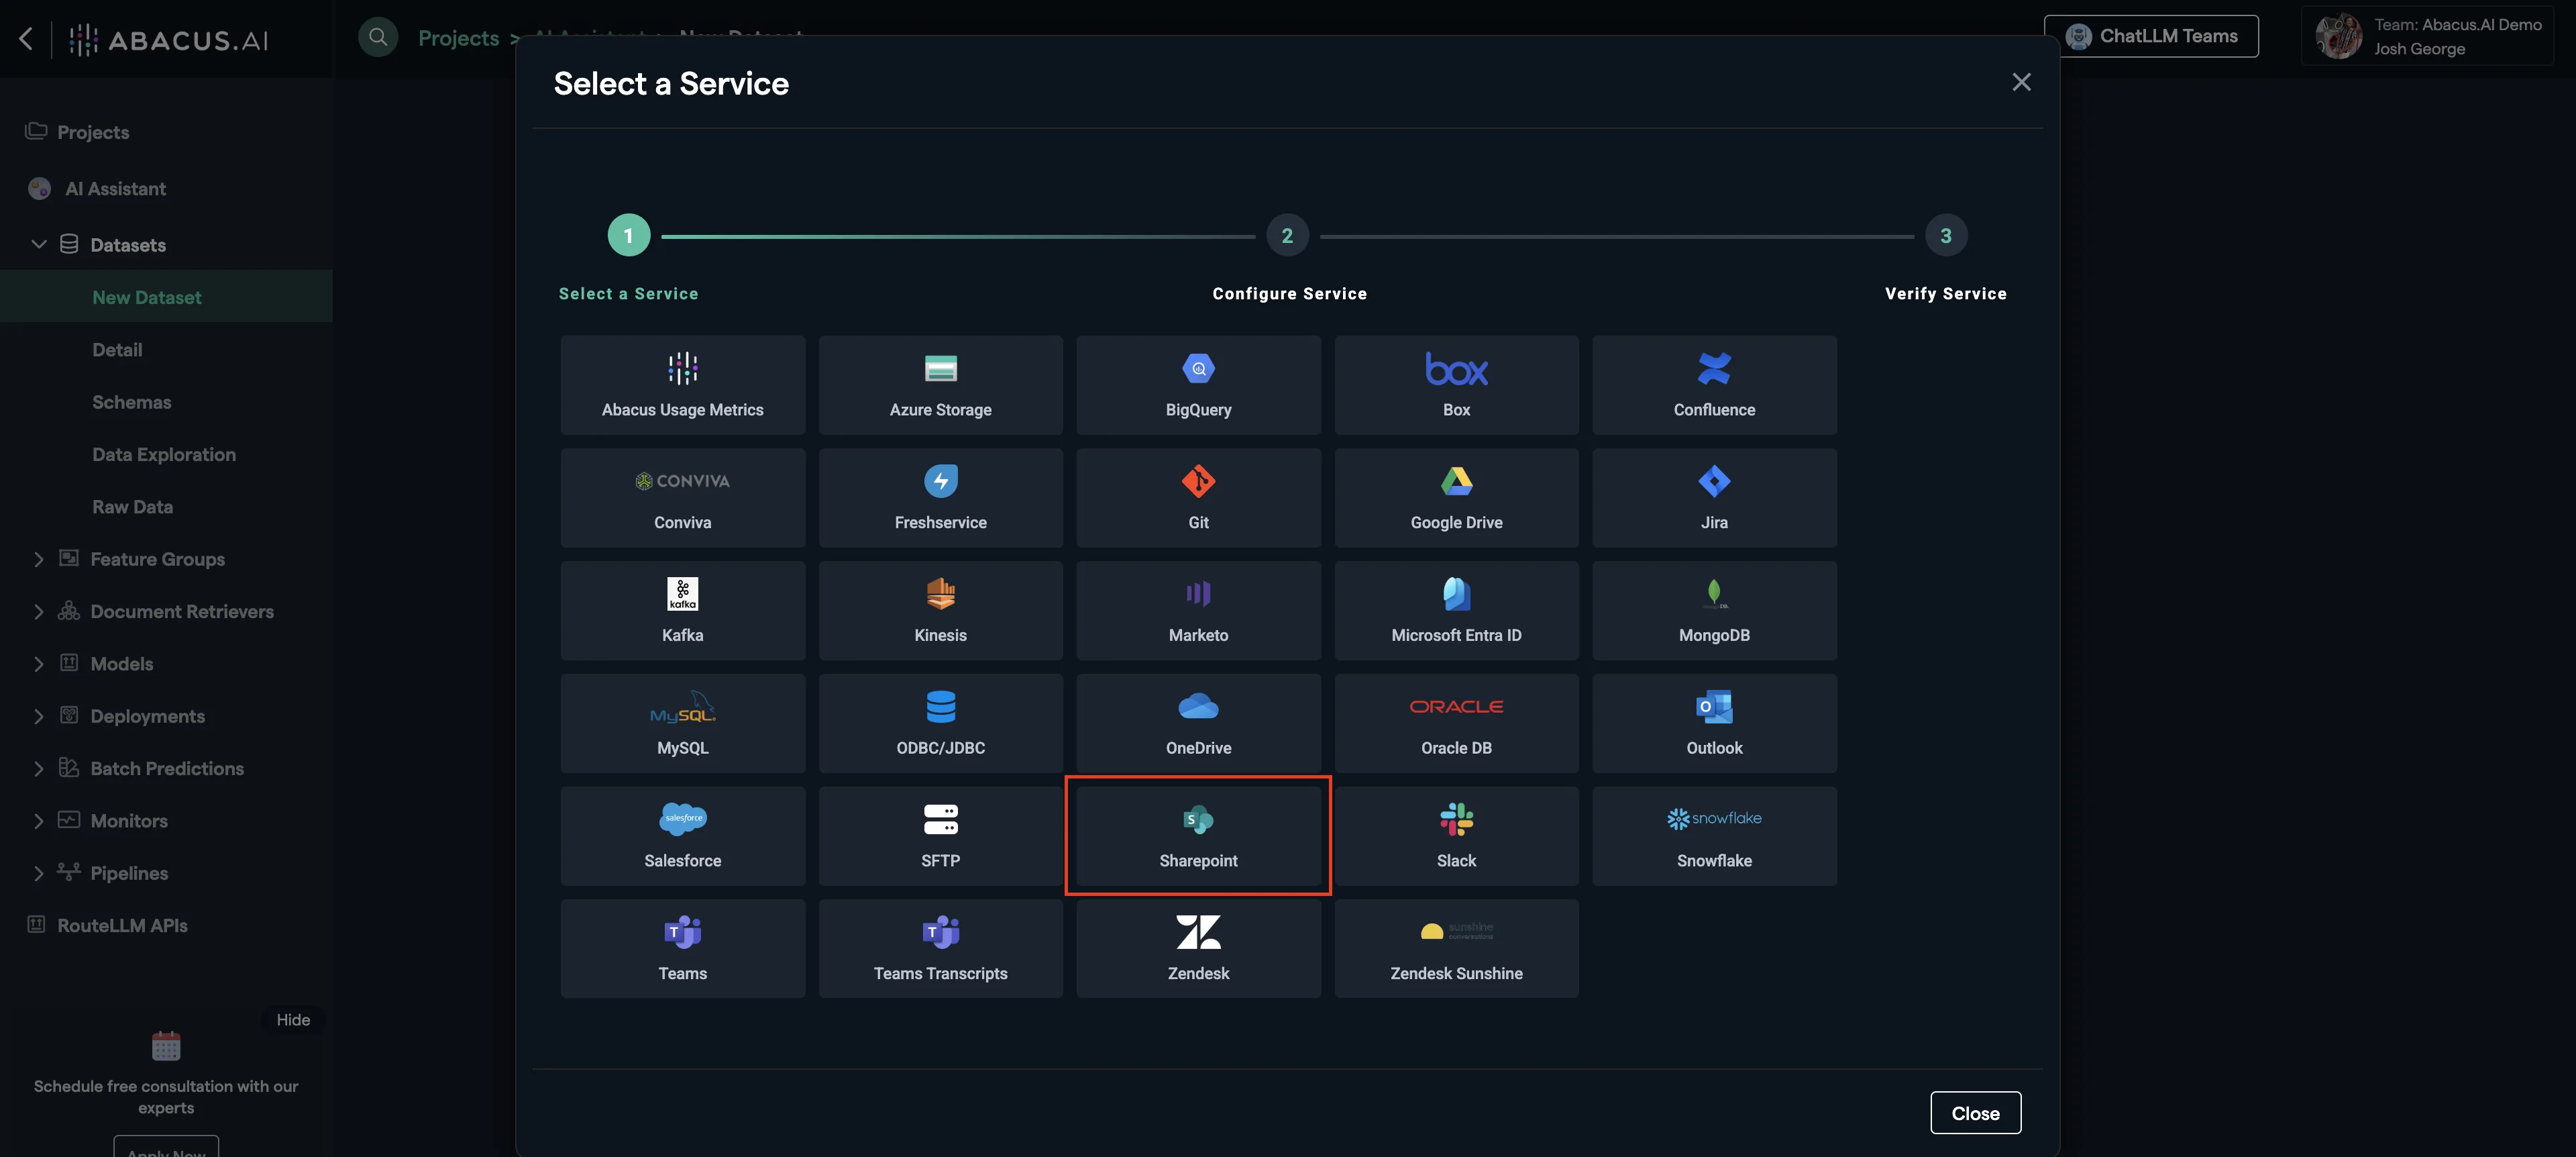
Select Read From External Service from file source options.
Click Add New Application Connector to create a new connector if not already existing.

You will see a list of all of our available out-of-the-box connectors. We can also help you create custom connectors for API-enabled applications that are not listed here.
Click on Sharepoint and follow the instructions for setup.
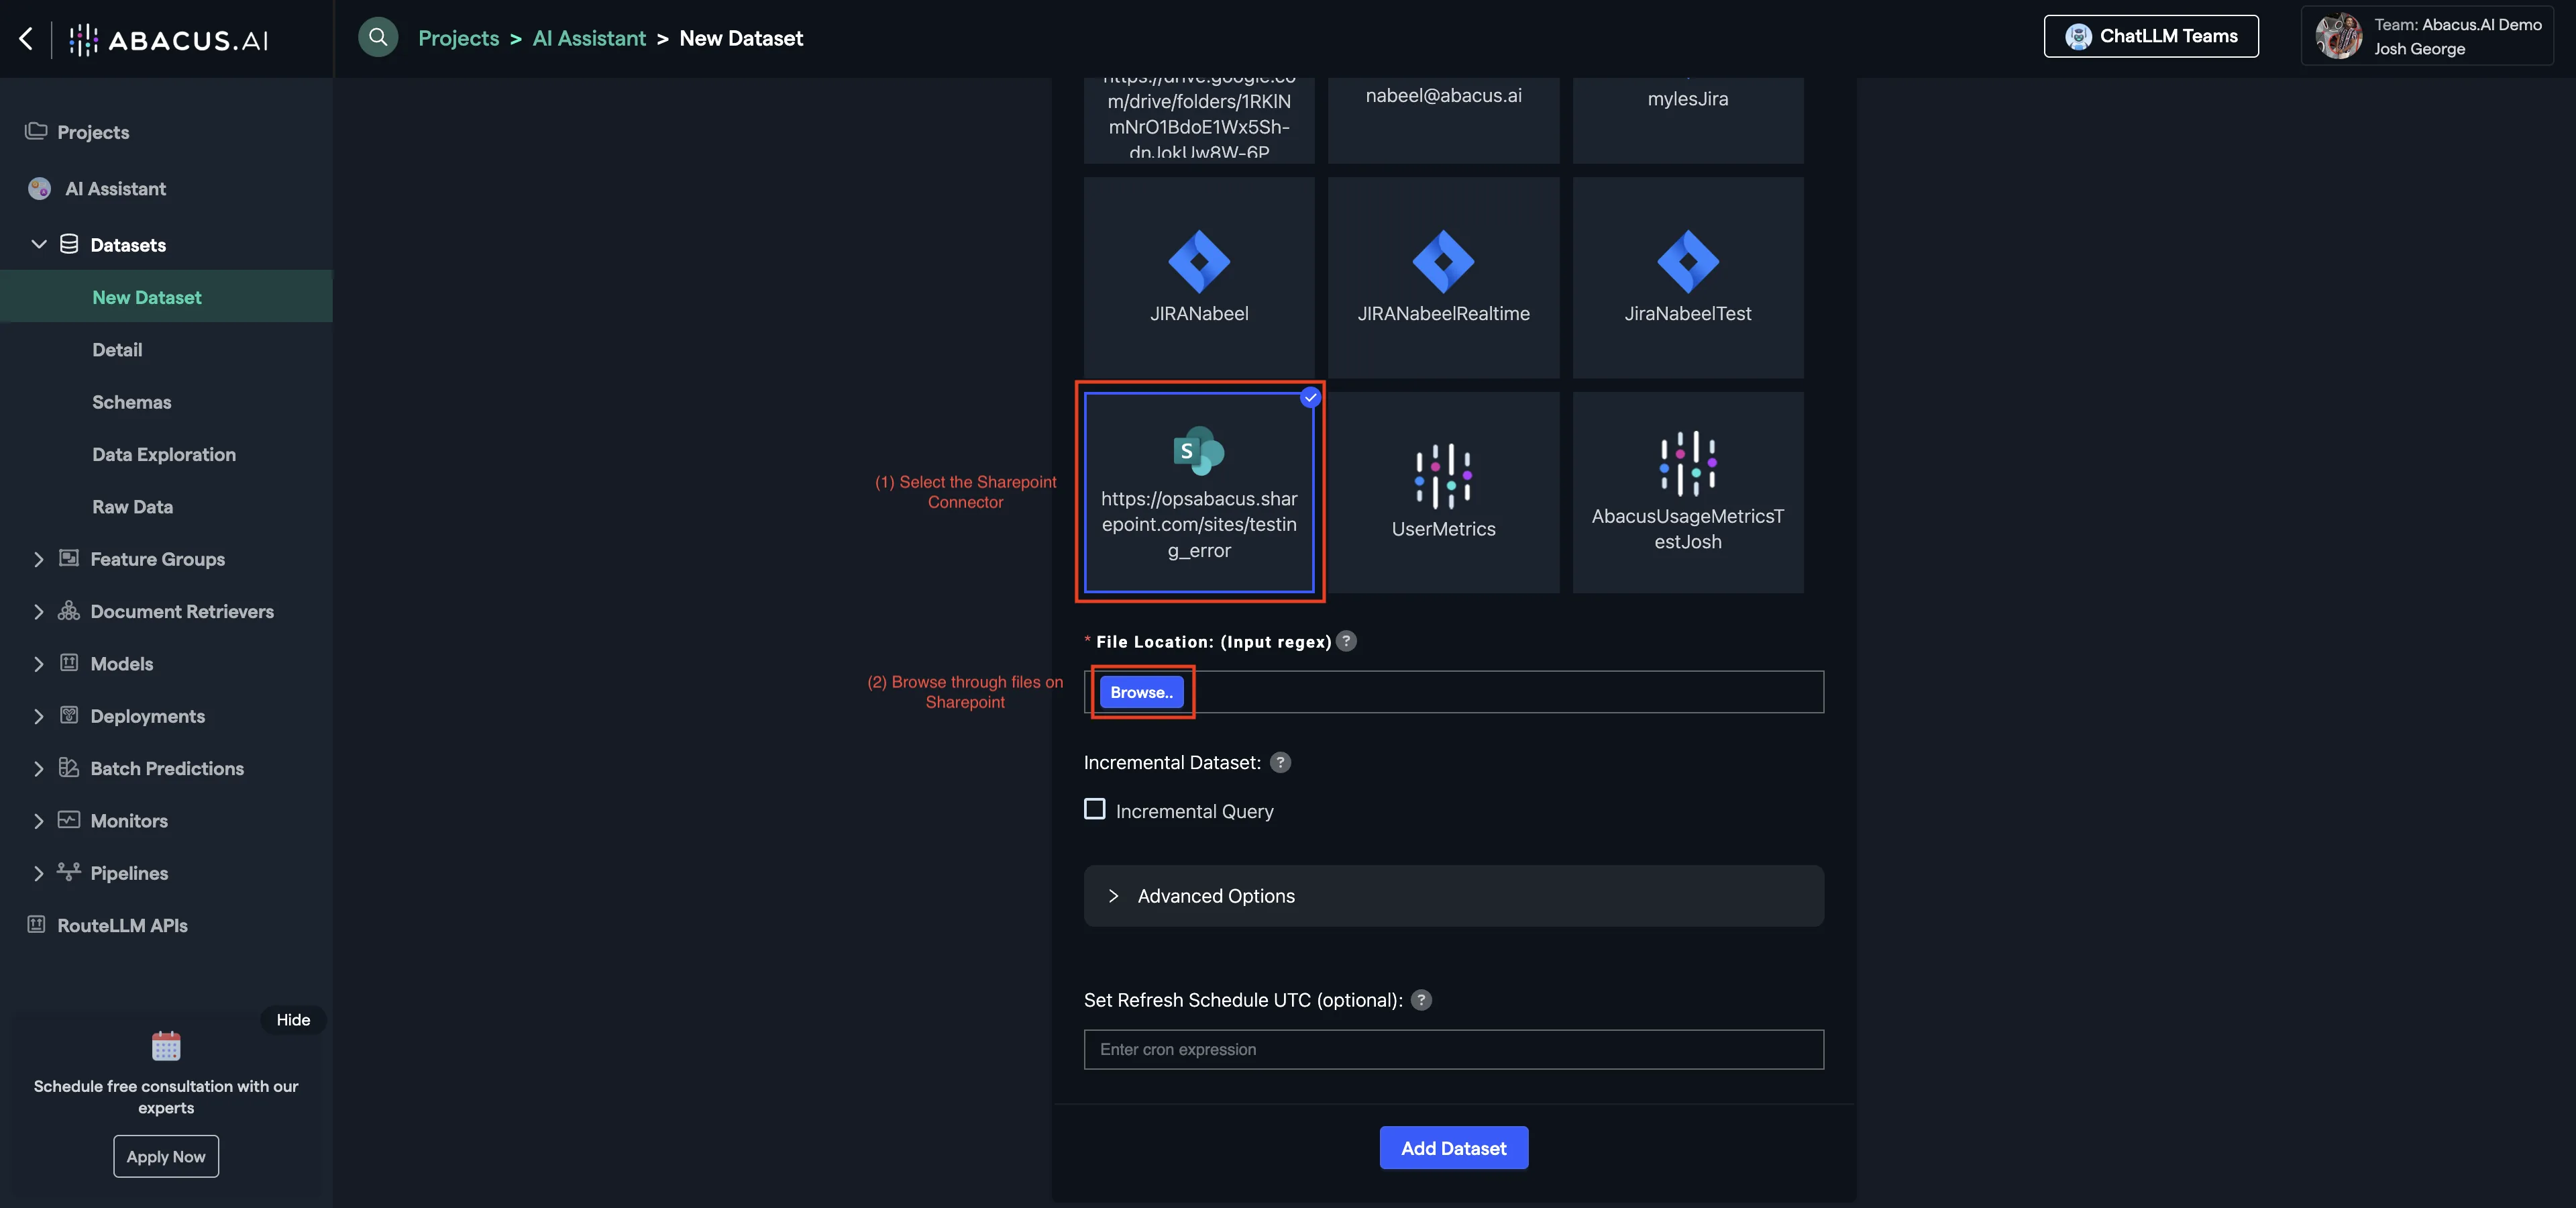
Once the connector is set up, you can choose it from the list of established connectors (below Add New Application Connector).
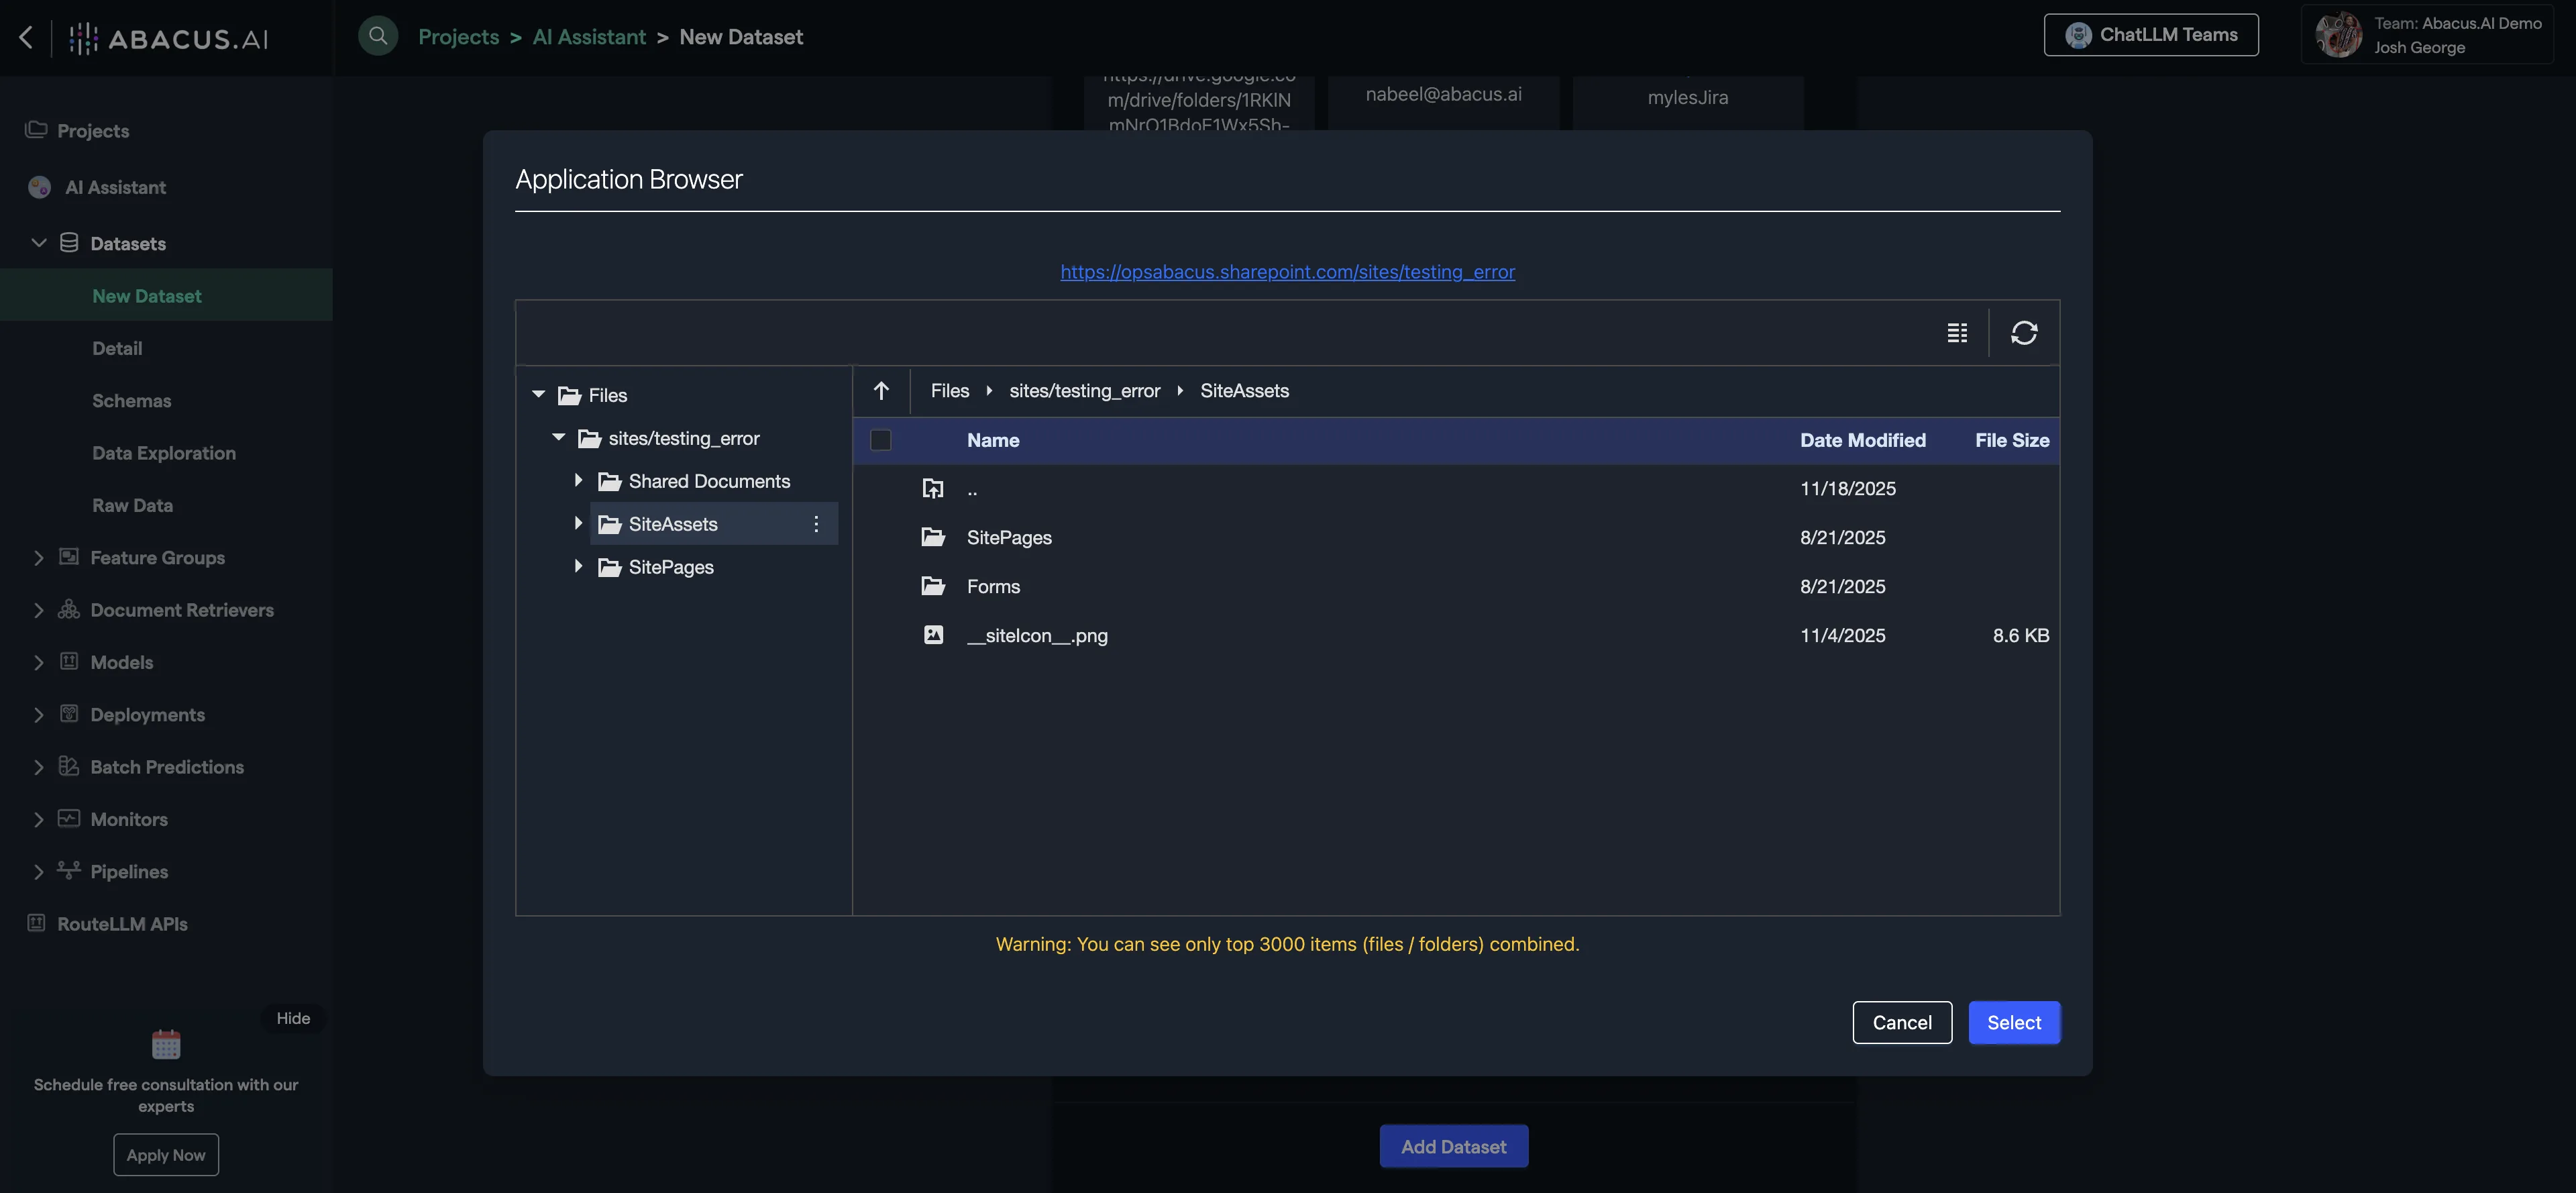
Select browse to look through the connected Sharepoint data and utilize it for your chatbot or data ingestion needs.
Step 2: Configuring Feature Groups
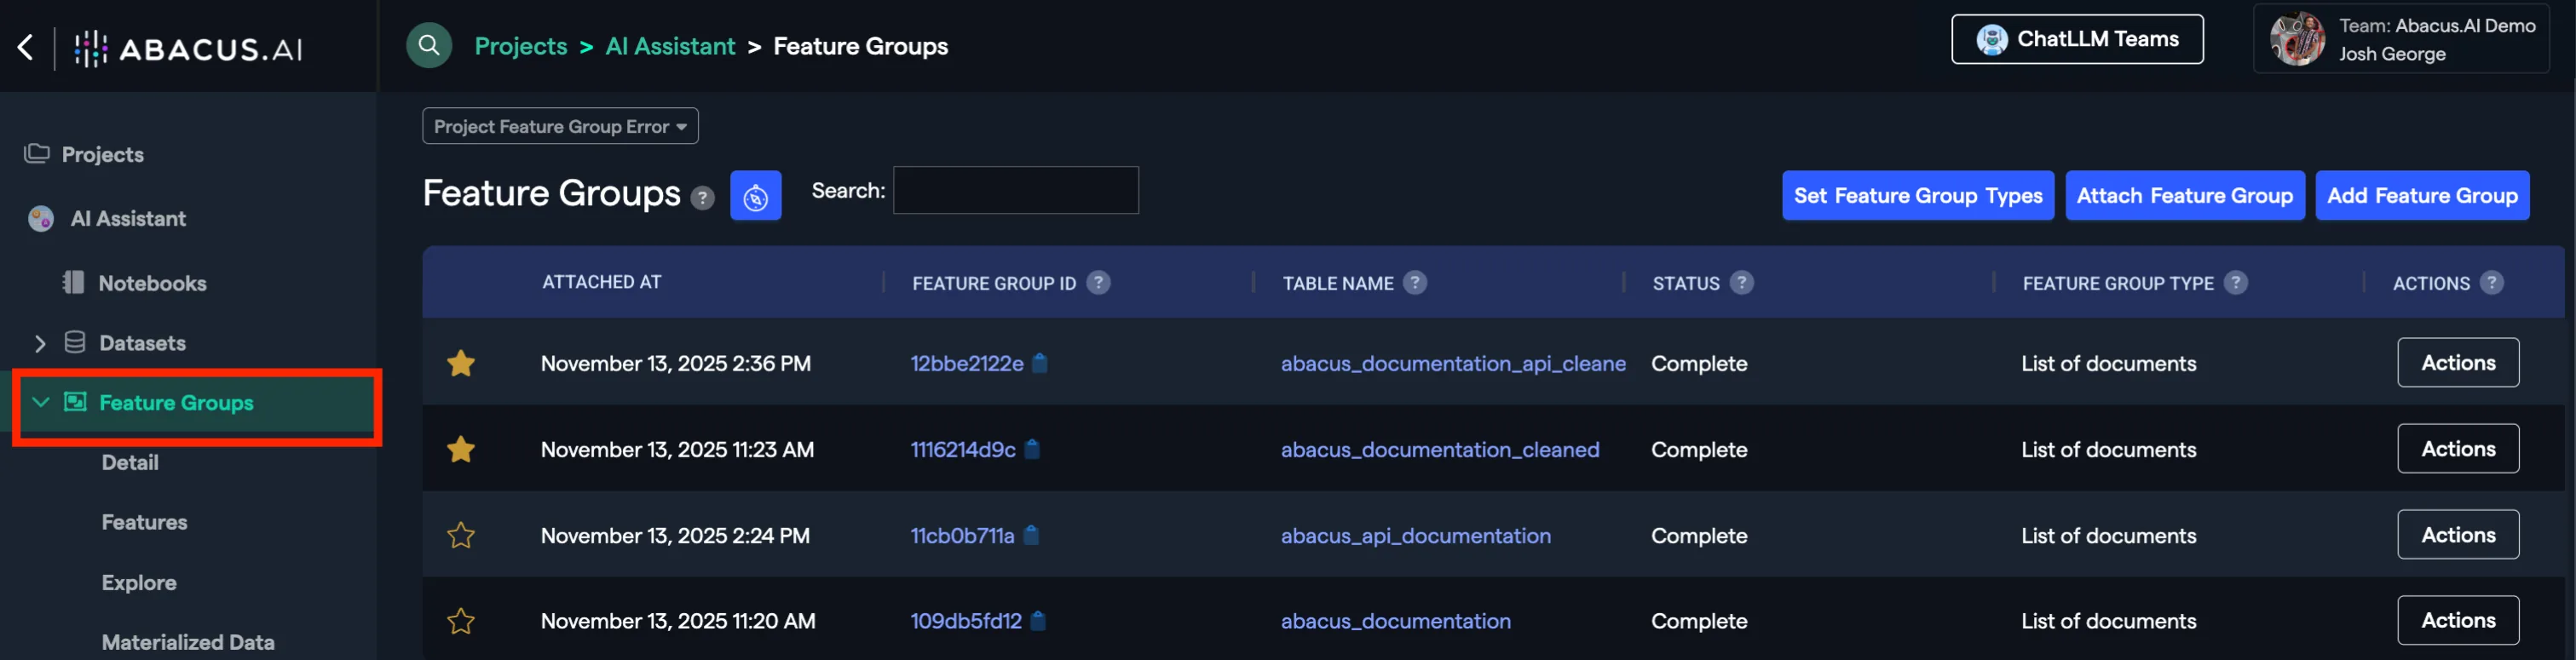
Once Abacus has finished inspecting the dataset, click on the Feature Groups section in the left panel to manage and configure your dataset.
You should be able to see a feature group with the same name as your dataset.
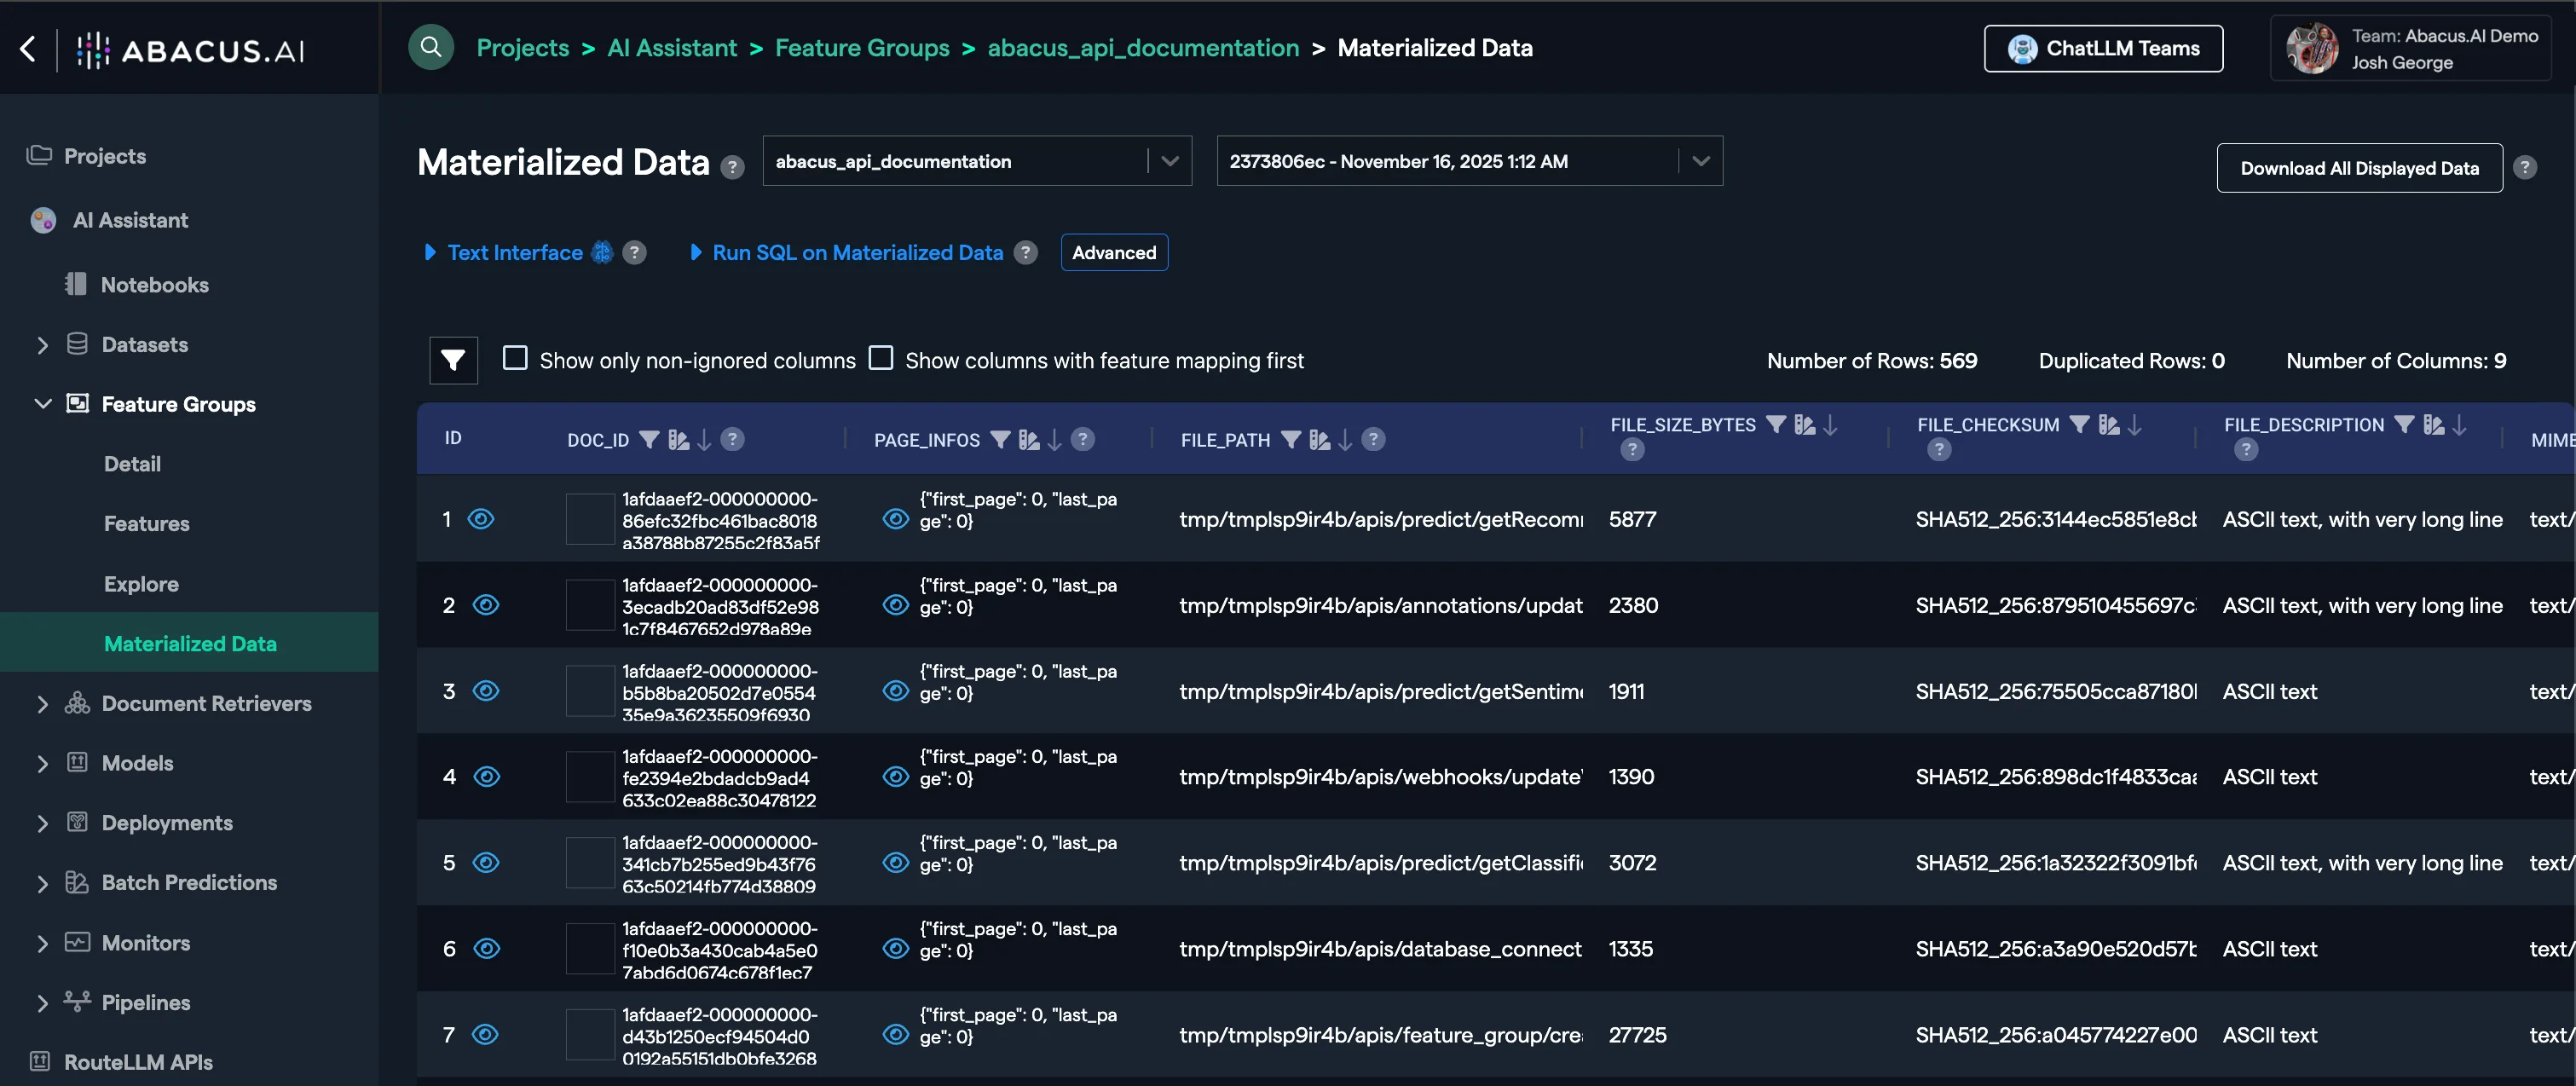
If you click on the Materialized Data view of the feature group, you will see your documents are listed in a tabularized format.
If you click on Features, you will be able to view the current feature group mapping. To learn more about the available mappings for this project type, visit Required Feature Groups
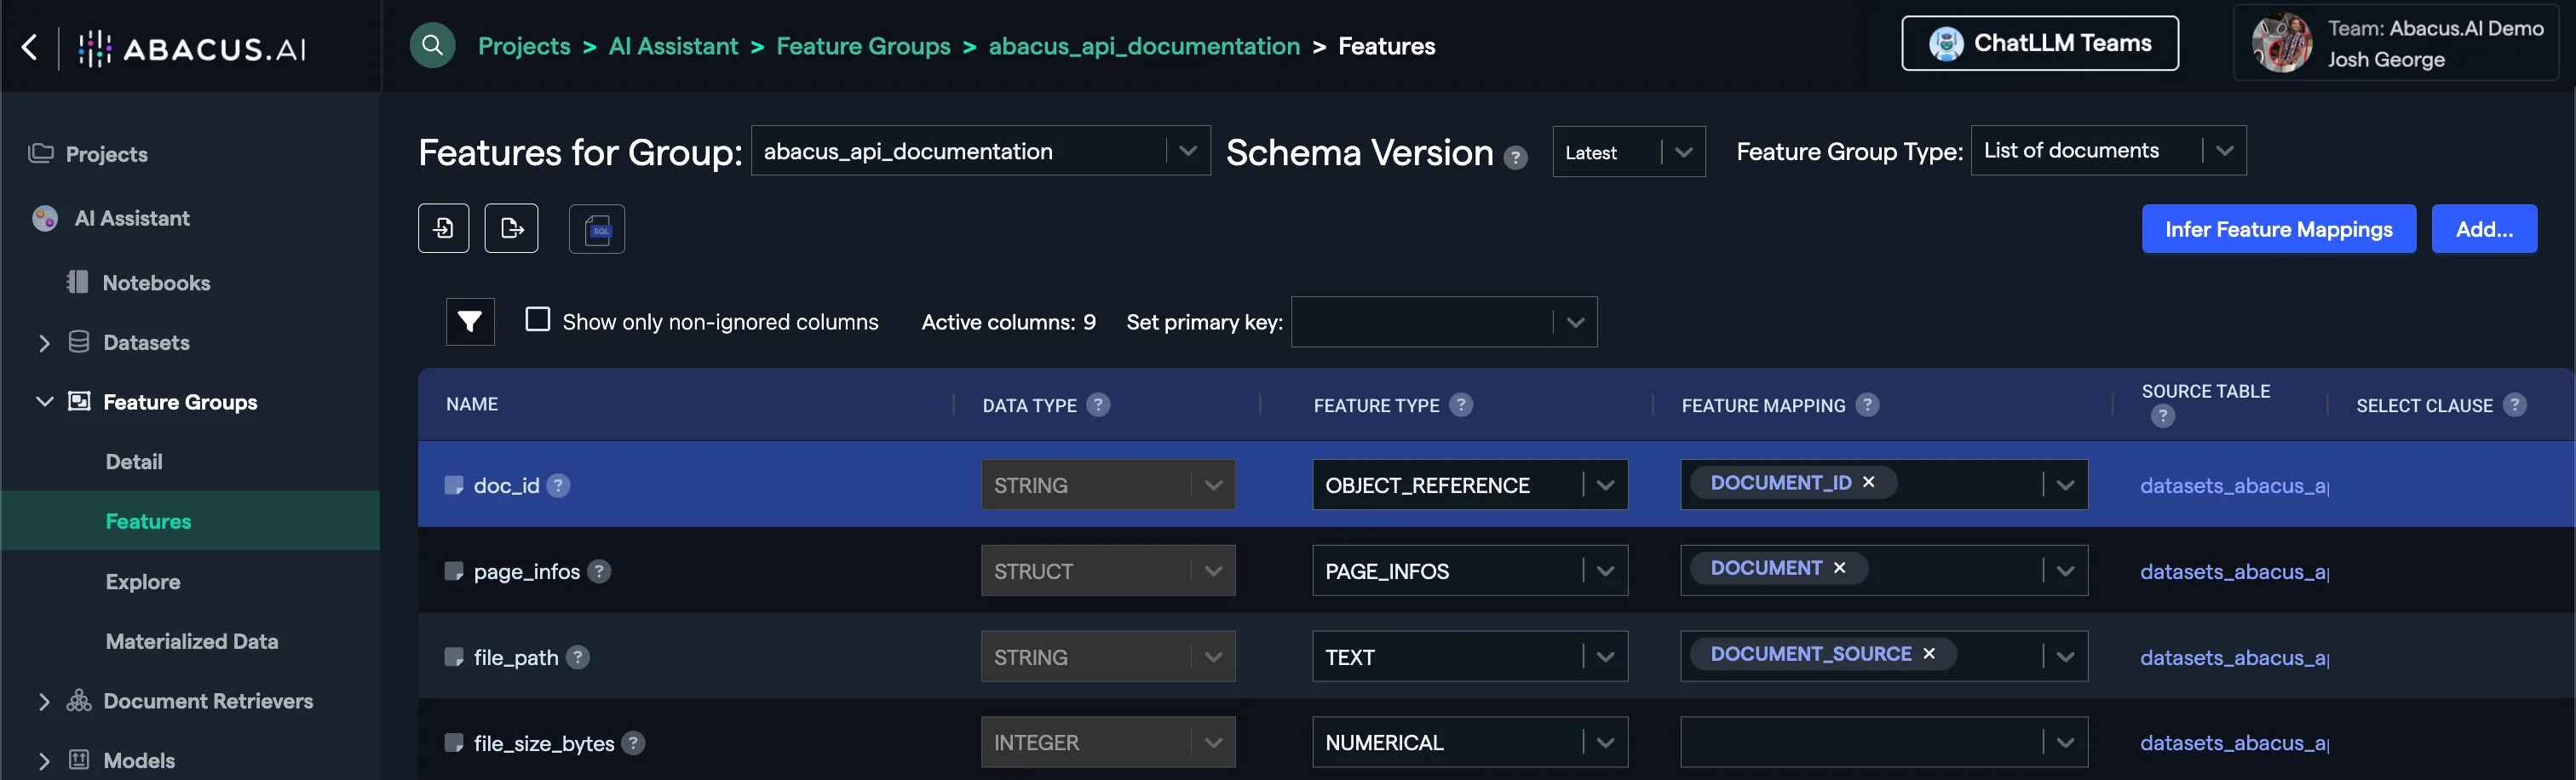
The feature mapping is required to train models, but Abacus will also do the mapping automatically for you for directly ingested document sets.
Step 3: Creating a Document Retriever
You are now ready to create a document retriever, which is our custom vector store.
Click on Document Retrievers on the left side panel
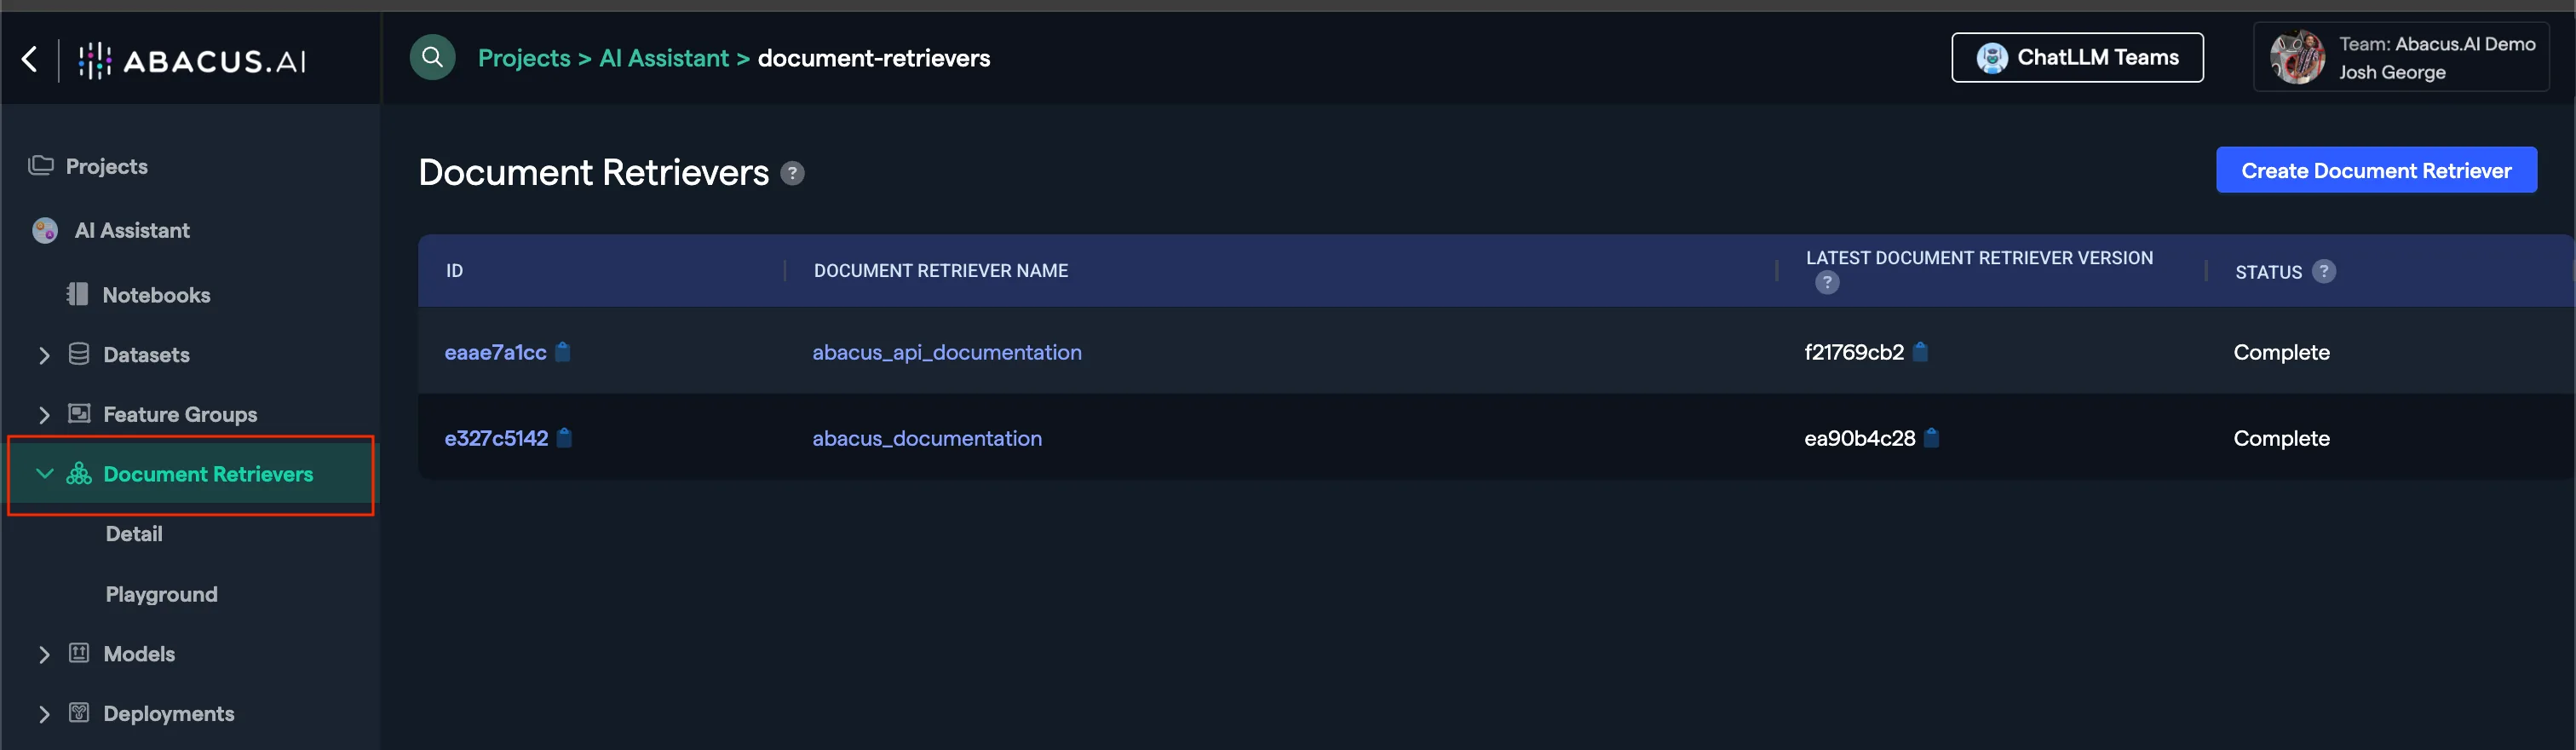
Then click on Create Document Retriever and select the feature group for which you wish to create embeddings.

Abacus offers many options on the document retrievers page but leaving the default settings is recommended. You can also click on the ? button next to options to learn more about how they work and how they should be leveraged.
Finally, document retrievers are only required when you are ingesting data into the platform for RAG Chatbots. You don't need to create a document retriever if you are utilising a user connector, or are only interested in creating a DataLLM (text-to-SQL)
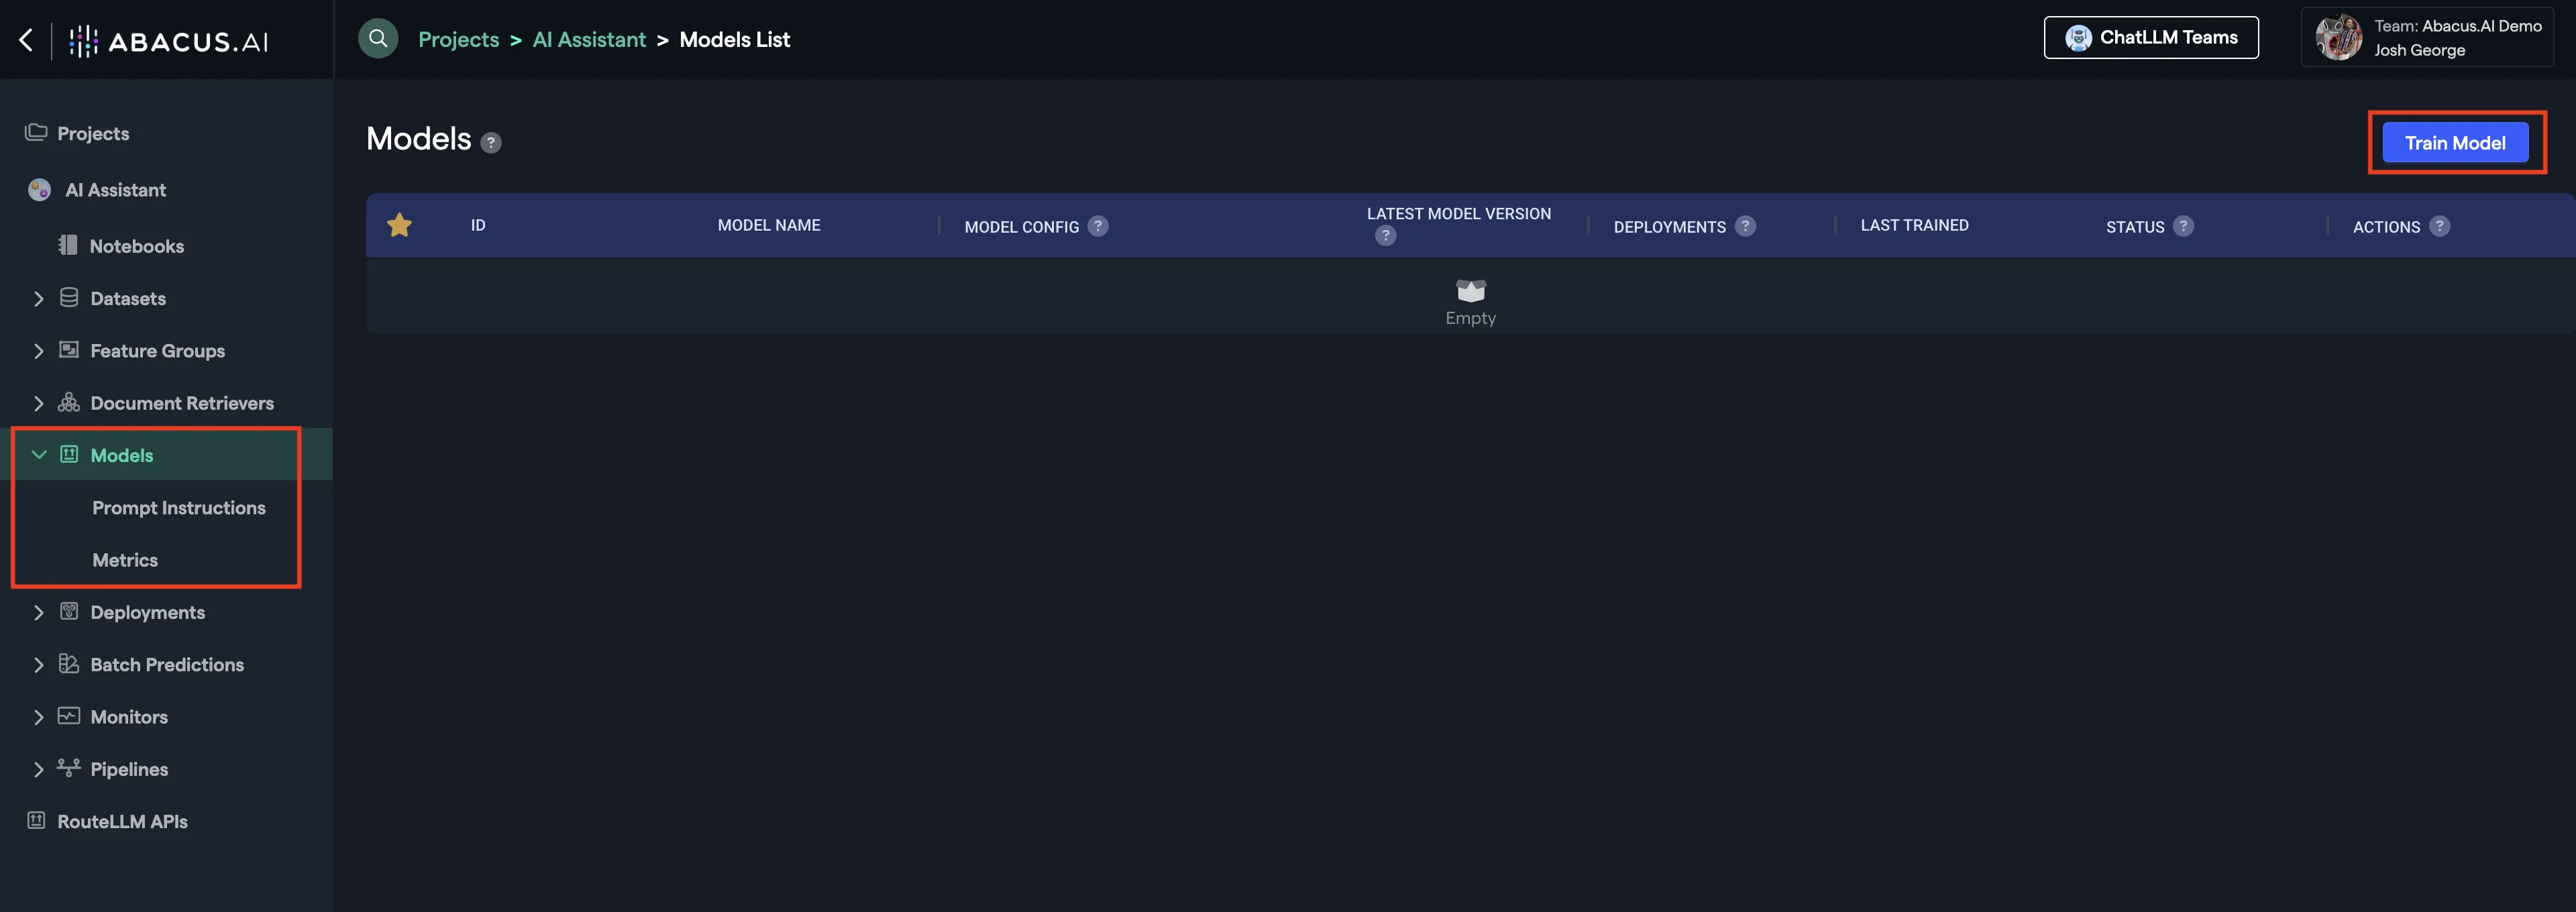
Step 4: Model Training
You are now ready to train your model. Create a new model by clicking Models on the left side panel.
And now select your "Unstructured" and "Structured" Data:
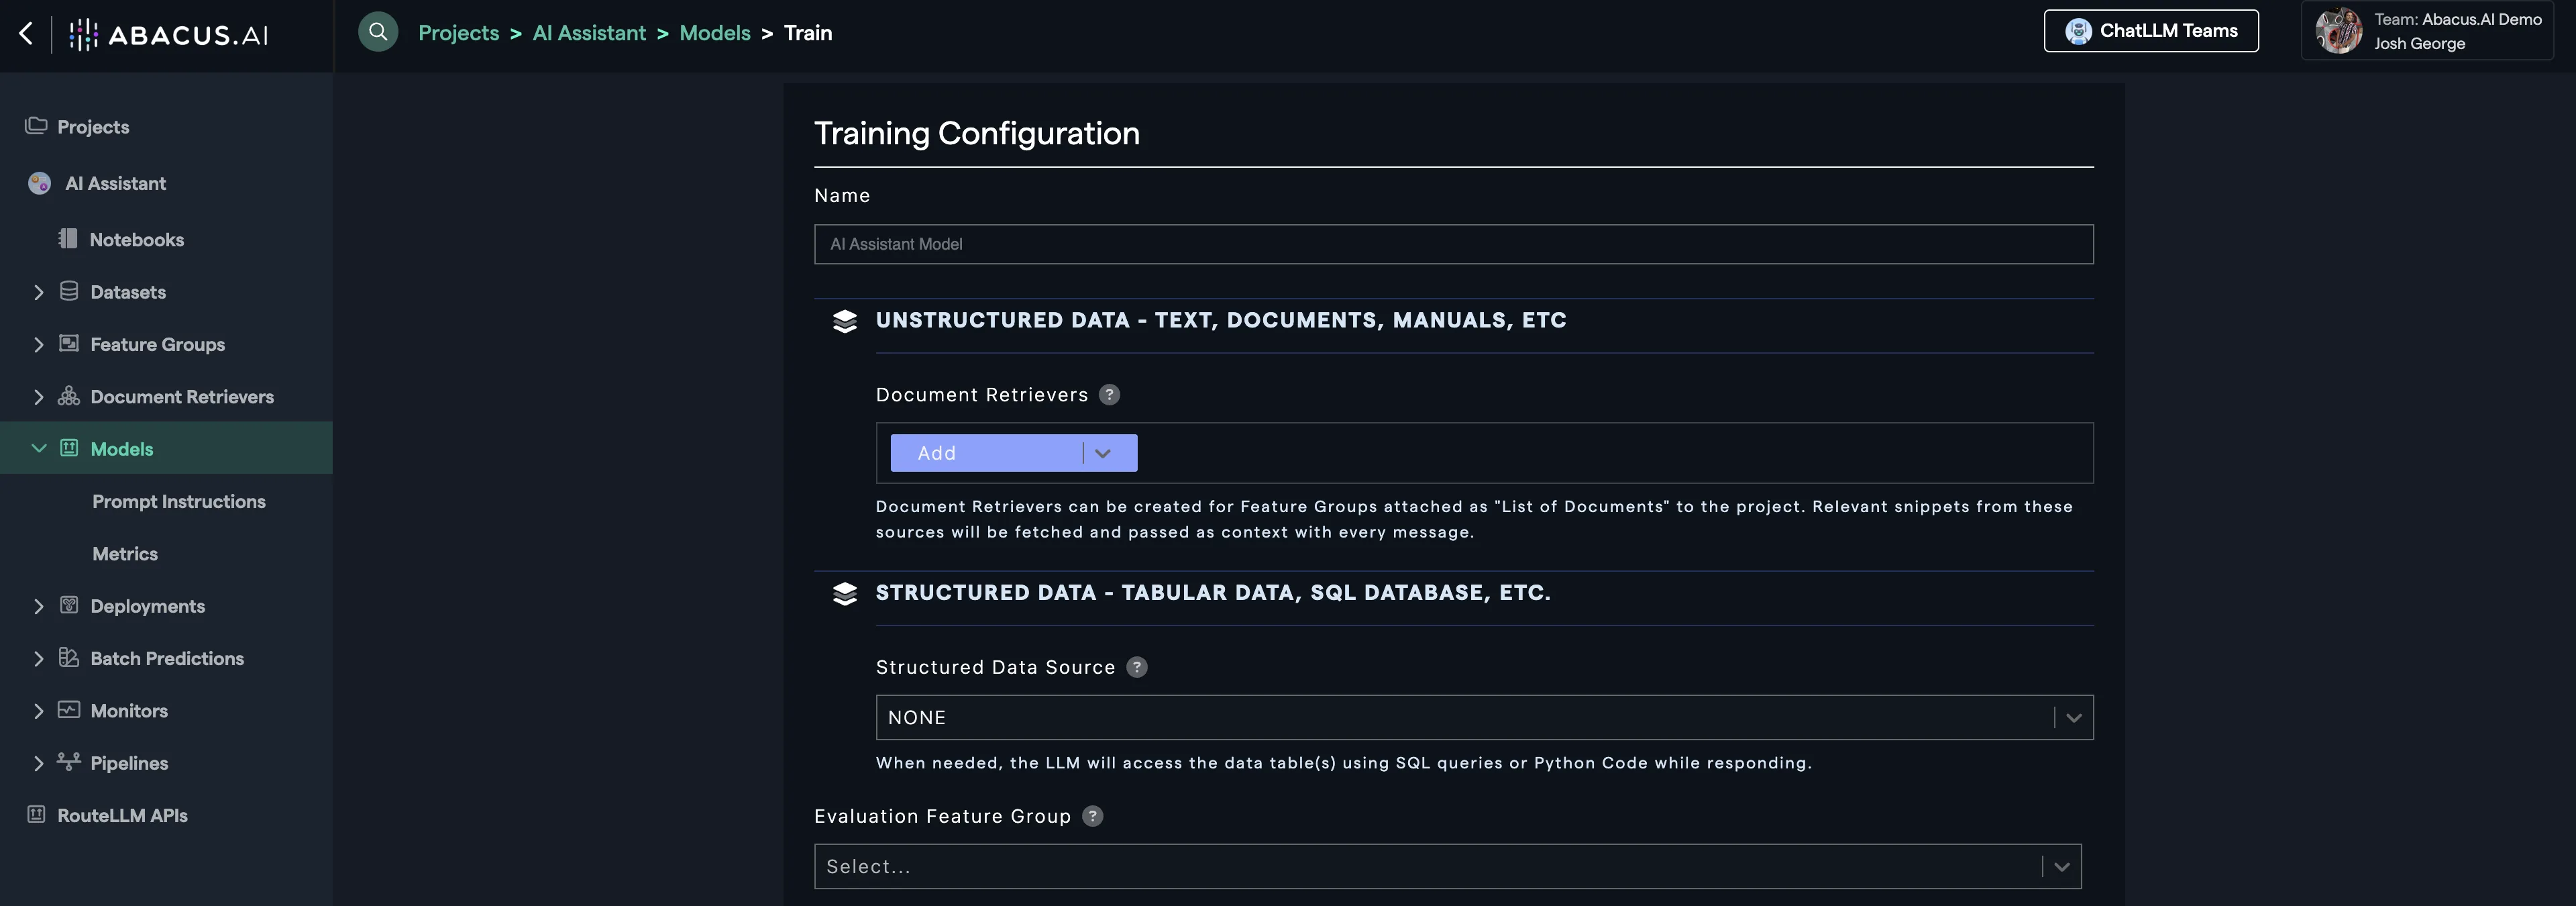
- Structured Data: Feature groups that have tabular data. The LLM will run SQL on top of them.
- Unstructured Data: Feature groups that contain free-form text data. The LLM will retrieve relevant chunks based on user question and provide an answer.
We provide a variety of different parameters and configurations to customize your model training process. We recommend starting with the default configurations for simplicity, but you can adjust parameters to better suit your use case like shown in the following examples. Click on the (?) button to learn more about specific options.
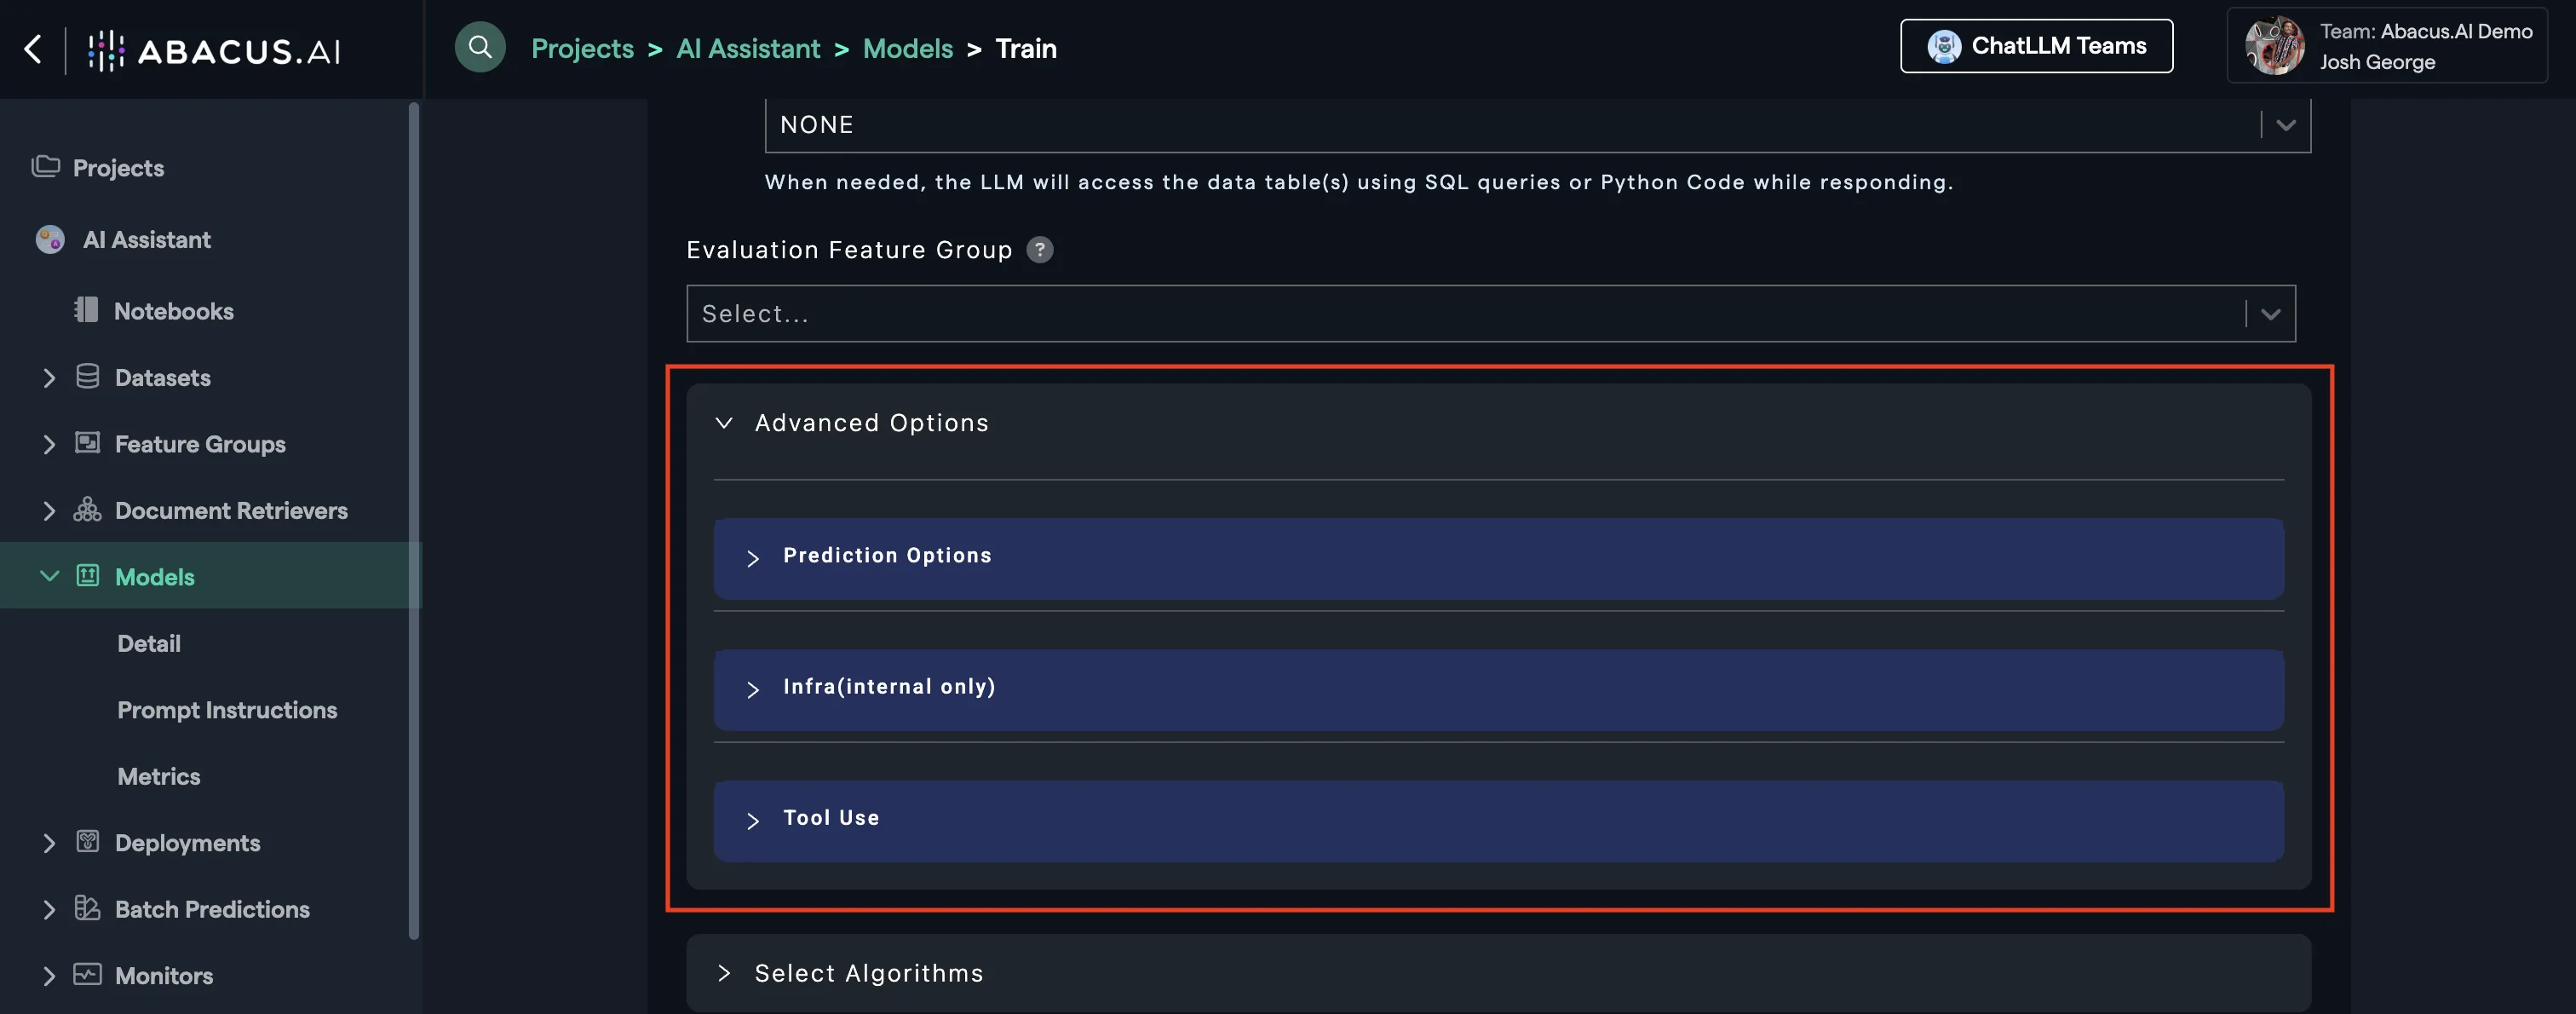
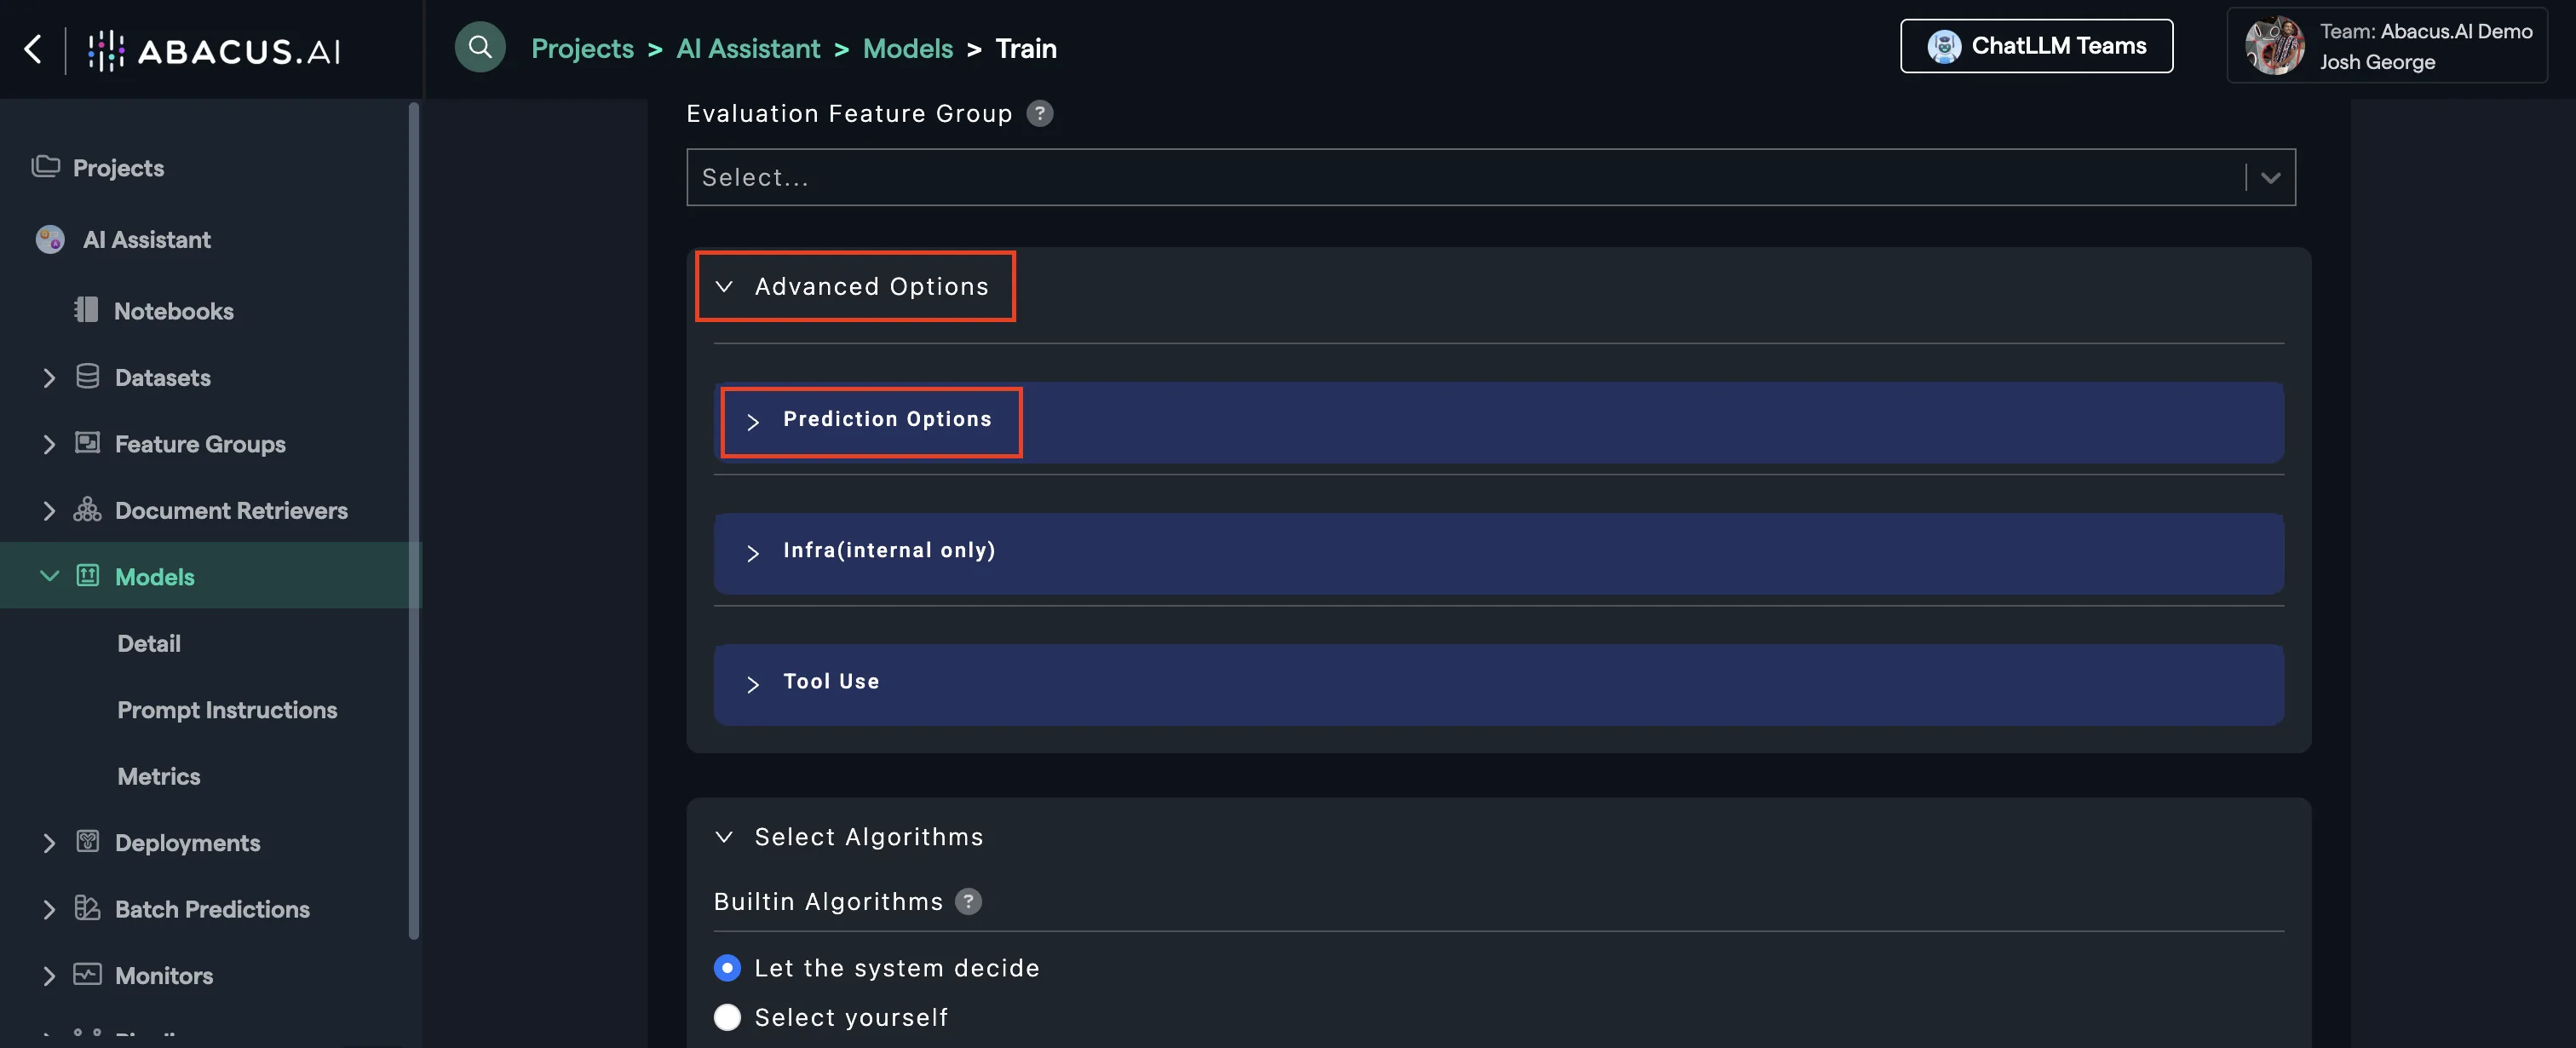
In cases where you want to influence how your model will respond to prompts, navigate to Advanced Options --> Prediction Options.
Example: Behavior Instructions & Response Instructions
You can use behavior instructions to guide the tone and style of responses, and response instructions to specify the format or structure of the output.
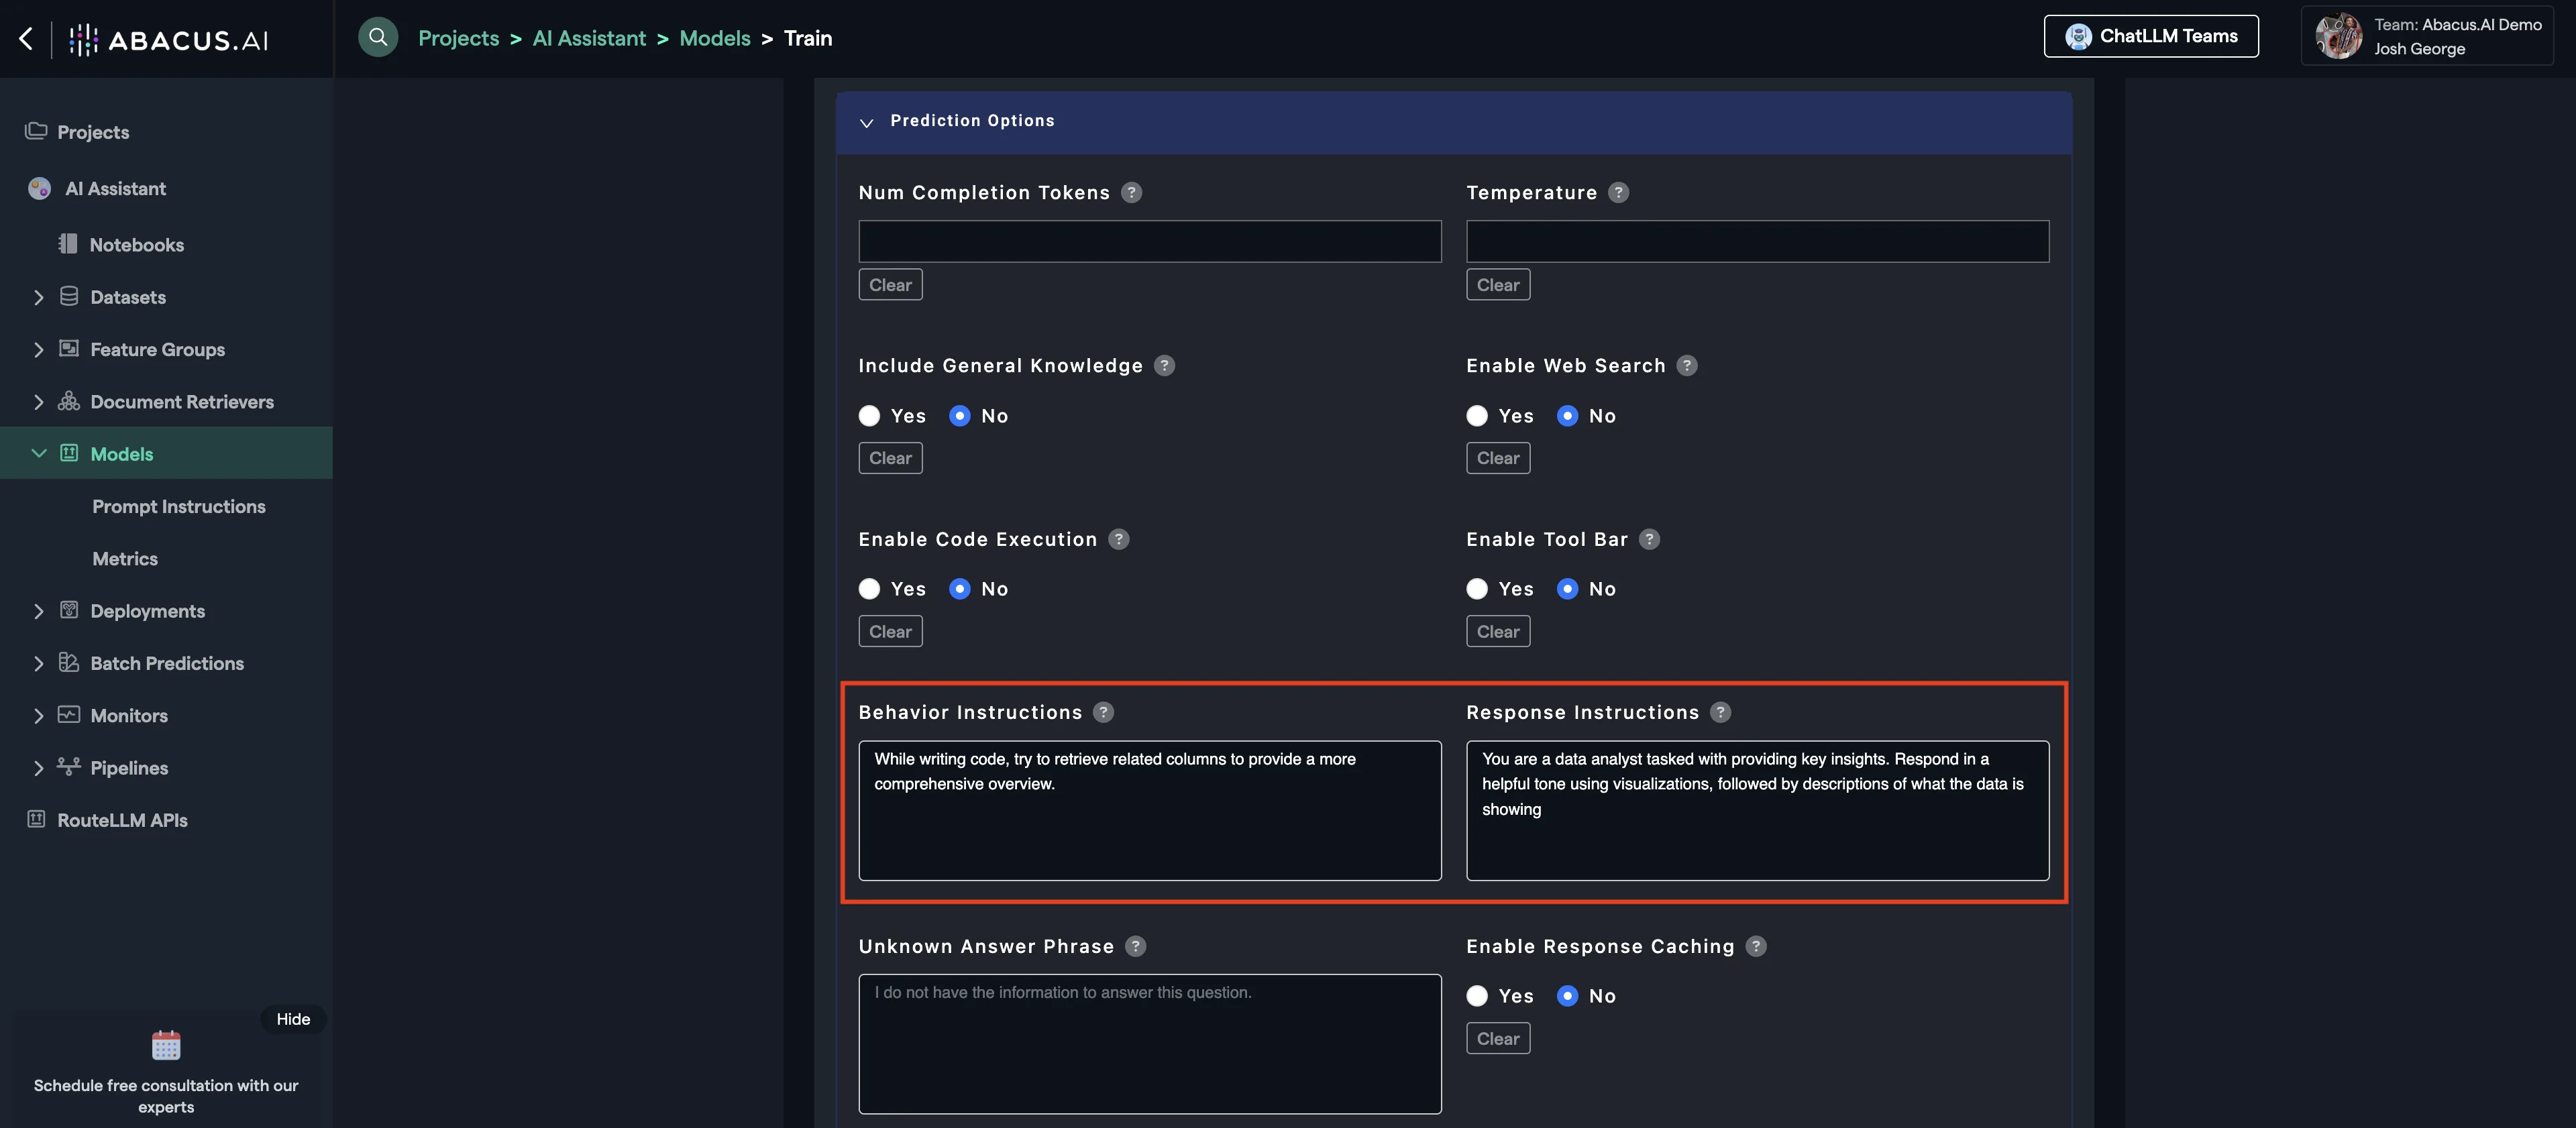
This example shows how to use behavior and response instructions to customize the chatbot's output.
You can utilize user-connector tools to integrate external services to enhance your chatbot's functionality and tailor it to your specific needs. We have out-of-the-box tools available that including Jira, Outlook, Slack, Gmail, Salesforce, etc. as well as the option to create/use custom tools via API on the platform. Even Sharepoint has an out of the box tool! We could have never ingested data if we wanted to and just used the tool directly.
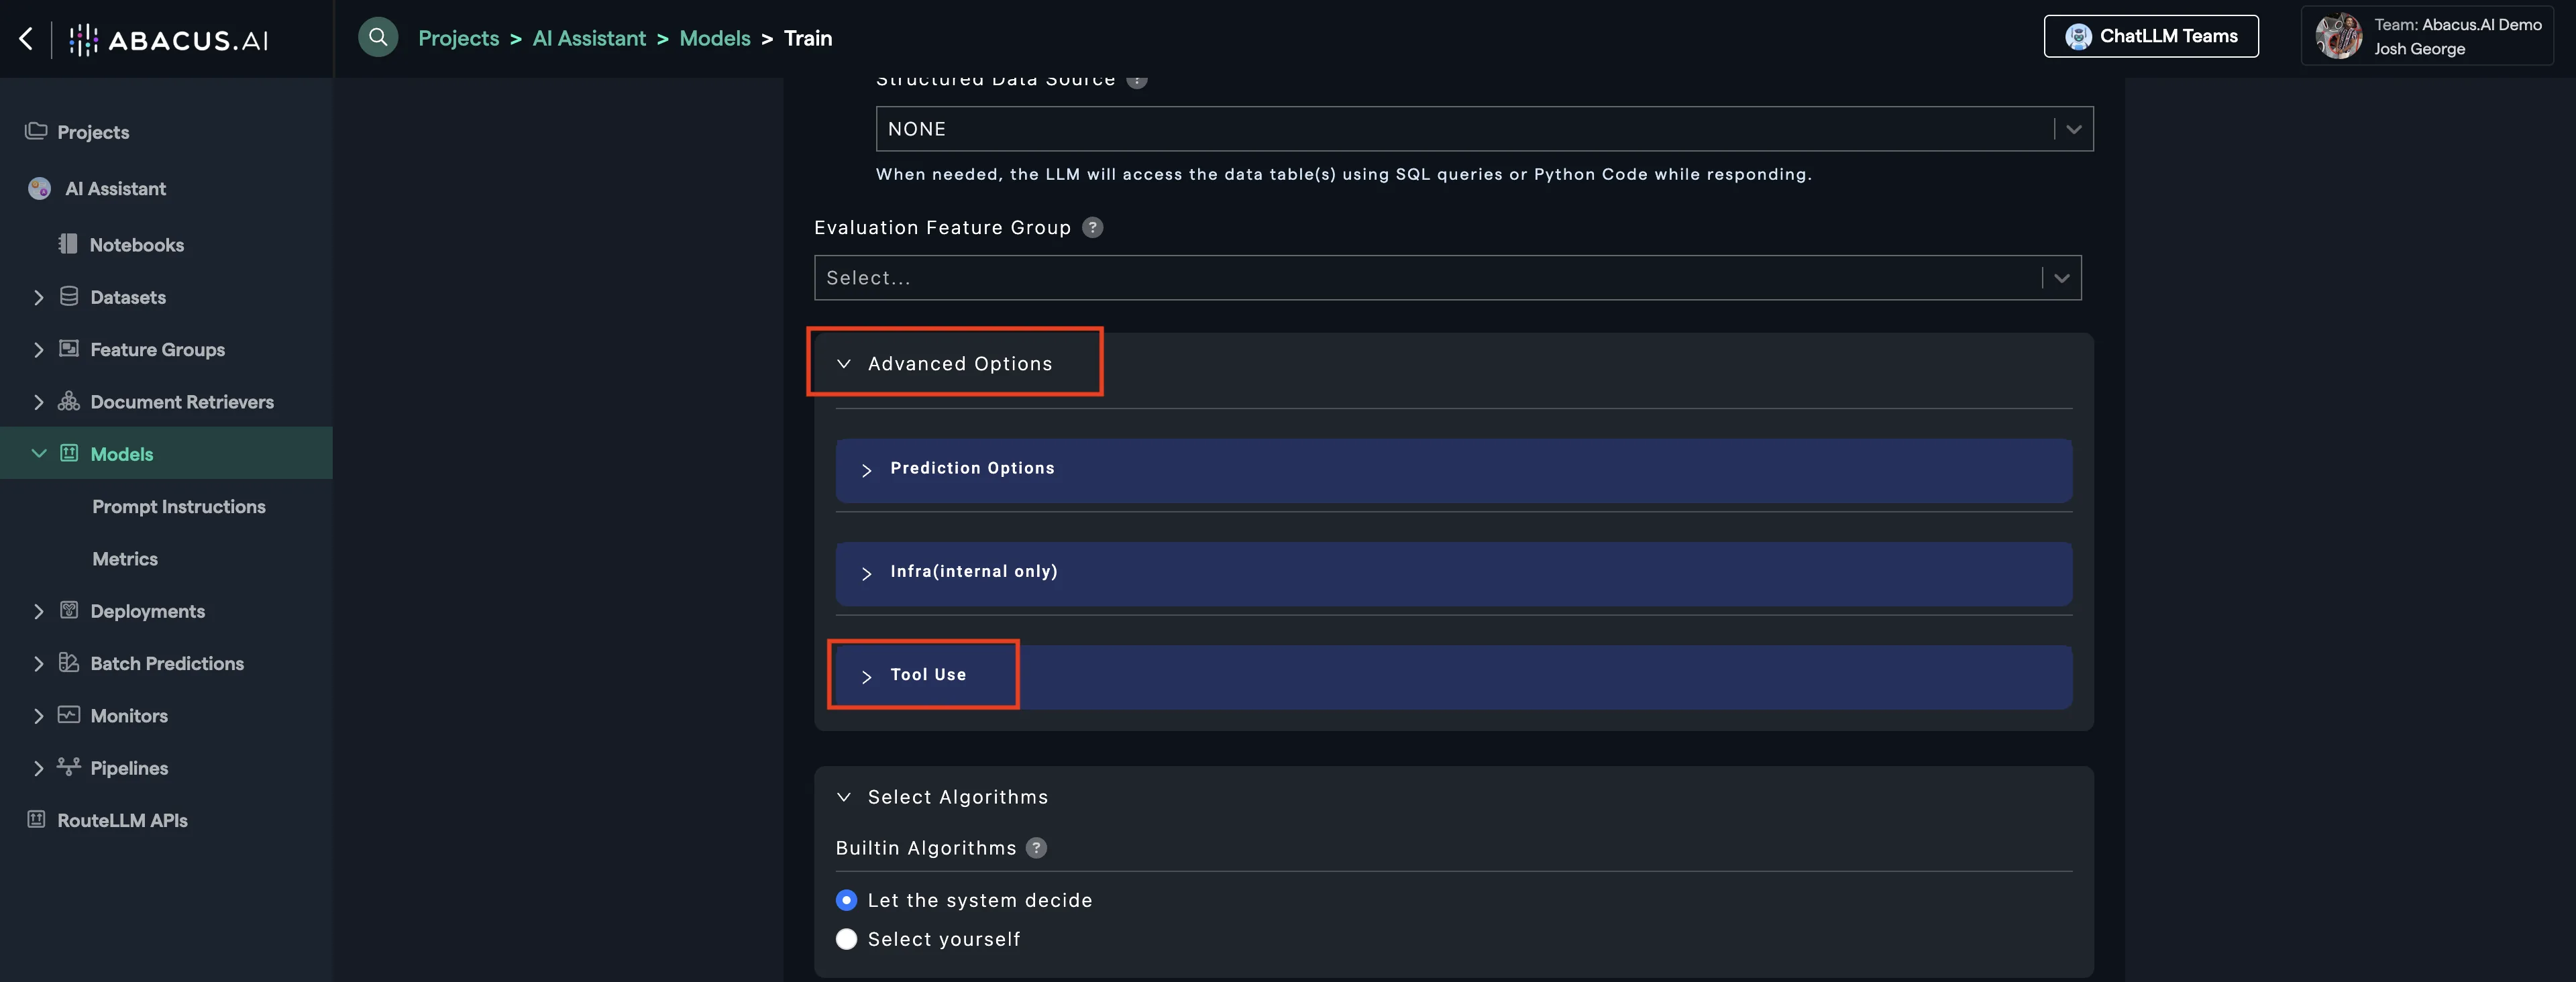
In cases where you want to add a tool to your chatbot, just navigate to: Advanced Options --> Tool Use and choose the tool(s) you are interested in.
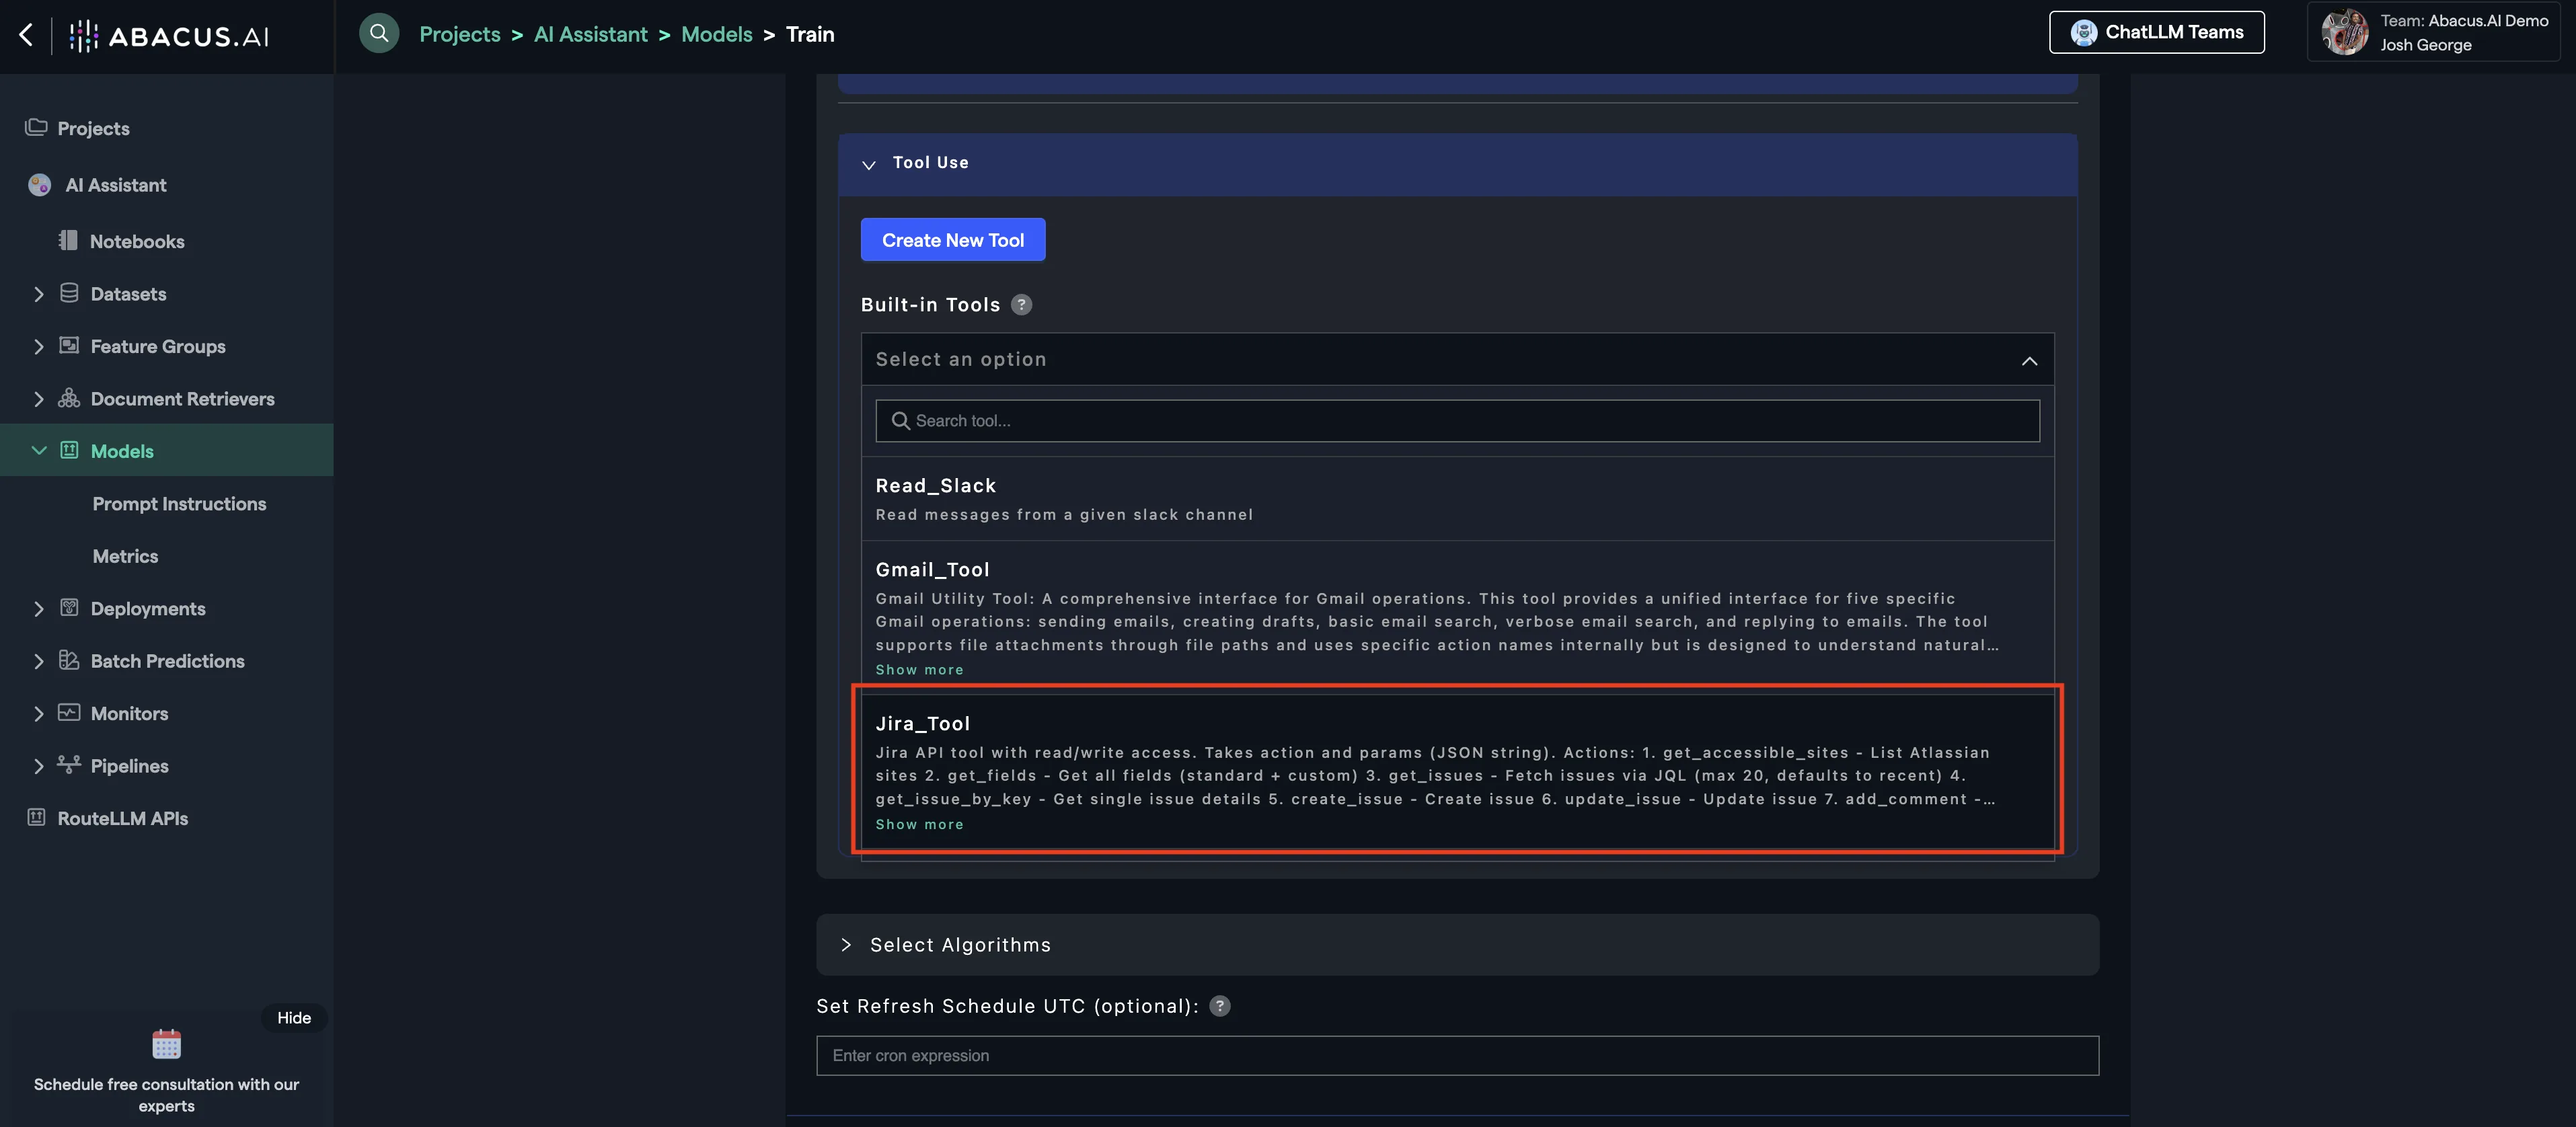
Example: Jira Tool
From Tool Use, navigate and click on Built-in Tools and select Jira Tool. This will allow you to access the tool's capabilities within the chatbot.
When you have configured all of your desired options, click on the Train Model button.
Step 5: Deploying your model
Depending on the settings, the model might take a while to complete configuration - especially if you are using a custom evaluation set.
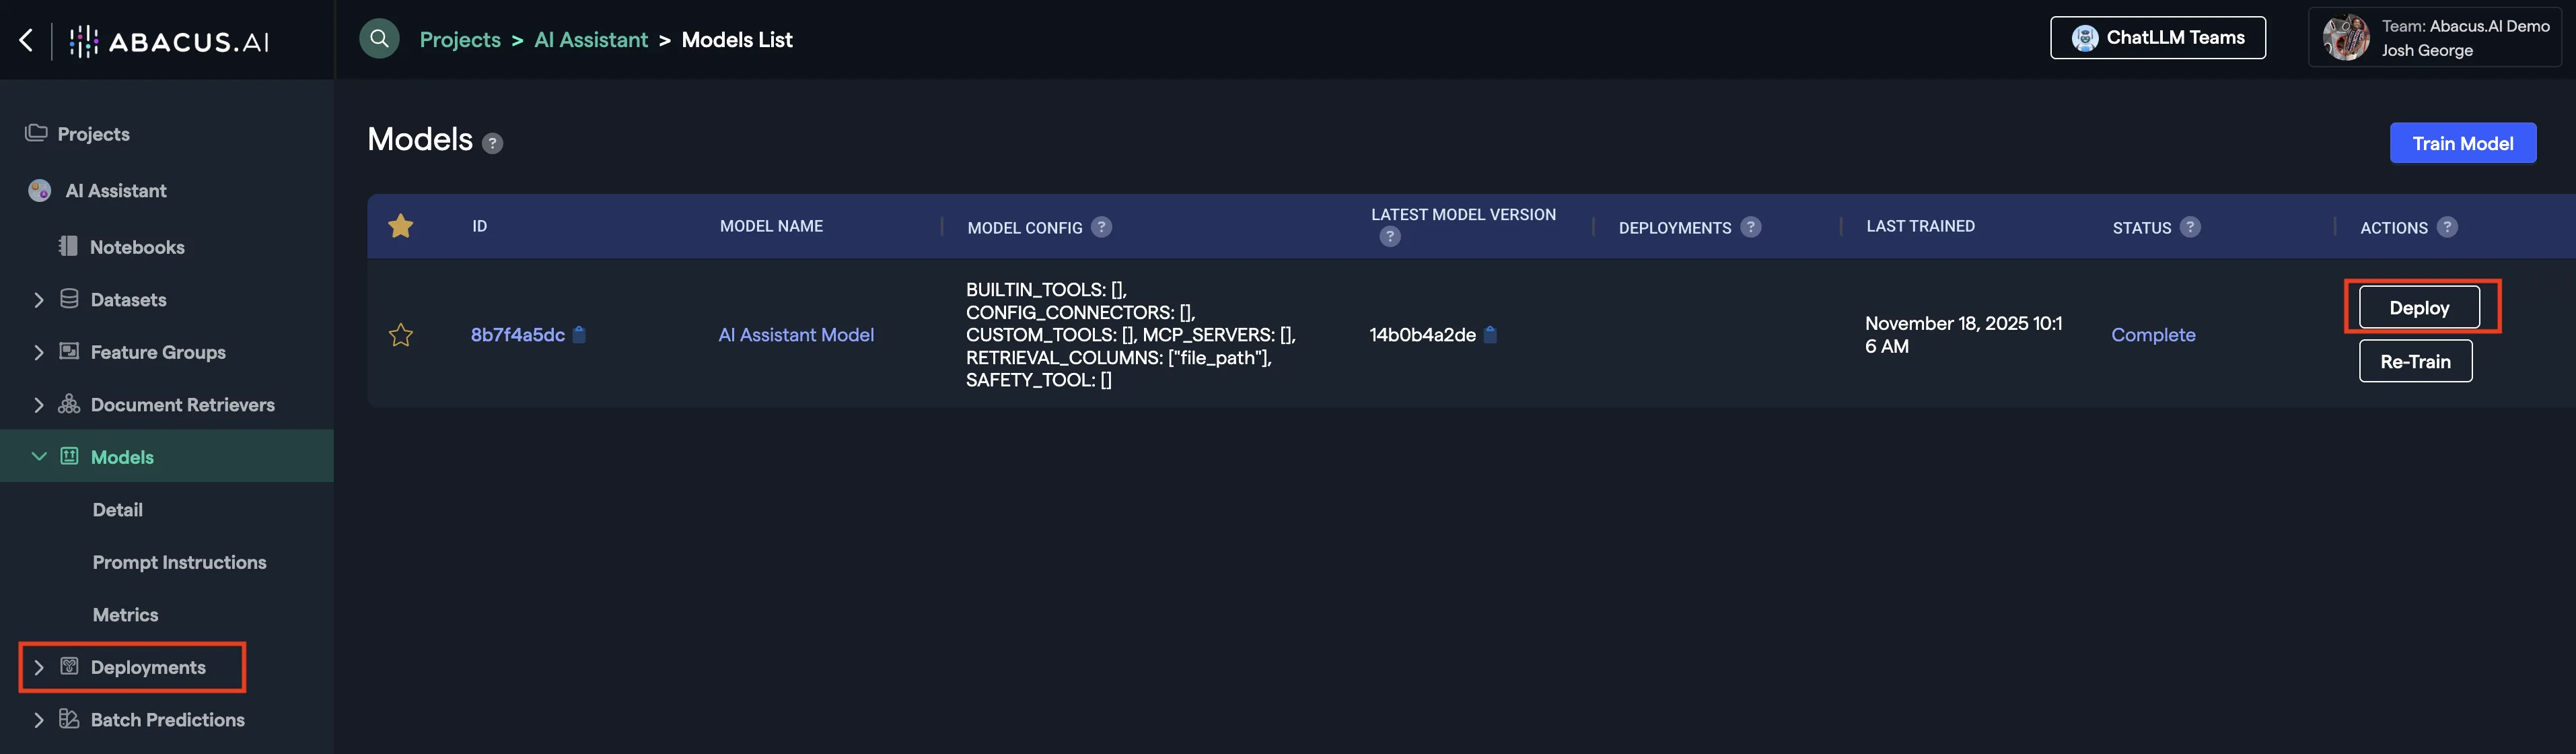
Once the model is ready, click on the Deploy button.
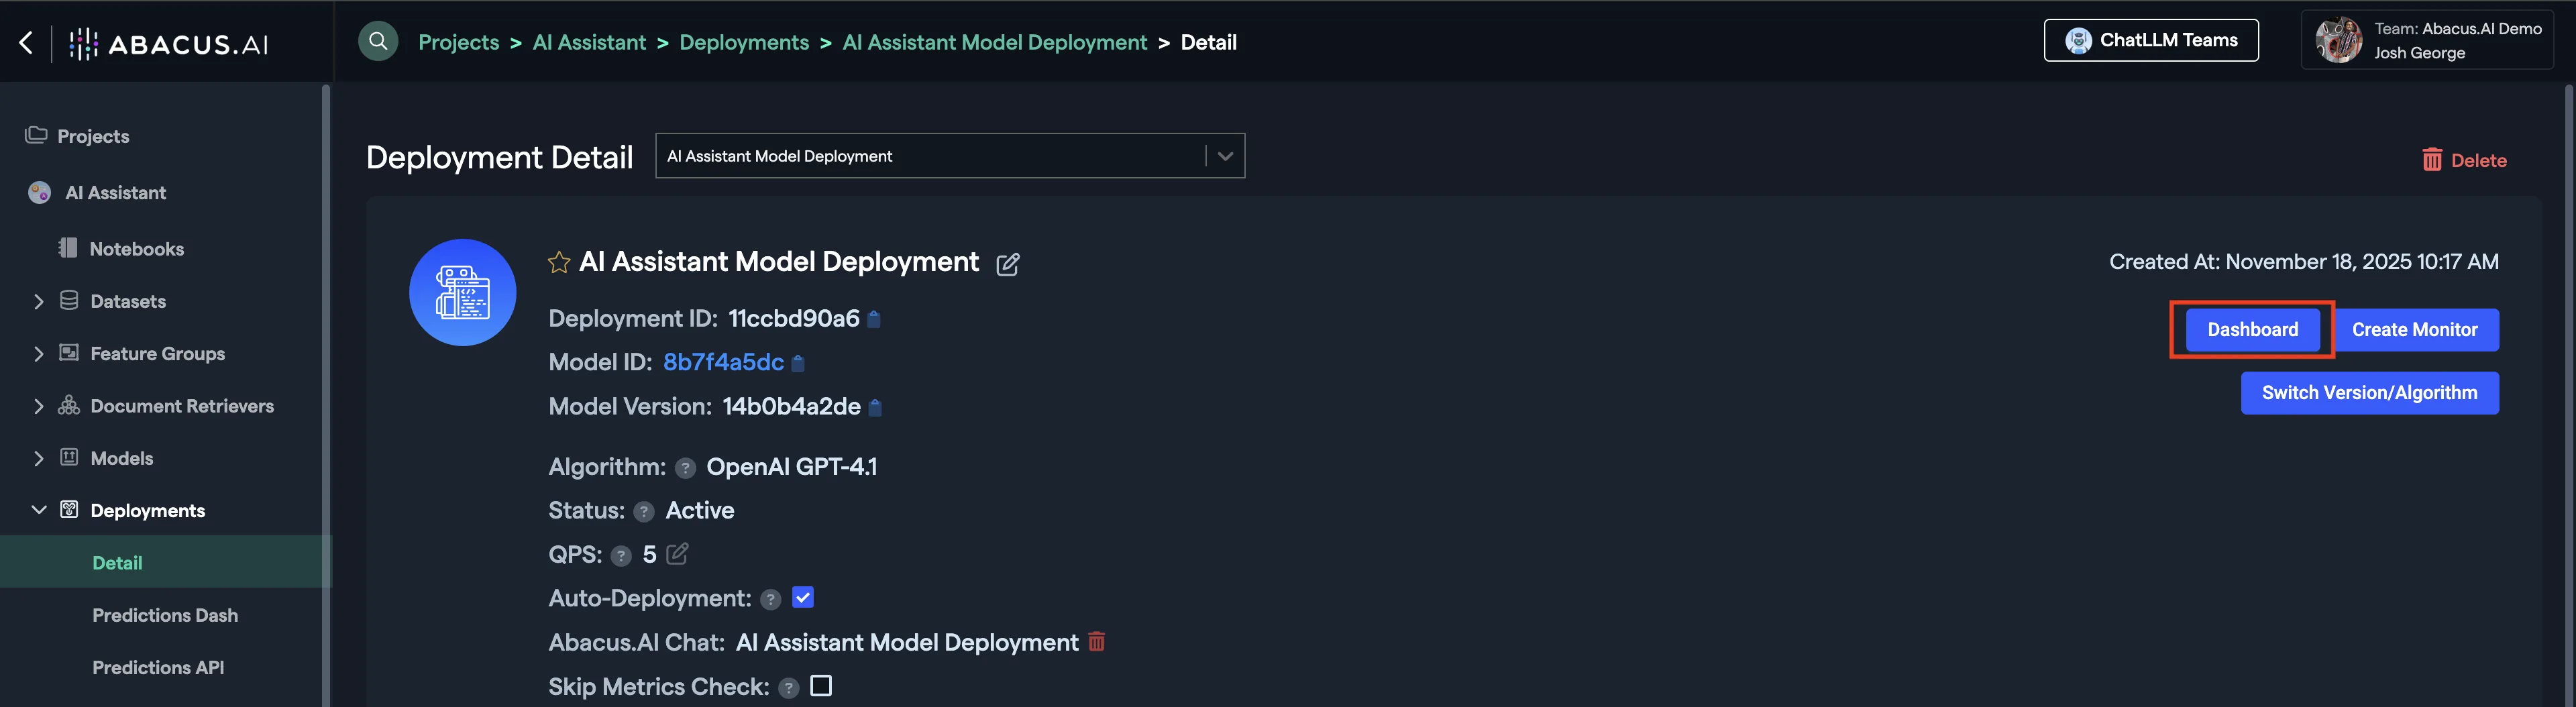
Follow the wizard to finalize deployment. Your deployed model will now become available in the Deployments page. By clicking on the Dashboard button, you will be able to create an external chat interface.
To learn more about Deployments, visit our Deployments Guide
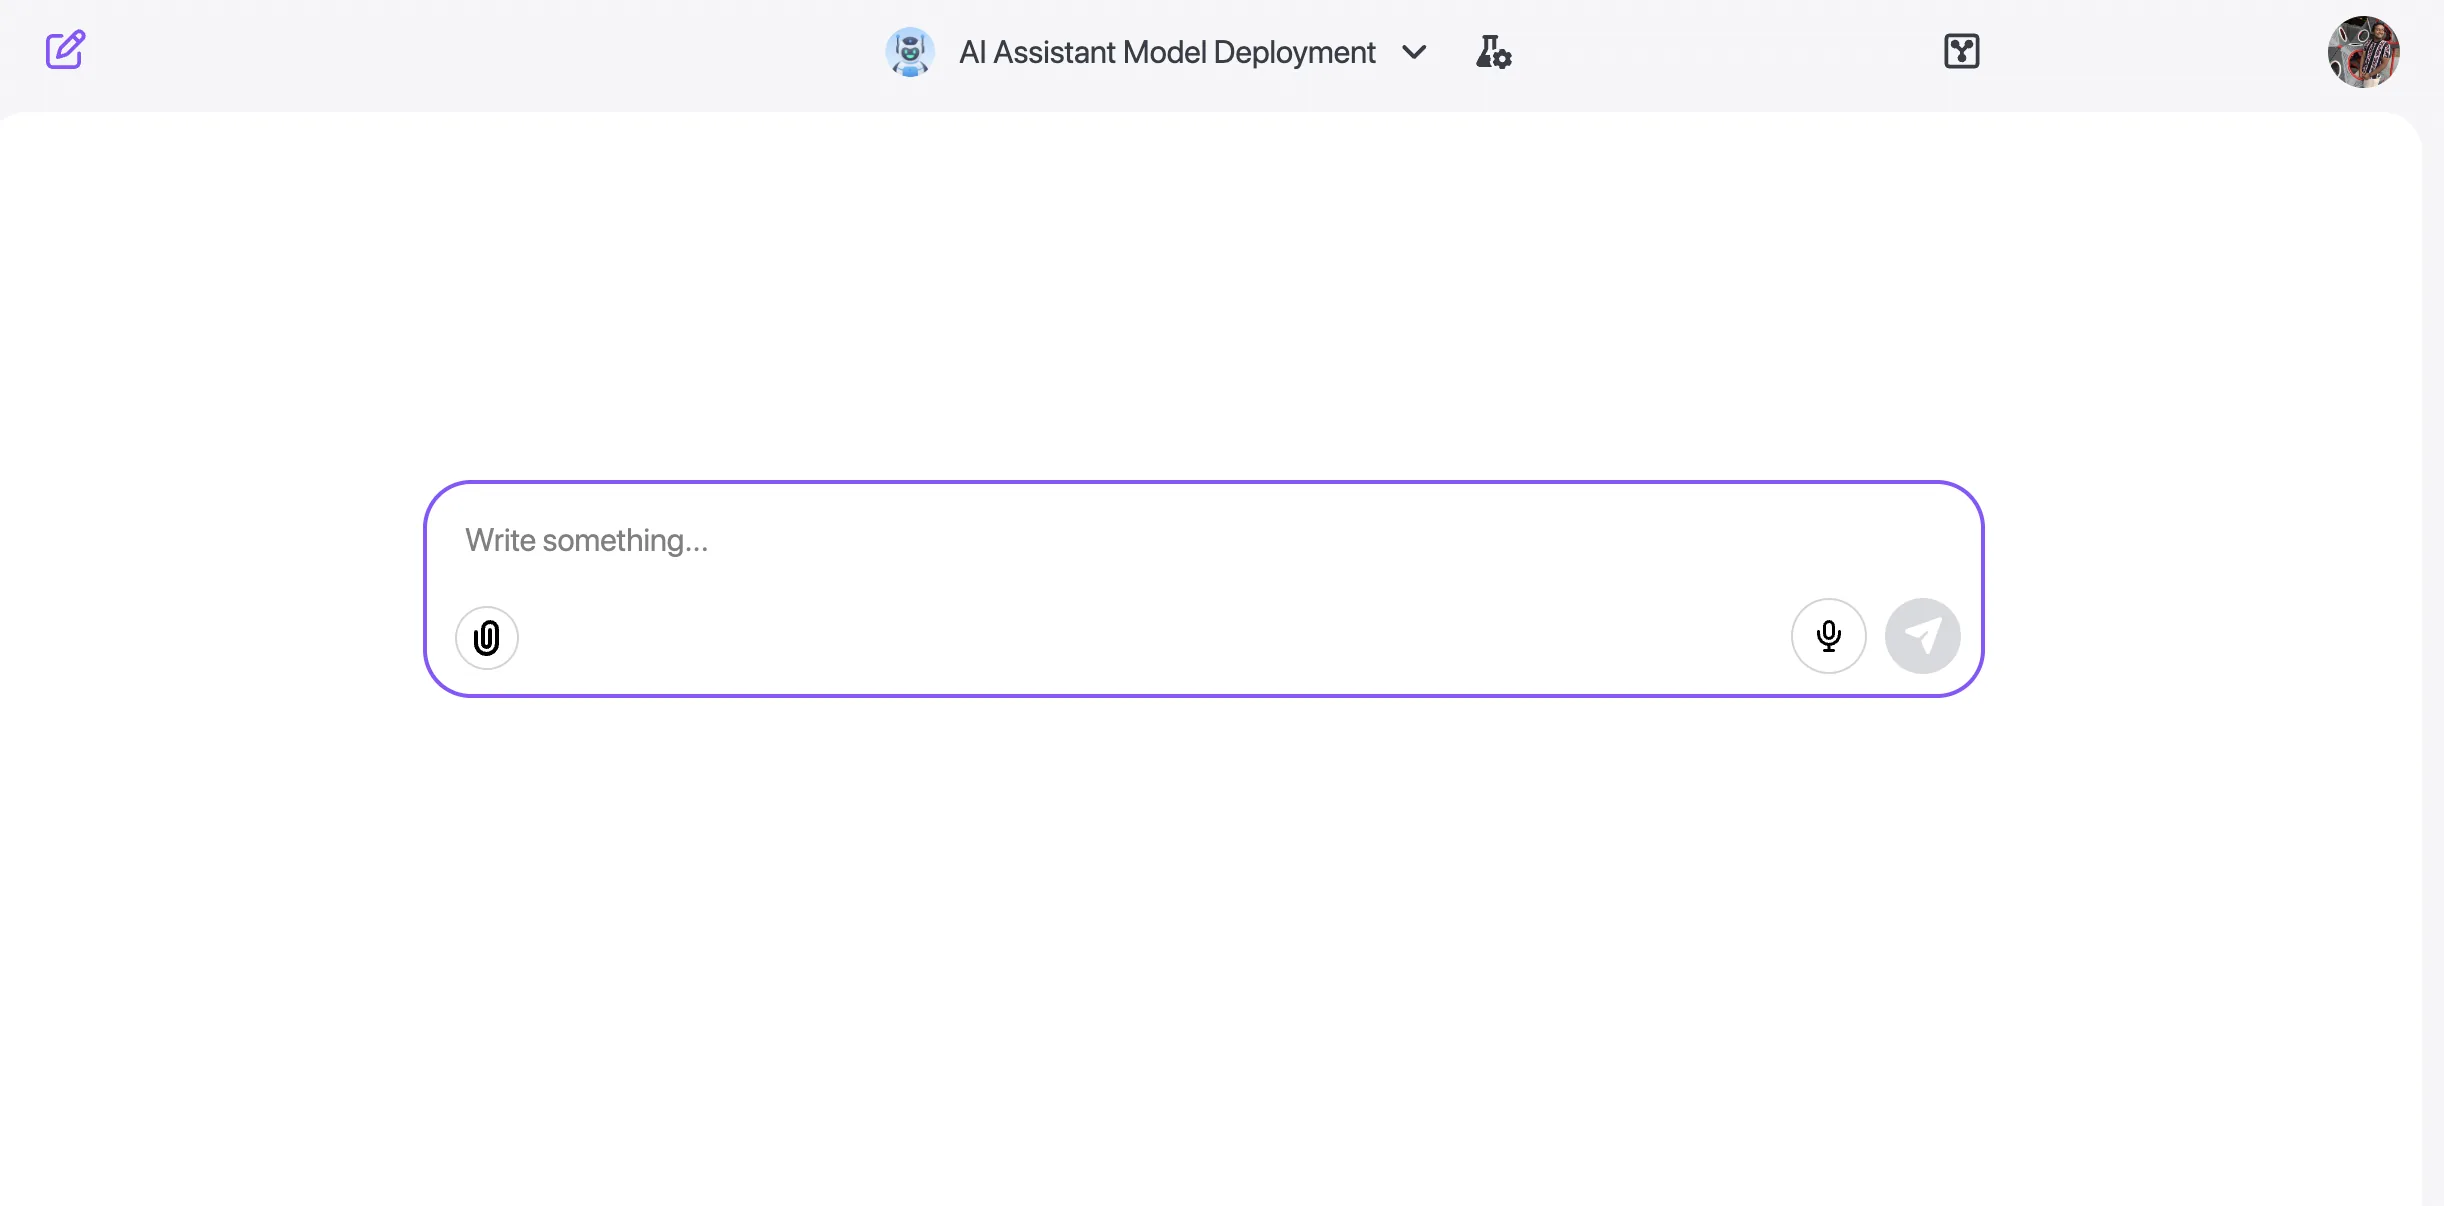
Your model is now ready to be used!
Here is how the external chat interface will look like:
Some important guides for post-deployment:
Model Evaluation
Train with Evaluation Data
Train your model with an Evaluation Feature Group containing questions and answers you expect the LLM to answer accurately based on your dataset.

Compare Metrics
Compare metric scores across different models. For all scores, the ideal value is 1.0. Higher scores indicate closer matches to ground truth. With well-matched evaluation questions, expect a BERT F1 score between 0.7 and 1.0.
Review ROUGE Scores
Check the ROUGE score for direct overlap between LLM and human responses. A score above 0.3 is generally good, accounting for natural variation in response formation. Scores depend on your specific ground truth and can vary with response verbosity.
Examine Individual Responses
Review individual questions and compare answers from different LLMs to verify accuracy and alignment with ground truth.
Advanced Options and Considerations for Custom Chatbots
Adding Metadata Columns
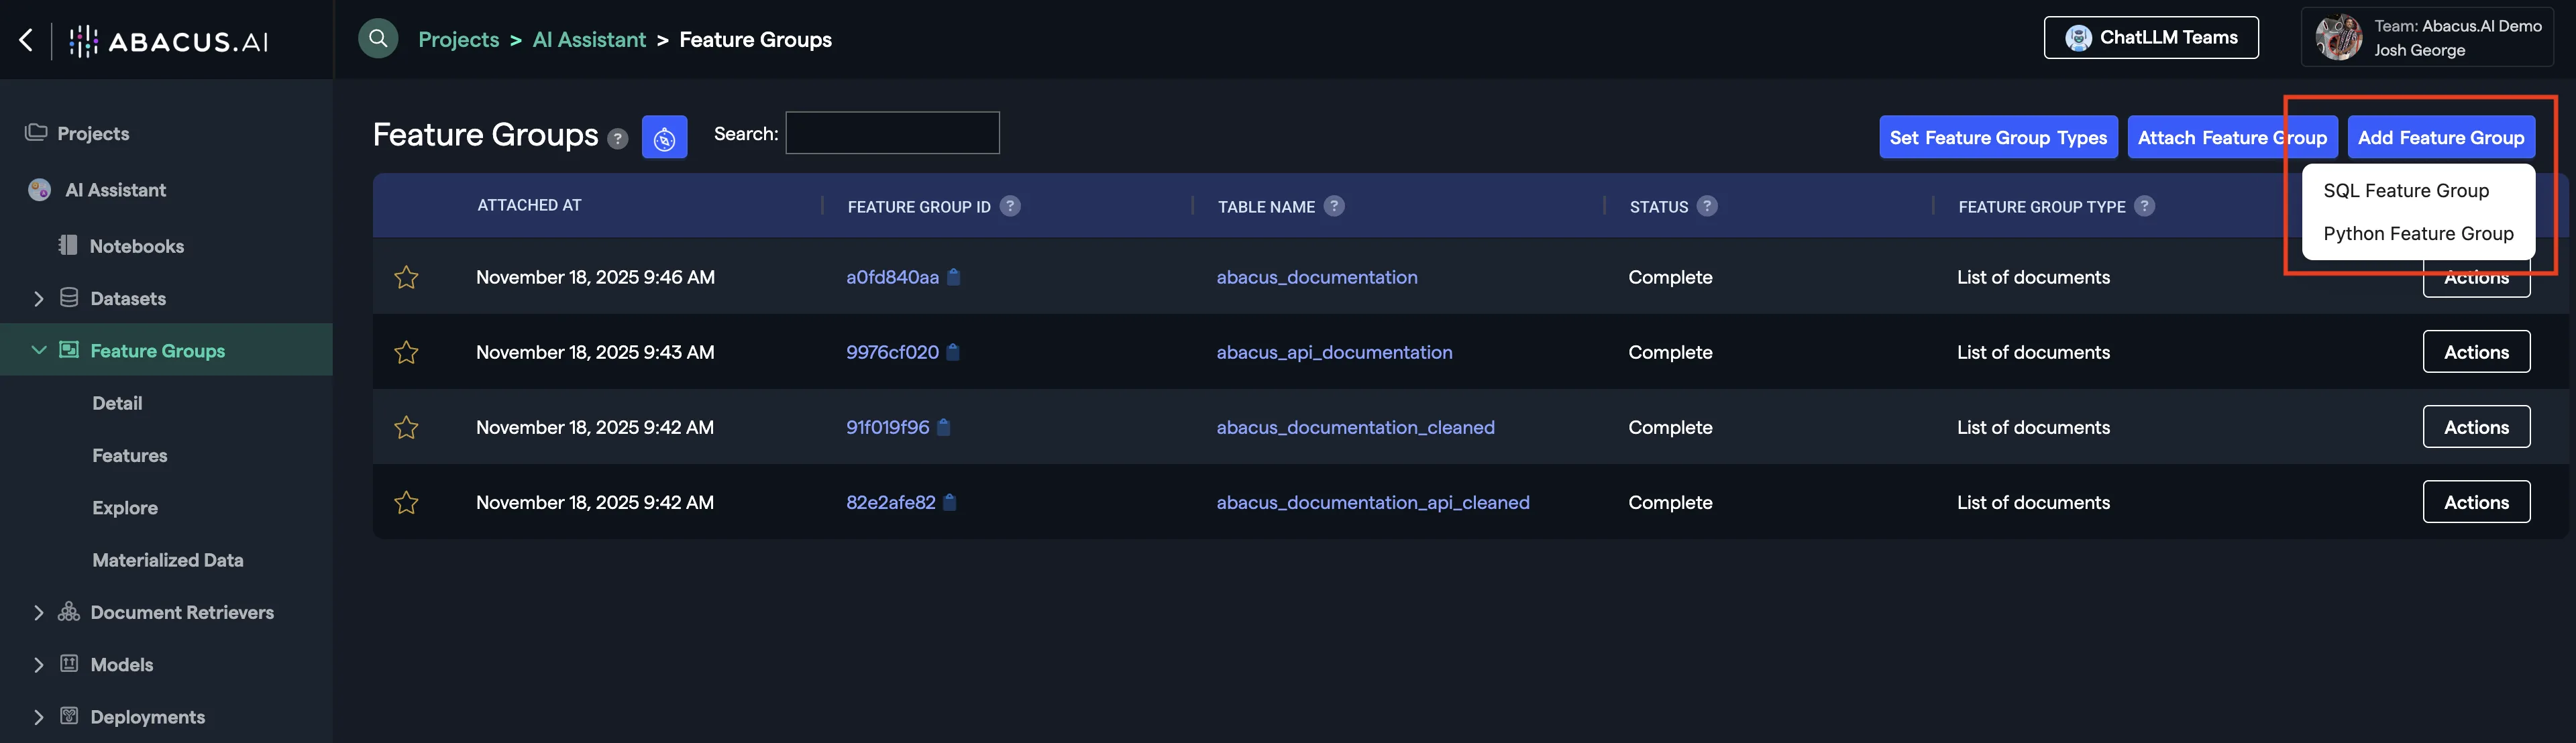
Example: Adding a SQL Feature Group
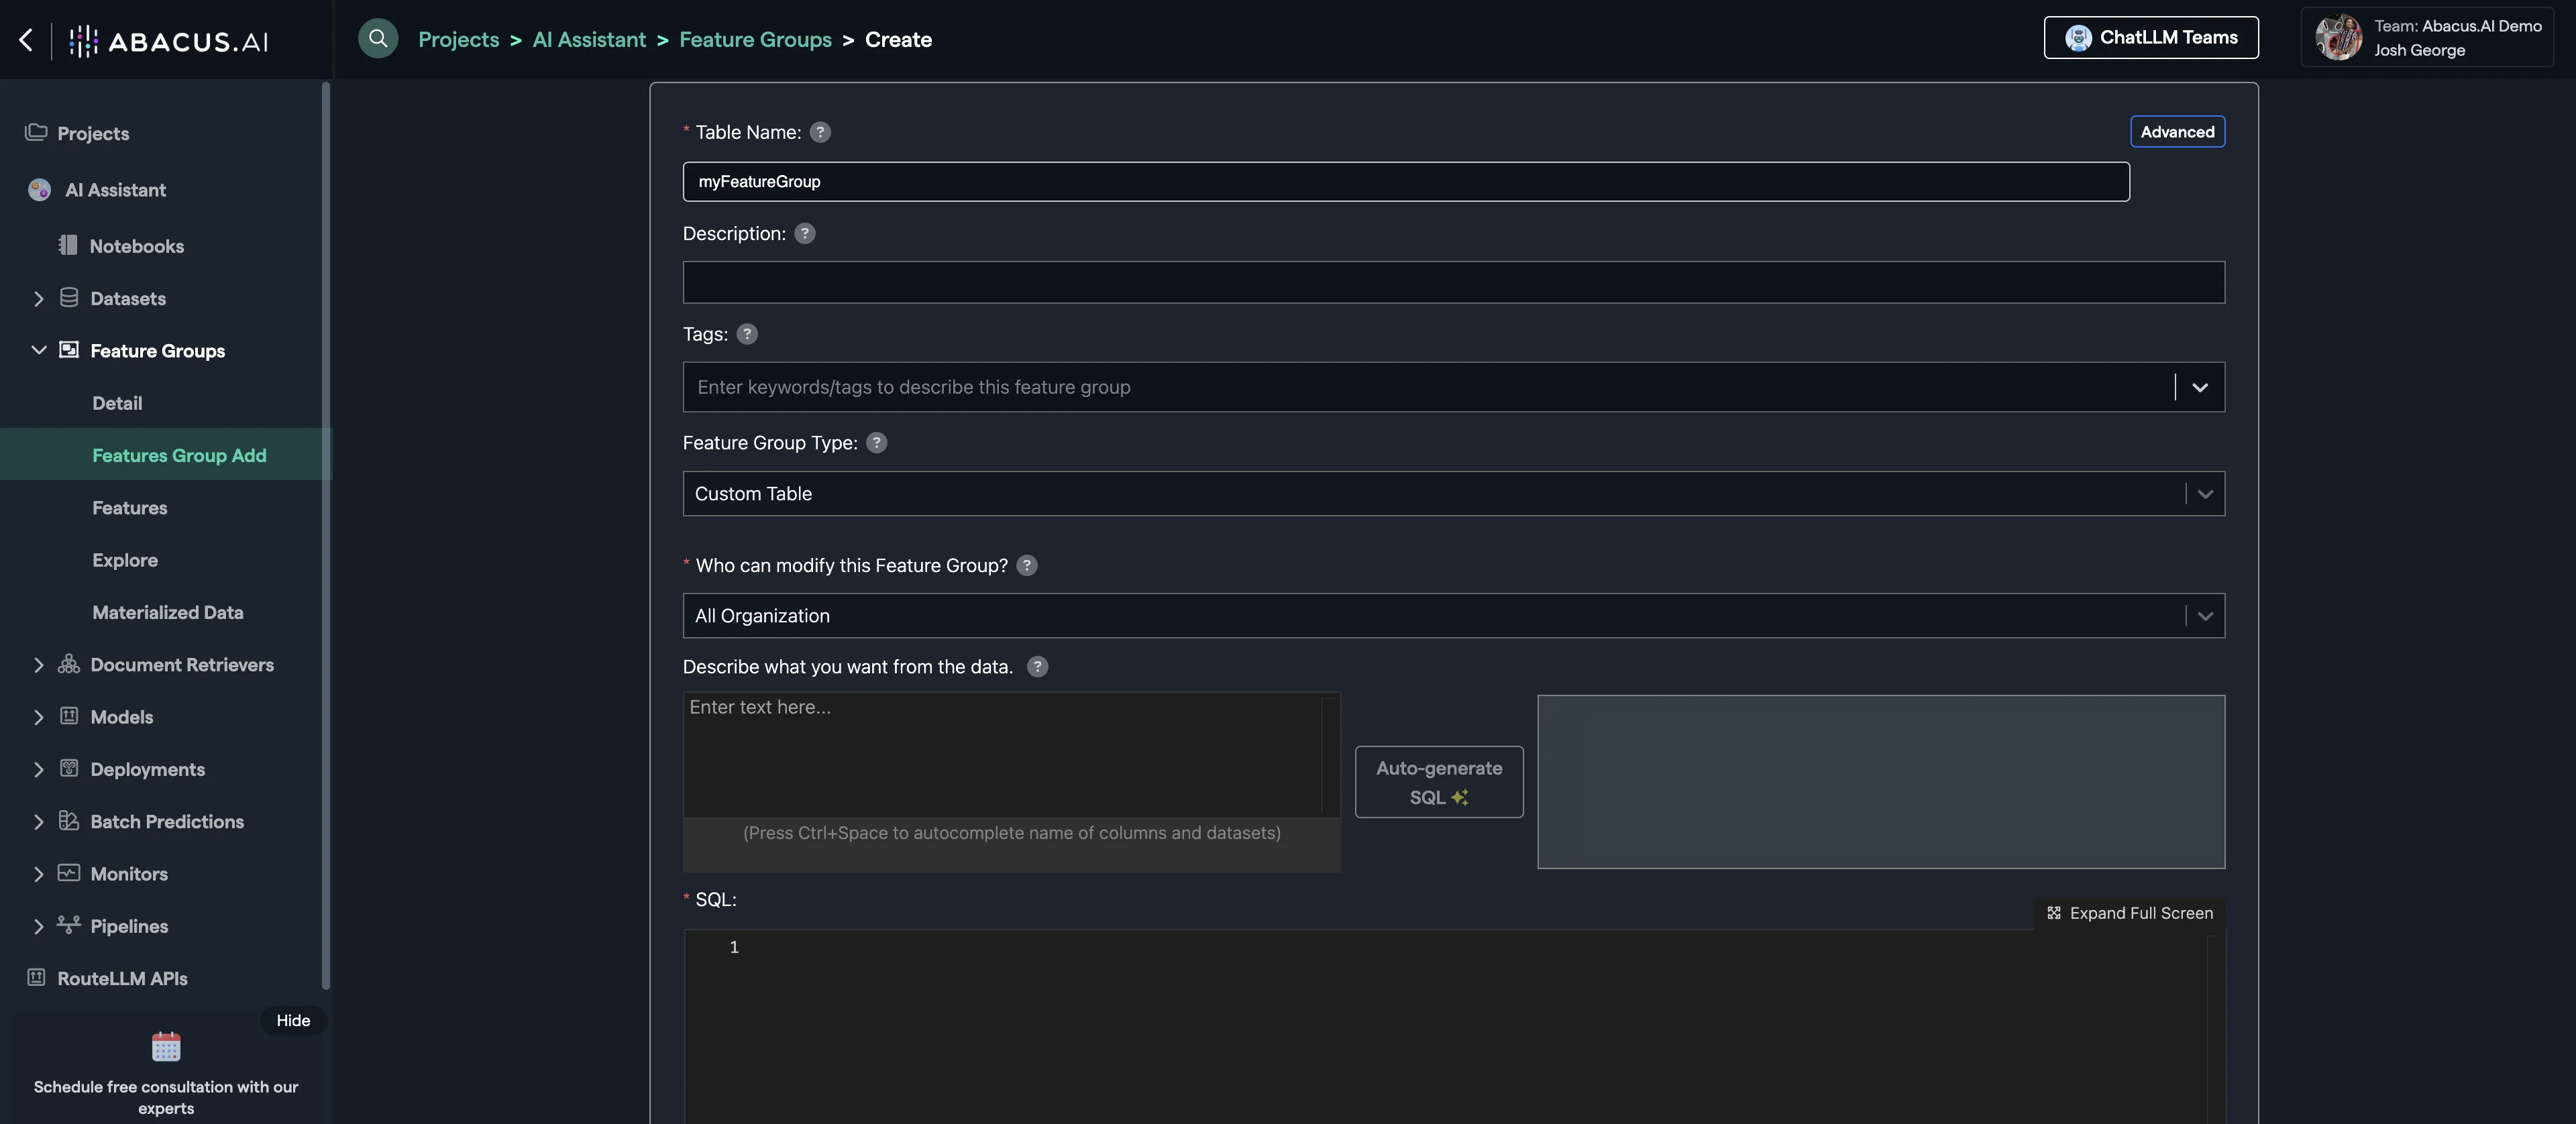
You can create different views on top of your data using SQL or Python by clicking on Add Feature Group and selecting the respective programming language.
This is a view of the SQL option, where you can write queries or use the 'Automatic SQL Generation' tool to create transformations and filters in natural language.
For example, you could execute something like:
SELECT *,
    CASE WHEN file_path LIKE '%sales%' THEN 'sales'
         WHEN file_path LIKE '%marketing%' THEN 'marketing'
         ELSE "inventory"
    END AS documentation_type
FROM document_feature_group
Directly on the feature group to create a new column called documentation_type. Then you can pass that as metadata in the model training advanced options, so that the model can use that metadata to:
- Directly influence responses
- Filter search results from the documen retriever / vector store.
Take a look at this example:
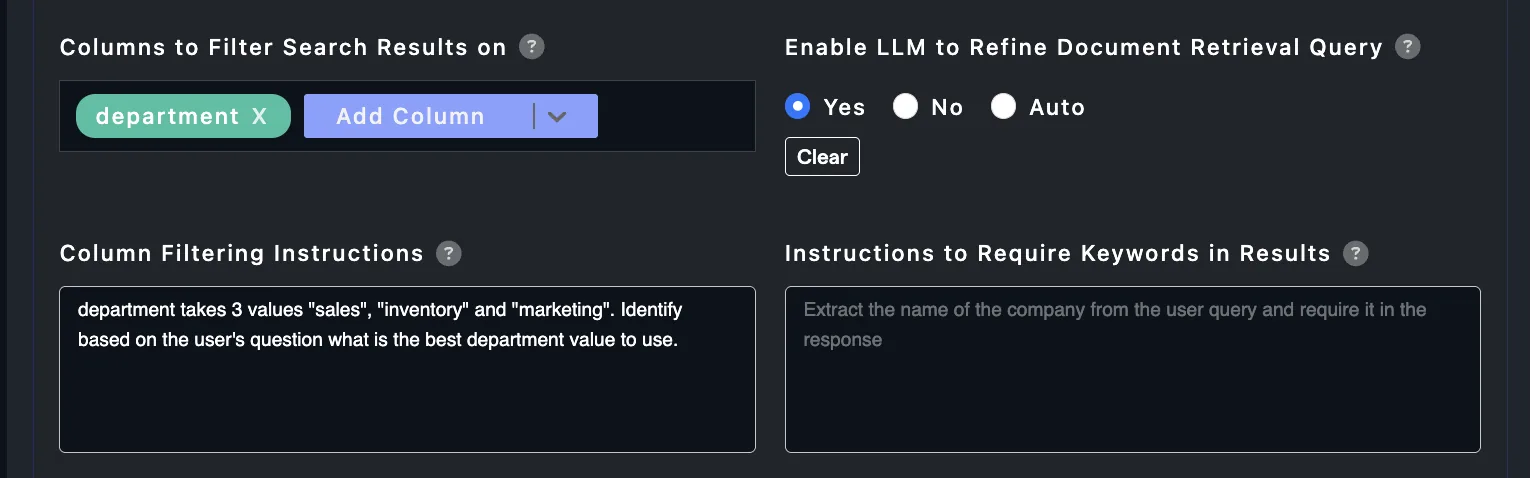
We are using below options:
Enable LLM to Refine Document Retrieval Query: YESColumns to Filter Search Results on: department
And are providing clear instructions to the Large Language Model (LLM) on how to choose a filter for the department.
Note: This is a soft filter. The the model will naturally raise the scores of documents that match the particular metadata feature value, but won't stop other search results (chunks) to be used.
When to Choose a User Connector vs Ingesting Data into the Platform
One of the key considerations when building a Custom Chatbot is whether to use a built-in user connector or upload data directly into the platform using an org-level connector. Learn more about connectors
Use a user connector when:
- You want to provide users with access to all of their data
- You need to leverage inherited permissions from the original data sources
- User-specific access control is critical
Ingest data into the platform when:
- You have a specific set of documents that should be available to all users of a particular Custom Chatbot
- You need granular control over embeddings, metadata, and data processing
- The dataset is curated and consistent across all users
Combining Both Approaches
You can mix and match these methods to suit your specific use case.
Example: A customer service Chatbot might:
- Ingest a curated knowledge base (FAQs, product documentation, policies) using an org-level connector, ensuring all agents access the same information
- Add a Jira user connector to give each agent access only to their assigned tickets, respecting existing permissions
Required Feature Group Types
To train a model for this use case, create feature groups of the following types:
| Feature Group Type | Setting Name | Required | Description |
|---|---|---|---|
| List of documents | DOCUMENTS | False | Documents to use as a knowledge base for your LLM |
| Custom Table | CUSTOM_TABLE | False | Structured data for querying and analysis in DataLLM (either this OR documents required) |
| Evaluation | EVALUATION | False | Questions and expected answers for evaluating model performance |
List of Documents Feature Group
Documents to use as a knowledge base for your LLM.
| Feature Mapping | Feature Type | Required | Description |
|---|---|---|---|
| DOCUMENT | Y | The document text | |
| DOCUMENT_ID | Y | The unique document identifier | |
| DOCUMENT_SOURCE | N | The source URL of the document |
Custom Table Feature Group
Structured data for text-to-sql querying and analysis in DataLLM. Either this OR documents is required (both may be used).
| Feature Mapping | Feature Type | Required | Description |
|---|---|---|---|
| [COLUMN NAME] | Y | Any column available for DataLLM queries and analysis |
Evaluation Feature Group
Questions and expected answers for evaluating model performance.
| Feature Mapping | Feature Type | Required | Description |
|---|---|---|---|
| QUESTION | Y | Question used to evaluate the model | |
| ANSWER | N | The question's expected answer |
Feature groups are optional for this project type. You can train a model using only instructions and potentially some user-connector tools. So you don't necessarily need to upload feature groups to proceed with training.
Predictions
For any deployed model within the abacus platform, you can leverage an API to call it externally. The steps to do this are:
- Deploy the Model
- Navigate to the Deployments Page
- Click on the
Predictions APIbutton on the left side
That will give you the exact API endpoints and tokens you need to use the deployment.
The Relevant API References for this use case are:
If you don't want conversation history retention:
If you want conversation history retention, without streaming data:
If you want both conversation history retention and streaming output:
Note: You will need to use
--no-bufferon bash commands for streaming responses.