AI Workflows
Note: The AI Workflows UI is currently being updated. All functionality remains the same, but some interface elements shown in this guide may differ from what you see. This guide will be updated once the new design is fully rolled out.
Overview
Choose this option to leverage the Abacus AI Workflows framework for creating your own AI Agent. Workflows are fully customizable, allowing you to seamlessly integrate data transformations, machine learning models, and Large Language Model (LLM) prompts. You can build with maximum flexibility using the Abacus Python SDK and any standard Python commands you need.
To follow this tutorial, ensure you have followed these steps:
- Log in to the Abacus developer platform
- Create a new project of type "AI Workflow"
- Provide a name, and click on
Skip to Project Dashboard.
If you are having trouble creating a new project, follow this guide
The Abacus.AI platform supports various types of AI Workflows:
- DEFAULT: The standard interface for AI Workflows. It provides a form submit UI, following the JSON react schema framework
- CHAT: Workflows designed for conversational interactions. In most cases, these can be handled with a Custom Chatbot
- AUTONOMOUS: Workflows that operate with minimal human intervention, making decisions and performing tasks independently.
Example use cases would be:
- Invoice Extraction: AI Workflow that extracts data from invoices, matches fields, and organizes them into structured formats. (DEFAULT)
- Transcript Summarizer: An AI Workflow that summarizes long transcripts into concise and meaningful summaries. (AUTONOMOUS)
- Request For Proposal Automation: Receives a CSV/Word document from the customer, extracts questions and provides responses for each one (DEFAULT)
- Email Automation: Read emails and respond to them or create drafts for response (AUTONOMOUS)
Video Tutorial
Steps to Train a Model
Step 1: Create an AI Workflow
To create an AI Workflow, navigate to the UI, and click on create AI workflow:
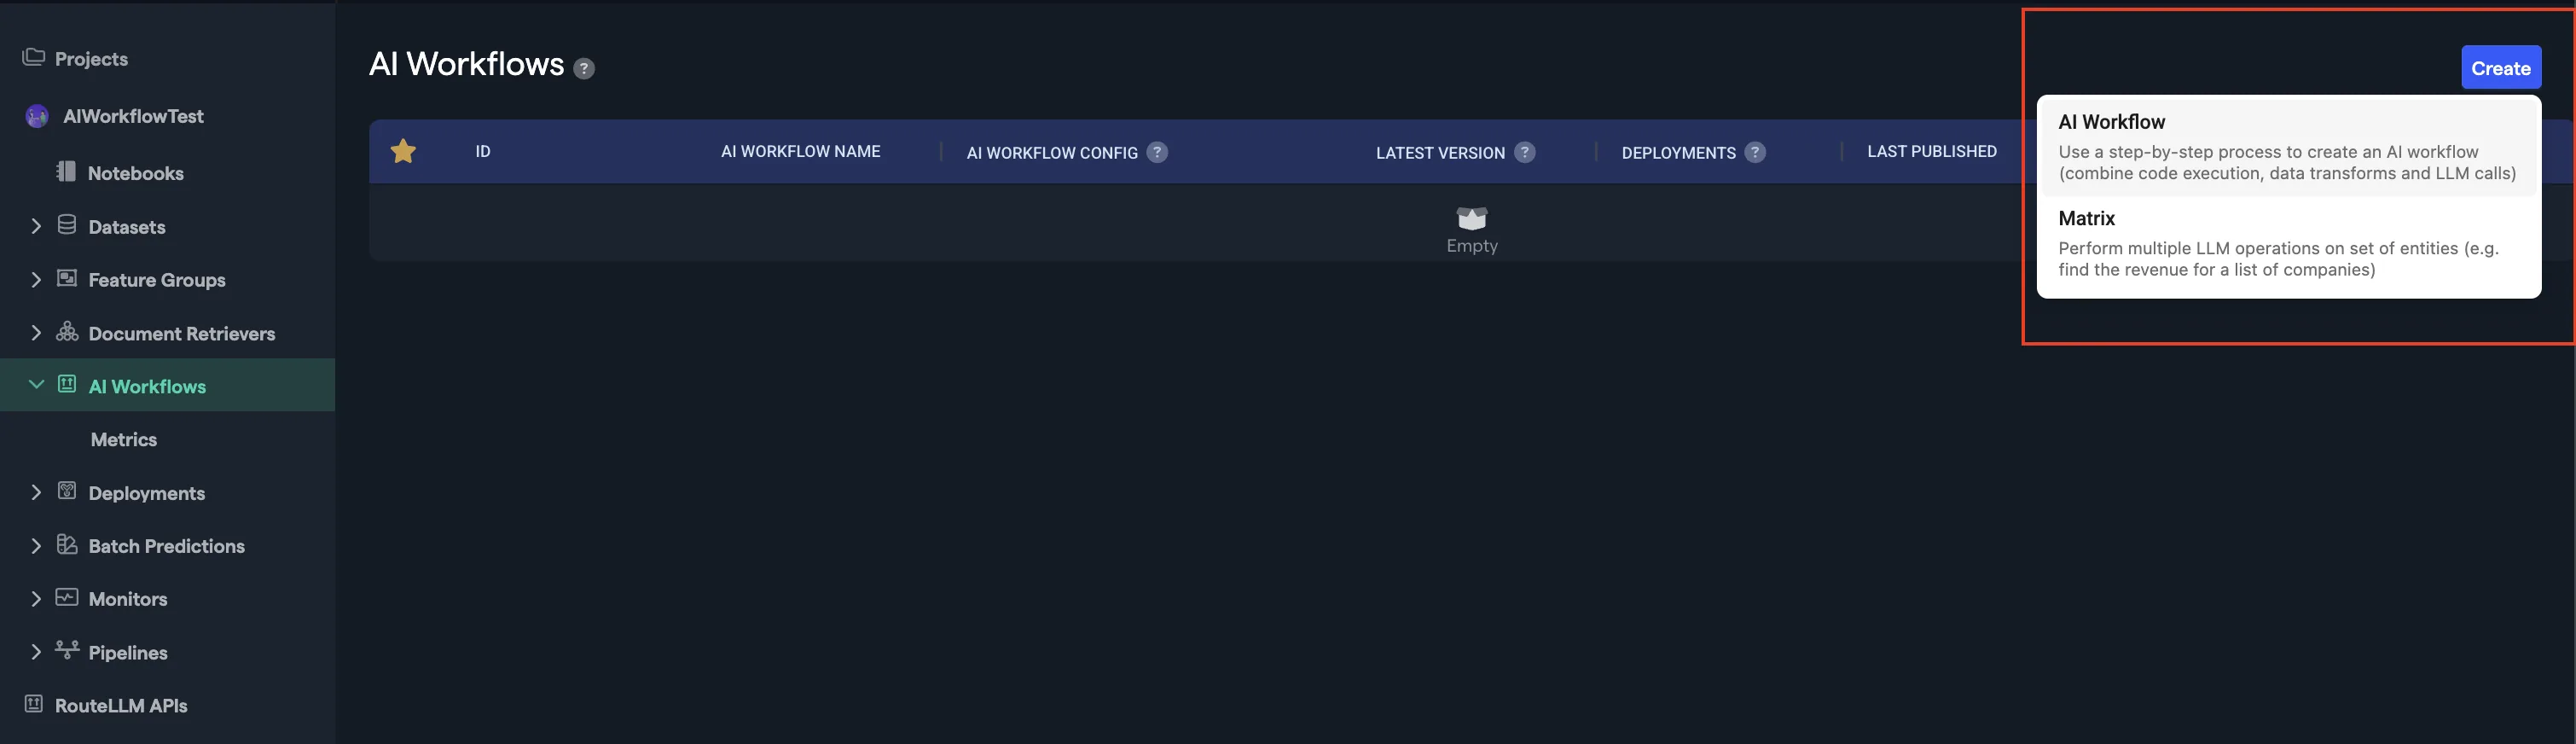
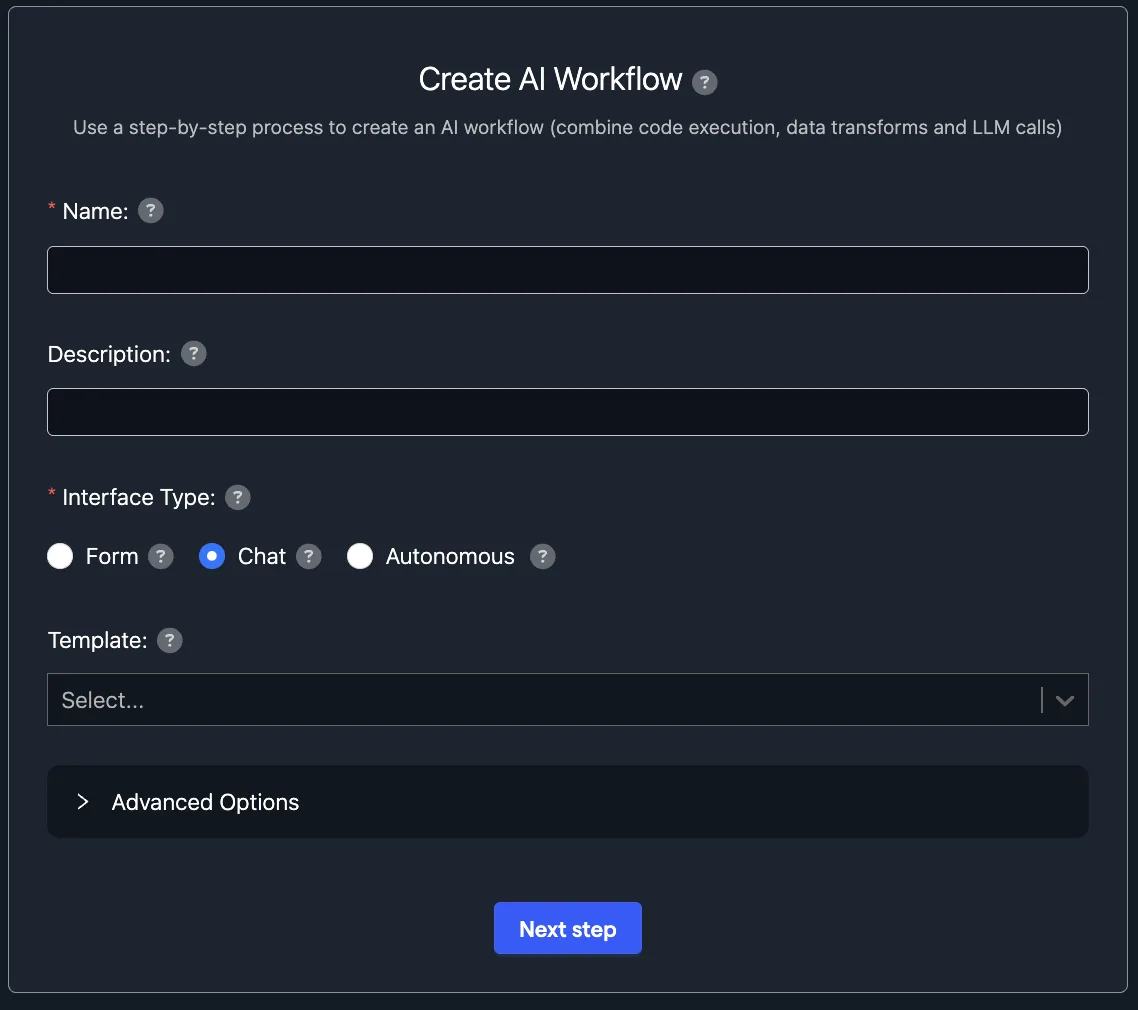
Now, you can follow the navigation wizard. Choose the AI Workflow type you need, provide a name and then click on "Next Step".
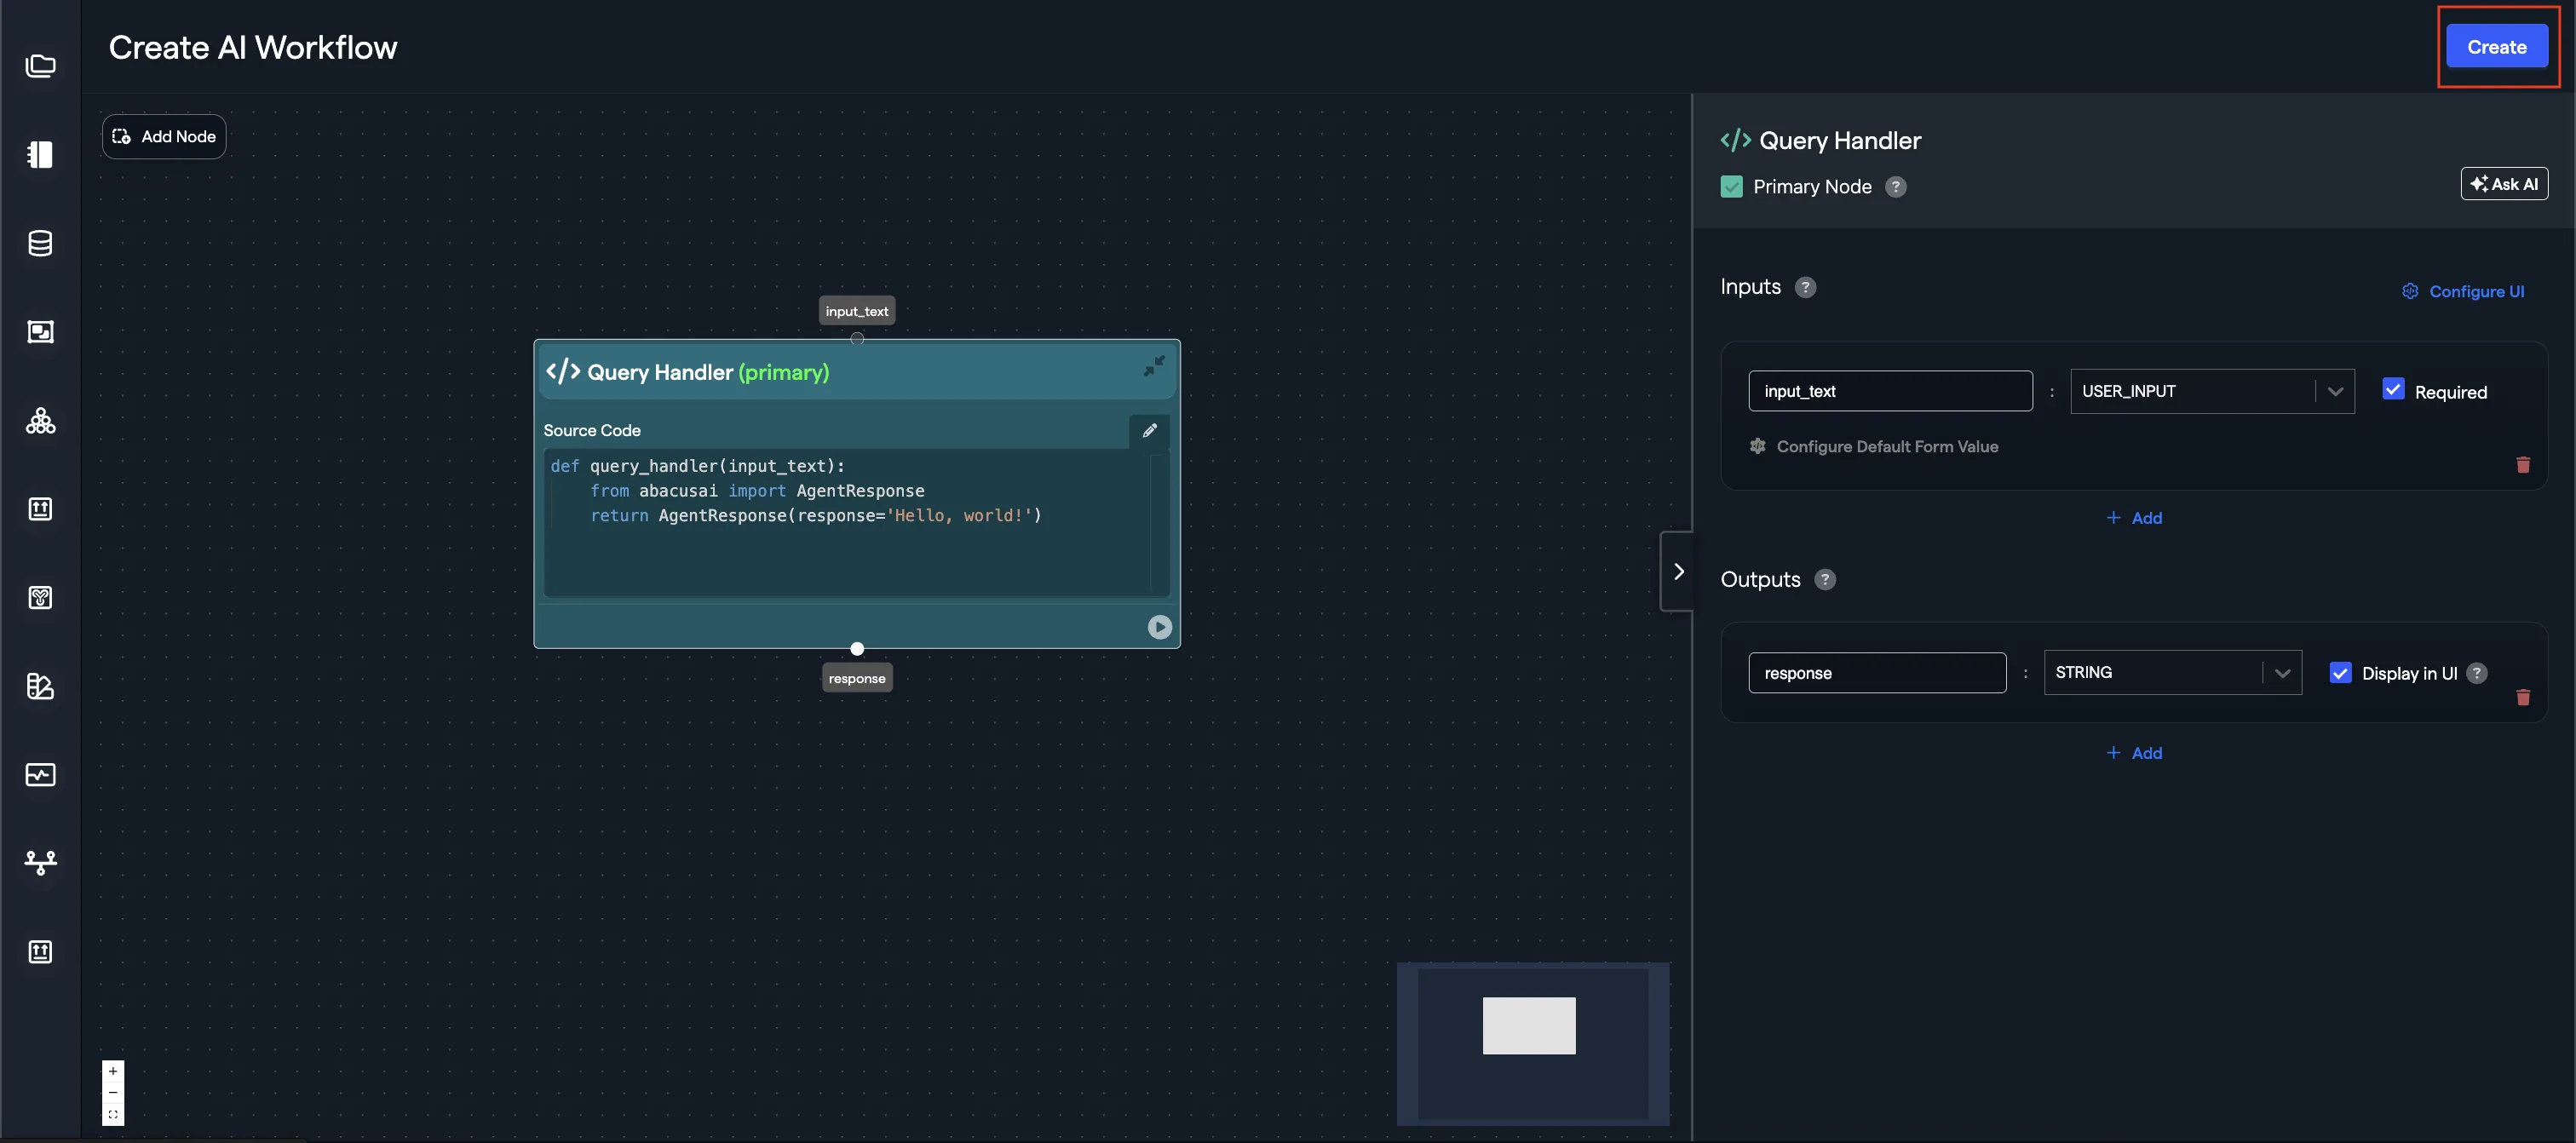
You are now in the AI Workflow Creation page! You can start:
- Adding nodes using the UI elements
- Connect nodes with each other
- Alter their code
Once you are ready and have something you like, click on the "Create" button.
Once you have created the AI Workflow once, you will also start seeing more options in the UI:
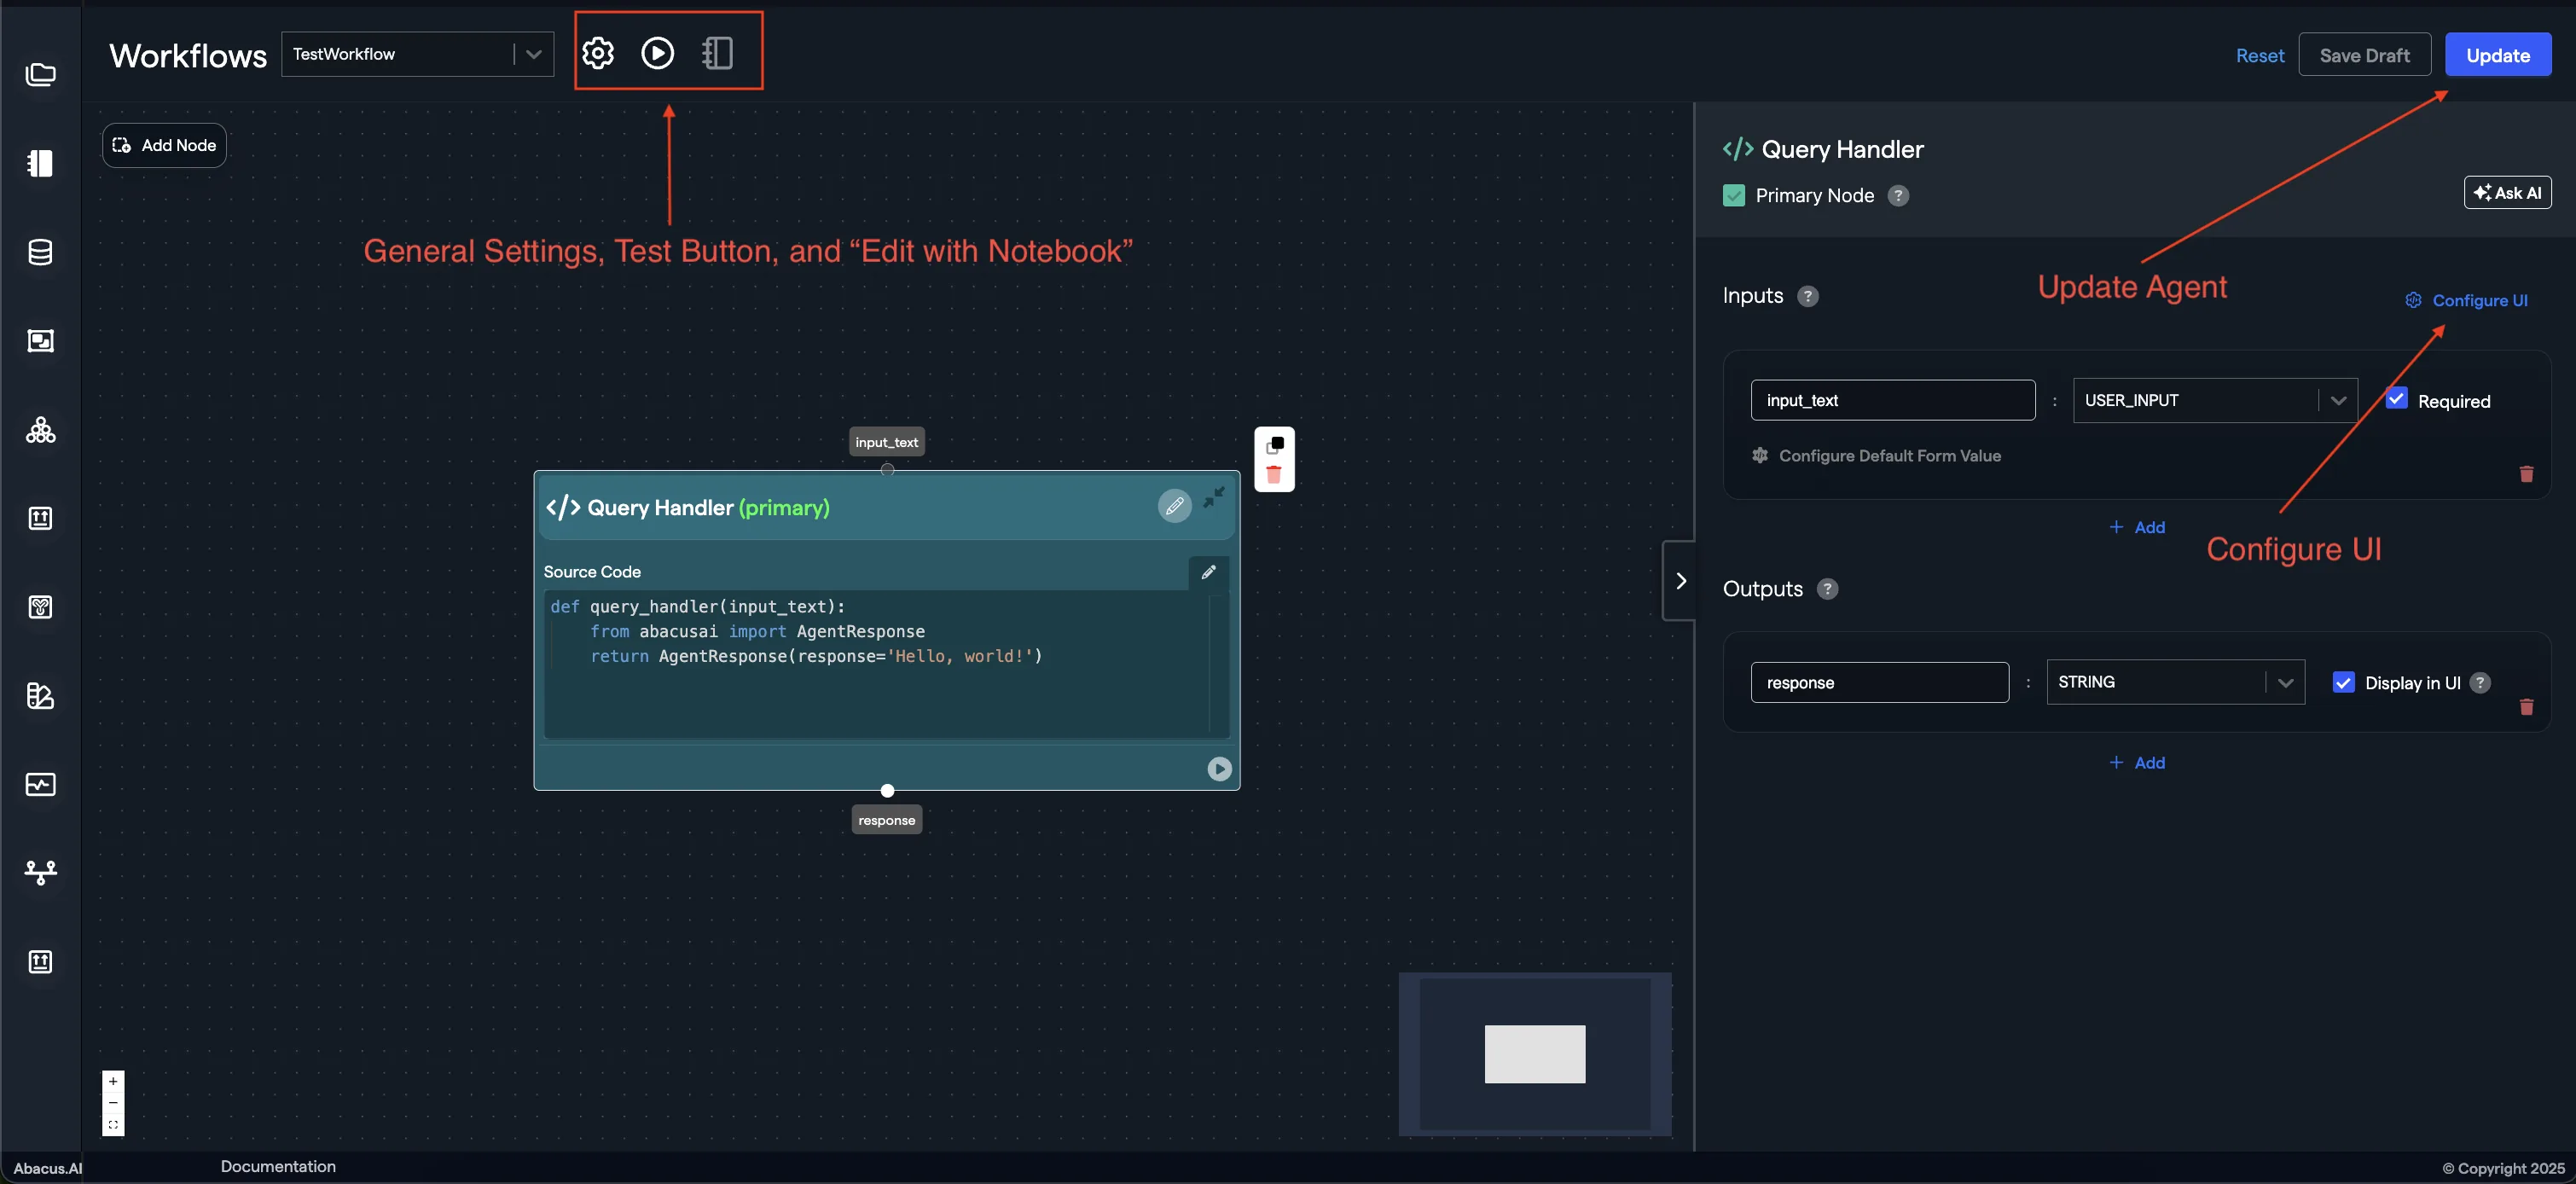
These options will allow you to:
- Test the AI Workflow
- Check the full code of the AI Workflow and edit it through a notebook
- Configure general settings of the AI Workflow
Step 2: Customize your AI Workflow
You can keep altering and customizing your AI Workflow (agent) as you see fit! You can add nodes and configure their properties. You can also use LLM Assisted Node Creation
To learn more about the AI Workflow python framework, and how to use it, visit our AI Workflow Python SDK Tutorials
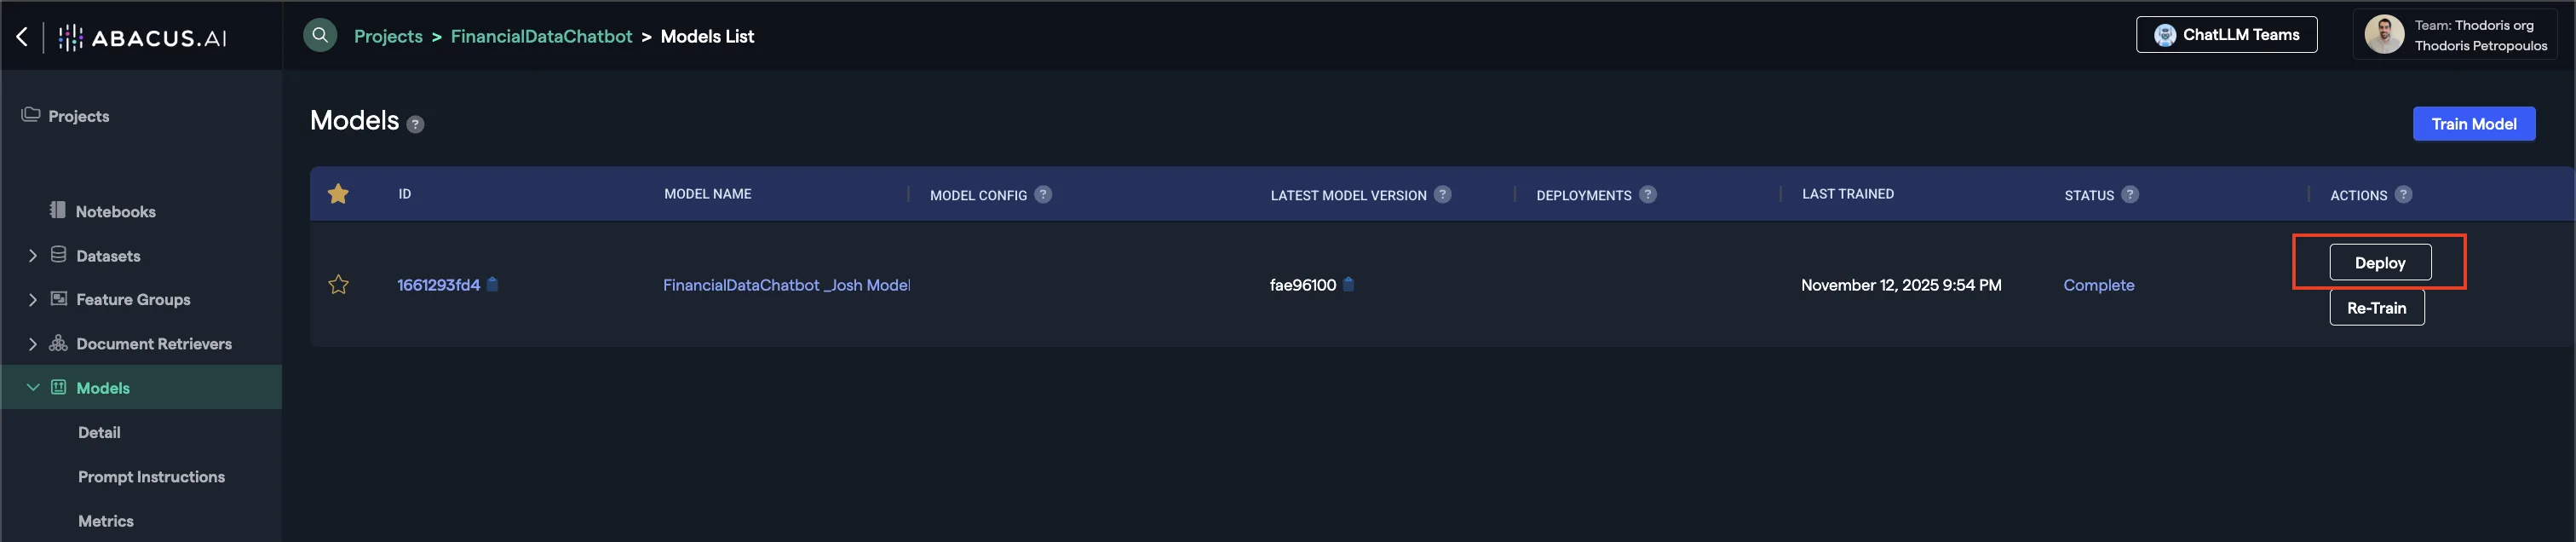
Step 3: Deploying your model
Once the model is ready, click on the Deploy button within the model's page.
- Offline Deployment Mode: Select this option when you want the model to be available for batch processing.
- Online Deployment Mode: Select this option when you want the model to be available to use via the API

Here are some of the important options you will be able to see within the Deployment page of a model:
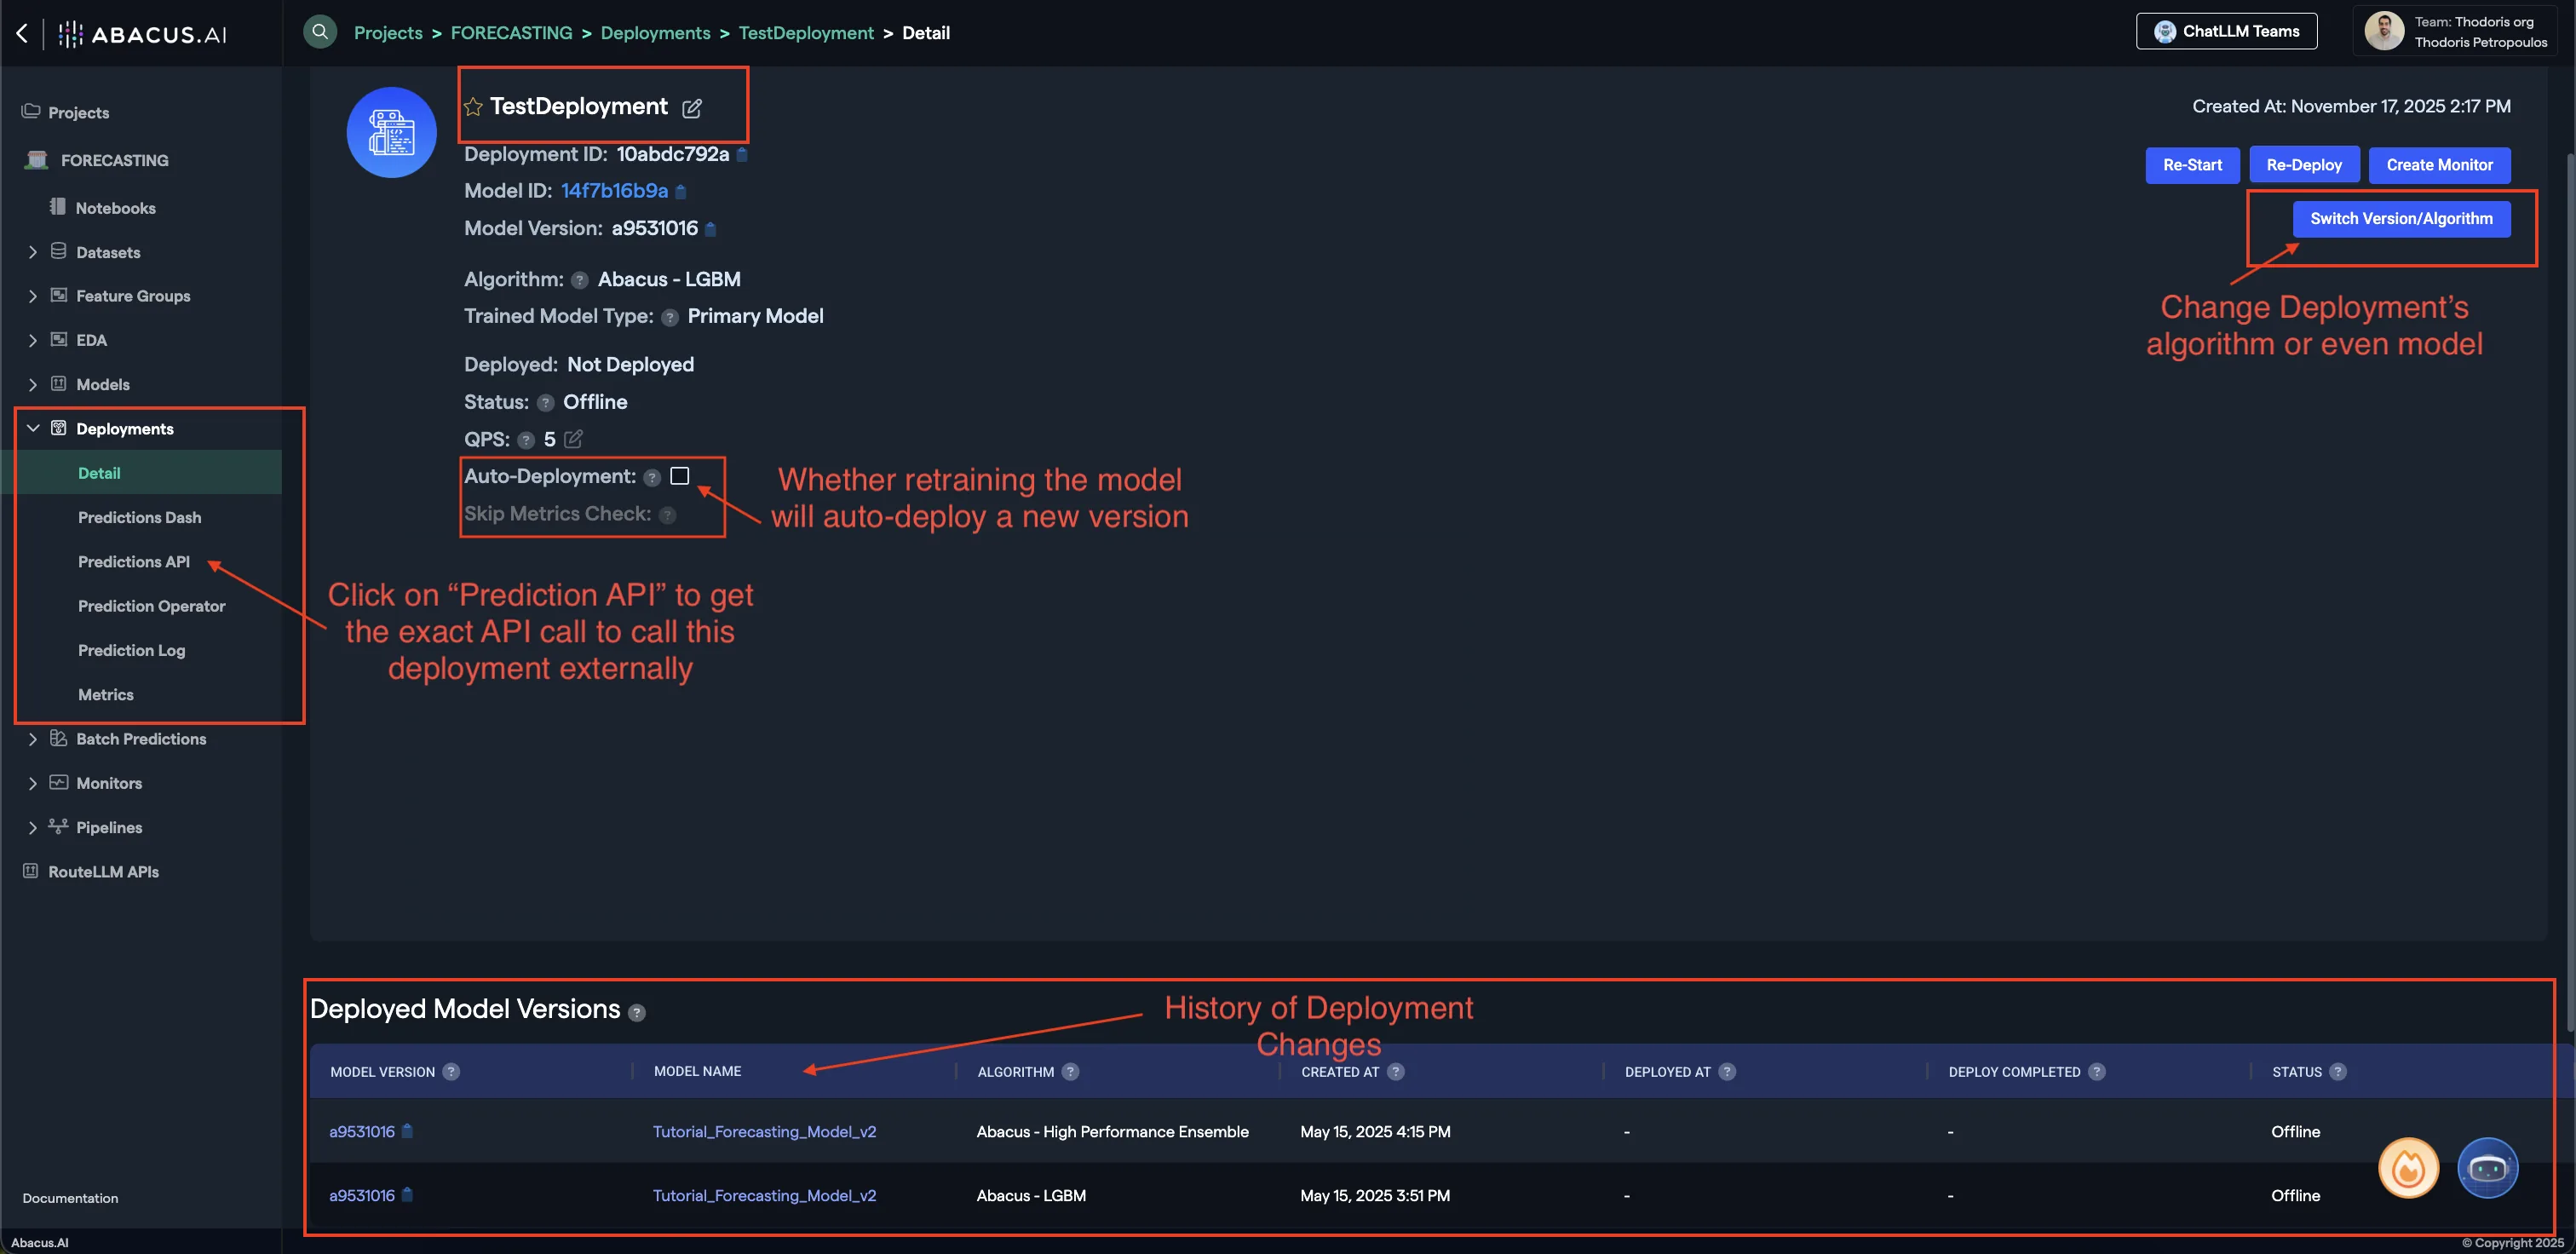
- Prediction API: Clicking on this button will provide you with a sample API request to call this model externally.
- Switch Version/Algorithm: This option allows you to change the model version or algorithm used for predictions.
- Auto Deployment: Whether model retrains will also auto-deploy the newest version of the model.
To learn more about Deployments, visit our Deployments Guide
Your workflow is now ready to use!
Predictions
For any deployed model within the abacus platform, you can leverage an API to call it externally. The steps to do this are:
- Deploy the Model
- Navigate to the Deployments Page
- Click on the
Predictions APIbutton on the left side
That will give you the exact API endpoints and tokens you need to use the deployment.
The Relevant API References for this use case are:
For Simple Form Based Agents:
For Conversational Agents:
- Create Deployment Conversation
- Execute Conversational Agent
- Execute Conversational Agent with streaming
Note: You will need to use
--no-bufferon bash commands for streaming responses.
Advanced Options and Considerations for AI Workflows
When creating AI Workflows, you will have the option to add new nodes and use a LLM to help you create each individual node.
Sample prompts
- Create a node that takes a topic as input and responds with a story using LLM.
- Create a node that takes a query and a document from the user as inputs and returns the content of the document along with the original query.
- Create a node that takes a topic as input and an optional website link from the user. The node returns a news article on the topic along with a short summary.
- Create a node that accepts the following inputs from the user: title, genre, character name, and target audience. The node returns a plan for generating a story and a new title.
Example AI Workflows
1. File Analyzer (Form-Based AI Workflow)
-
Node 1: Extract Content Prompt: Create a node that takes a query and a document from the user as inputs and returns the content of the document along with the original query.
-
Node 2: Answer Query Prompt: Create a node that uses LLM to answer the query based on the document content.
2. Generate Story Plan Doc (Form-Based AI Workflow)
-
Node 1: Story Planning Node Prompt: Create a node that accepts the following inputs from the user: title, genre, character name, and target audience. The node returns a plan for generating a story along with the original title provided by the user.
-
Node 2: Generate Story Doc Node Prompt: Create a node that generates a PDF document with the title at the top and content created using LLM based on the plan.
Note: Add reportlab to the package requirements if not already present.
3. News Reporter AI Workflow (Form-Based AI Workflow)
-
Node 1: News Reporter Node Prompt: Create a node that takes a topic as input and an optional website link from the user. The node returns a news article on the topic along with a short summary.
-
Node 2: Generate News Doc Node Prompt: Create a node that accepts an optional document file from the user. This node uses the article and summary to generate a text file formatted based on the uploaded document, incorporating the content from the article and summary.
4. Email Replier (Form-Based AI Workflow)
-
Node 1: Fetch Email Node Insert template node: "Fetch Inbox"
-
Node 2: Generate Reply Node Prompt 1: Create a node that processes the email contents fetched and returns a draft reply generated using LLM.
Prompt 2: Create a node that processes the email contents fetched and returns a draft reply generated using LLM, along with other fields required by the "Send Email" node.
Note: The second prompt requires inserting the "Send Email" node before creating the Generate Reply node.
- Node 3: Send Email Node Insert template node: "Send Email"