Named Entity Recognition
Overview
This tutorial shows how to create a Named Entity Recognition model in the Abacus Developer Platform.
To follow this tutorial, ensure you have followed these steps:
- Log in to the Abacus developer platform
- Create a new project of type "Named Entity Recognition"
- Provide a name, and click on
Skip to Project Dashboard.
If you are having trouble creating a new project, follow this guide
Example use cases would be:
- Extract and classify person names, organizations, and locations from documents
- Identify medical codes and terminology in healthcare records
- Categorize entities in academic research and literature analysis
- Automate information extraction for content recommendation systems
Note: We strongly recommend using an AI Workflow, for all NER related tasks. Modern LLMs excel at doing this task and they will most likely be more accurate. Having said that, there are advantages to dedicated NER models. Most notably, they can scale easily to millions of predictions with a much lower cost.
Steps to Train a Model
Step 1: Ingest data into the platform
Once you are ready to upload data, follow these steps:
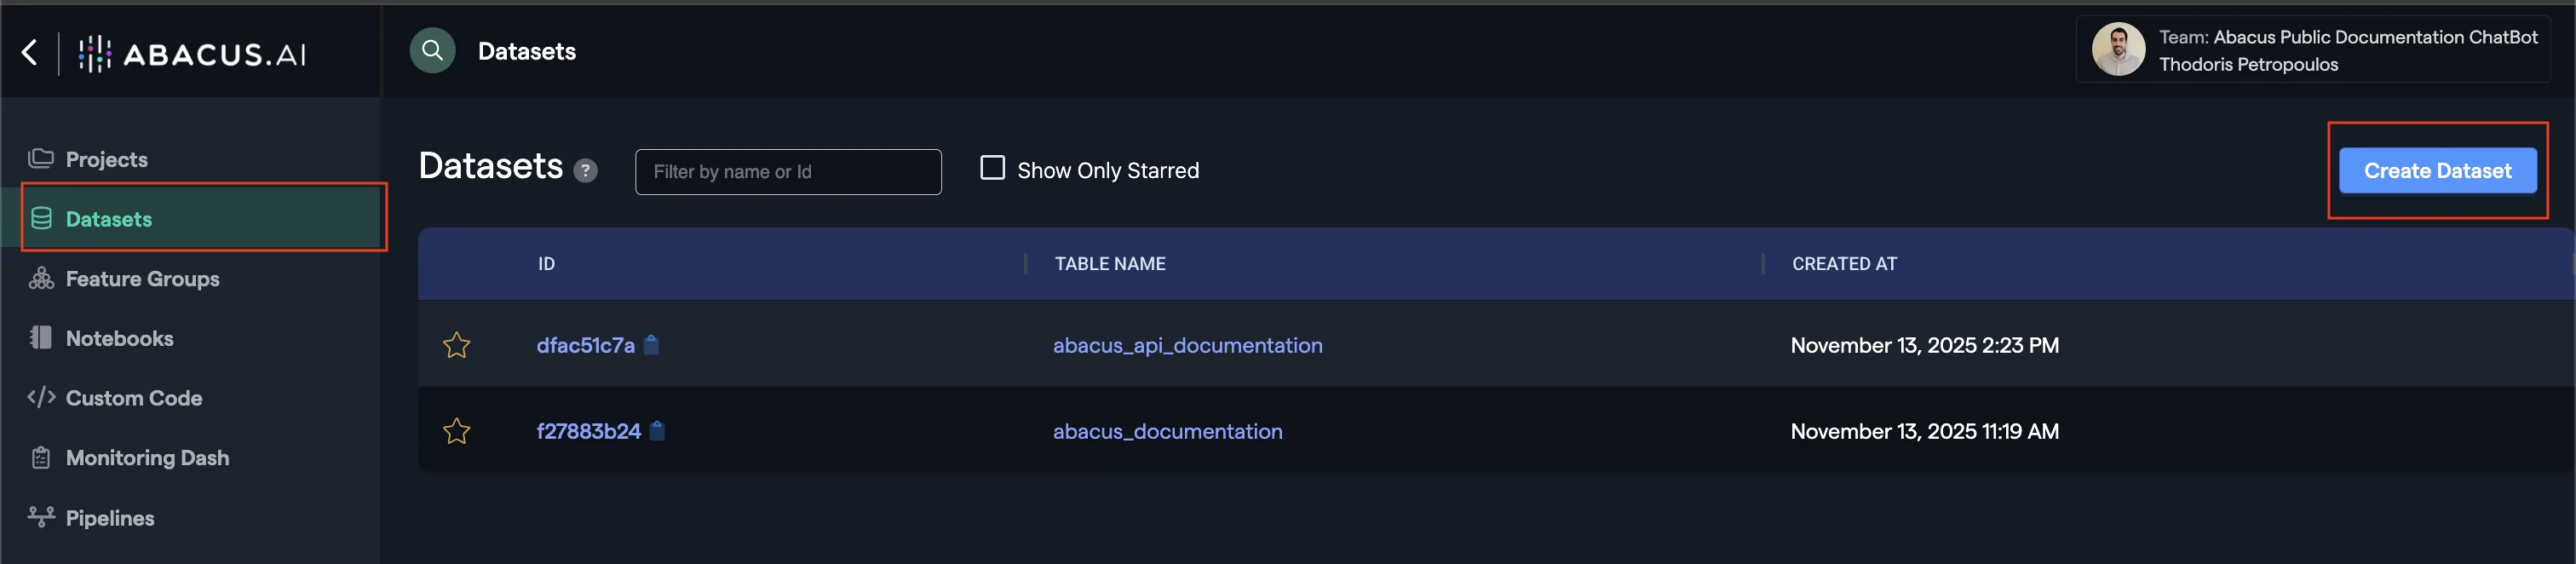
- Click on
Datasetswithin the project page on the left side panel. - Click on
Create Dataseton the top right corner. - IMPORTANT: Provide a name and choose the
Labeled DocumentFeature Group type

The options for data uploading are:
- Direct upload of documents (PDFs, Word Docs, etc) using a zip file
- Ingestion from a connected data source
- A table of data with a text column (in which case, you will need to have a unique identifier for each row)
Step 2: Configuring Feature Groups
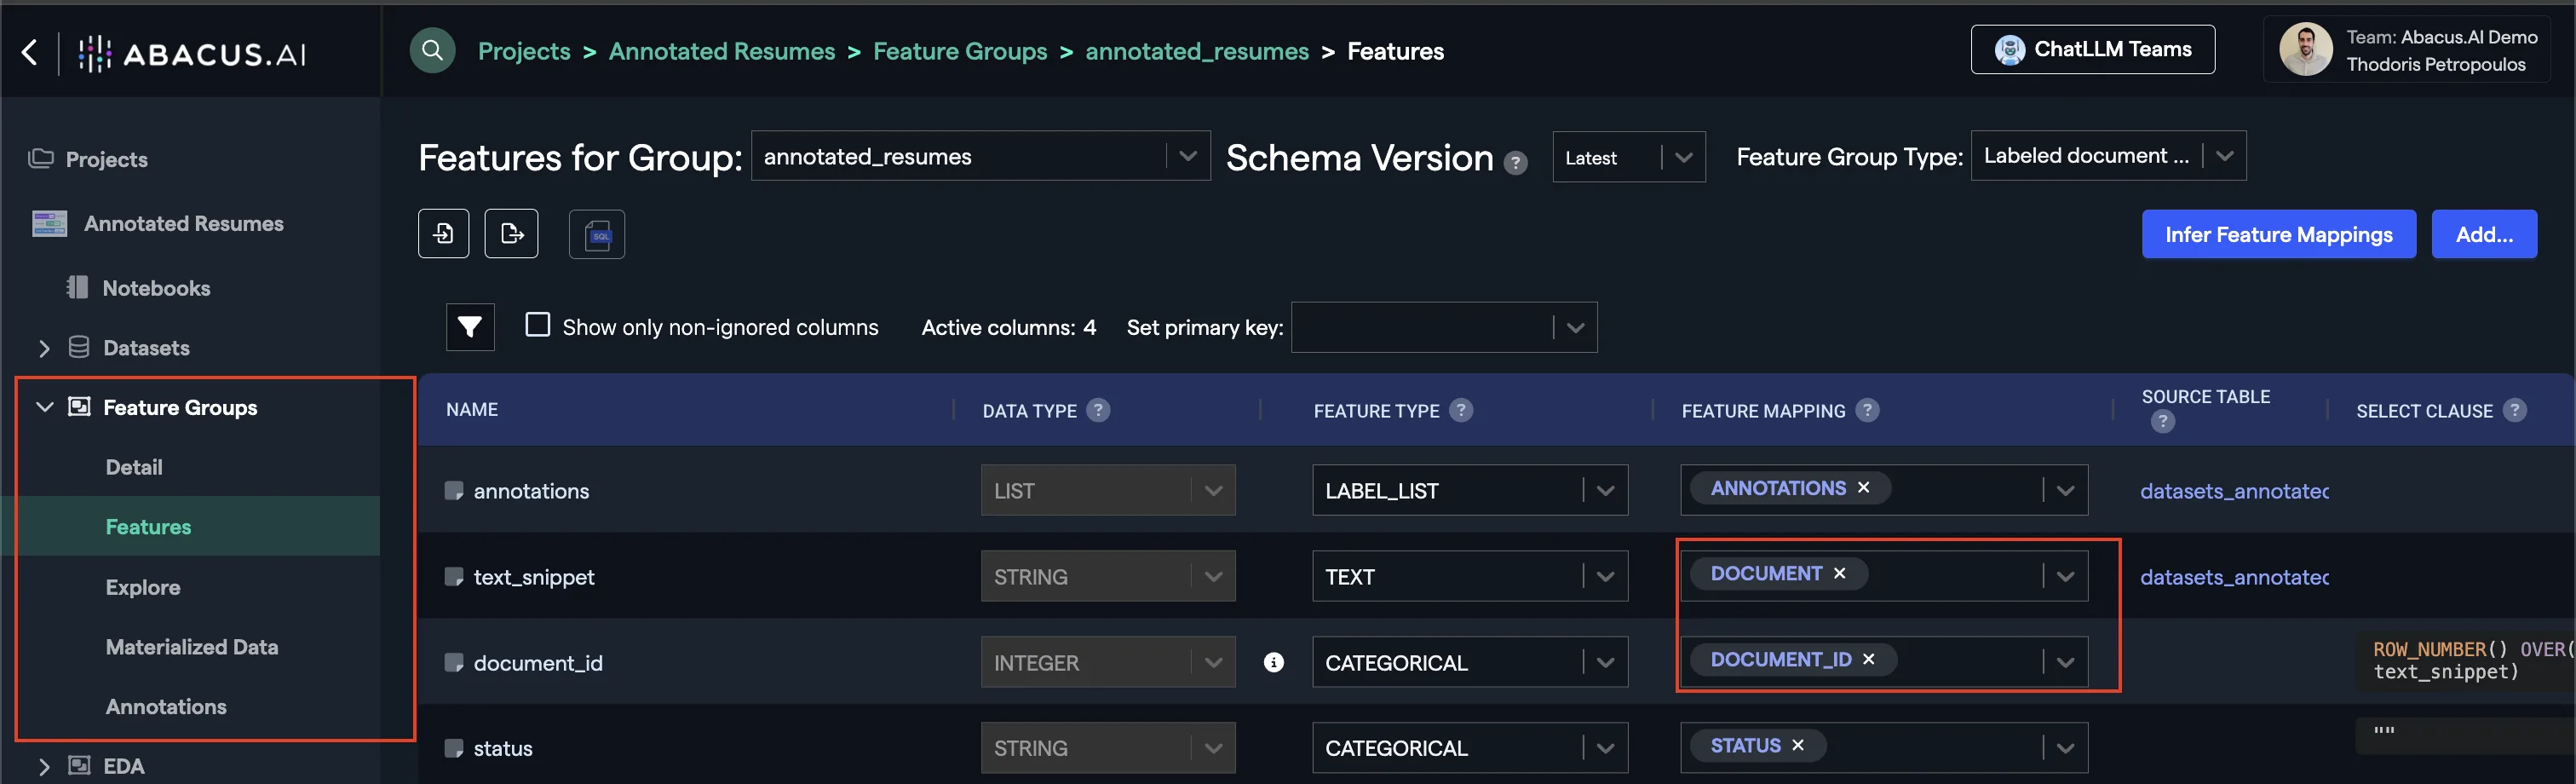
Once the dataset has finished inspecting, navigate to the Feature Group area from the left panel. You should be able to see a Feature Group that has the same name as the dataset name you provided.
- Navigate to Feature group → Features
- Select the appropriate feature group type (see Required Feature Groups)
To learn more about how feature group mapping works, visit our Feature Group mapping guide for detailed configuration instructions.
Here is an example of how this looks:
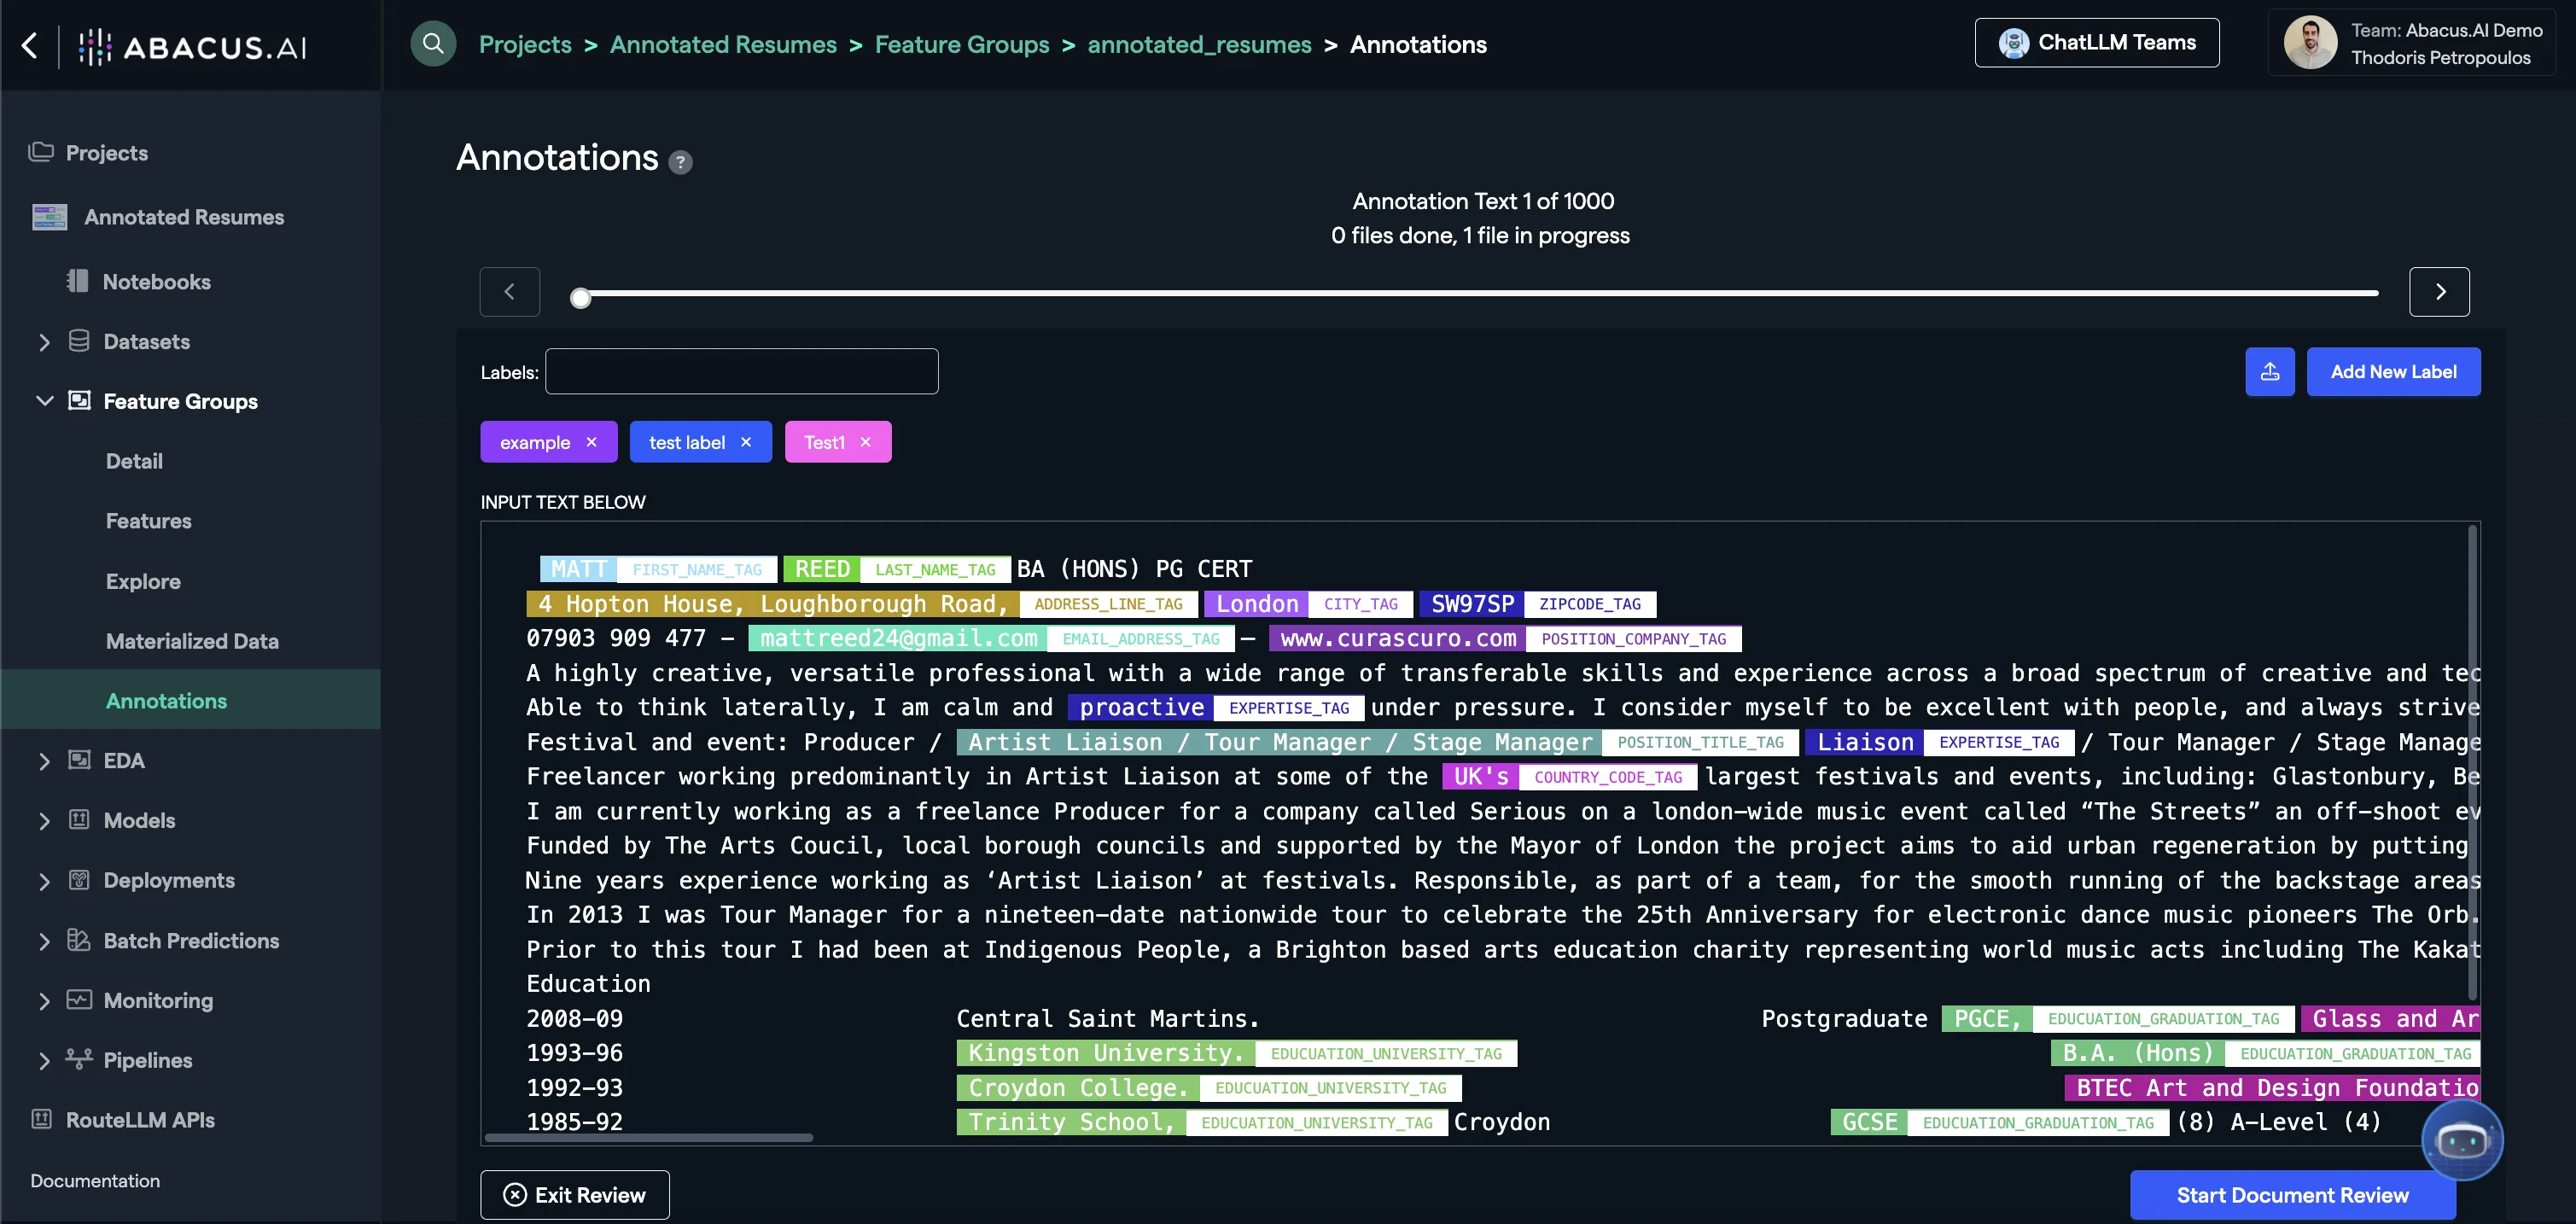
Step 3: Annotations
You can now Add annotations. Click on Feature Group --> Annotations and start adding labels to your data.
The wizard is intuitive to use, and you can see an example of it below:
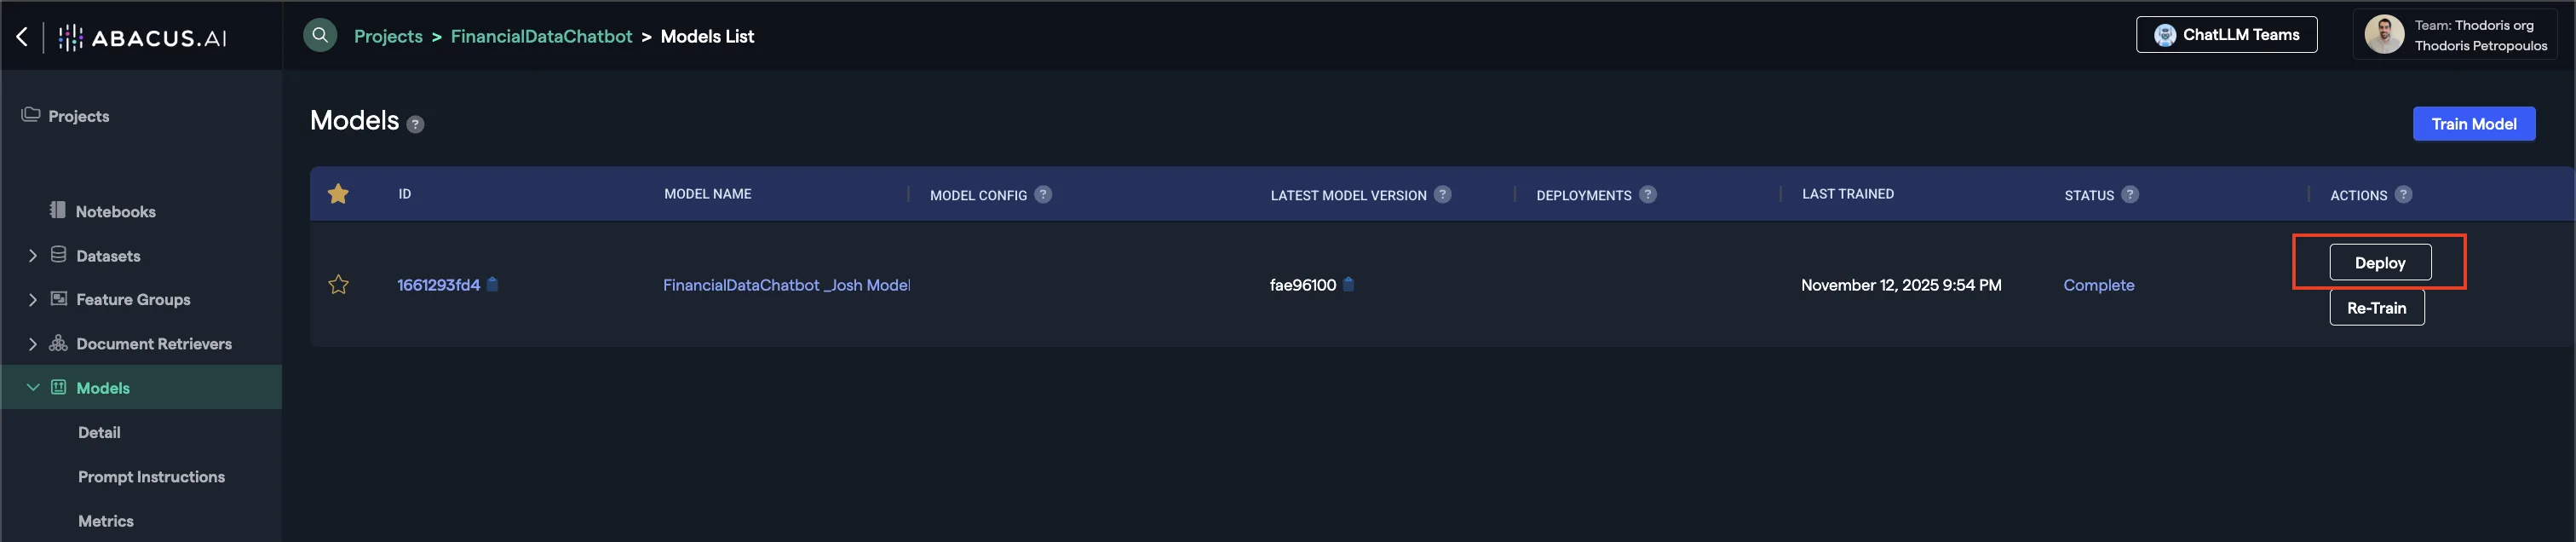
Step 4: Model Training
You are now ready to train your model. Create a new model by navigating to the models page:
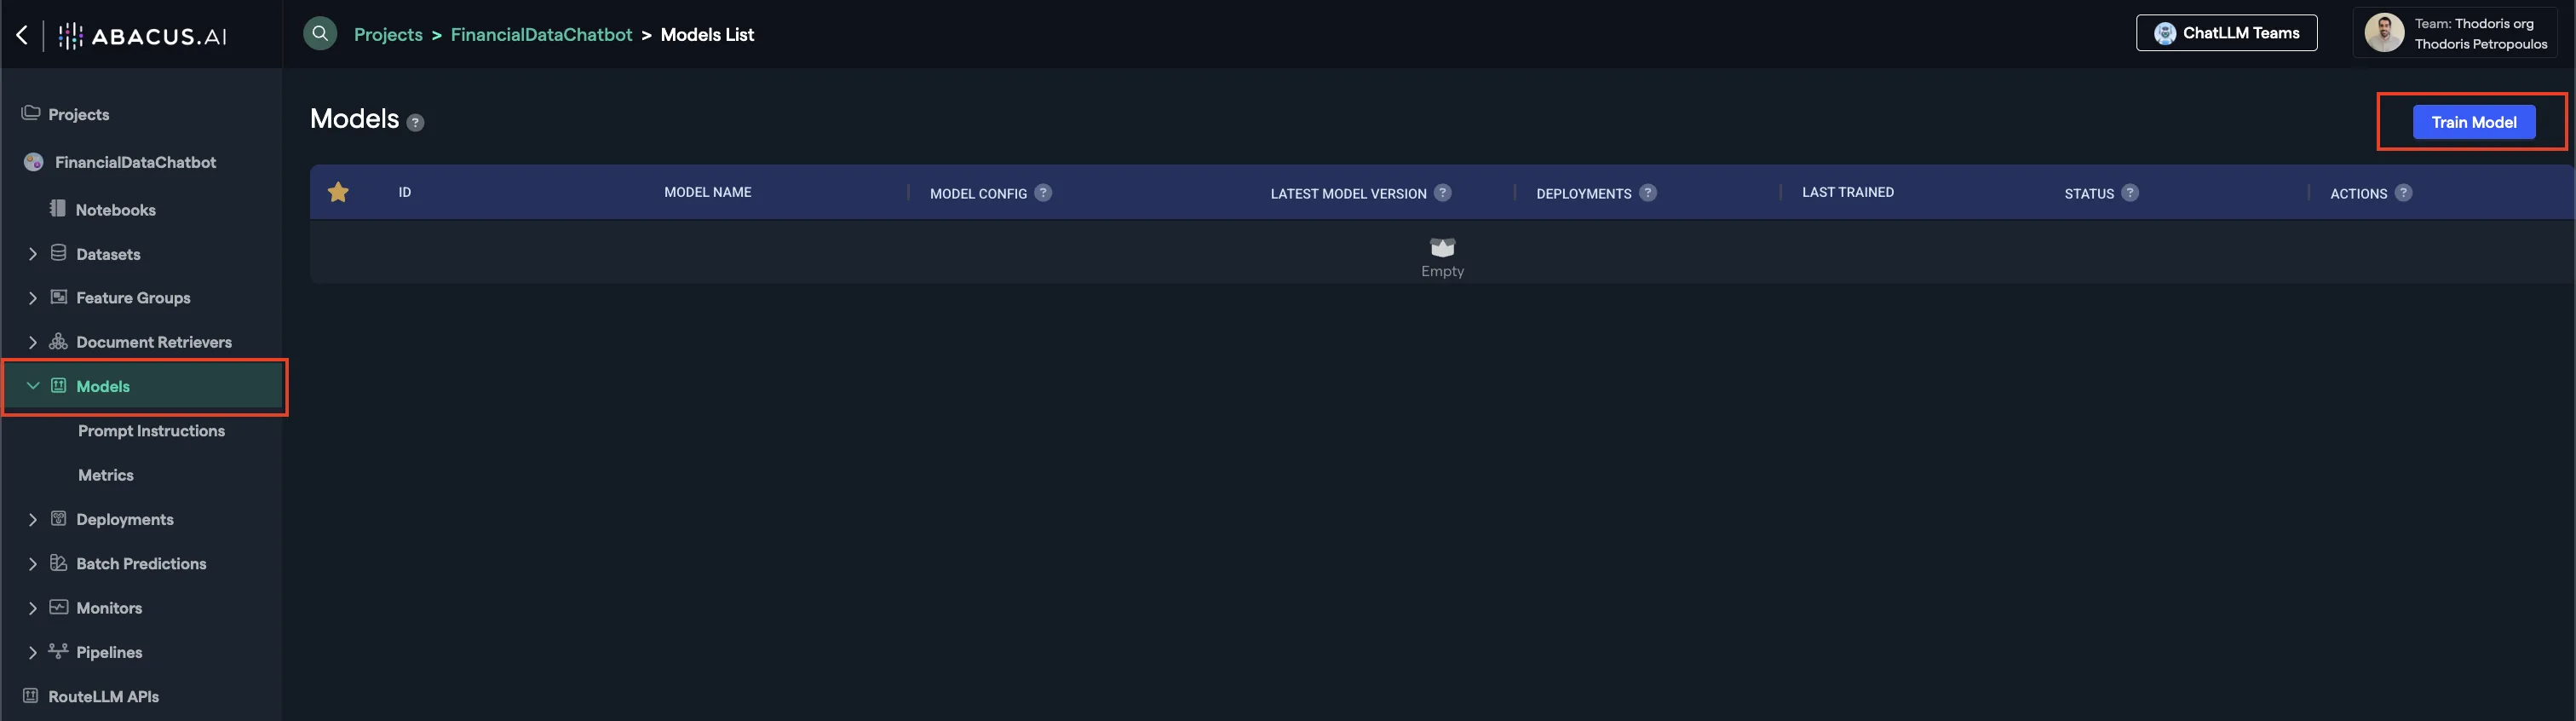
After you click on train:
- Select your training feature group(s) — Choose the datasets you want to use for training
- Configure training options — We recommend keeping the default values, but you can customize settings based on your needs. Click the (?) icon next to any option to see what it does
- Monitor training progress — Your model will begin training automatically. You can track its status in real-time
For use cases with ground truth data, you'll be able to evaluate model performance through the Metrics page, accessible directly from your model's dashboard.
Step 5: Deploying your model
Once the model is ready, click on the Deploy button within the model's page.
- Offline Deployment Mode: Select this option when you want the model to be available for batch processing.
- Online Deployment Mode: Select this option when you want the model to be available to use via the API

Here are some of the important options you will be able to see within the Deployment page of a model:
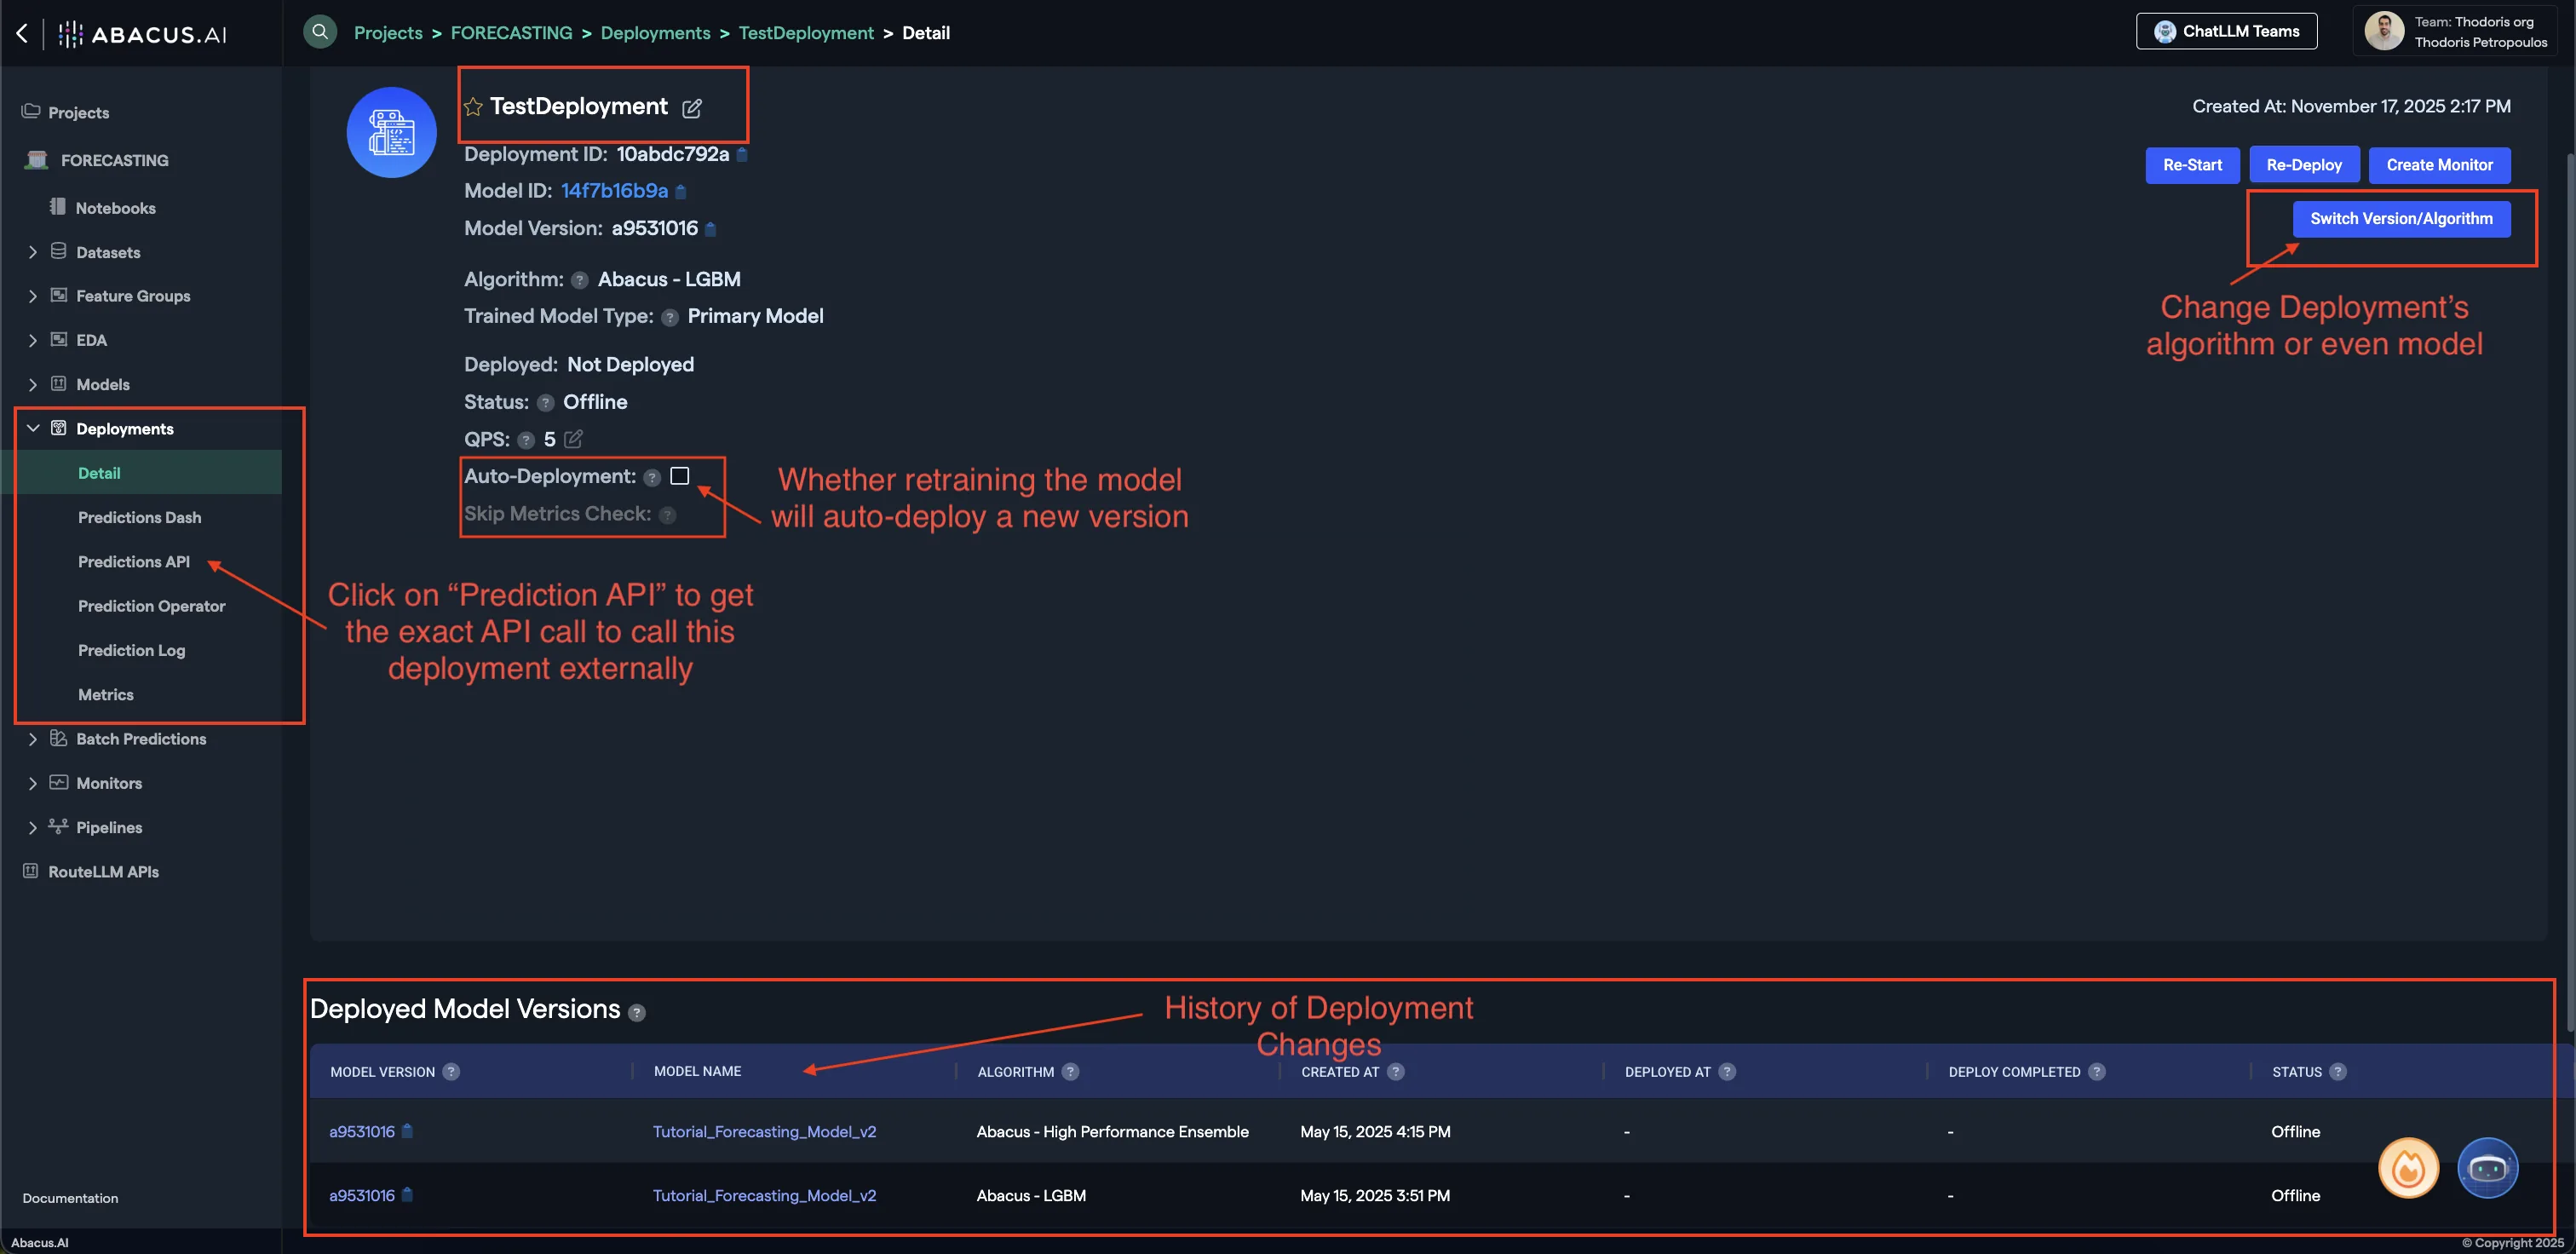
- Prediction API: Clicking on this button will provide you with a sample API request to call this model externally.
- Switch Version/Algorithm: This option allows you to change the model version or algorithm used for predictions.
- Auto Deployment: Whether model retrains will also auto-deploy the newest version of the model.
To learn more about Deployments, visit our Deployments Guide
Your model is now ready to use!
Batch Predictions
Batch predictions is the process of using a deployed model to make predictions on a batch of input data. It's how you get predictions out of all Machine Learning Models.
The process is as follows, and is applicable for all machine learning project types:
- Upload data, ensuring that it is in the same format as the model training data
- Navigate to Batch Predictions --> Create New Batch Prediction from the left side panel
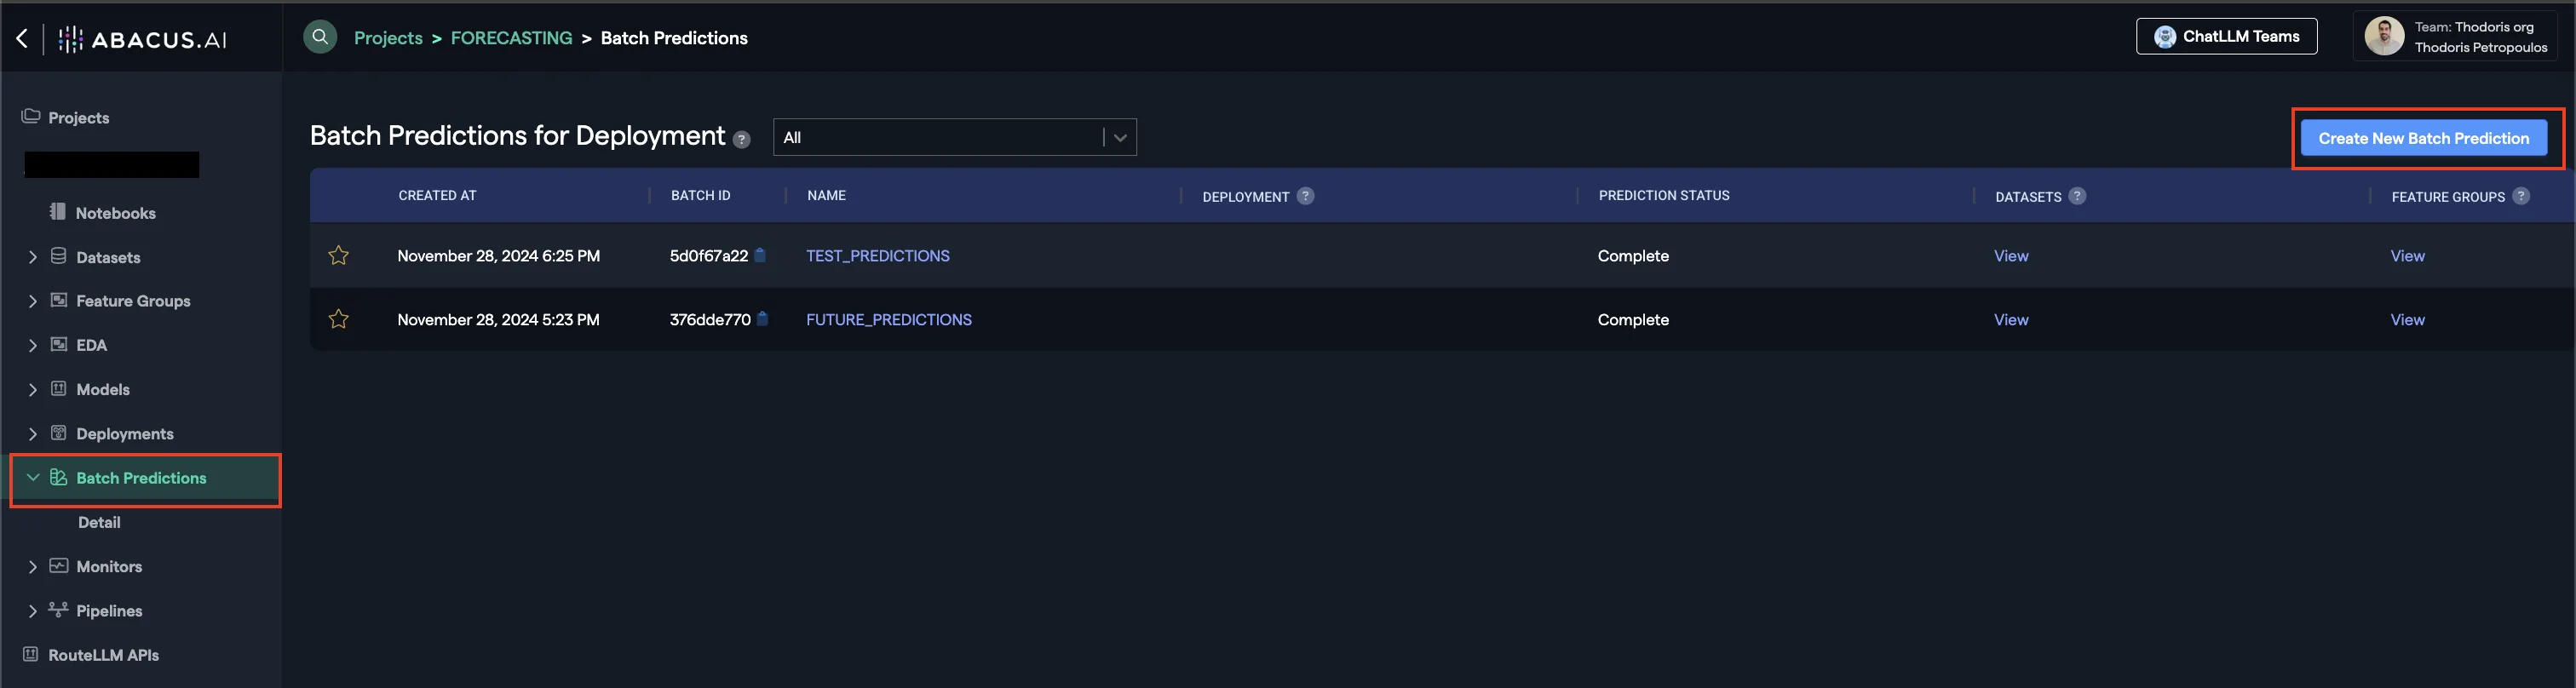
- Follow the wizard
- Select the deployment (This is the model that will be used to make predictions)
- Select the input Feature Group to the batch prediction
- Select the output Feature Group for the batch prediction
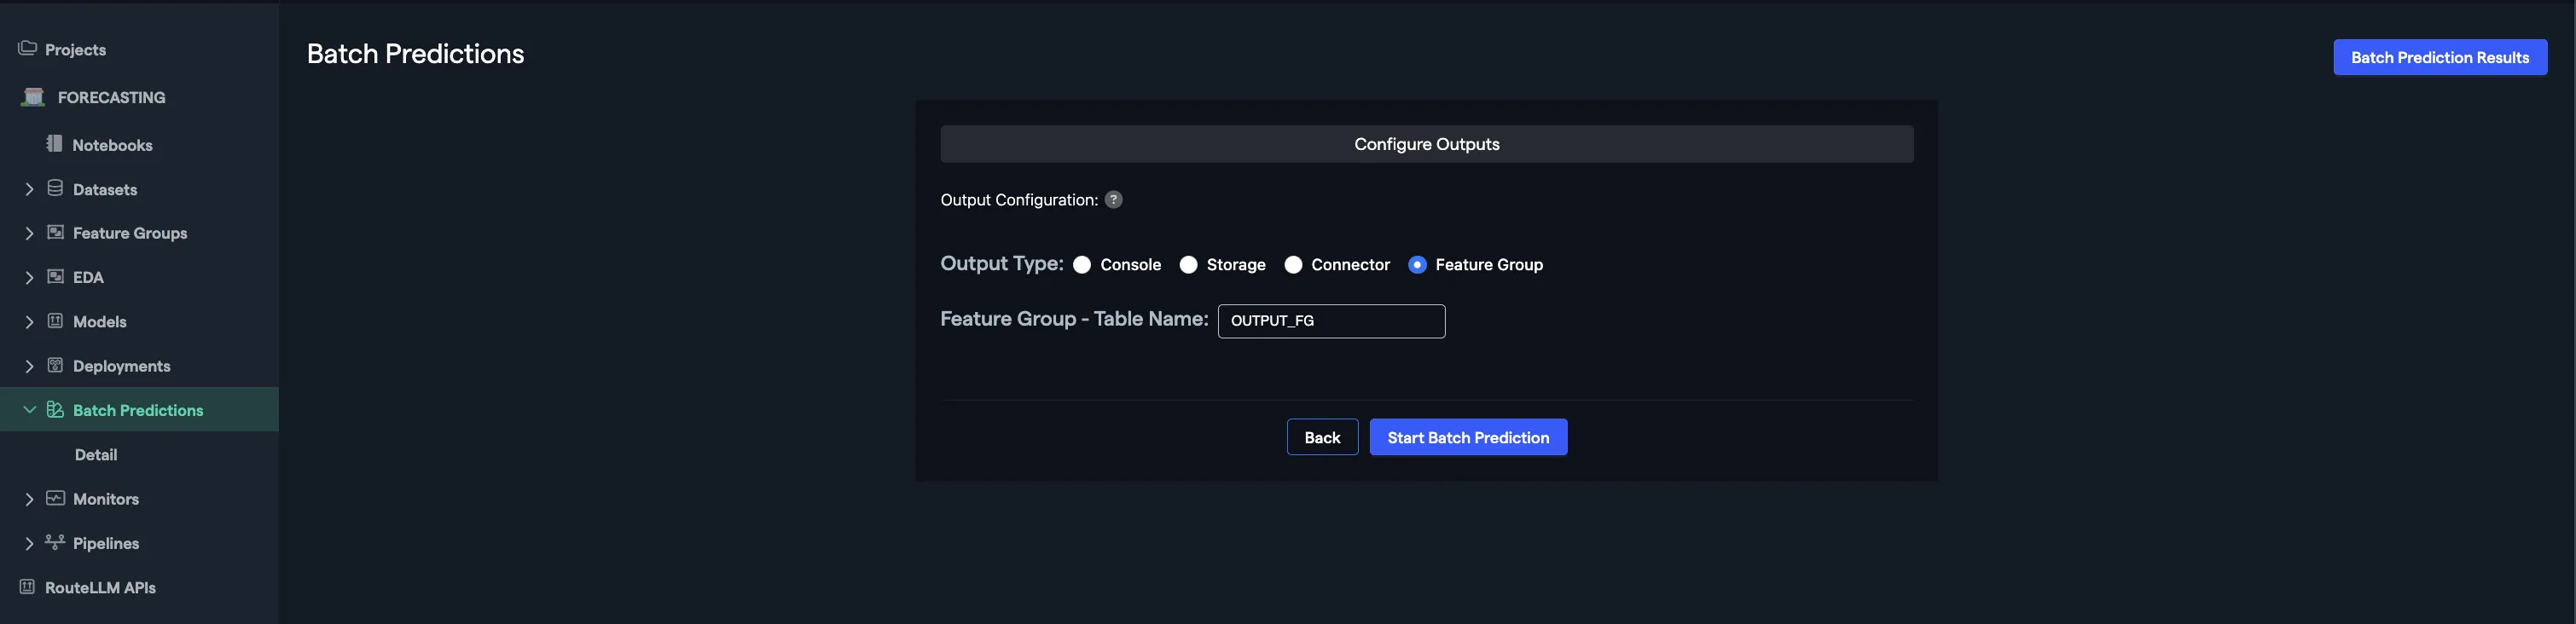
Abacus will now use the deployed model you selected to create predictions. The output Feature Group will have columns with the predicted values. If you re-run the same batch prediction, a new version of Feature Group will be created with the new output.
To learn more about Batch Predictions, visit our Batch Predictions Guide
Required Feature Group Types
To train a model under this use case, you will need to create Feature Groups of the following type(s):
| Feature Group Type | API Configuration Name | Required | Description |
|---|---|---|---|
| Text Data | TEXT_DATA | True | This dataset contains raw text data with labeled entities for training the model to recognize and classify named entities. |
Feature Group: Text Data
This dataset contains raw text data and corresponding entity labels for training the named entity detection model.
| Feature Mapping | Feature Type | Required | Description |
|---|---|---|---|
| TEXT | Text | Y | Raw text data containing entities to be classified |
| ENTITY_LABELS | Text/JSON | Y | Labels for entities in the corresponding text (e.g., person names, organizations, medical codes) |
| [ADDITIONAL_METADATA] | N | Any additional metadata or context that may improve entity detection accuracy |
Predictions
For any deployed model within the abacus platform, you can leverage an API to call it externally. The steps to do this are:
- Deploy the Model
- Navigate to the Deployments Page
- Click on the
Predictions APIbutton on the left side
That will give you the exact API endpoints and tokens you need to use the deployment.
The Relevant API References for this use case are: