May 2026 Platform Update
Abacus Webinar
The Abacus team will be hosting a webinar on Wednesday June 24th, 9am PST, focused on using the platform to build AI Workflows and custom Chatbots. You can register for the event here.
Developer Platform
Connectors
Microsoft Purview Labels The platform now supports using data labels defined in Purview to manage which data should be processed by the Abacus platform. When authenitcating Sharepoint or OneDrive a new parameter, Skip Sensitivity Labels, allows you to list all document labels that should not be processed:

Newly Available We have added a number of new connectors to the platform that are available either on the developer platform or as First Party Connectors in the Super Assistant. The following connectors are all available to use:
- Dropbox
- HubSpot
- Athena
- QuickBooks
- Tableau
- DocuSign
For more information on any of these please refer to our documentation page
Super Assistant
New Models
A number of new models have been made available in the platform over the last month:
- Anthropic's Claude Opus 4.8
- Google's Gemini 3.5 Flash
- Qwen 3.7 Max
To find out how a range of models perform don’t forget to check out our benchmark, LiveBench
Abacus Design
Design has been updated to provide a much more flexible experience during the design phase of projects, as well as more options of what to do with your completed work.
Edit Mode For more flexibilty to manually edit designs built by the Abacus Agent users can now use the Edit mode to make a range of colour, text and formatting changes directly on the design.
Once the Agent has completed the design and you are able to preview the results use the Edit button at the top of the preview pane to enable inline editing:
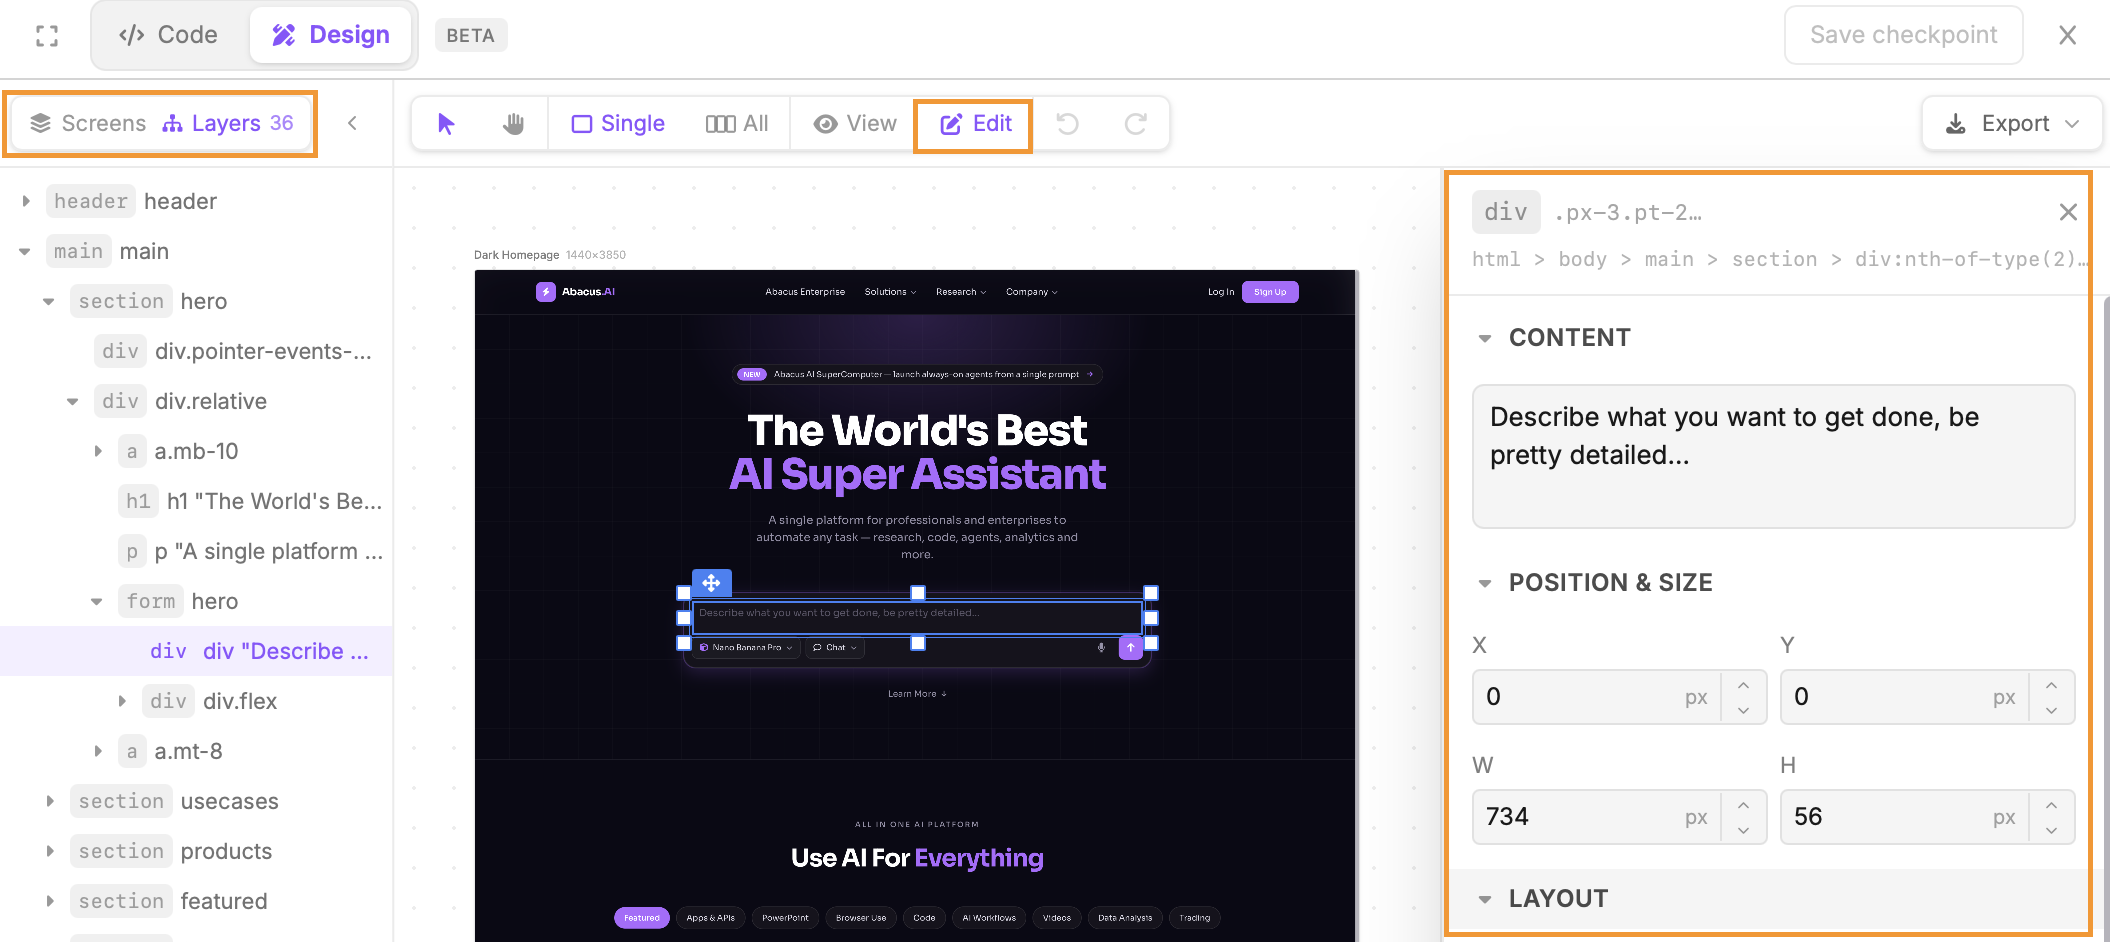
- The editing pane will appear on the right-hand side of the screen, giving you options to change the content, topography, layout and colours of the elements that you select in your design
- To further refine which components you are editing use the Layers option at the top-left of the preview pane. This allows you to select the specific html components you wish to edit
Export Options Once your designs are complete there are a number of options for you to be able to export your completed design:
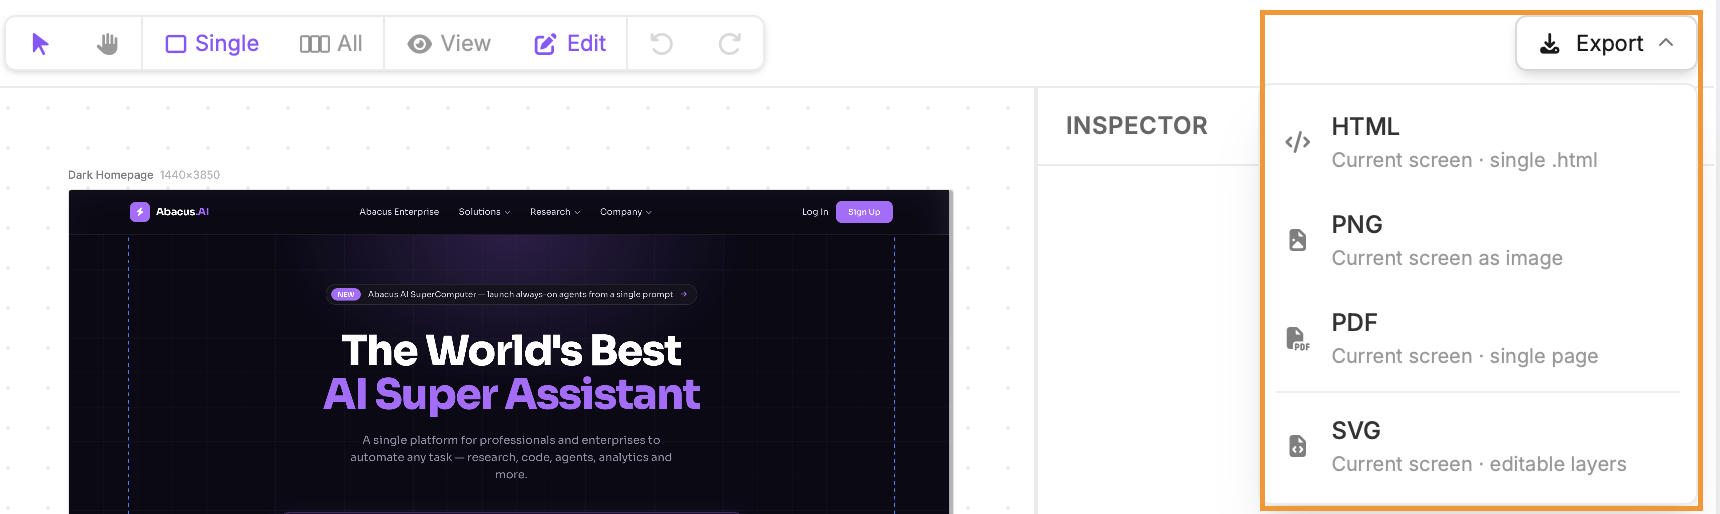
Note that if you wish to work on a design already created in Figma you can provide the Abacus Agent with the relevant Figma url and it will be able to re-create the work inside of Abacus. Once your work in Abacus is complete you can use the SVG option to export the designs back to Figma
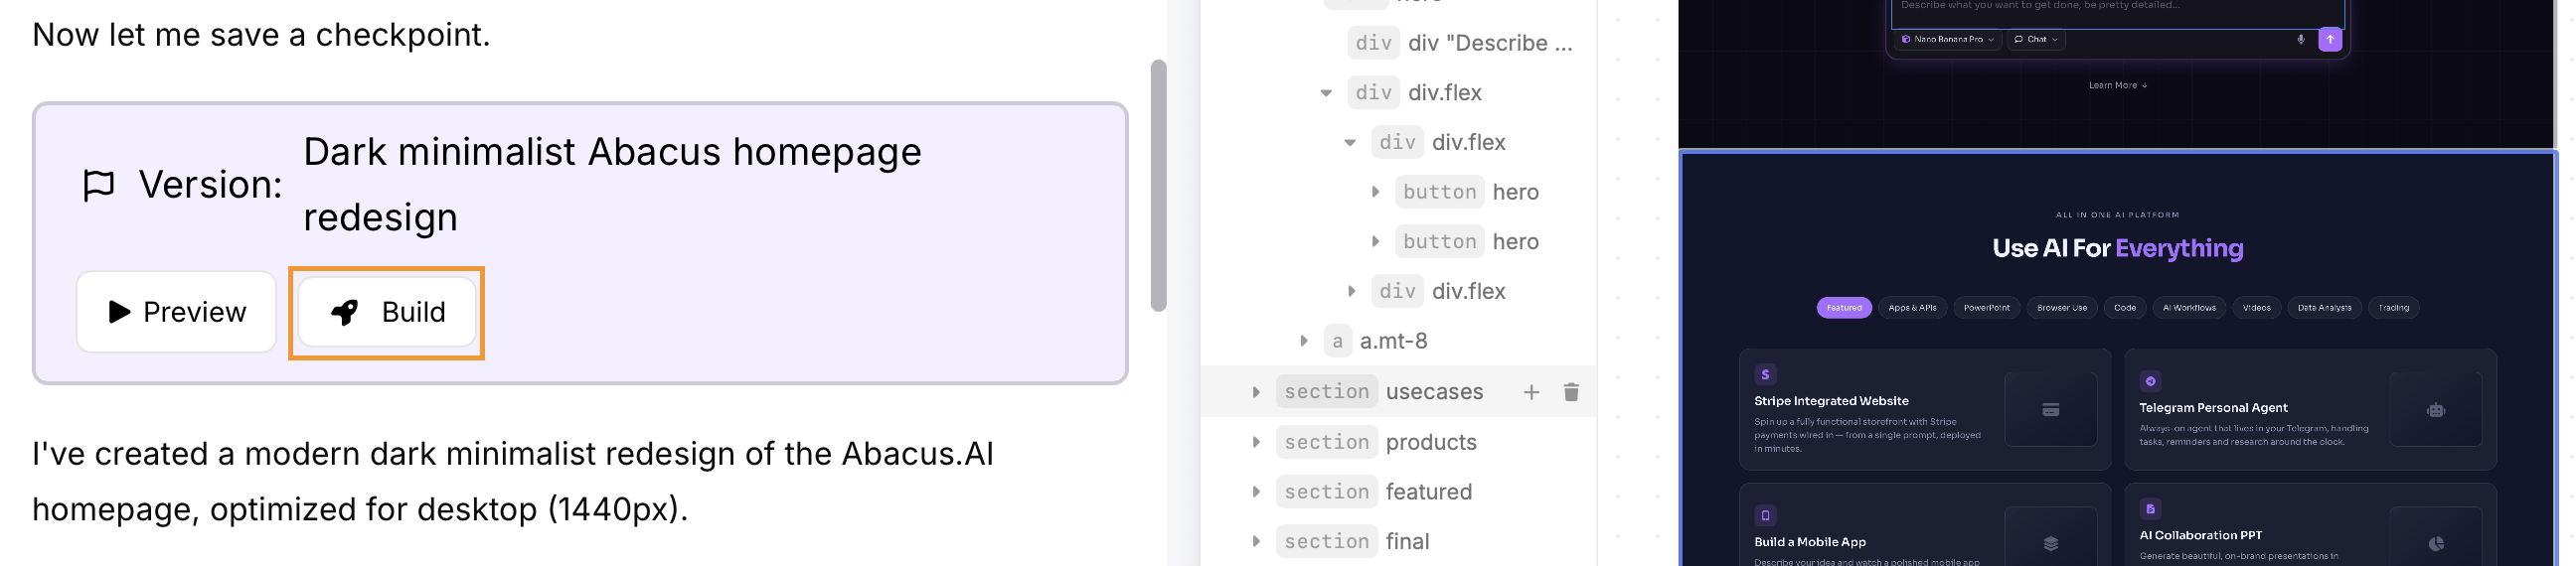
Turning Designs into Apps When you decide that your design is ready to be made into a fully functioning application this can be done using the Abacus Agent. We have added a new Build button to allow you to do this easily - it's available in the conversation whenever you have a version of your design to preview:
Abacus Apps
A new feature for Abacus Apps that adds significant benefits when building internal facing applications is the passing through of user information via headers. Apps can be designed to grab information from the headers about the specific user interacting with the application. At present this includes:
- The user email associated with their Abacus account
- Any tokens from First Party Connectors they have already authenticated
This makes it very easy to build applications integrated with common user tools without needing to embed complex authentication methods or have users re-authenticate into these applications. To work it is required that the app be deployed as either Owner Only or Private to Org.
Here is simple prompt that demonstrates how this feature can be used:
Build me an app that allows me to view all my latest activity in Slack and Gmail as well as show all of my Google Calendar events for the day.  The app should:

1. Create different sections in one dashboard page for each of these applications
2. Show me the last 10 messages in Slack and last 10 emails from Gmail
3. Show an error message for users that have not authenticated these apps already.  The message should redirect them to the connectors page in the platform.

There should be no additional SSO built into the app and users should not be asked to login. Credentials should be directly imported from their existing connectors if available.
The tokens and user email are available as part of the headers when they access the application and can be used to access data from the connectors.
Abacus CoWork
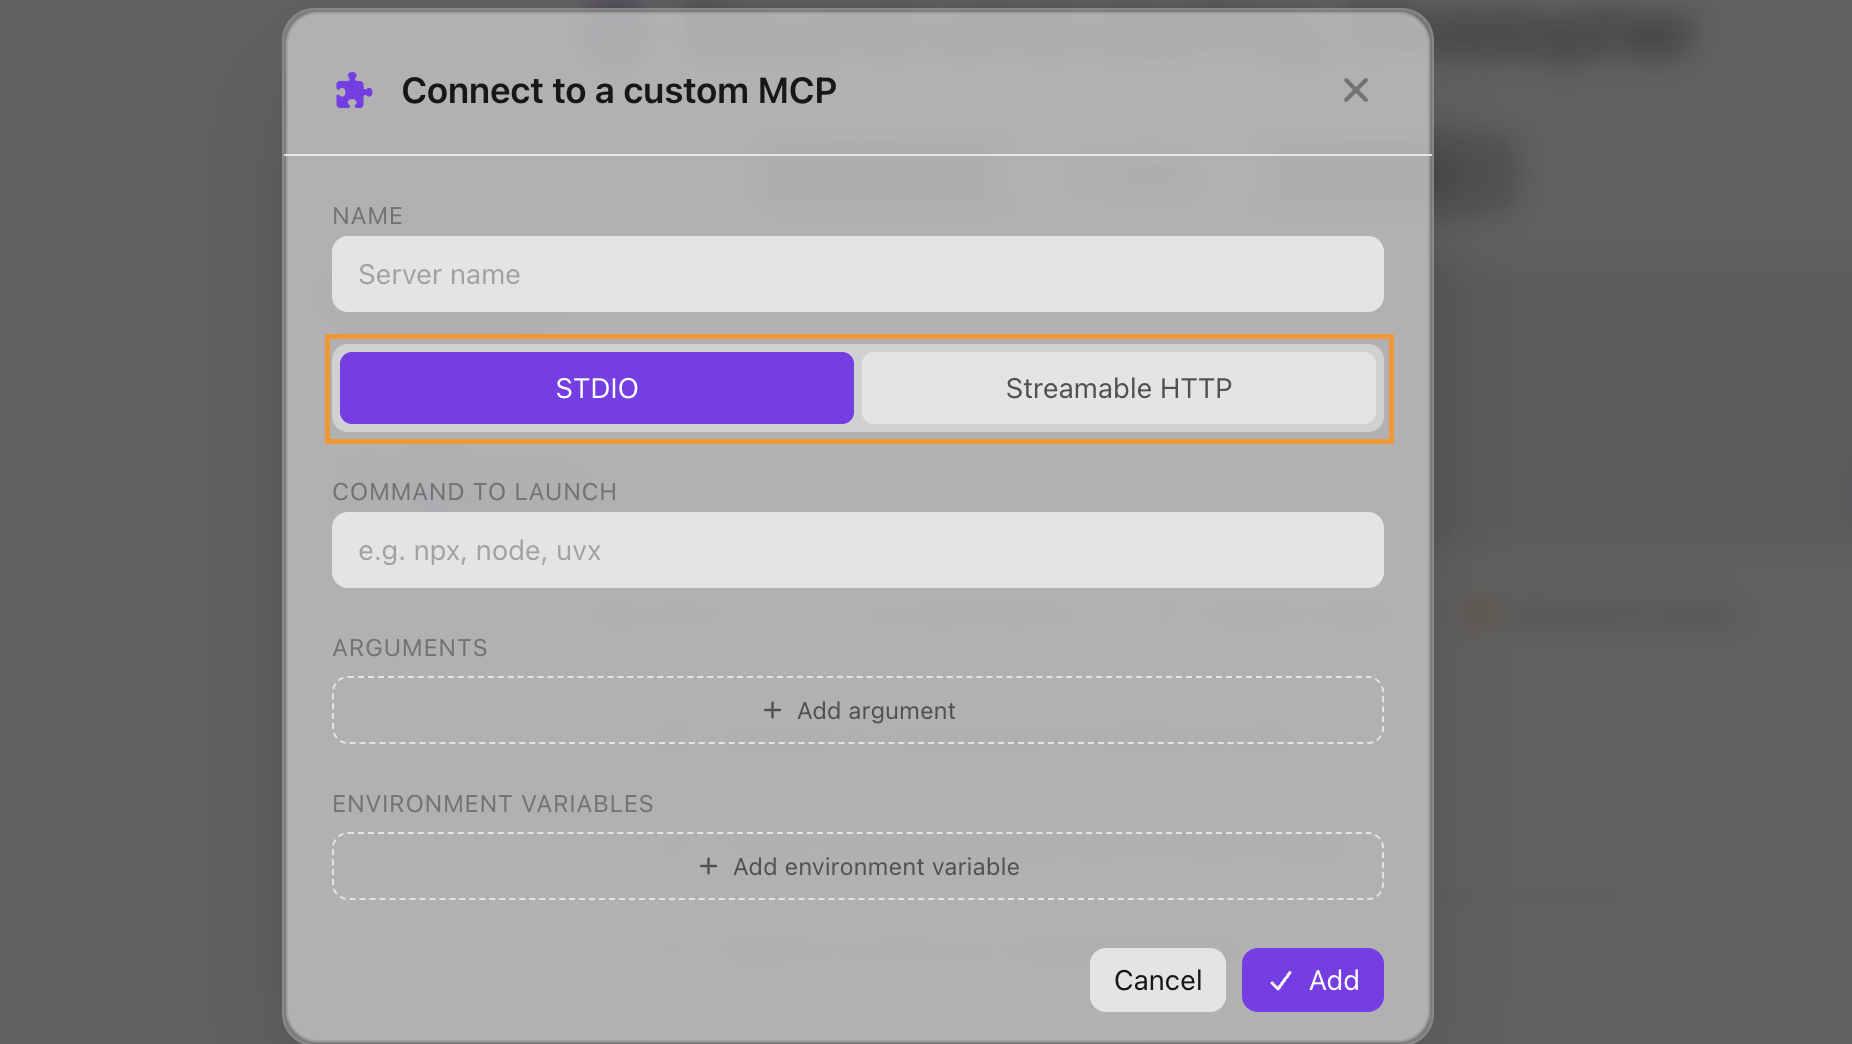
MCP Integration Abacus CoWork now supports MCP integration in both CoWork and Code modes. To configure servers use the MCP Servers option in the settings toolbar:
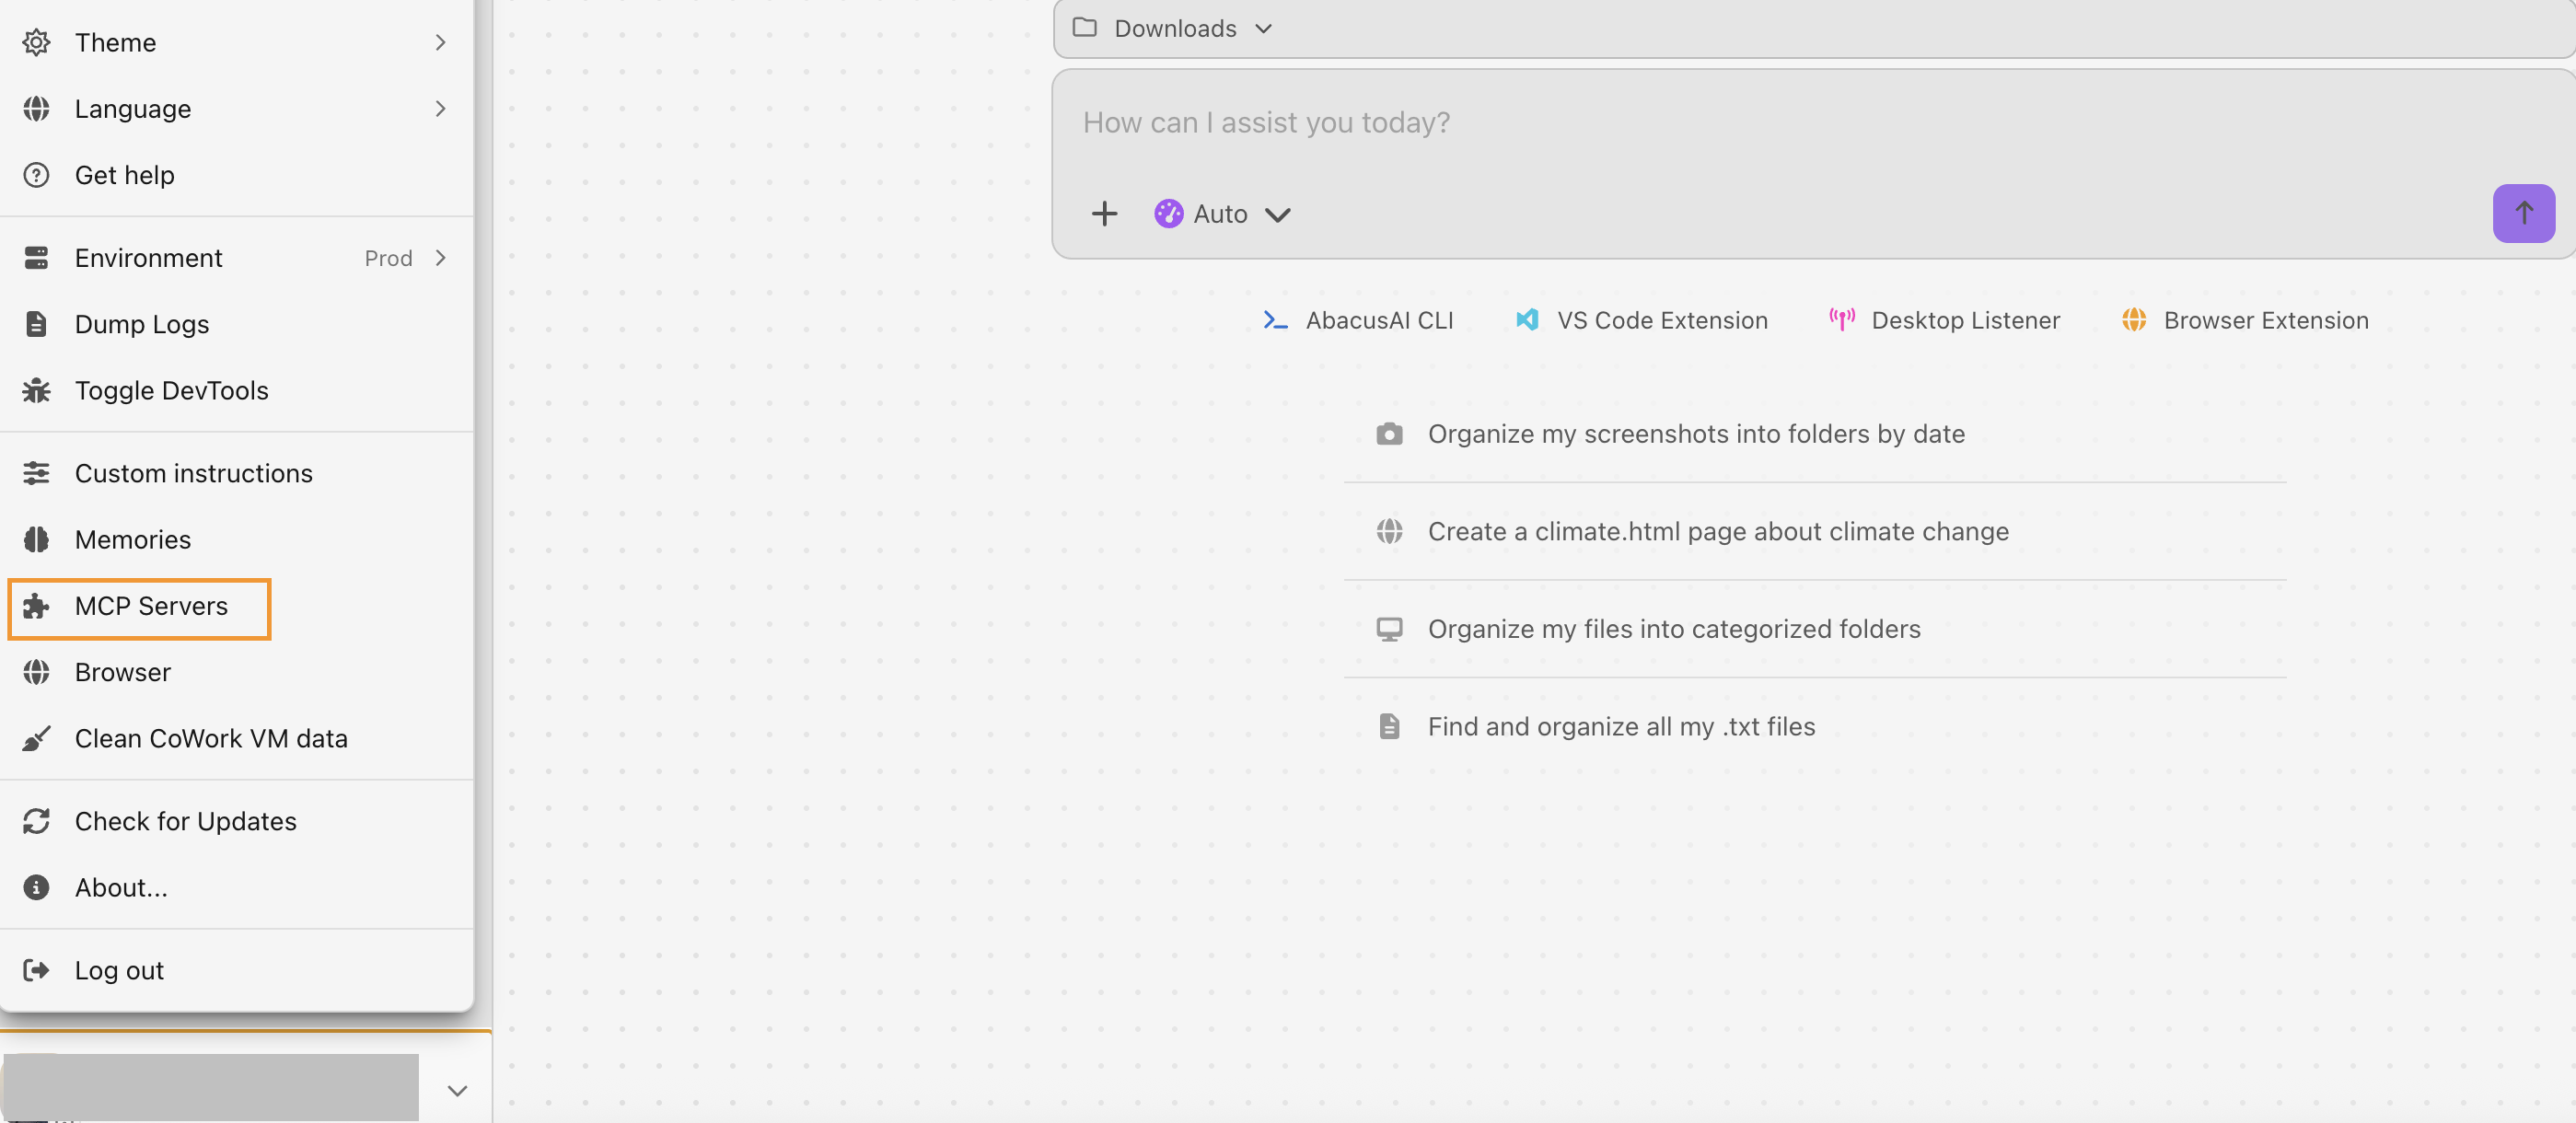
There are two options for adding MCP servers into the tool: 1. Add Server allows you to add a new MCP server configuration. This can either be STDIO for local servers or Streamable HTTP for remote servers:
2. Importing an existing server configuration file is also supported. This can be done as a manual upload or imported from Cursor, Claude Code or the Abacus CLI

For more details please refer to our MCP documentation here. Note also that Browser Use has its own settings options found in the same toolbar.
Custom Chatbots Custom chatbots that you have access to in the web application are now also available in Chat mode. To access these bots use the model dropdown menu in the prompt window:

Below the list of regular LLMs will be all the custom bots that a user has access to. A new tab for filtering to only these bots is also present:

Global Skills
Custom skills that have either been built in Abacus or imported can now be made available to the entire organization as a global skill. To make a skill global a platform admin will need to use a new option in the Super Assistant permissions page: Profile >> Permissions and Groups >> Permissions. Under the Features & Integrations tab is a new option for managing global skills:

Note that global skills will initially appear as always-enabled for every user in the organization. Each global skill increases token usage for every conversation and skill instructions may conflict with existing system prompts or other skills, potentially causing unexpected behavior.
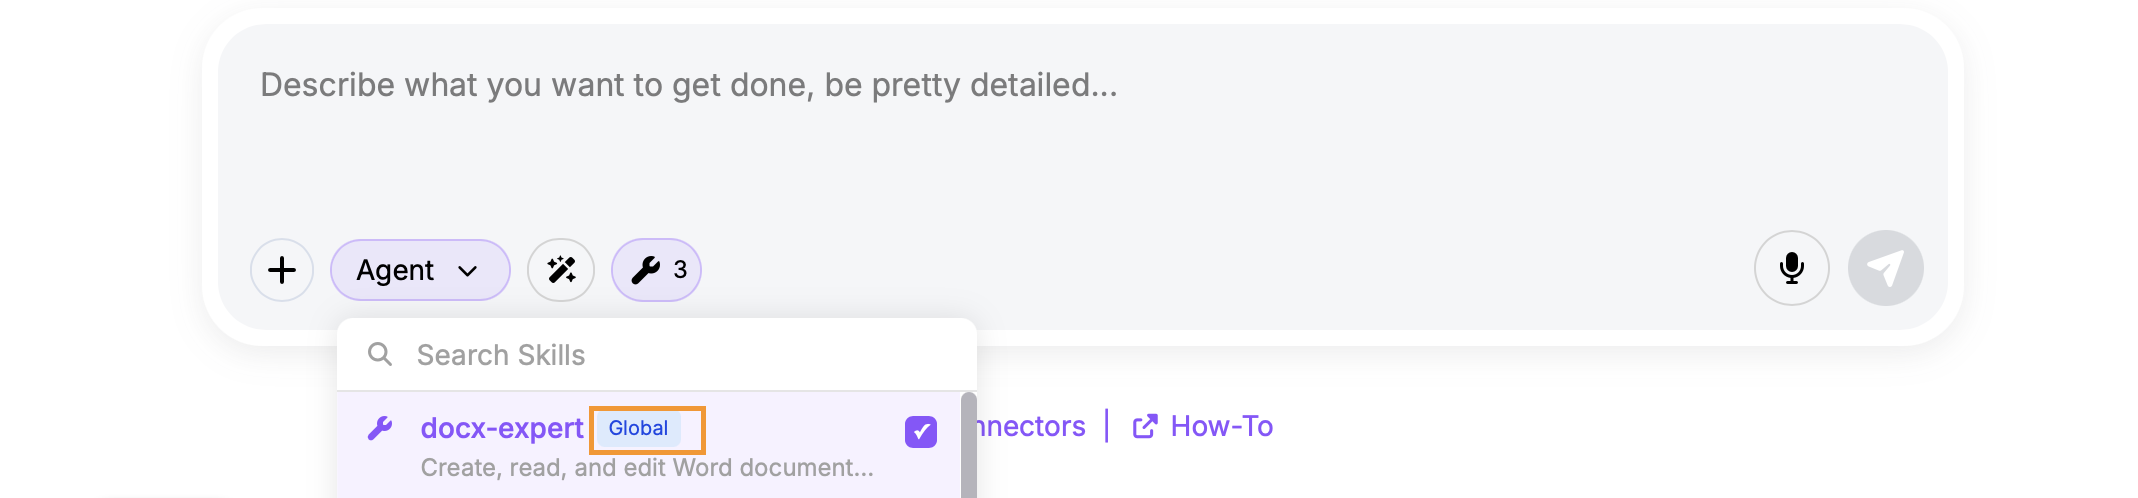
Users will be able to see global skills that have been added in the UI using the small spanner symbol in the prompt box. They can toggle the global skills on/off on a per conversation basis should they wish to.
Admin Updates
As well as the global skills several new admin controls have been added to the platform this month. All of these options can be viewed in the Permissions tab, accessed through the Profile menu >> Groups and Permissions >> Permissions:
- Manage Skill Creation allows admins to limit which users are able to build or import skills. Combined with global skills this create an effective way for the organization to manage which skills are created and available for users. This option is found under the Access & Restrictions tab

- Email Domain Restrictions gives the option to restrict which email domains the built-in Abacus mailer tool can send emails to, which provides a more secure environment for task execution. This option is found under the Access & Restrictions tab

Note that this domain restriction only applies to the Abacus mailer tool and does not apply to any first party connector tools like Gmail or Outlook.
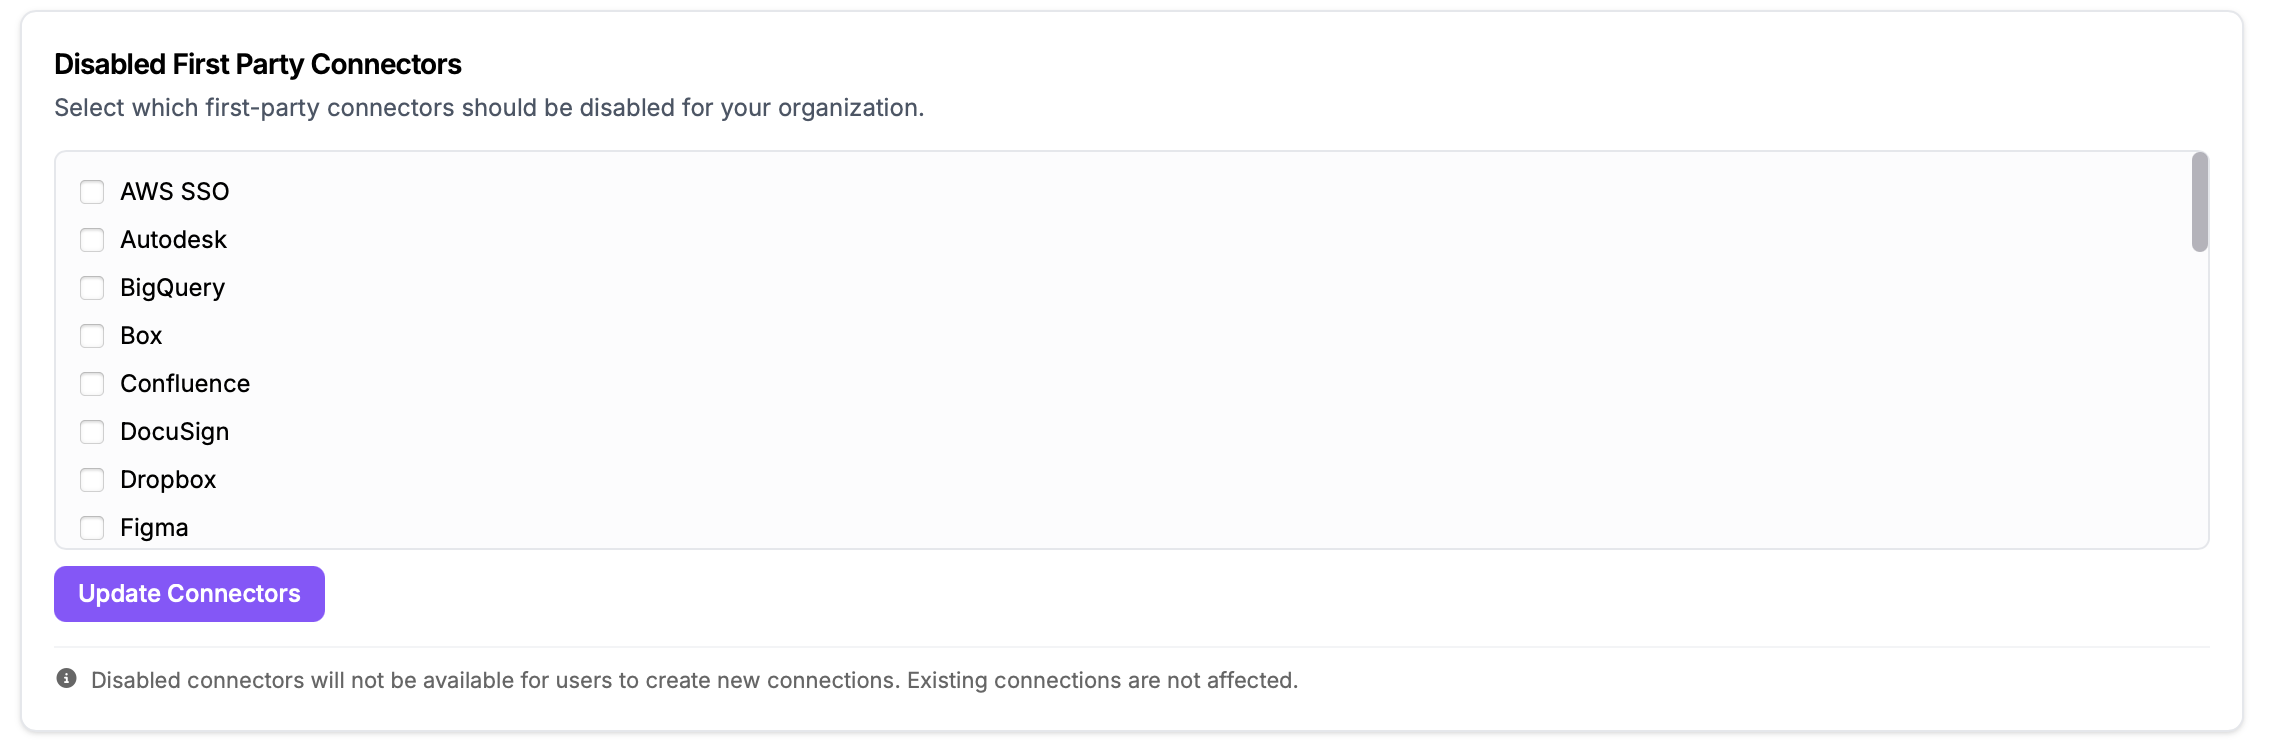
- Manage First Party Connectors is a simple interface to manage which first party connector tools are available for the business to authenticate. It is found under the Access & Restrictions tab:
- Global Project Sharing provides additional capabilities for managing how projects created by users can be shared. When turned on this option limits users from sharing projects globally, i.e. with the entire organization - they will only be able to share projects with specific groups or individuals. The settings are found under the Sharing & Privacy tab

User Spend Limit Monitoring
Users can now monitor their use against any daily limits that have been put in place. Users can click on their profile picture and then under the Profile menu will be able to see theor current daily spend:
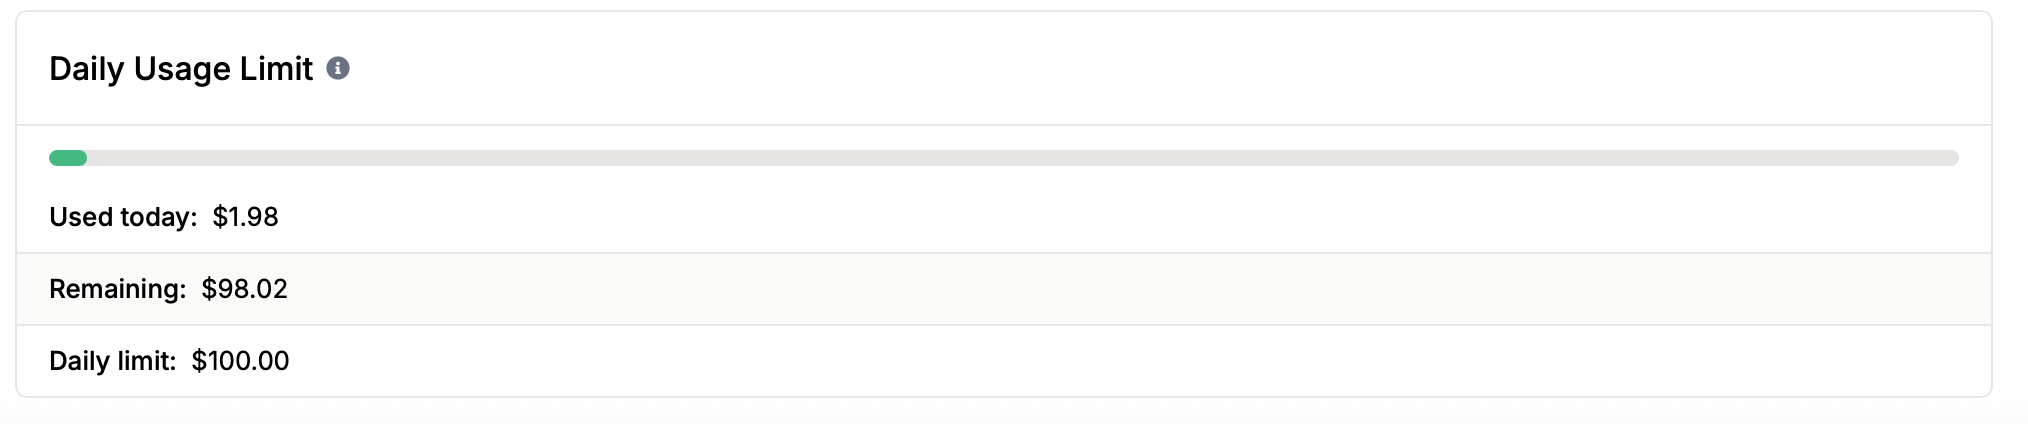
Note that this will only be visible if user limits have been put in place via the Rate Limts setting under Permissions