Slack Connector Documentation
Follow the steps below to integrate your chatLLM deployments with Slack and use Abacus.AI within your Slack workspace.
- Setup Instructions
- Configuration
- How to Use the Slack Integration
- Registration
- Important Information
- Troubleshooting and FAQ
Initial Connector Setup
Step 1: Add Connector
-
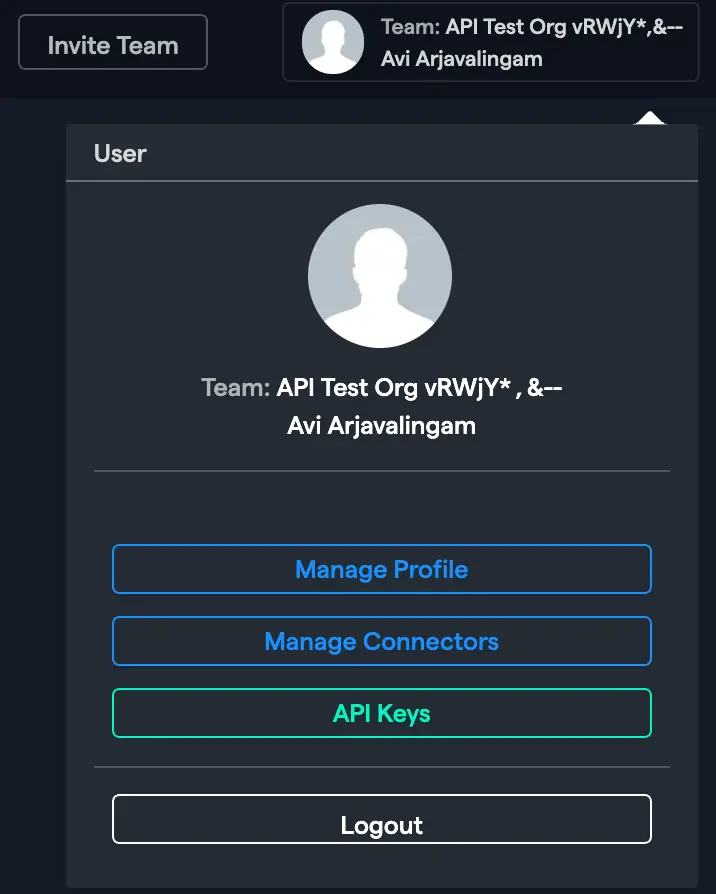
In the Abacus.AI UI, select your profile in the top right corner and choose "Manage Connectors".

-
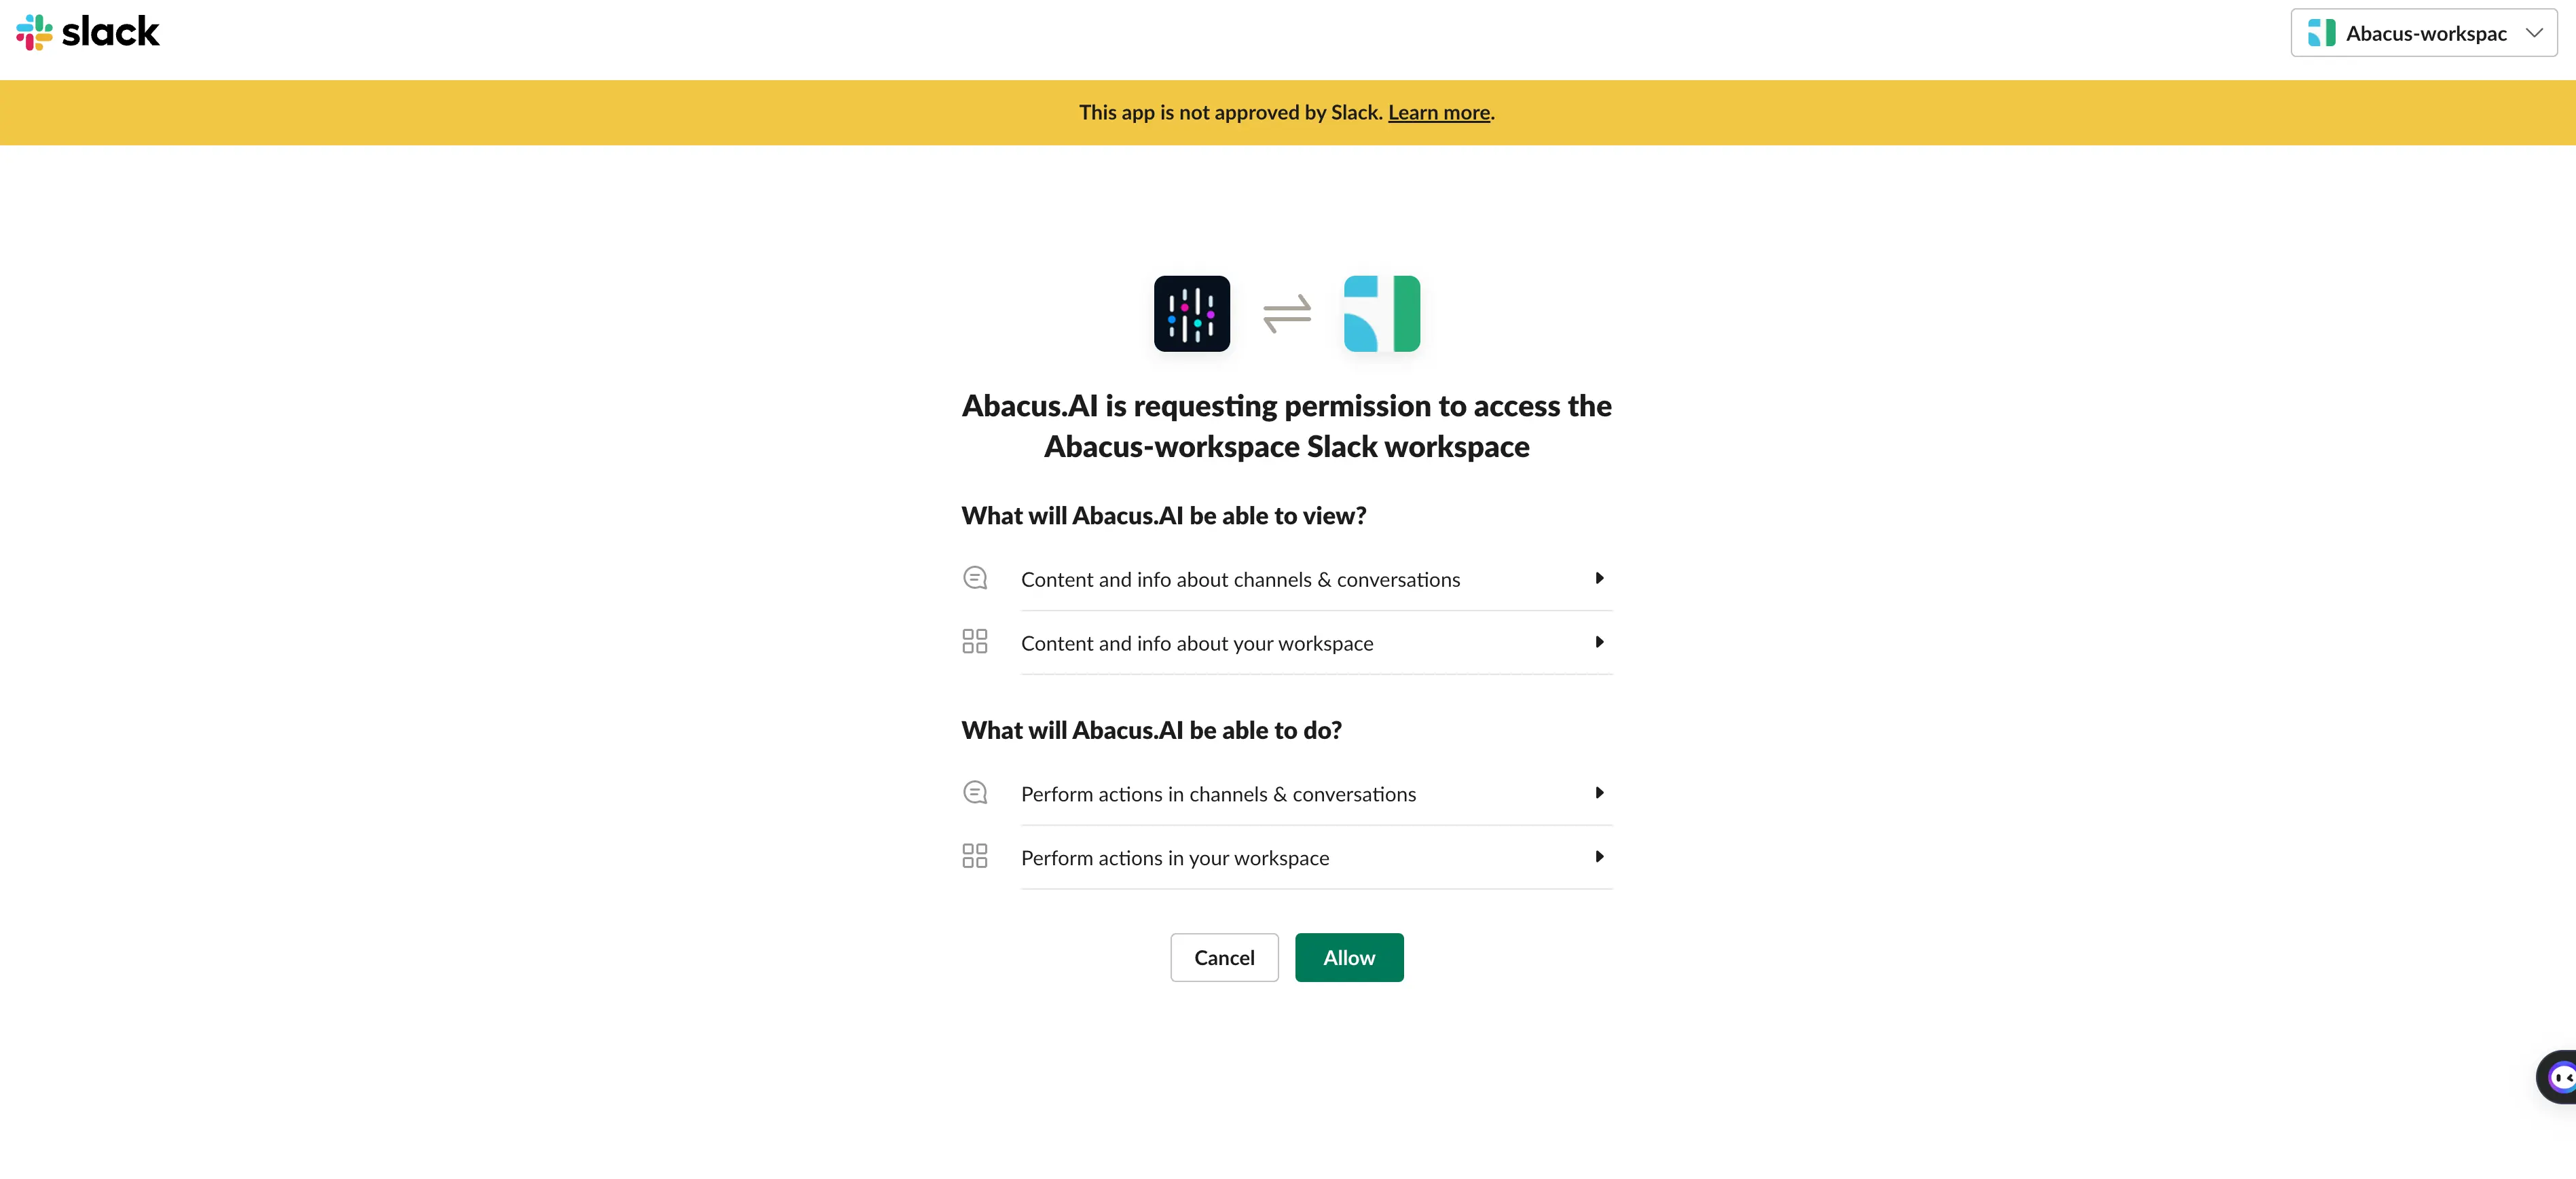
Select "Add New Connector", choose Slack, and authenticate with your Slack workspace.
-
Authenticate with Slack and verify the connector in the Abacus.AI platform.

Step 2: Create New Deployment
-
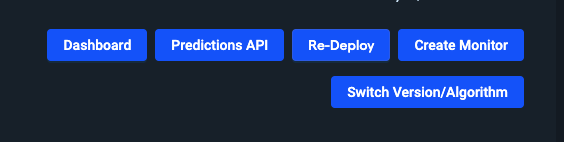
After you have finished your first ChatLLM or AI Workflow model, create a real-time deployment and open the Prediciton Dashboard for the active deployment.
-
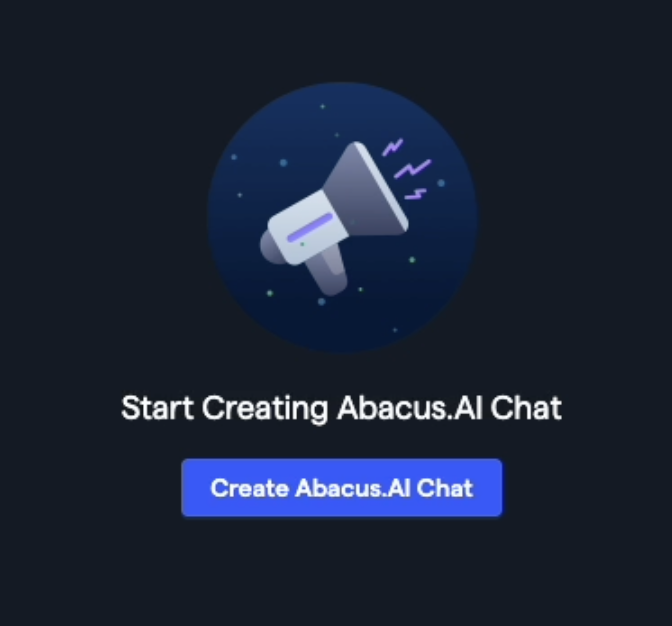
Click on "Create Abacus.AI Chat". This will trigger the creation of an external webpage that allows you to share the chatbot or AI Workflow with external users who may not need to have platform access.
Step 3: Configure User Permissions
-
Navigate to the "Bots" page in the chatLLM admin console.
-
Toggle on "All registered users" to allow all users to access the bot.
-
Set the default bot to the DataLLM bot or any other bot as required.
-
Ensure that the appropriate group permissions are set for bot access.
For more detailed instructions on managing team permissions and controlling access to specific bots, refer to the Abacus.AI Messaging Connectors Documentation.
You can now start using the Abacus.AI app within your Slack workspace.
Step 4: Set Up Links to Relevant Sources
To expose relevant links in the responses via the Slack connector, follow these steps:
- Create a document retriever on a feature group that has a column marked with the
DOCUMENT_SOURCEfeature mapping. This column will be used to display relevant sources in the Slack connector. - Train and deploy a model with that document retriever.
How to Use the Slack Integration
Utility Commands
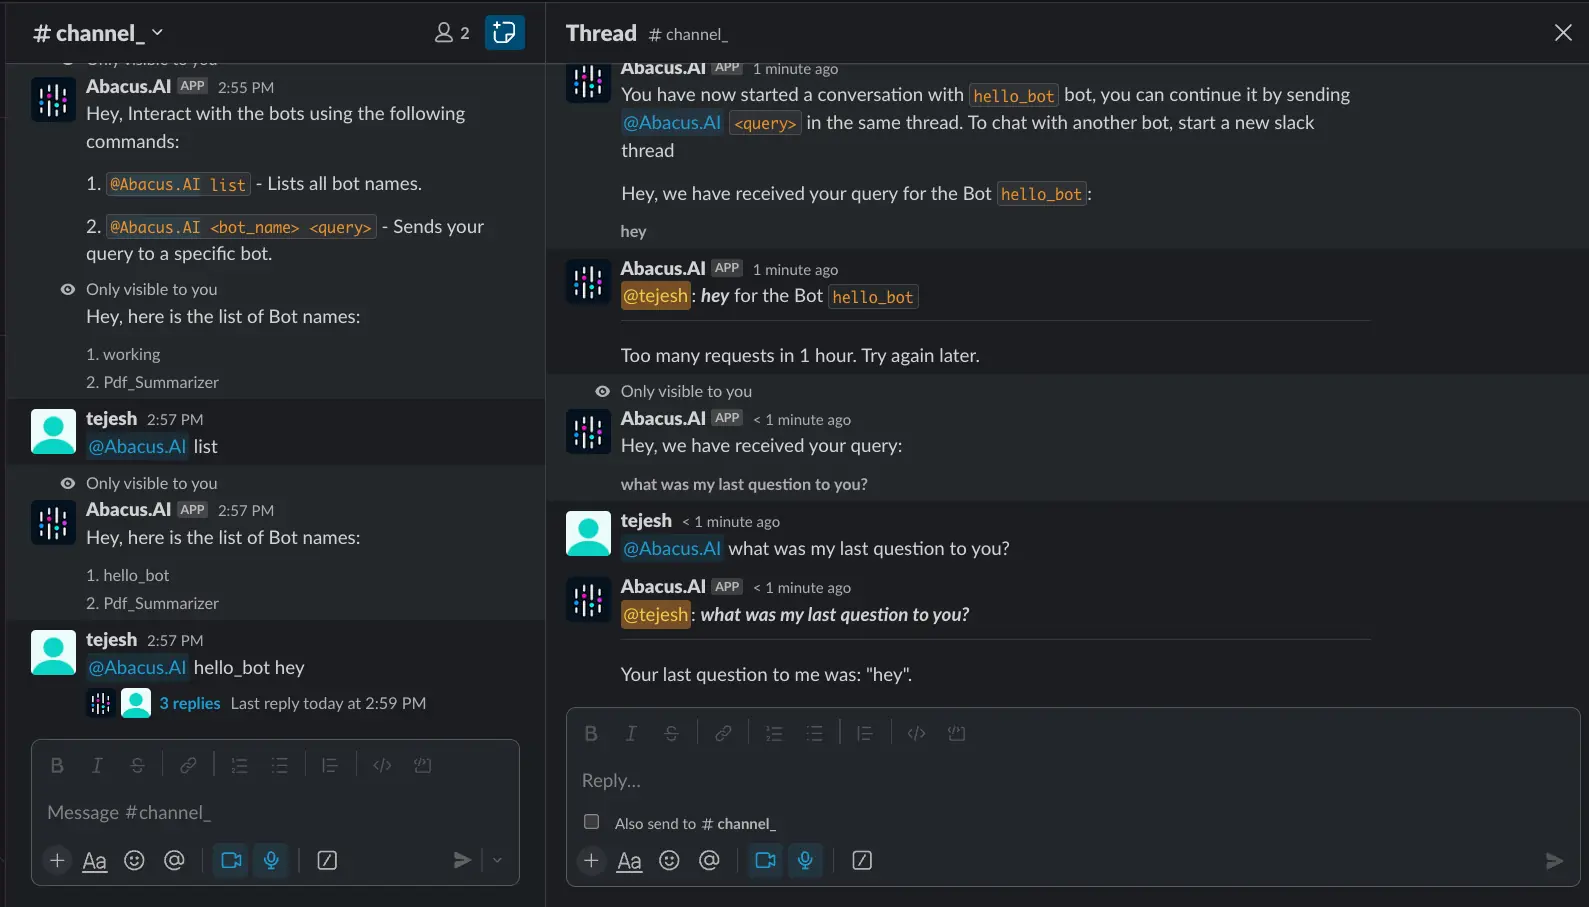
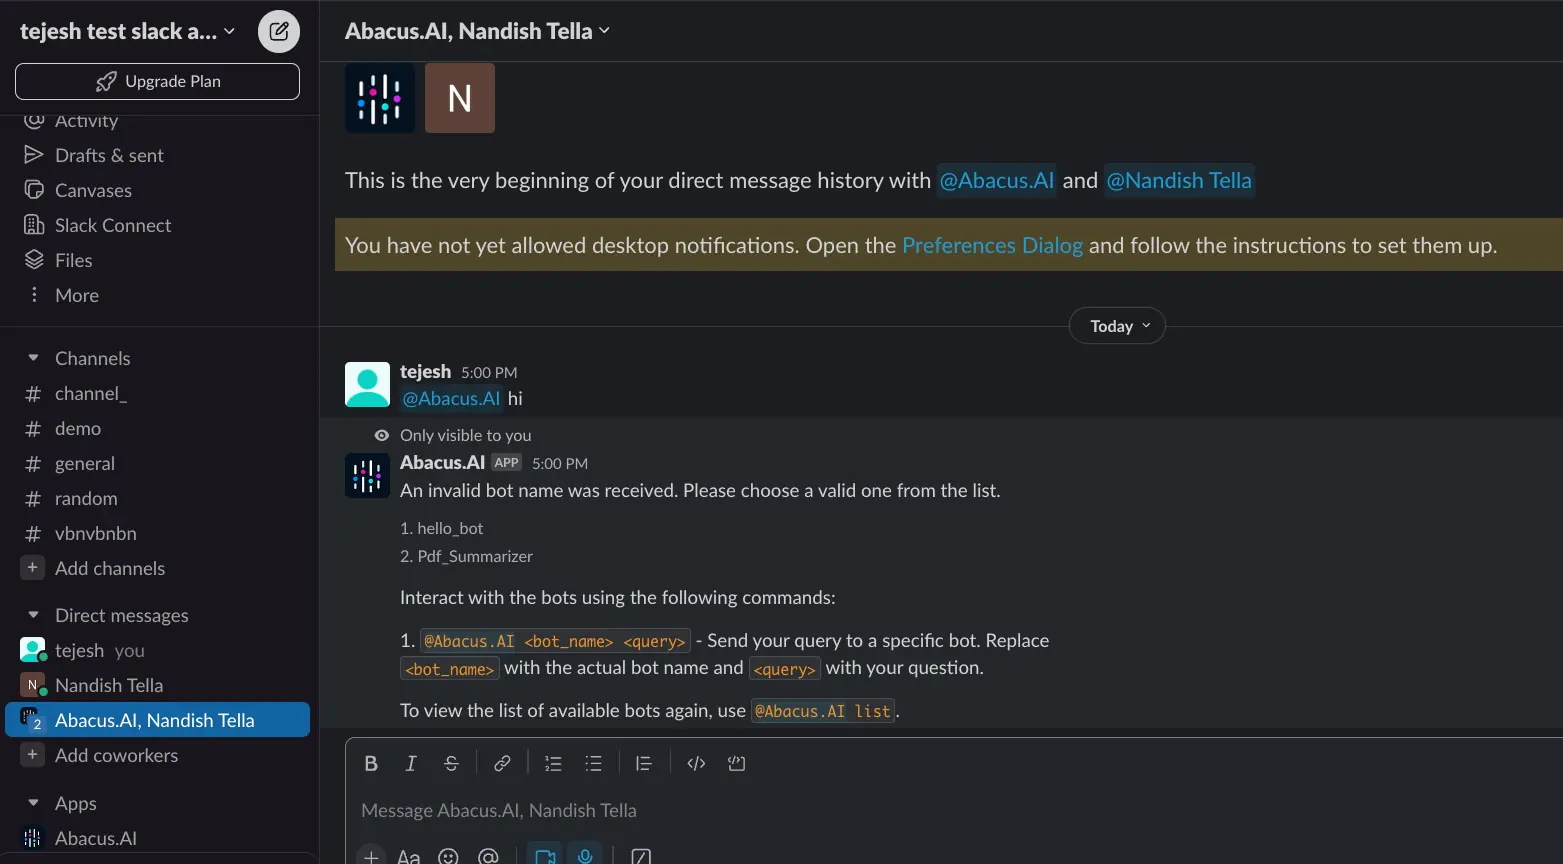
@Abacus.AI list— Lists all available chatbot names.@Abacus.AI help— Provides assistance in using the bot.

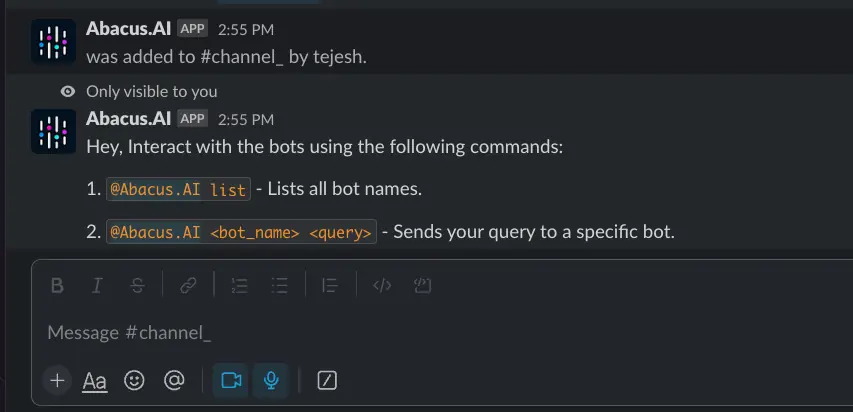
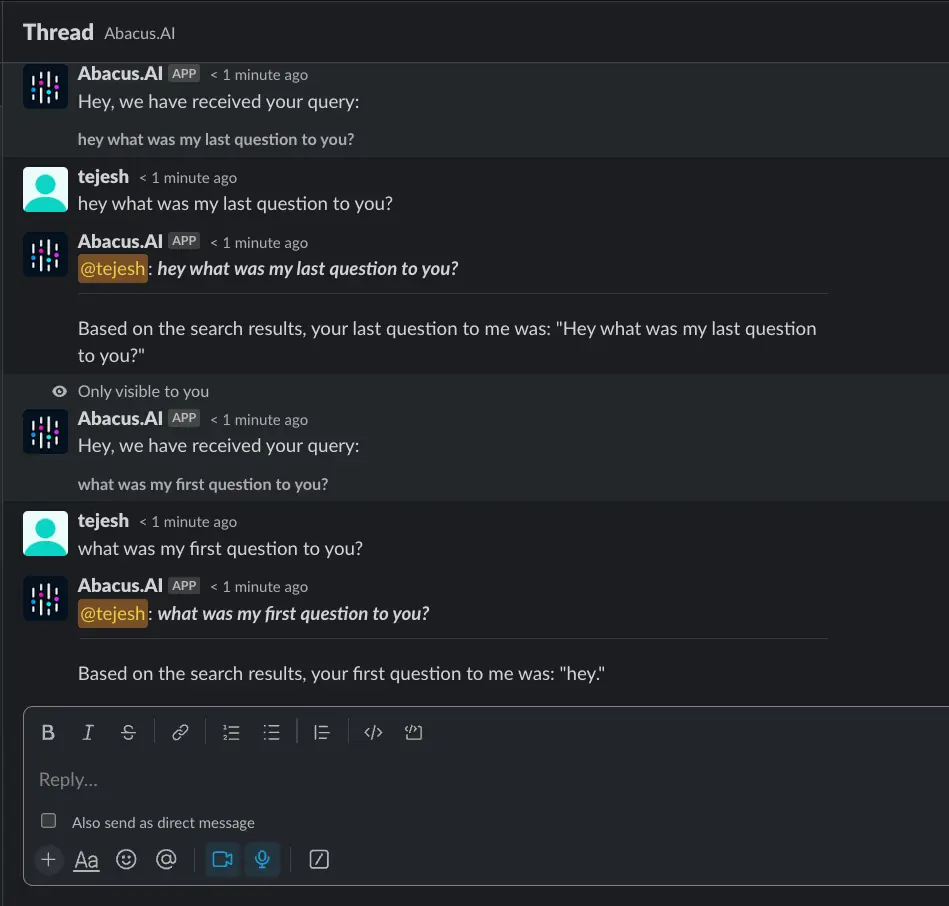
Interacting with Bots in Channels
In any Slack channel where the Abacus.AI app has been added, you must mention the bot to invoke it:
- Invoke a specific bot:
@Abacus.AI <bot_name> <query> - Use the default bot:
@Abacus.AI <query>(routes to your configured default bot) - Continue the conversation by replying in the thread created by the bot — no need to mention
@Abacus.AIagain within the same thread. - To switch bots, start a new message with
@Abacus.AI <different_bot_name> <query>.
Examples (Channel):
| What you type | What happens |
|---|---|
@Abacus.AI sales_bot What were Q4 results? | Sends the query to the sales_bot |
@Abacus.AI What were Q4 results? | Sends the query to your default bot |

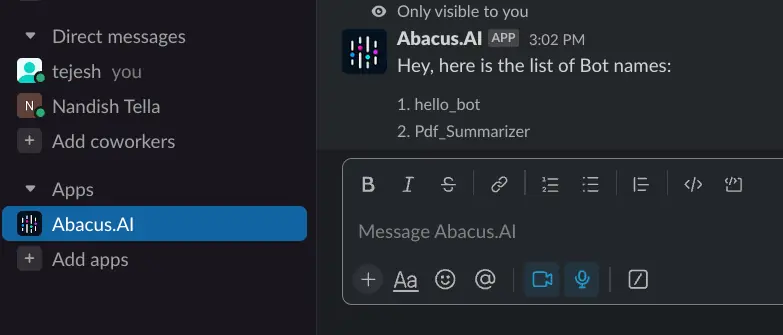
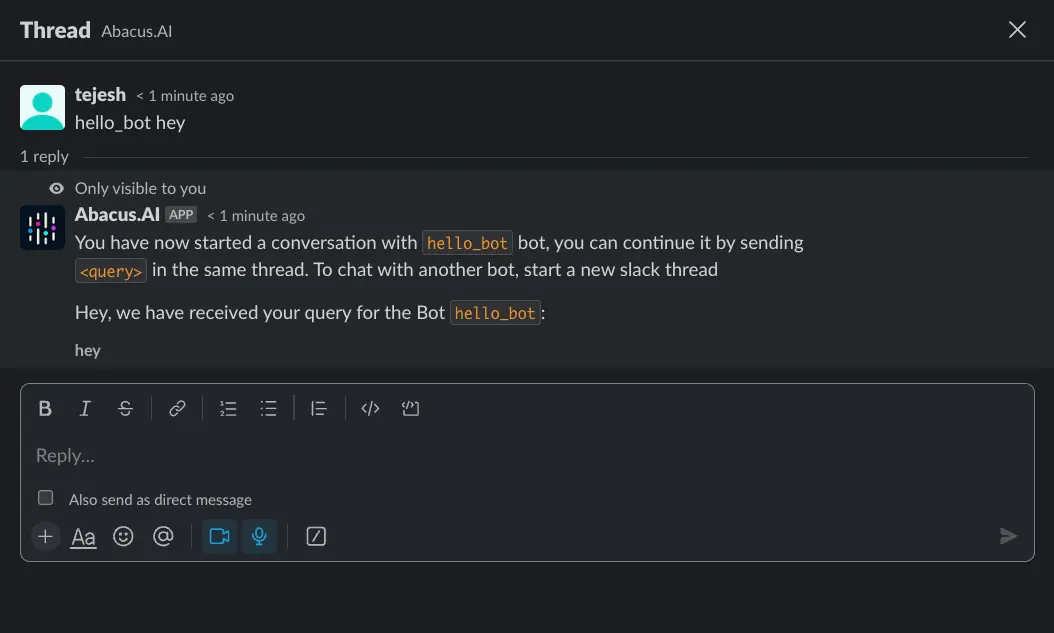
Interacting with Bots in Direct Messages (DMs)
In a direct message (DM) conversation with the Abacus.AI app, you do not need to use the @Abacus.AI mention — every message you send is automatically seen by the bot. You can still include the mention if you prefer; both styles work.
- Invoke a specific bot:
<bot_name> <query>or@Abacus.AI <bot_name> <query> - Use the default bot:
<query>or@Abacus.AI <query>(routes to your configured default bot) - Use
listor@Abacus.AI listto see available bot names. - Continue the conversation in the thread — subsequent messages will use the same bot without needing to specify the bot name again.
Examples (DM):
| What you type | What happens |
|---|---|
sales_bot What were Q4 results? | Sends the query to the sales_bot |
@Abacus.AI sales_bot What were Q4 results? | Same — sends the query to the sales_bot |
What were Q4 results? | Sends the query to your default bot |
@Abacus.AI What were Q4 results? | Same — sends the query to your default bot |
list | Lists all available bot names |
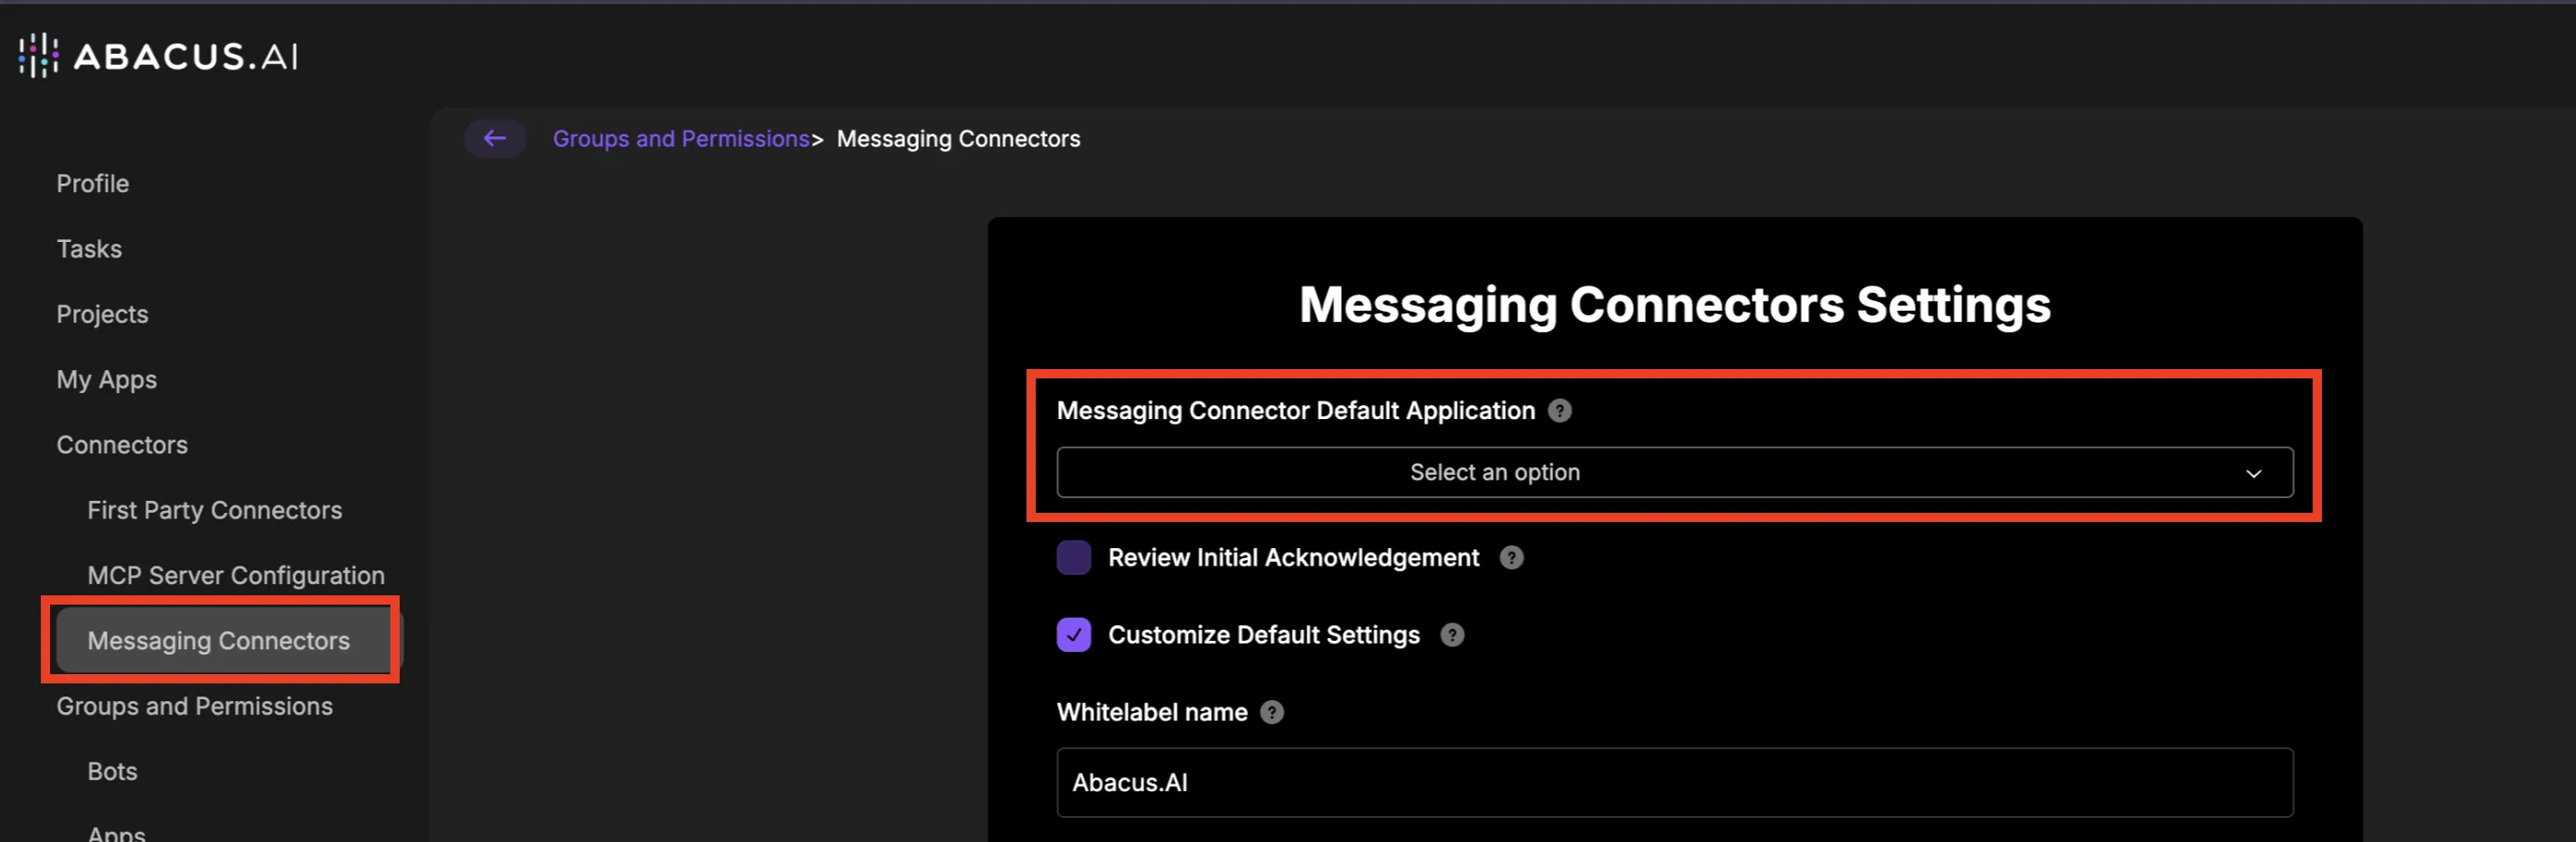
Setting a Default Bot
If you have a default bot configured, you can skip specifying the bot name entirely. Any message without a bot name will automatically be routed to the default bot.
To configure the default bot:
- In the Abacus.AI platform, navigate to Groups and Permissions > Messaging Connectors.
- Under Messaging Connector Default Application, select the bot you want to use as the default from the dropdown.
- Optionally, toggle Review Initial Acknowledgement to customize the acknowledgement message sent when a conversation starts.
- Optionally, check Customize Default Settings to configure additional options such as the Whitelabel name displayed to users.
Instructions for Registering with the Slack App
- Initiate registration by using the command
@Abacus.Ai registerto receive a registration link. This link connects your existing Abacus user account with your Slack account and grants access to private bots available to you. - After clicking the link, you will be directed to the login page. Before logging in, ensure that you have accepted the invitation received via email or signed up on the Abacus.AI platform beforehand.
- Once logged in, you will be redirected to Slack, where you'll be prompted to authorize the app. Click on
Allowto grant the necessary permissions. - Following authorization, a confirmation message will appear to indicate that your account is now successfully linked.
Notes on the Registration Process:
- You may need to disable pop-up blockers to complete the registration on the Abacus.AI platform.
- To disable pop-up blockers, click on the icon located at the top right corner of your browser and select
Always allow pop-ups and redirects from Abacus.AI. Then, clickDoneto apply the changes. - If using a different browser, you'll be notified to allow pop-ups if they are currently blocked.
Important Information:
- How we handle your data: Abacus.AI privacy policy
- Bot responses are generated and may produce inaccurate information.
- You may be prompted to add the bot to the channel the first time you use it.
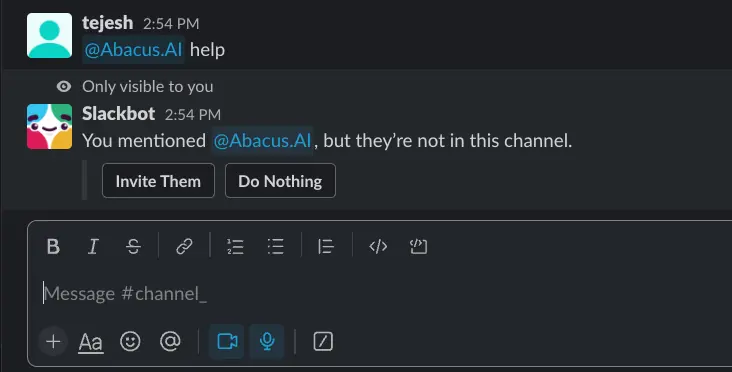
The bot can be used in public, private, direct messaging as long as the bot has been added there. Also, you can use the bot in the app's message tab.
To use the bot in direct messaging, you will need to add the bot to your direct messaging channel.
Troubleshooting and FAQ for the Slack Connector
How can I rename the Abacus.AI bot in Slack?
To rename the Abacus.AI bot in your Slack workspace, follow these steps:
- Open the Abacus.AI App in Slack:
- Navigate to your Slack workspace and open the Abacus.AI app.
- Access the Manage Apps Page:
- Go to the "Manage Apps" page within Slack.
- Edit the Bot User Name:
- Click on the "Abacus.AI" app.
- Select the "Edit" button next to the bot user name "Abacus.AI".
- Rename the Bot:
- Change the bot's name to your desired name, for example, "company_ai_bot".
- Click "Save Changes" to apply the new name.
- Verify the Changes:
- Navigate back to the Abacus.AI app page.
- Click "Open in Slack" to reopen the Slack window.
- Confirm that the bot now appears with the new name "company_ai_bot".
- Interact with the Renamed Bot:
- The bot will respond with a message, such as "Here is the list of Chatbot names: 1. onboarding_documentation_deployment".
These steps will help you customize the bot's name to better fit your workspace's needs.
For a visual guide, you can watch the embedded video below:
Help
For any support or queries, you may reach out to us at Abacus.AI help.