Setting up Okta for Single Sign-On
This document outlines the setup process for integrating Okta with Abacus.AI for Single Sign-On (SSO). It includes OAuth-based integration, along with best practices, security requirements, and answers to commonly asked enterprise questions.
Overview
Okta can be used to integrate with Abacus.AI for Single Sign-On (SSO) using either OAuth or SAML. This document provides step-by-step instructions for OAuth, along with details on security requirements and troubleshooting. If you would like to set up Okta SAML SSO, please see the instructions here.
Using OAuth
Step 1: Navigate to Okta Admin Dashboard
- Log in to your Okta Admin Console.
- Go to
<your-okta-admin-subdomain>.okta.com/admin/apps/add-app.
Example:abacusai-admin.okta.com/admin/apps/add-app.
Step 2: Browse App Integration Catalog
-
Browse the App Integration Catalog and click the Create New App button.

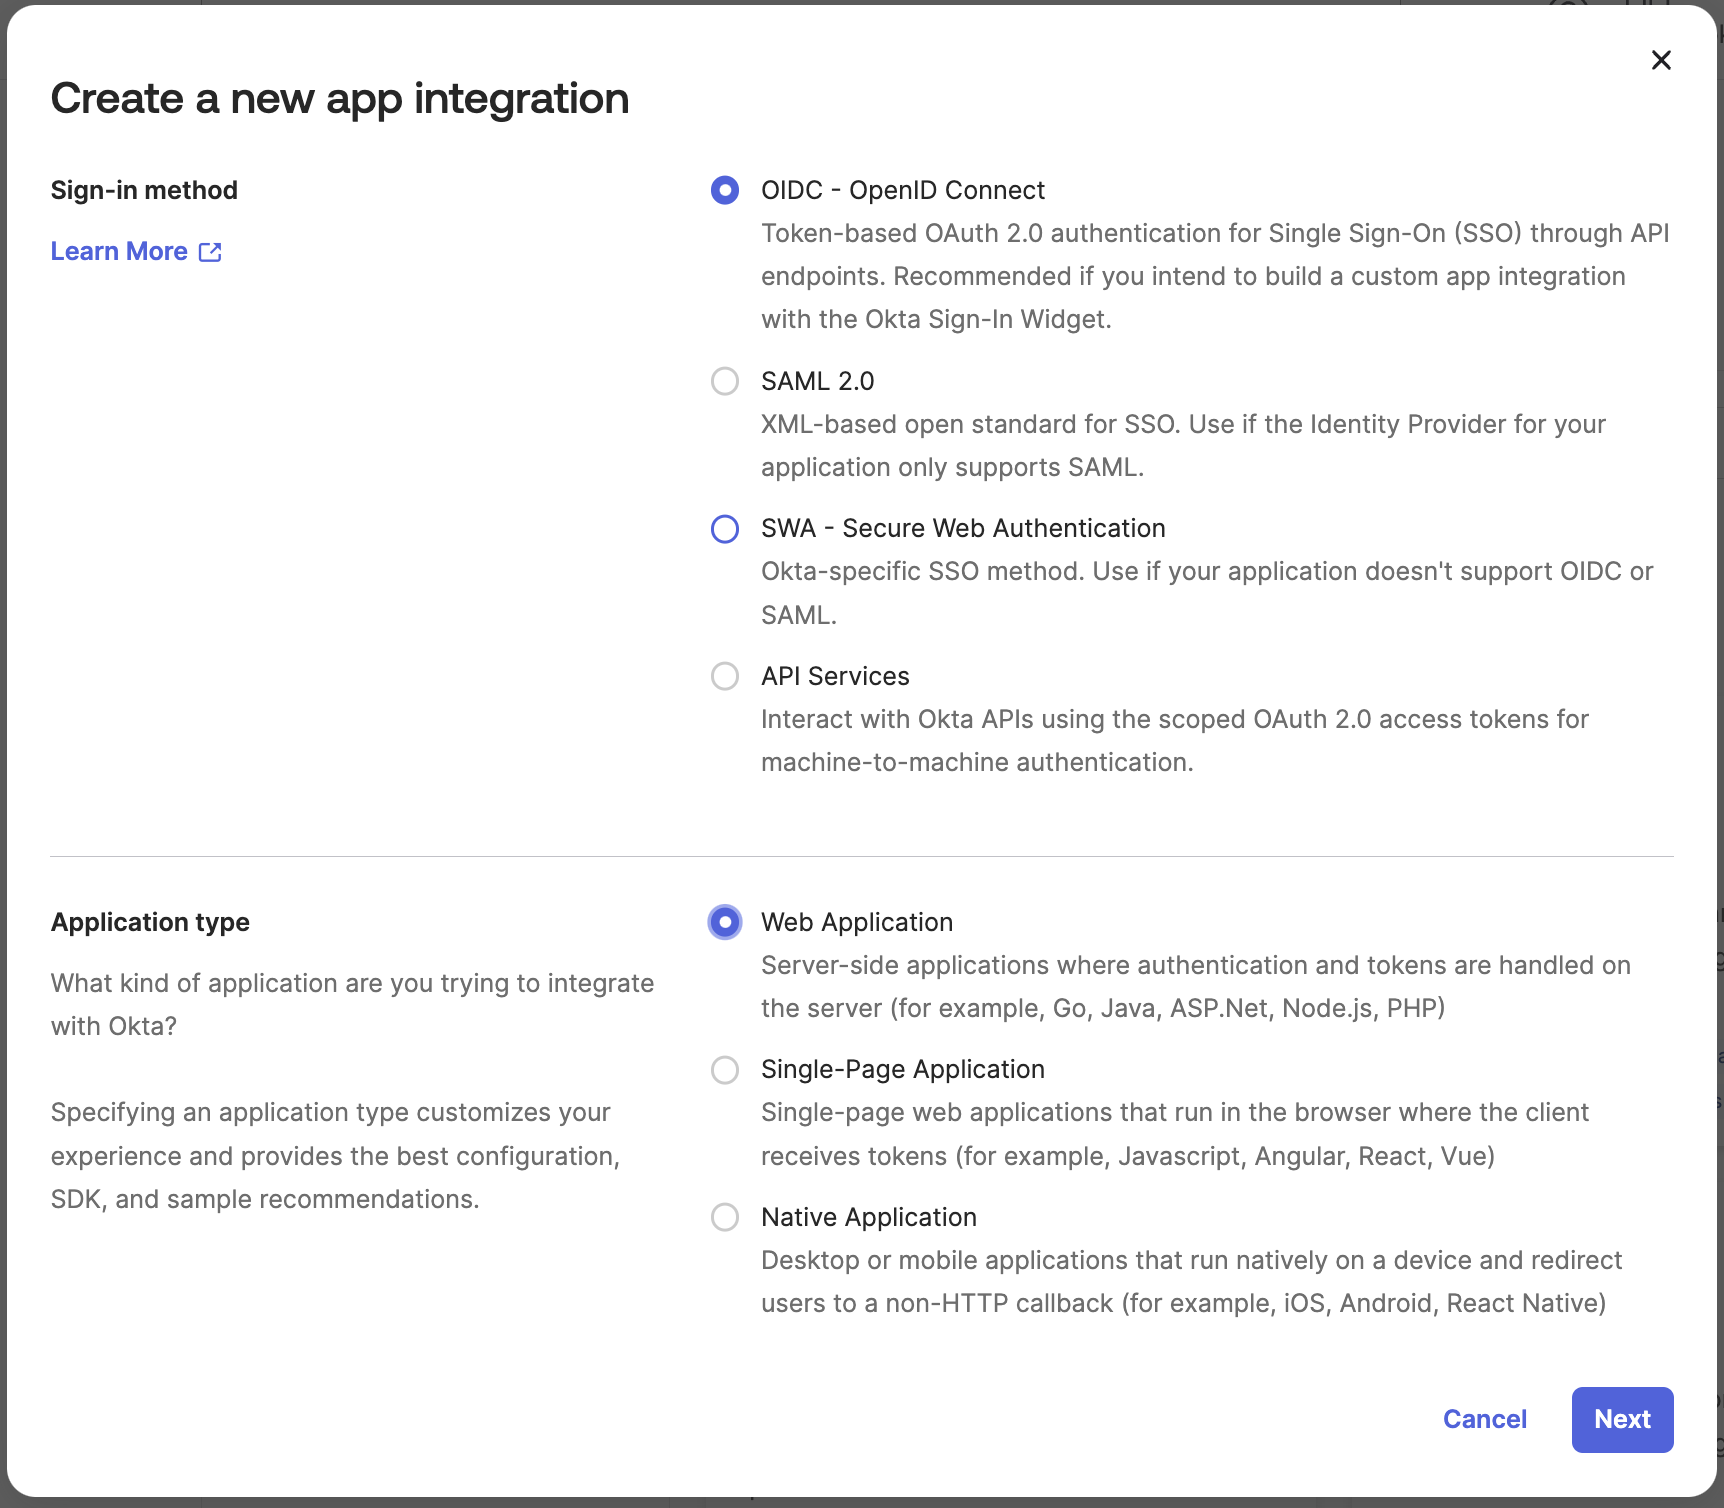
Step 3: Create a New App Integration
-
Select the following settings:
- Sign-in method:
OIDC - OpenID Connect - Application type:
Web Application
- Sign-in method:
-
Click Next.
Step 4: Configure Redirect URL and Sign-Out Redirect URIs
- App integration name: Enter a name for your app integration.
- Sign-in redirect URIs: Set the Redirect URL to:
https://dev-kkhyscwx.us.auth0.com/login/callback.
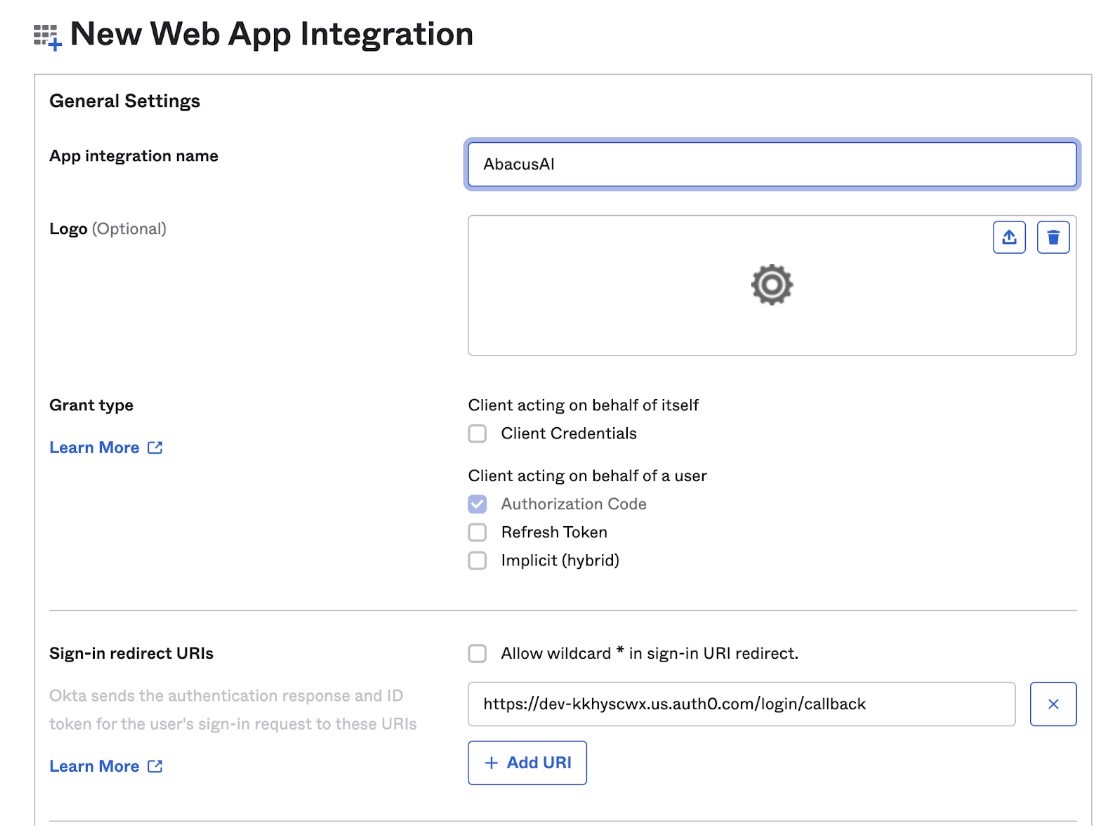
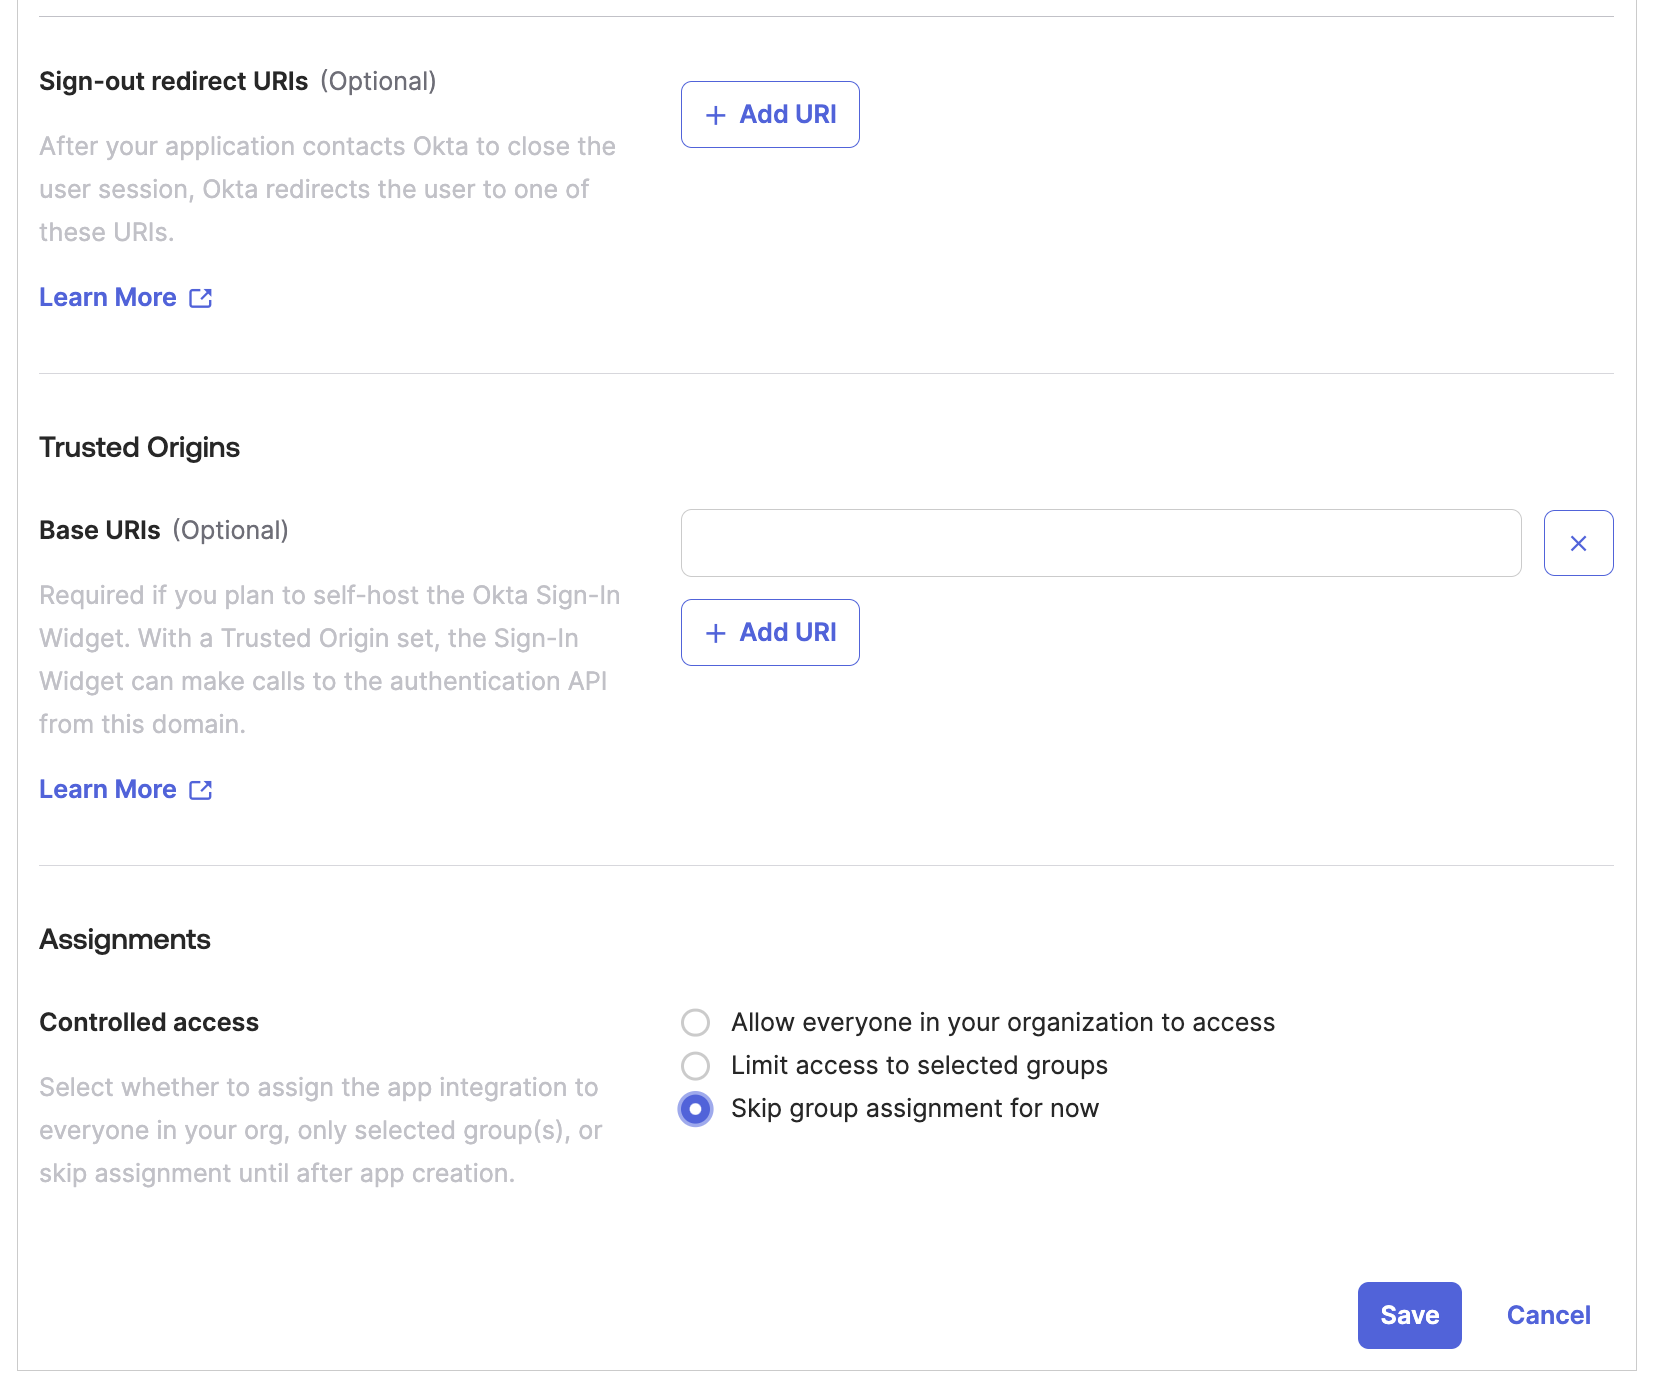
- Sign-out redirect URIs: Leave the sign-out redirect URIs blank.
- You may set the assignments now or skip this step.
- Click
Save.
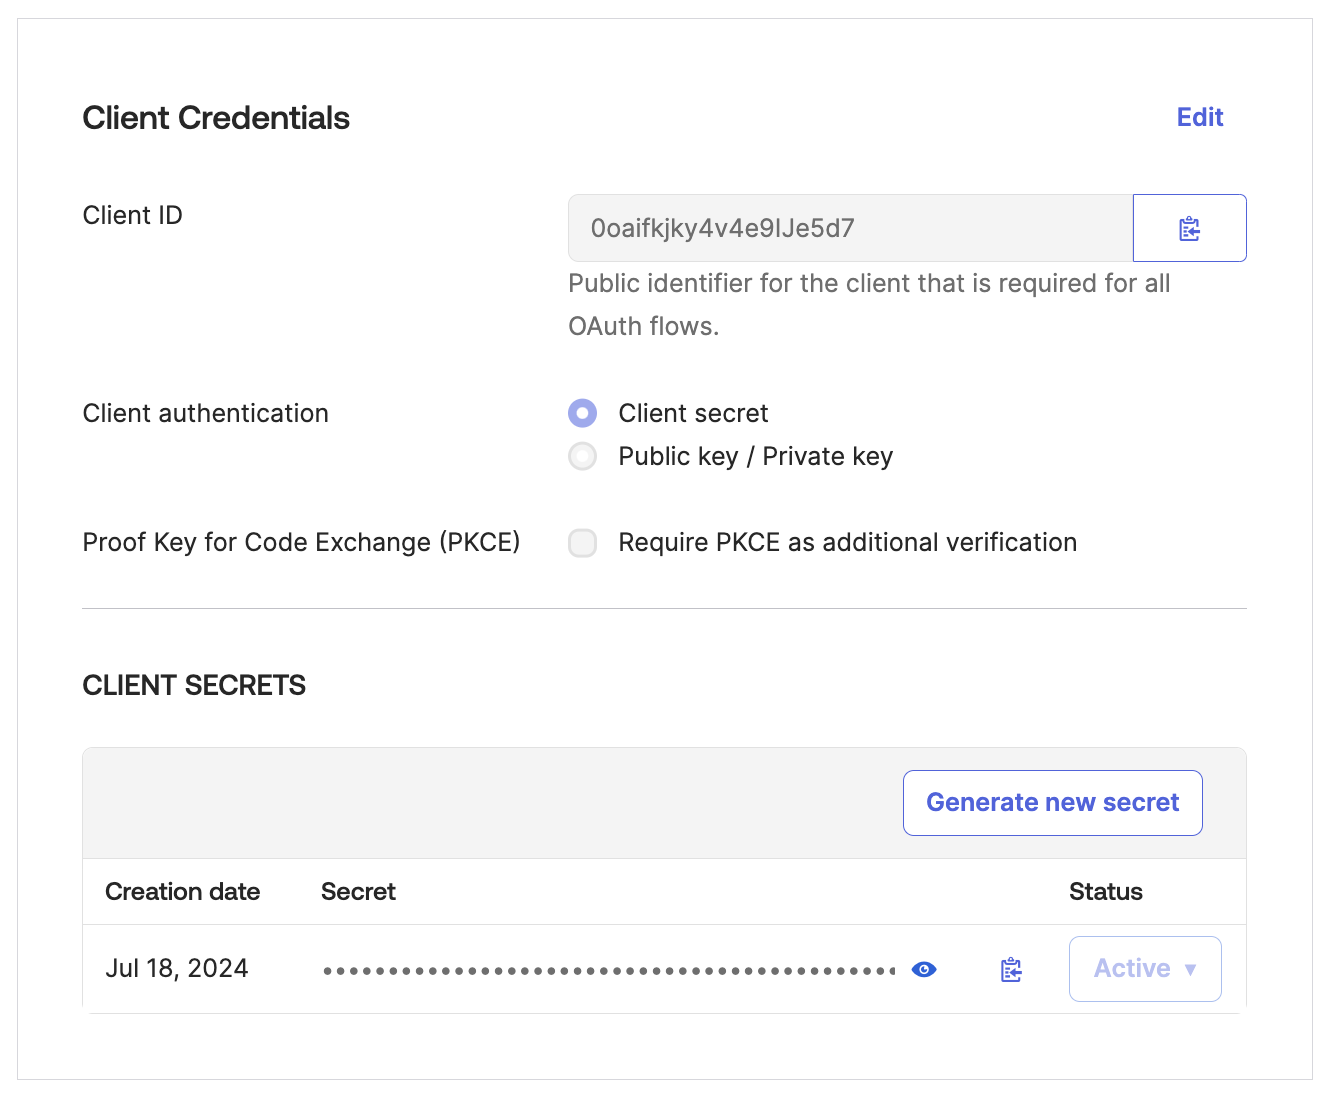
Step 5: Provide Okta URL and Client Credentials
-
Email us at
connectors@abacus.aiwith the following information:- Your Okta URL (e.g.,
abacusai.okta.com) - The client ID
- The client secret for your newly generated app.
- Your Okta URL (e.g.,
Step 6: Wait for Setup Completion
- After providing us with your Okta information, please wait while we set up your Abacus.AI environment to enable Okta SSO.
- We will notify you when the setup is complete.
- After setting up the app on Okta, make sure your application is active and then assign users to the app.