NetSuite administrator setup
A NetSuite administrator, together with an Abacus.AI workspace administrator, completes these steps once for the whole workspace. They register your NetSuite Integration Record (OAuth 2.0 application) as a config connector so that end users can sign in with their own NetSuite login.
Without this setup, users cannot connect and see "NetSuite organization-level setup is incomplete".
Step 1: Find your Account ID
In NetSuite, go to Setup → Company → Company Information and note the Account ID.
It looks like 1234567 for a production account or 1234567_SB1 for a sandbox. Abacus.AI uses this value to build the account-specific SuiteTalk endpoints for your instance.
Step 2: Enable the required features
Go to Setup → Company → Enable Features and open the SuiteCloud subtab, then:
- Under SuiteTalk (Web Services), check REST WEB SERVICES.
- Under Manage Authentication, check OAUTH 2.0.
- Accept the SuiteCloud Terms of Service if prompted.
- Click Save.
Step 3: Create the Integration Record (OAuth 2.0 application)
Go to Setup → Integration → Manage Integrations → New and configure the record:
-
Name — something recognizable, for example
Abacus.AI. -
State — set to Enabled.
-
Under OAuth 2.0, check AUTHORIZATION CODE GRANT.
-
REDIRECT URI — enter exactly:
https://abacus.ai/oauth/callback -
Under SCOPE, check REST WEB SERVICES. Only check RESTLETS or SuiteAnalytics Connect if your integration also needs them.
-
Leave TOKEN-BASED AUTHENTICATION and the client credentials (machine-to-machine) options unchecked — Abacus.AI uses the interactive Authorization Code Grant.
-
Click Save.
NetSuite displays the CLIENT ID (CONSUMER KEY) and CLIENT SECRET (CONSUMER SECRET) only once, immediately after you save the Integration Record. Copy both values before leaving the page. If you lose the secret you must reset it from the Integration Record and update the Abacus.AI config connector.
Step 4: Grant the required role permissions
Every user who will connect to NetSuite needs a role that carries the OAuth 2.0 and REST Web Services permissions.
Go to Setup → Users/Roles → Manage Roles, edit the role your users will use, open the Permissions tab and then the Setup subtab. Add the following three permissions with Level set to Full:
| Permission | Level | Why it is needed |
|---|---|---|
| Log in using OAuth 2.0 Access Tokens | Full | Allows the role to sign in with an OAuth 2.0 access token. |
| OAuth 2.0 Authorized Applications Management | Full | Allows the user to authorize the Abacus.AI Integration Record. |
| REST Web Services | Full | Allows the role to call the SuiteTalk REST API. |
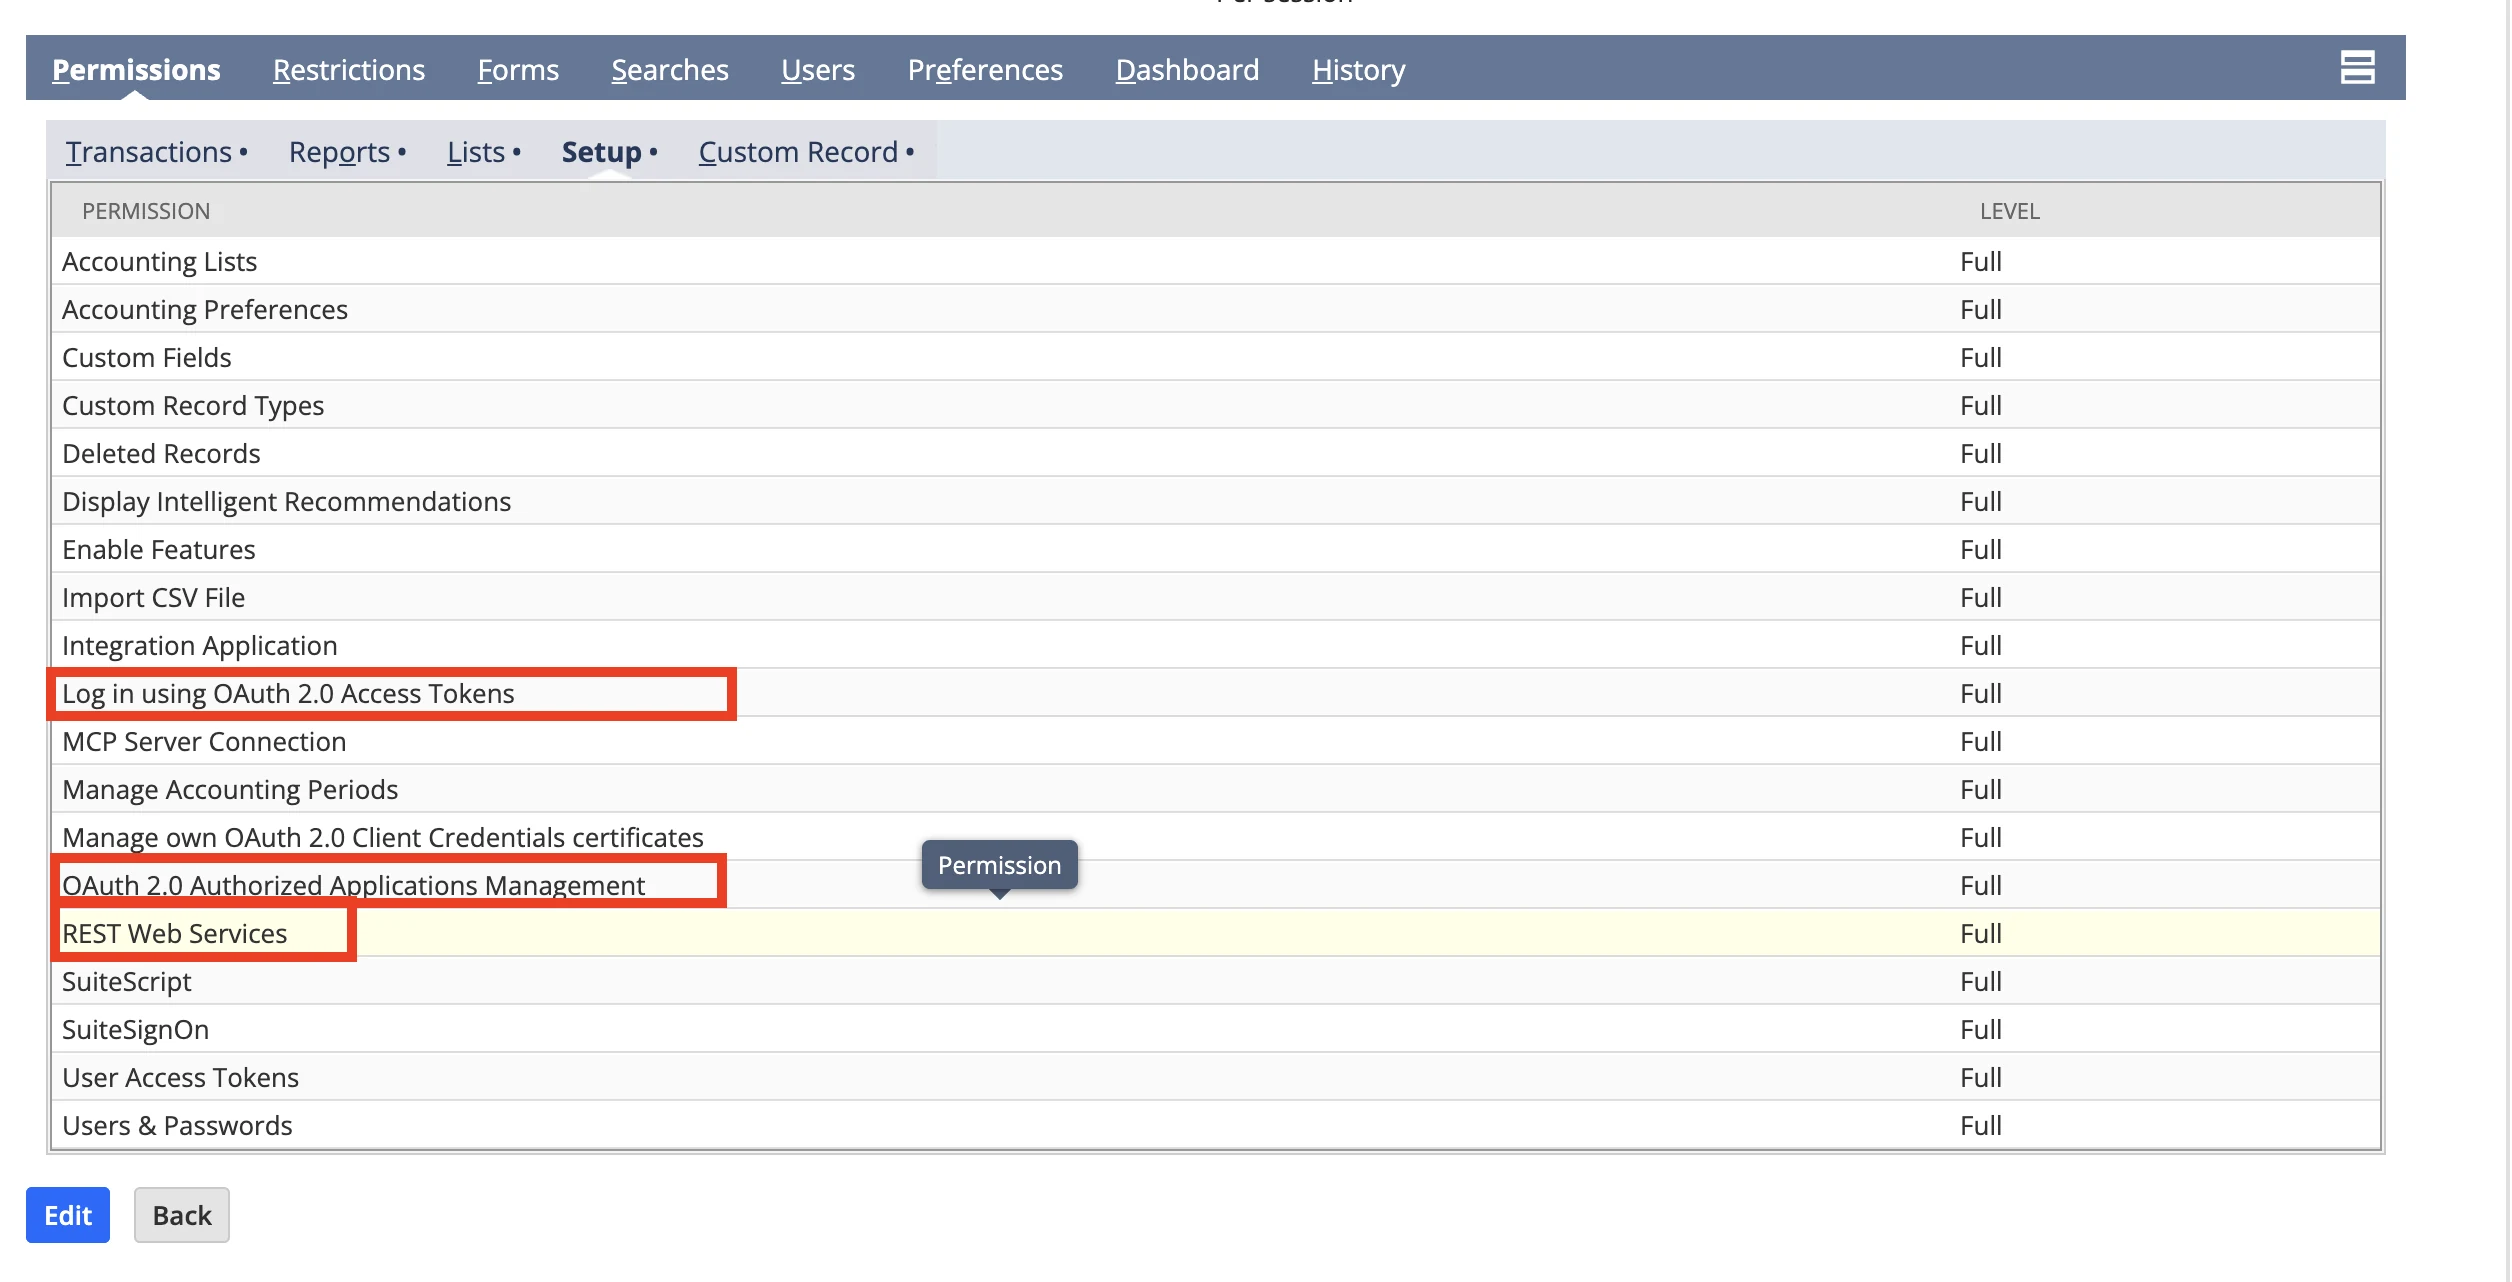
Also grant the record-level permissions the agent needs on the Transactions, Lists, Reports and Custom Record subtabs. For example, reading customers requires the Customers permission under Lists, and reading sales orders requires Sales Order under Transactions. The connector can only see what the role can see.
Do not use a Web Services Only or Single Sign-On Only role. Those role types block the interactive browser sign-in and users will see "Your Role Does Not Support OAuth2 Login" when they try to connect.
Step 5: Assign the role to your users
Go to Setup → Users/Roles → Manage Users, edit each user who will connect, open the Access tab and add the role from Step 4. Save.
Step 6: Create the config connector in Abacus.AI
-
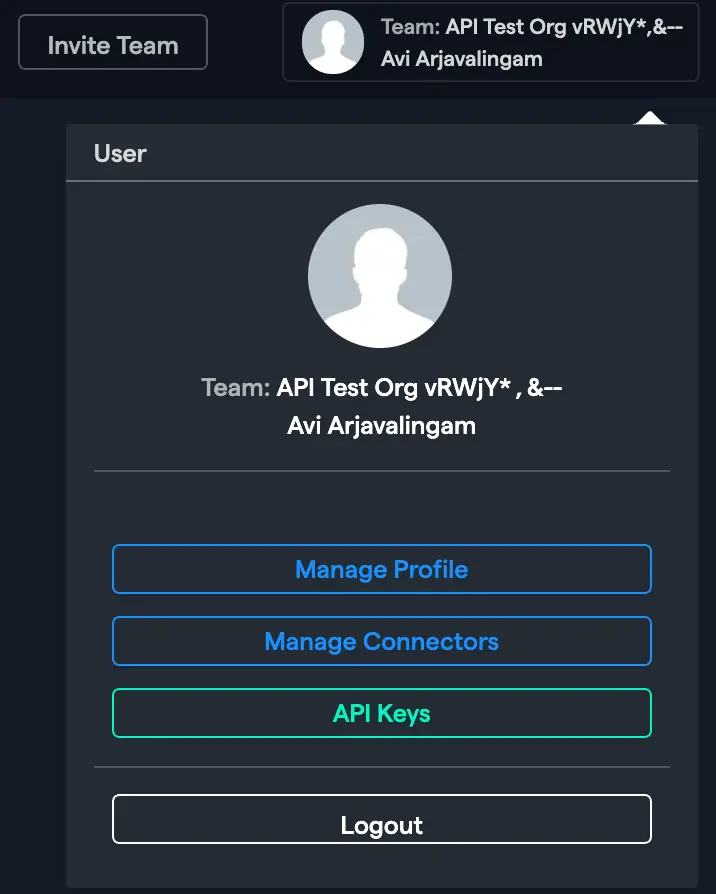
Navigate to the Abacus.AI Connected Services Dashboard. You can also click your profile picture in the top right corner and select "Manage Connectors".

-
Click "Add New Connector" and choose "NetSuite" from the "Select a Service" popup.
-
Fill in the Integration Record details you collected in the previous steps:
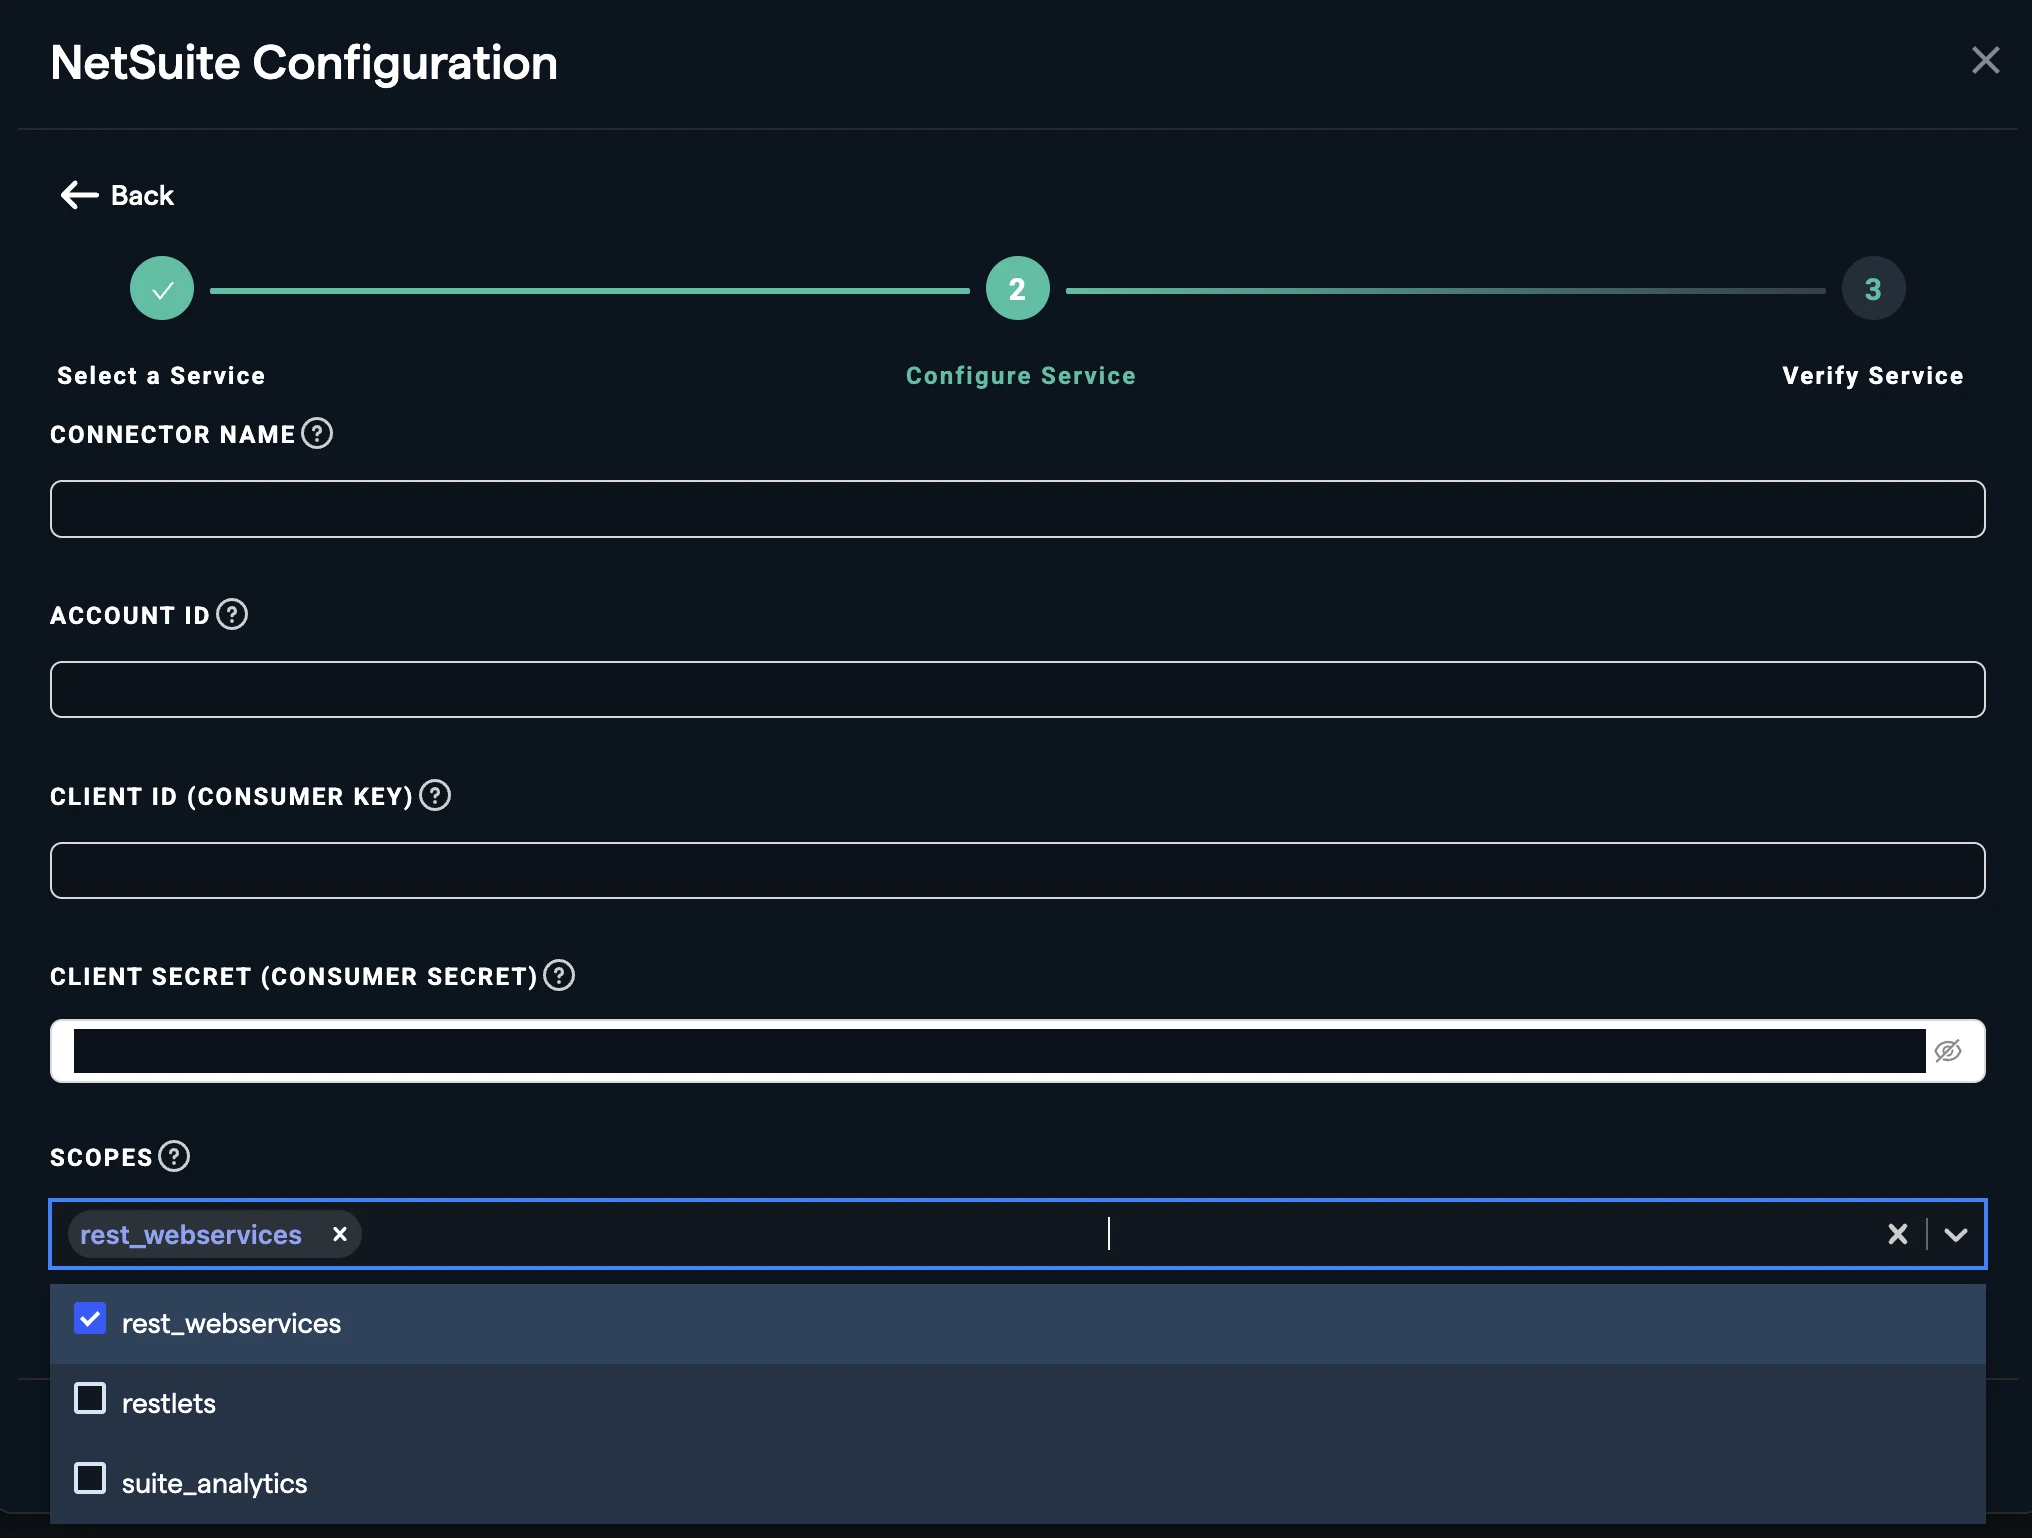
Field Required Description Connector Name No A name to identify this NetSuite config connector. Defaults to NetSuite Config Connector - <org id>.Account ID Yes Your NetSuite Account ID from Step 1, e.g. 1234567or1234567_SB1.Client ID (Consumer Key) Yes The Client ID / Consumer Key of the Integration Record from Step 3. Client Secret (Consumer Secret) Yes The Client Secret / Consumer Secret of the Integration Record from Step 3. Scopes Yes OAuth 2.0 scopes requested when users authenticate. rest_webservicesis selected by default and is required. Addrestletsorsuite_analyticsonly if you also enabled those scopes on the Integration Record. -
Click "Create".
The NetSuite config connector is inherently config-only — it stores credentials for user connections and does not itself connect to NetSuite, so there is no "Config Only" toggle to set. You can edit it later from the Connected Services Dashboard if the Account ID, credentials or scopes change.
Next step
Users can now connect NetSuite in ChatLLM Teams.